Halloween Pumpkin Carving Contest · Starts October 1st · $500 in prizes
← Back to ideas
@ai_concepts
Aug 30, 2026
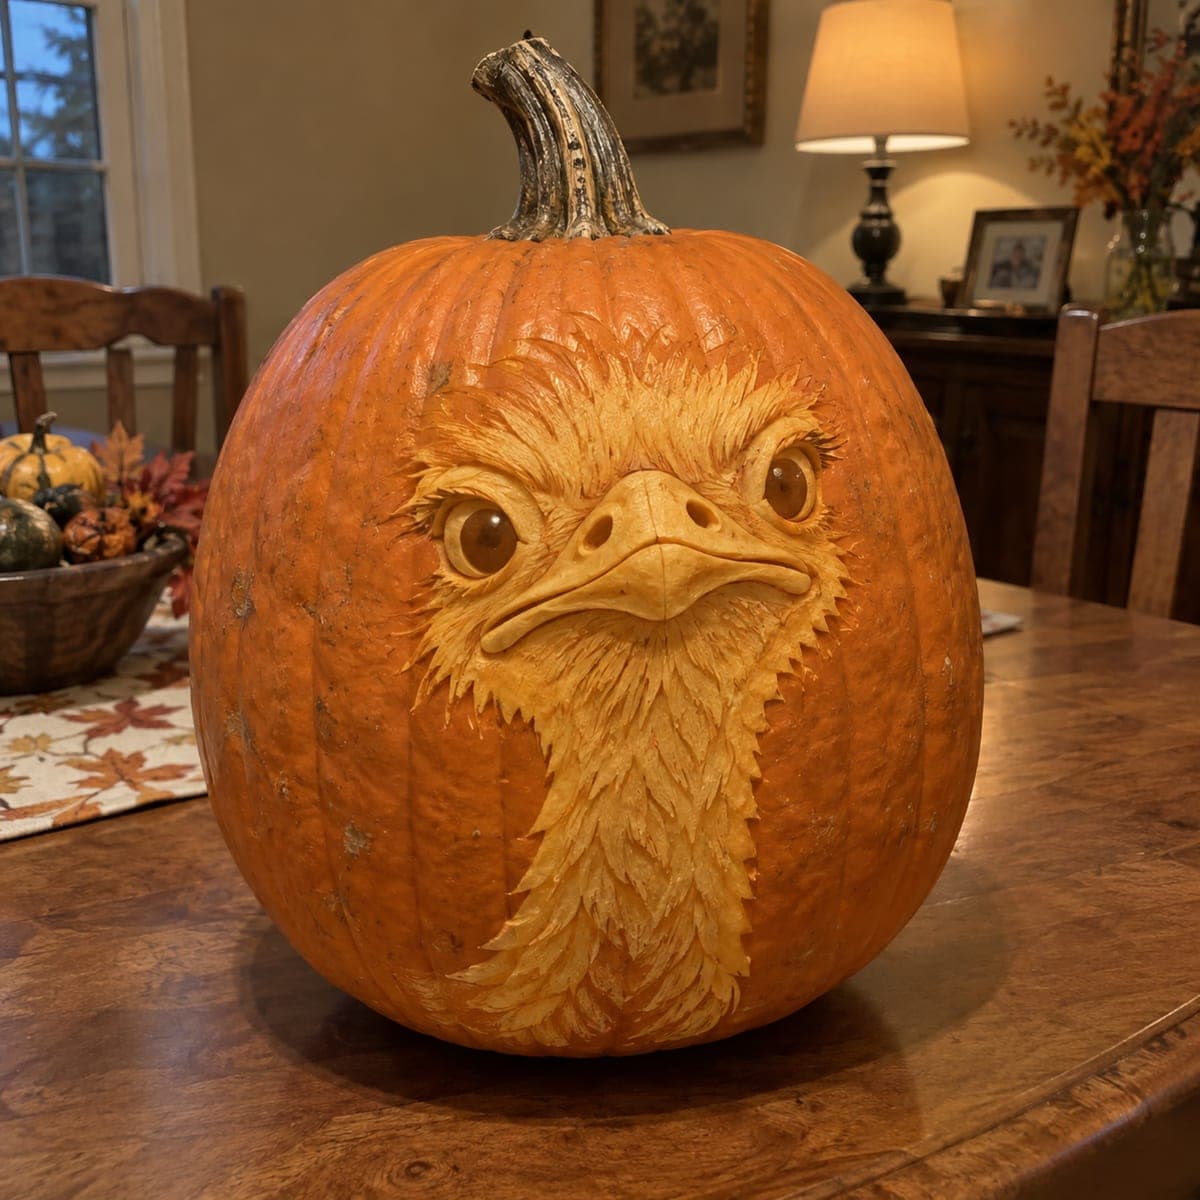
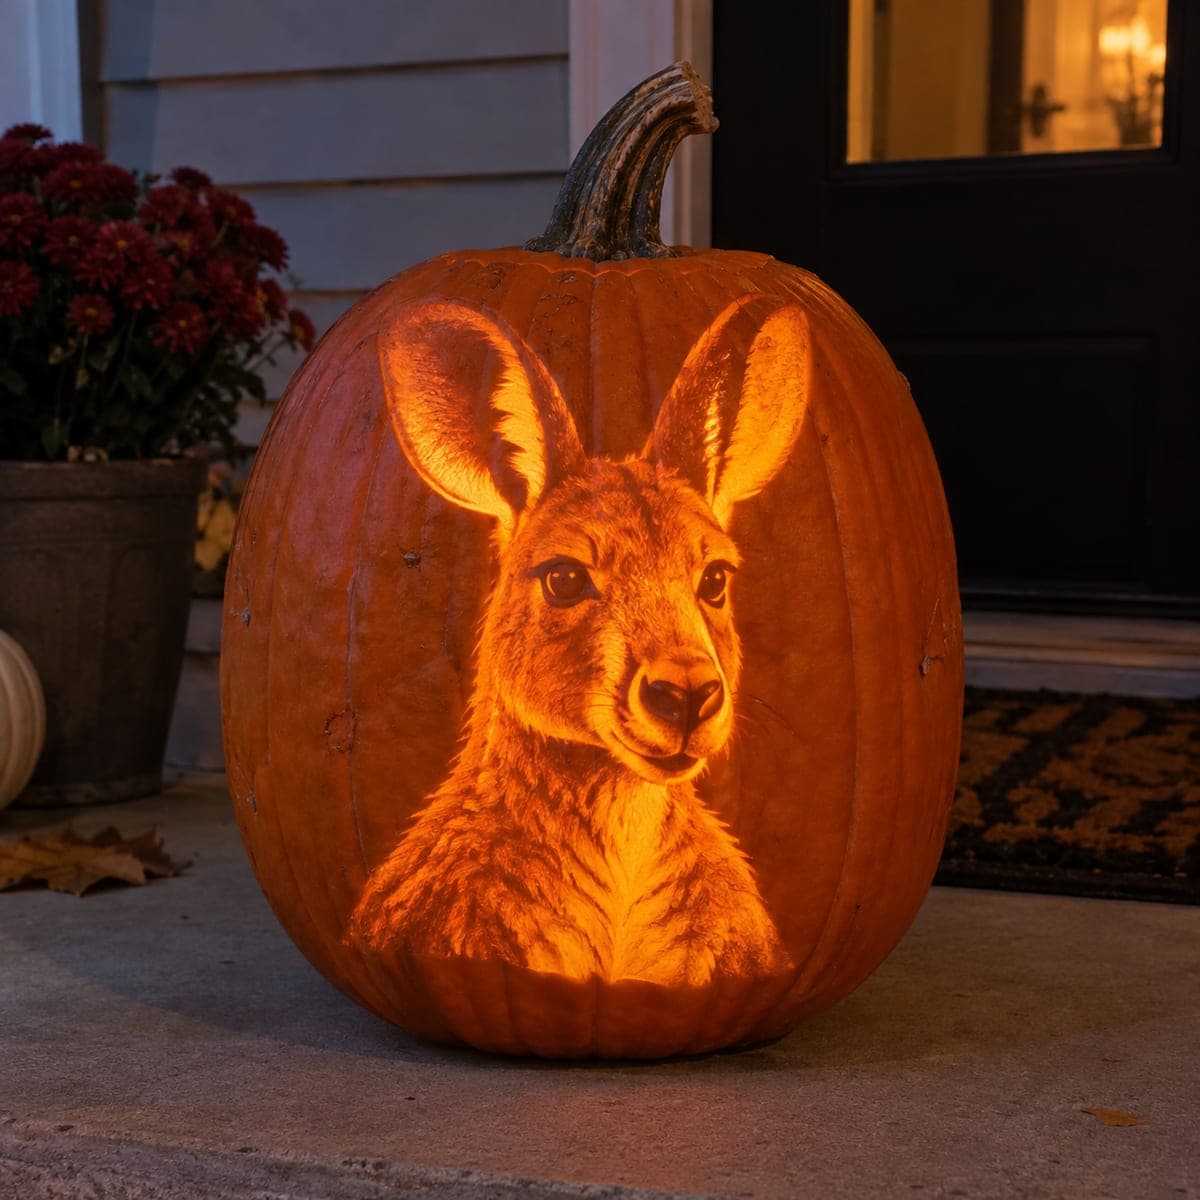
Curious Ostrich Portrait Glowing Etched PumpkinAI
0

Curious Ostrich Portrait Glowing Etched Pumpkin

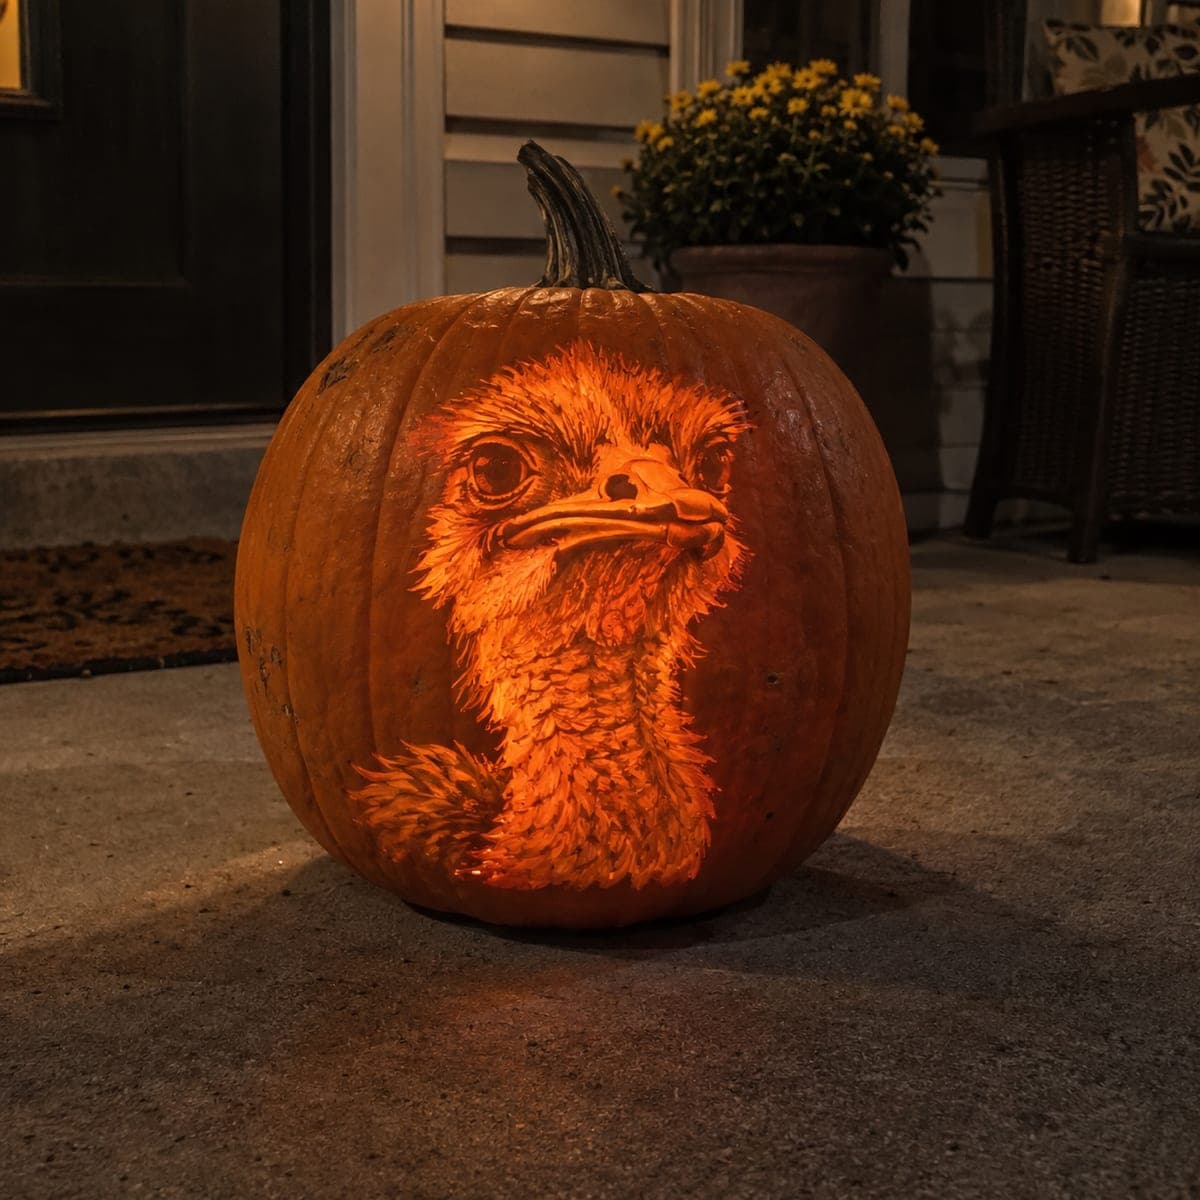
An ostrich cranes its long neck across this pumpkin and fixes the viewer with huge glassy eyes, its shaggy feathers etched stroke by stroke into the glowing rind. The realism comes from depth control: shave the face and beak thinnest so they shine brightest, and let the neck feathering fade into thicker, darker rind. Backlight it with a bright LED, since fine feather texture disappears with a weak candle. Guaranteed double-takes from everyone who walks by.

This is an AI-generated concept image: a realistic, carvable design idea rather than a photo of a finished carve. AI concepts are always labeled and sit out the leaderboard and the contest.

No ratings yet · Sign in to rate
Comments (0)

  • No comments yet — be the first.

Save without an account. Sign in to like or comment.

Our tips for carving a similar design

The whole illusion here rests on depth control, not cutouts. You shave the face and beak down to a thin, bright layer while leaving the neck feathers thicker and darker, so the light reads as glowing skin and shadowy plumage. Everything is etched with a shallow loop tool, and a strong LED behind it is what makes the fine feather strokes actually appear.

Written by PumpkinCarvingIdeas.com, inspired by the image above. These are our suggestions, not instructions from the uploader. This approach to the AI concept has not been tested on a real pumpkin.

From pumpkin to porch

  1. Clean the pumpkin and mount your pattern

    Pick a tall, smooth-faced pumpkin and cut a wide access hole in the back or bottom, not the top, so the front stays uninterrupted. Scrape the inside wall behind the face down to about one inch so light passes through evenly. Tape your ostrich pattern flat over the front and transfer the outline plus the main feather flow lines with a poking tool. Mark where the eyes, beak, and darkest neck areas fall before you remove the paper.

  2. Map your three shading zones

    Before cutting anything, lightly outline three areas: the brightest face and beak, the mid-tone feather mass, and the dark outer edges. Keeping these zones clear in your head prevents you from shaving too much in one spot. Work under a bright work light so you can judge how thin the rind is getting. This planning stage is what separates a muddy blob from a readable portrait.

  3. Shave the face and beak thinnest

    Using a ribbon or loop tool, scrape the face and beak down to the thinnest layer you dare, roughly a quarter inch, so these areas glow brightest. Do not cut all the way through; you want translucent skin, not open holes. Keep the beak surface smooth and rounded so it catches light as a solid shape. Test often by holding a flashlight inside to check brightness.

  4. Etch the feathers stroke by stroke

    Switch to a small V-gouge or fine loop and pull short, curved strokes to build the shaggy feather texture, always following the direction feathers grow. Leave more rind on the neck and outer feathers so they stay dimmer and read as shadow. Vary your pressure so some strokes glow and others stay dark, which creates the layered, fluffy look. Take breaks to step back and check the overall flow rather than fussing one tiny patch.

  5. Deepen the eyes and refine contrast

    Carve the eyes carefully, shaving the glassy dome thin for a bright catchlight but leaving a thin dark rim and pupil for depth. Go back over any areas that look flat and shave them slightly thinner to boost the glow. Keep the very edges of the portrait thick and untouched so the ostrich fades softly into the pumpkin instead of ending in a hard line. Small adjustments here add most of the realism.

  6. Light it and photograph

    Drop in a bright battery LED, warm white or amber, since fine etching disappears under a weak light. Set the pumpkin in a dim spot and check that the face reads clearly from a few feet away. Seal the shaved areas with a thin coat of petroleum jelly to slow drying and keep the glow crisp. Photograph it at night against a dark background so the feather texture pops.

Gather your supplies

Check things off as you get ready.

Work on a stable surface, keep your free hand out of the cutting path, and have an adult handle sharp tools.

Three levels of light

  • Leave intact

    The outer feather edges and the dark neck fringe stay thick and untouched so they read as shadow.

  • Peel & shade

    The mid-tone feather mass and neck get light etching for a dim, layered glow.

  • Cut through

    No full cutouts here; the face, beak, and eye highlights are shaved thinnest so they shine brightest without opening a hole.

Learn the carving basics

Before you start cutting

There is no real pumpkin here, so can this actually be carved?

This is an AI concept image, so no real pumpkin exists, but the design is achievable with pure shading technique. Everything relies on shaving the rind to different thicknesses rather than cutting through, which is physically sound. Just keep the thinnest areas around a quarter inch so they hold together.

How do I keep the beak looking solid and not just a hole?

Shave the beak surface smooth and thin so it glows as one bright shape, but never cut through it. A solid, rounded beak reflects light as a form, while a cutout would just look like an empty gap. Leave thin dark lines along the beak edges to define its shape.

Why does the light matter so much for this design?

Fine feather etching is subtle, and a weak or flickering candle will wash it out into a dull blur. A bright, steady LED pushes light through the thin shaved areas so each stroke shows. Warm white or amber keeps the classic pumpkin color while still being bright enough.

Your take belongs here, too.

Changed a detail? Made it simpler? Share a photo of your version and tell the community what worked.

Share your pumpkin

More pumpkins like this

You've reached the end · 8 pumpkins
The Patch Report

Fresh pumpkins, in your inbox.

The best new carvings, ideas worth stealing, and how-tos for carving season. Short, seasonal, and gone by November.

A short email during carving season. Unsubscribe anytime. See our privacy policy.