Halloween Pumpkin Carving Contest · Starts October 1st · $500 in prizes
← Back to ideas
@ai_concepts
Aug 6, 2026
Capybara Portrait Etched Pumpkin Carving IdeaAI
0

Capybara Portrait Etched Pumpkin Carving Idea

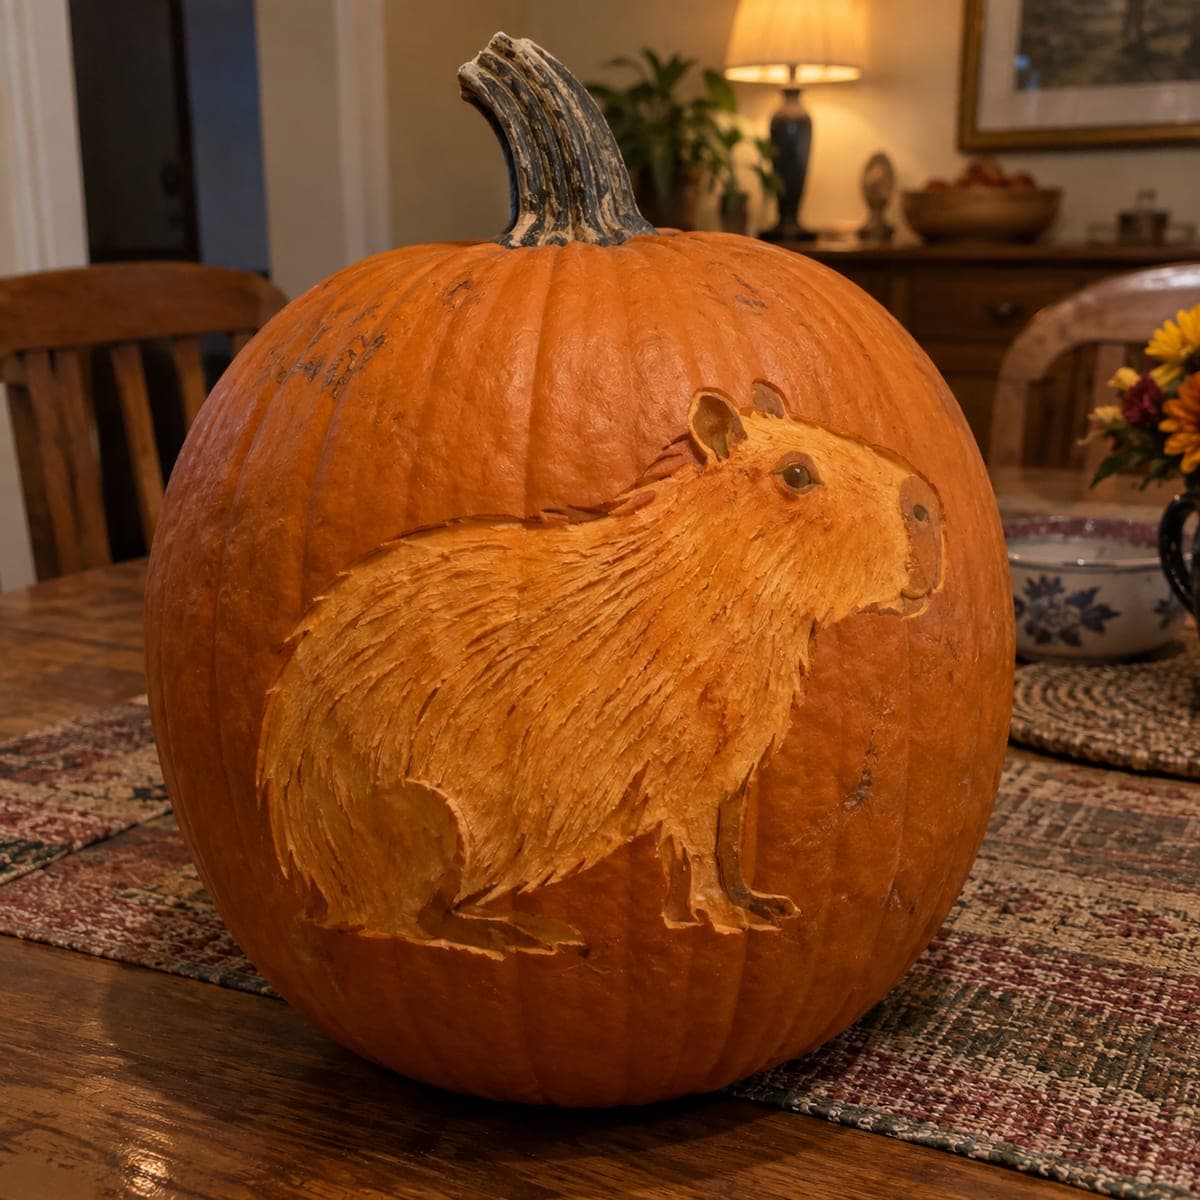
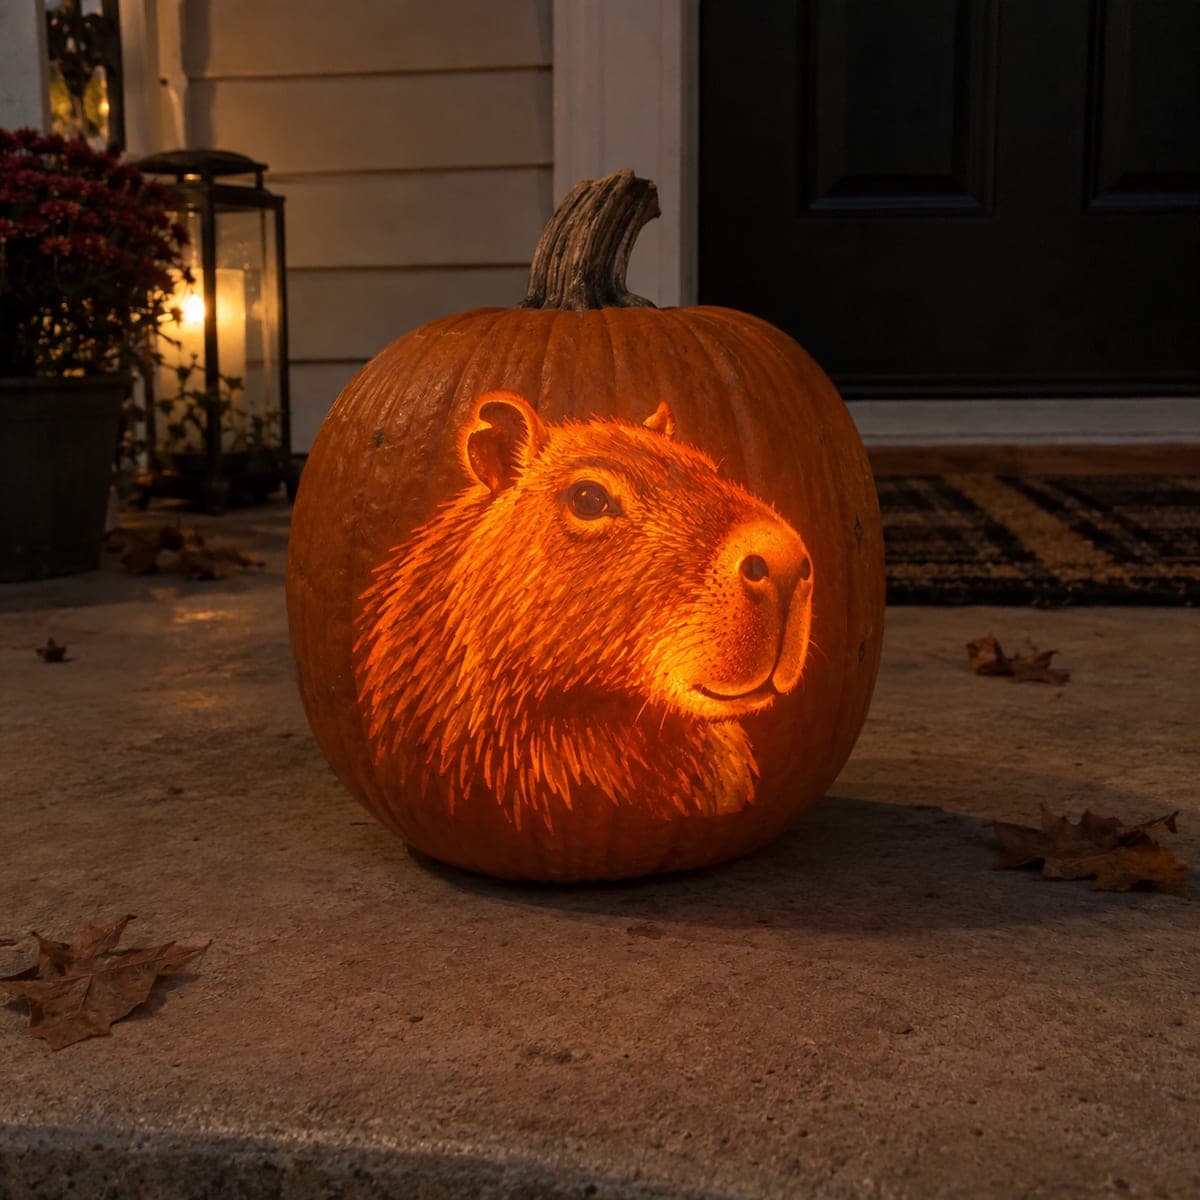
A full-body capybara stands in profile, its coarse fur and gentle expression rendered through fine surface etching that captures every hair strand and the animal's characteristic barrel-shaped silhouette. The no-cutout shading technique means the pumpkin remains structurally solid, making it durable enough for a multi-week display on a dining room table. Use a linoleum V-gouge to draw in the fur direction with short strokes, working from the darkest underside tones toward the lighter back. Capybara fans searching for a unique pumpkin carving idea will find this design instantly recognizable and conversation-starting.

This is an AI-generated concept image: a realistic, carvable design idea rather than a photo of a finished carve. AI concepts are always labeled and sit out the leaderboard and the contest.
No ratings yet · Sign in to rate

Comments (0)

  • No comments yet — be the first.

Save without an account. Sign in to like or comment.

Our tips for carving a similar design

The whole design lives on the surface, with no cutouts at all, so the light glows softly through peeled skin instead of open holes. The trick is controlling depth: the deeper you scrape, the brighter it reads, which lets you build the capybara's coarse fur and rounded body entirely in shades of orange. Plan it as a portrait study, working from dark undertones up to the lightest highlights along the back.

Written by PumpkinCarvingIdeas.com, inspired by the image above. These are our suggestions, not instructions from the uploader. This approach to the AI concept has not been tested on a real pumpkin.

From pumpkin to porch

  1. Pick and prep a smooth pumpkin

    Choose a tall, evenly colored pumpkin with a broad flat area on one side for the capybara's barrel-shaped body. Wipe it clean and dry it well. Since this design has no big openings, you can either leave it whole and light it from a small back hole, or cut a low door in the rear. Cutting a rear access panel keeps the front face intact and easy to light.

  2. Transfer the outline

    Tape your capybara stencil over the flat area and go over the main silhouette, ears, eye, and nose with a poking tool or transfer paper. Keep the outline light so it does not show in the finished glow. Step back and check that the whole animal fits comfortably with room around it. Mark the direction the fur flows so you have a guide before you start gouging.

  3. Skin the body for the base glow

    Using a ribbon or loop tool, peel just the outer skin off the entire capybara shape to reveal the lighter flesh underneath. Keep this first pass shallow and even so it reads as one soft mid tone. This is your canvas for the fur. Take your time and resist digging deep this early.

  4. Etch fur direction with a V-gouge

    Switch to a small linoleum V-gouge and pull short strokes that follow the fur, starting under the belly and legs where the animal is darkest. Work upward toward the back, making your strokes a little deeper and closer together where you want more brightness. Overlap the strokes so no strip of flat skin breaks the coat. Let the ears and cheek follow their own shorter fur pattern.

  5. Build the face and highlights

    Deepen the top of the back, the muzzle, and the lit edge of the body to create your brightest values. Leave the eye and the shadow under the chin nearly untouched so they stay dark and give the face its gentle expression. Scrape the nose and the rims of the ears carefully with the tip of the gouge for fine detail. Compare light and dark areas often by holding the pumpkin up to a window.

  6. Light it and photograph

    Drop a battery LED inside through your back hole and dim the room to check the balance of tones. If any area looks muddy, scrape it a touch deeper to brighten it, since you cannot add material back. Rub a little vegetable oil on the etched areas to slow drying and deepen contrast. Set it on a table runner, turn down the lights, and take your photo.

Gather your supplies

Check things off as you get ready.

Work on a stable surface, keep your free hand out of the cutting path, and have an adult handle sharp tools.

Three levels of light

  • Leave intact

    The eye, the shadow line under the chin, and the background pumpkin stay as untouched skin for the darkest tones.

  • Peel & shade

    The full capybara body gets its skin peeled for a soft mid orange glow that forms the coat's base.

  • Cut through

    Nothing is cut all the way through; the brightest highlights along the back and muzzle are simply the deepest scraped areas.

Learn the carving basics

Before you start cutting

Since this is a concept image, can a real pumpkin actually hold this much detail?

Yes, because the design is pure surface etching with no cutouts, the pumpkin wall stays intact and strong. Fine fur strokes hold well as long as you do not scrape all the way through. This is exactly why an etched portrait lasts longer than a design full of open cuts.

How do I keep the fur from looking flat?

Vary the depth of your gouge strokes rather than keeping them uniform. Deeper, tighter strokes catch more light and read as highlights, while shallow, spaced strokes stay dark. Always follow the natural direction of the fur so the coat looks like it flows over the round body.

How should I light an etched design with no cutouts?

Use a battery LED placed inside through a small back access hole rather than a candle. The glow travels through the thin peeled skin, so etched areas light up while untouched skin stays dark. Keep the light toward the carved side and dim the room for the best contrast.

Your take belongs here, too.

Changed a detail? Made it simpler? Share a photo of your version and tell the community what worked.

Share your pumpkin

More pumpkins like this

You've reached the end · 8 pumpkins
The Patch Report

Fresh pumpkins, in your inbox.

The best new carvings, ideas worth stealing, and how-tos for carving season. Short, seasonal, and gone by November.

A short email during carving season. Unsubscribe anytime. See our privacy policy.