Halloween Pumpkin Carving Contest · Starts October 1st · $500 in prizes
← Back to ideas
@ai_concepts
Jul 15, 2026
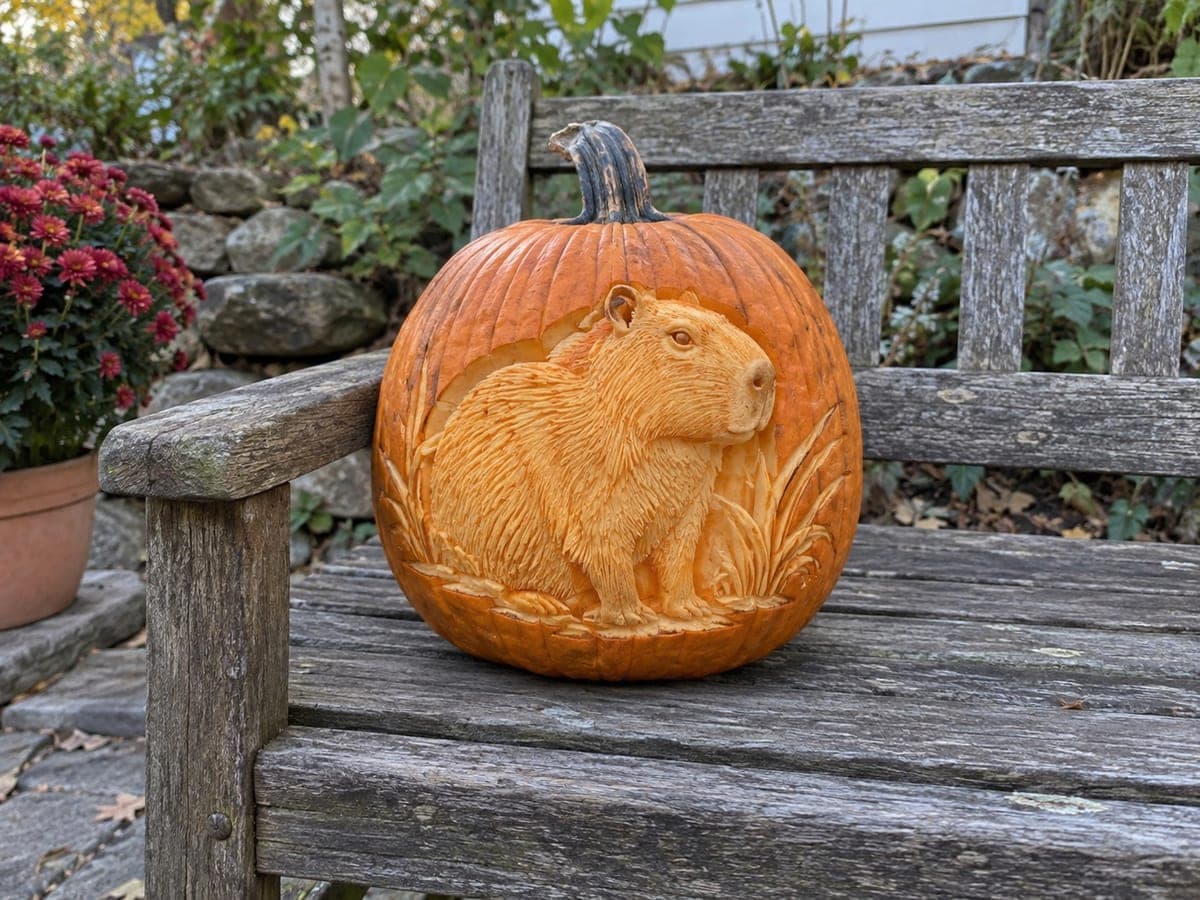
Detailed Capybara Relief Carving on Garden PumpkinAI
0

Detailed Capybara Relief Carving on Garden Pumpkin

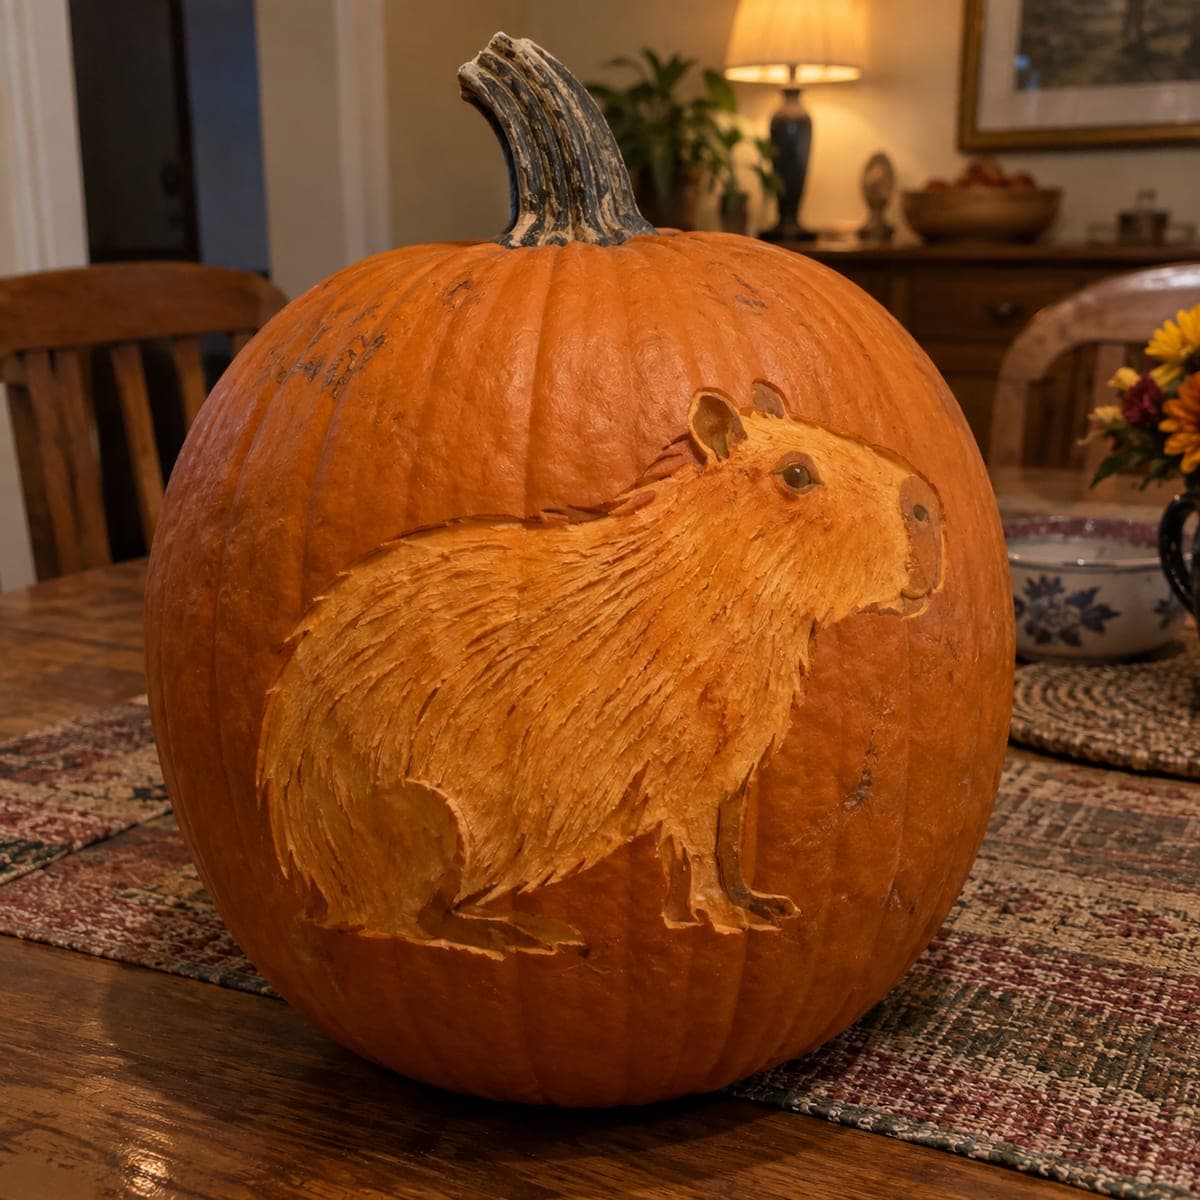
A capybara sitting contentedly in tall grass is etched across this large pumpkin in fine detail, the animal's coarse brown fur and calm expression translated into warm amber relief carving. The grassy foreground uses short parallel cuts to create texture, while the capybara's body uses broader shading strokes to distinguish it from the background. This pumpkin carving idea appeals to fans of the internet-famous animal and is unusual enough to generate genuine curiosity. Use a large pumpkin with a smooth skin and thick walls to give yourself room for the level of detail shown.

This is an AI-generated concept image: a realistic, carvable design idea rather than a photo of a finished carve. AI concepts are always labeled and sit out the leaderboard and the contest.
No ratings yet · Sign in to rate

Comments (0)

  • No comments yet — be the first.

Save without an account. Sign in to like or comment.

Our tips for carving a similar design

The core trick here is relief carving, where you shave away the outer skin at different depths instead of cutting all the way through. The capybara stays raised and smooth against a peeled background, while short parallel scoops give the grass its texture. Plan on a large, thick-walled pumpkin so you have depth to sculpt the fur and keep the whole scene lit from within without cutting a single window.

Written by PumpkinCarvingIdeas.com, inspired by the image above. These are our suggestions, not instructions from the uploader. This approach to the AI concept has not been tested on a real pumpkin.

From pumpkin to porch

  1. Pick the pumpkin and open the back

    Choose a big pumpkin with smooth, blemish-free skin and the thickest walls you can find. Cut a round access hole in the back, not the top, so the front face stays whole for the relief. Scrape the inside wall behind your design down to about one inch thick using a loop tool. A thinner wall lets more glow pass through the peeled areas later.

  2. Transfer the capybara outline

    Print or trace a capybara-in-grass stencil sized to fill most of the front. Tape it on and poke the main outlines with a pin or transfer tool, marking the body edge, the ear, the eye, the leg lines, and the tops of the grass blades. Remove the paper and connect the dots lightly with a washable marker. Keep the capybara large and centered so you have room for fur detail.

  3. Peel the background first

    Using a ribbon or loop tool, shave the skin off everything around the capybara and grass down to the pale flesh. This is the mid-glow layer that will separate the animal from the dark rim of the pumpkin. Work slowly and keep the depth even so the background reads as one smooth field. Leave a clean edge right up against the capybara's outline.

  4. Shape the capybara in shallow relief

    Lower the flesh gently around the body so the capybara stands slightly proud of the background. Use broad, smooth scoops for the rounded body and cheeks, then switch to a fine detail tool for the coarse fur, pulling many short strokes in the direction the hair grows. Keep the muzzle and forehead a touch higher and smoother to catch the most light. Carve the eye as a small shallow dot rather than a hole so the face keeps its calm look.

  5. Texture the grass and edges

    For the tall grass in the foreground and sides, make short parallel cuts that taper to a point at the top of each blade. Vary the depth a little so some blades glow brighter than others. Keep every blade attached at its base so nothing snaps off. Clean up any ragged marker lines and soften the transition where the grass meets the peeled background.

  6. Light it and photograph

    Drop a battery LED puck or a short string of LED lights inside through the back hole. Never use a candle, since the fine relief walls are thin and can scorch. Test in a dark room and adjust the light position until the capybara glows softly and the grass texture shows. Photograph it at dusk on a bench or step, and mist the cut surfaces with water to keep them fresh between viewings.

Gather your supplies

Check things off as you get ready.

Work on a stable surface, keep your free hand out of the cutting path, and have an adult handle sharp tools.

Three levels of light

  • Leave intact

    The dark rim of pumpkin skin around the whole scene and the untouched top near the stem stay dark to frame the image.

  • Peel & shade

    The background field and the capybara body are skin-peeled to varying depths for a warm amber glow that shapes the fur and face.

  • Cut through

    Nothing is cut fully through on this design, so keep the light inside; the brightest spots come from the thinnest peeled areas on the muzzle and grass tips.

Learn the carving basics

Before you start cutting

This looks like a lot of detail. Do I have to cut all the way through anywhere?

No, and that is the point of a relief carving. The entire scene is created by peeling skin and shaving flesh to different depths, not by cutting windows. The glow comes through the thinned wall, so the light stays soft and even across the capybara.

How thin should I make the wall behind the design?

Aim for about one inch on the inside wall, then rely on your surface peeling to control brightness. Thinner peeled spots glow brighter, thicker ones stay dim. Do not go so deep that you break through, or you will lose the smooth relief look.

How do I keep the fur from looking like random scratches?

Study which way the hair flows on a capybara and pull all your short strokes in that same direction, curving over the shoulder and down the leg. Keep the muzzle and forehead smoother and slightly higher so the face reads clearly against the busy fur. Working from broad shading first and adding fine strokes last keeps it organized.

Your take belongs here, too.

Changed a detail? Made it simpler? Share a photo of your version and tell the community what worked.

Share your pumpkin

More pumpkins like this

You've reached the end · 8 pumpkins
The Patch Report

Fresh pumpkins, in your inbox.

The best new carvings, ideas worth stealing, and how-tos for carving season. Short, seasonal, and gone by November.

A short email during carving season. Unsubscribe anytime. See our privacy policy.