Halloween Pumpkin Carving Contest · Starts October 1st · $500 in prizes
← Back to ideas
@ai_concepts
Aug 6, 2026
Realistic Elephant Portrait Carved Into a PumpkinAI
0

Realistic Elephant Portrait Carved Into a Pumpkin

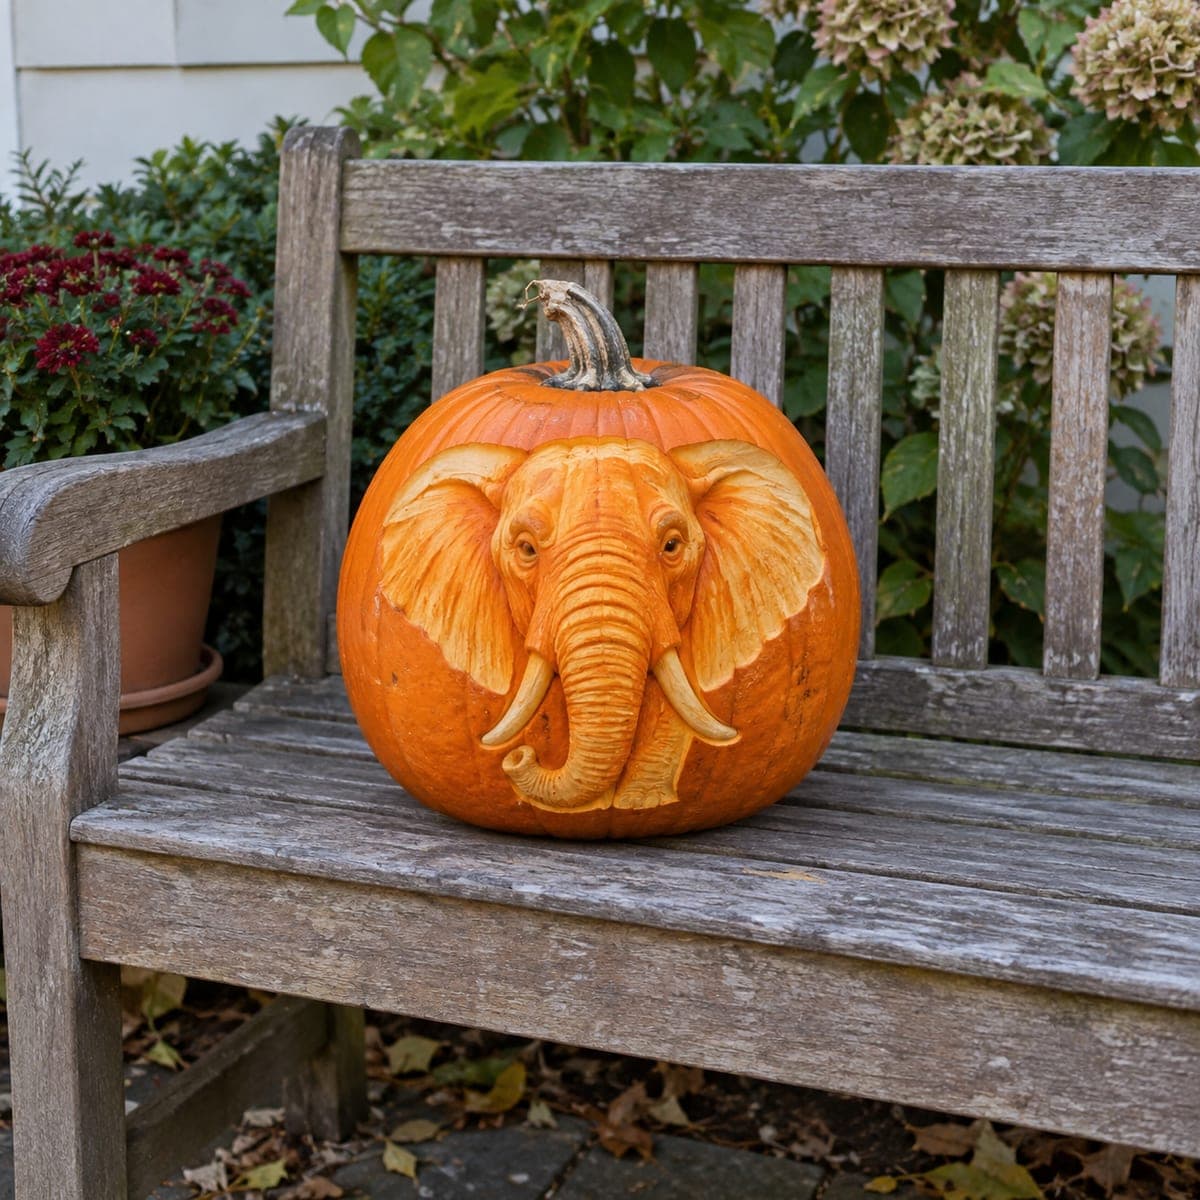
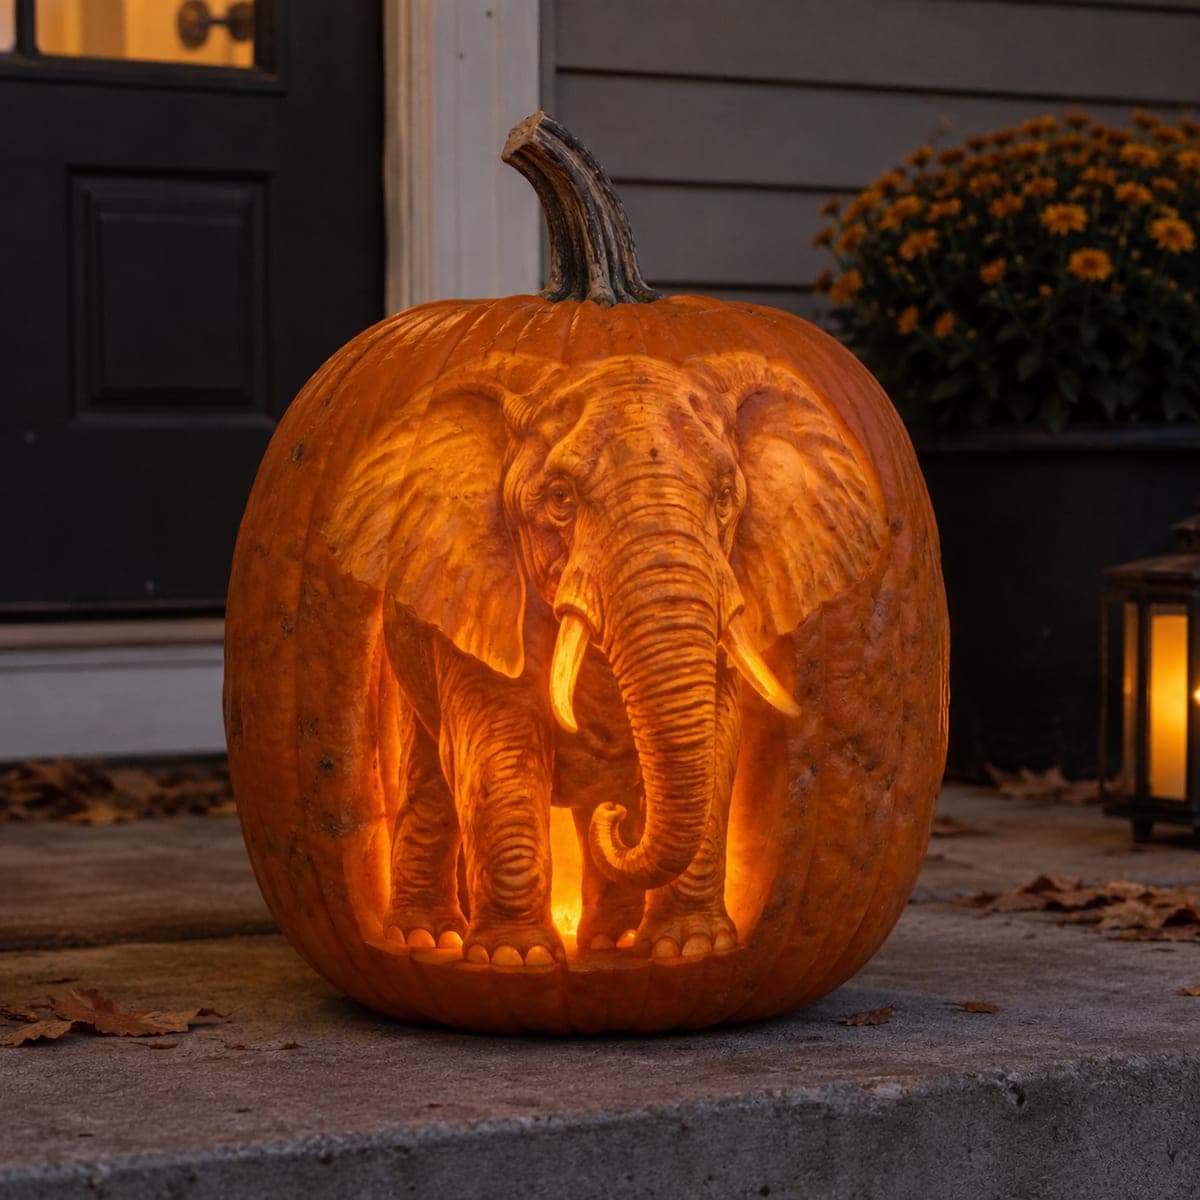
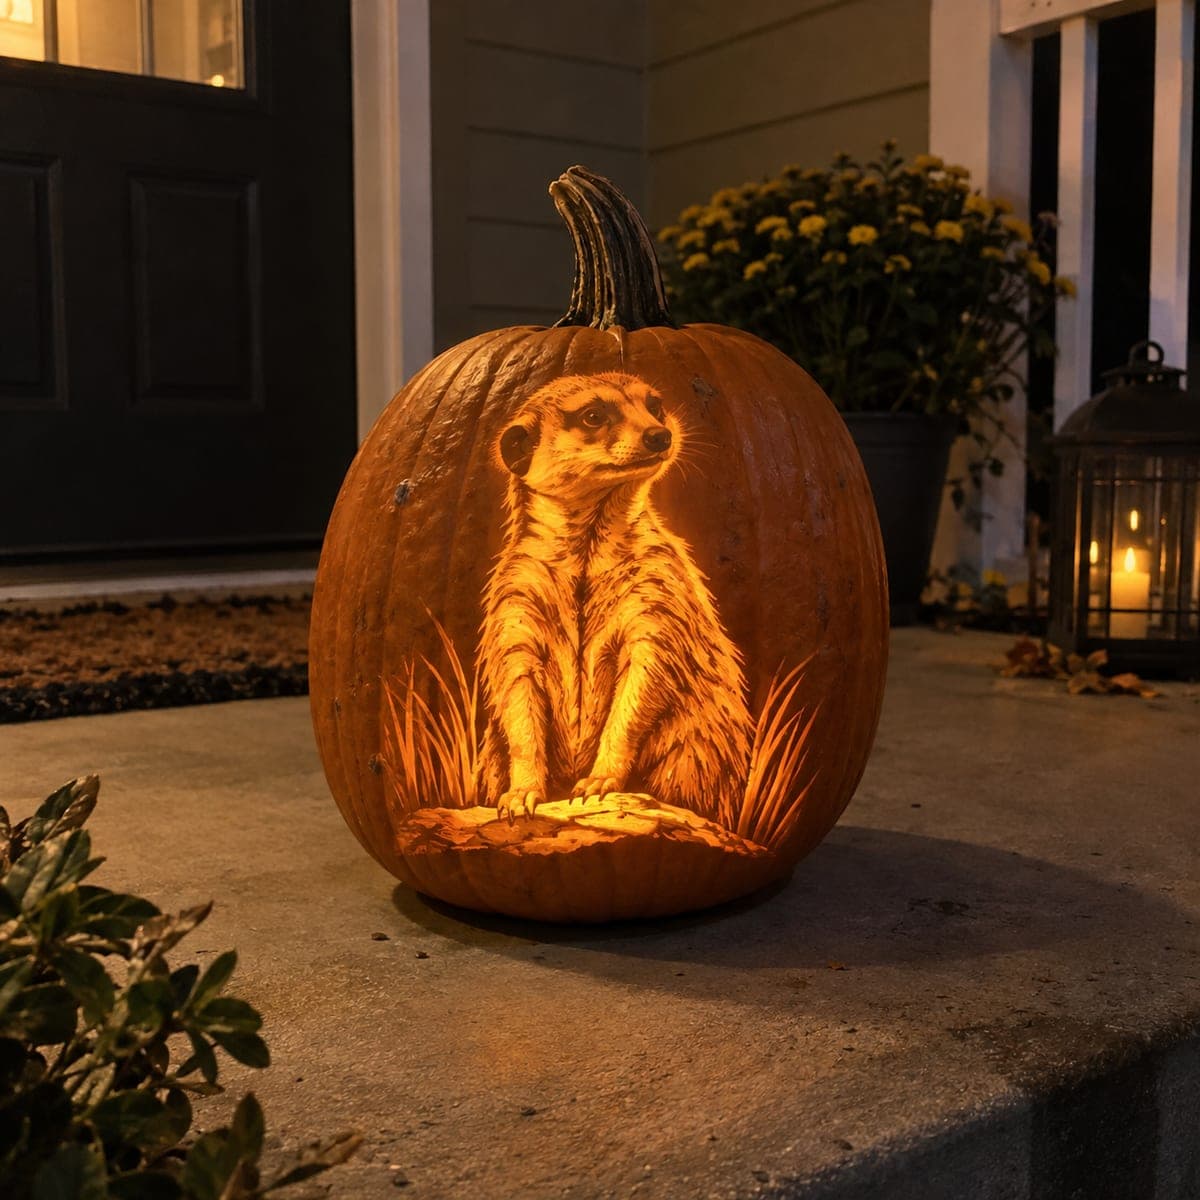
A full-bodied African elephant glows from the face of this pumpkin, with wrinkled skin, curved tusks, and huge fanned ears rendered in warm candlelit relief. The effect comes from shading, peeling the rind away at different depths so thin areas glow brightest. Sketch the outline first, then work from the lightest zones (belly and ears) down to the deep shadows, and light it with two LED pucks for even coverage.

This is an AI-generated concept image: a realistic, carvable design idea rather than a photo of a finished carve. AI concepts are always labeled and sit out the leaderboard and the contest.

No ratings yet · Sign in to rate
Comments (0)

  • No comments yet — be the first.

Save without an account. Sign in to like or comment.

Our tips for carving a similar design

The core trick here is depth shading, where you peel the pumpkin rind to different thicknesses so thin spots glow bright and thick spots stay dark. You build the whole elephant out of light instead of cutting holes, keeping the surface mostly intact. Plan your values first, then work from the brightest areas down into the deep shadows.

Written by PumpkinCarvingIdeas.com, inspired by the image above. These are our suggestions, not instructions from the uploader. This approach to the AI concept has not been tested on a real pumpkin.

From pumpkin to porch

  1. Transfer and study the design

    Pick a tall, wide, blemish-free pumpkin so the elephant has room to sit centered on the front. Tape your stencil down and poke the main outlines with a transfer tool: the ears, head, trunk, tusks, legs, and belly. Before you cut anything, mark your value zones lightly with a marker so you know which areas will be brightest, mid, and darkest. This mapping is what makes a shaded portrait read clearly once it is lit.

  2. Open a back access hole and light test

    Cut a lid or a round door on the back rather than the top so the stem stays intact as shown. Scrape the inside wall behind the elephant down to about one inch thick with a loop tool. Drop in two LED pucks and check the glow from the front so you can see how thin you need to go. Never use a candle for a shaded carve like this, the even LED light shows detail far better and stays safe on a porch.

  3. Peel the brightest zones first

    Start with the belly, lower trunk, and the fanned ear surfaces, since these are your lightest areas. Use a shallow ribbon or loop tool to scoop the orange rind away, leaving a thin translucent layer that will glow strong. Work slowly and check the light often, because you can always remove more but you cannot put it back. Keep edges soft and rounded so the skin transitions look like real wrinkled hide.

  4. Build the mid tones and wrinkles

    Move to the head, trunk folds, and leg creases, peeling less deeply so these read as medium orange. Drag the tool in the direction of the wrinkles to suggest texture, and vary your pressure to fade one value into the next. The trunk gets tight parallel ridges, while the ears fan out in broad soft sweeps. This gradual blending is the whole illusion, so take your time and step back frequently.

  5. Leave the shadows and shape the tusks

    Do not touch the outermost background skin or the deep recesses behind the ears and between the legs, that dark untouched rind frames the animal. For the tusks, peel them thin and smooth so they glow pale and curve forward brightly against the darker trunk. If you want a few true cutouts, save small gaps near the toes or under the trunk for last so the wall stays strong while you carve the detail work.

  6. Clean up and photograph

    Go back over every edge with a fine detail tool to sharpen the eyes, tusk tips, and toenails. Wipe away pulp crumbs and blot the thinned areas dry so the light passes cleanly. Set both LED pucks inside, spaced apart for even coverage, and shoot in low evening light on the porch. A little petroleum jelly on the cut edges slows browning if you want it to last a few extra days.

Gather your supplies

Check things off as you get ready.

Work on a stable surface, keep your free hand out of the cutting path, and have an adult handle sharp tools.

Three levels of light

  • Leave intact

    The outer background skin and the deep recesses behind the ears and between the legs stay untouched and dark to frame the elephant.

  • Peel & shade

    The head, trunk folds, and leg creases are peeled to mid depth for a warm dim glow that carries the wrinkle texture.

  • Cut through

    The belly, lower trunk, ear surfaces, and tusks are shaved thinnest for the brightest glow, with only tiny true openings near the toes.

Learn the carving basics

Before you start cutting

This looks incredibly detailed. Can a first-timer really attempt it?

This is an expert-level shaded portrait, so it helps to have carved a few relief designs first. If you are newer, start with a simpler animal outline and practice peeling to different depths on a scrap pumpkin. The technique is learnable, it just rewards patience and a steady hand.

How do I keep the tusks and toes from looking flat?

Peel the tusks thinner than the trunk around them so they glow noticeably brighter and pop forward. For the toes, leave thin dark lines between each one rather than cutting them out, which keeps the front wall strong. Contrast in brightness is what creates the sense of depth.

Why not just cut the elephant all the way through?

Cutting through would give you a flat silhouette and lose all the wrinkled skin and shading. The glow of this design comes from thinning the rind so light passes through at different strengths. Save actual cutouts for a few tiny accents and let the peeling do the work.

Your take belongs here, too.

Changed a detail? Made it simpler? Share a photo of your version and tell the community what worked.

Share your pumpkin

More pumpkins like this

You've reached the end · 8 pumpkins
The Patch Report

Fresh pumpkins, in your inbox.

The best new carvings, ideas worth stealing, and how-tos for carving season. Short, seasonal, and gone by November.

A short email during carving season. Unsubscribe anytime. See our privacy policy.