Halloween Pumpkin Carving Contest · Starts October 1st · $500 in prizes
← Back to ideas
@ai_concepts
Sep 7, 2026
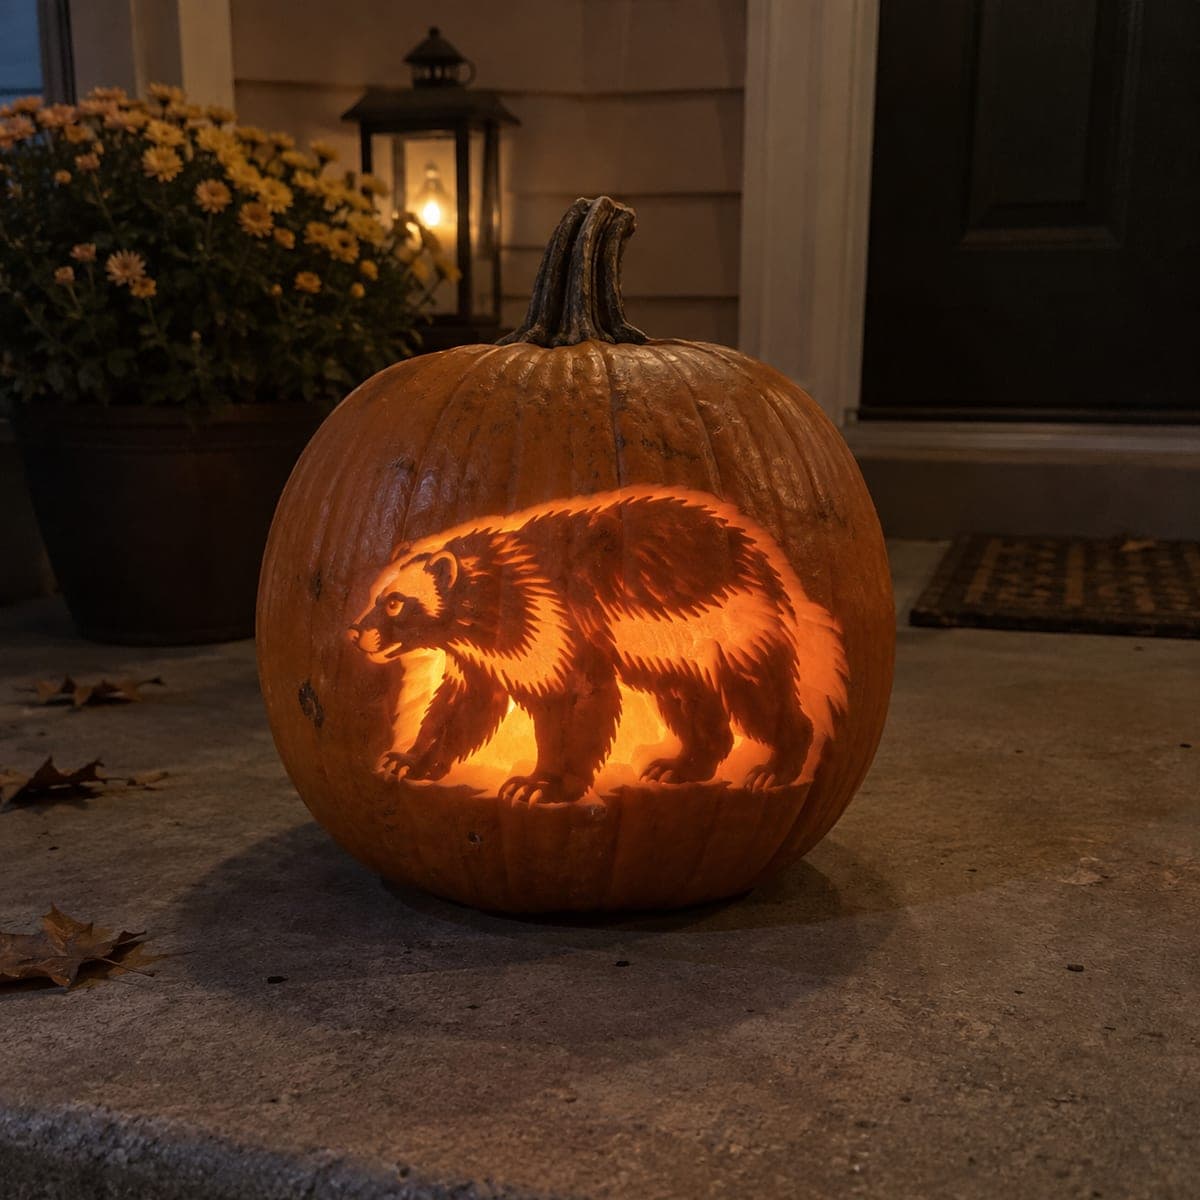
Walking Black Bear Shaded Pumpkin CarvingAI
0

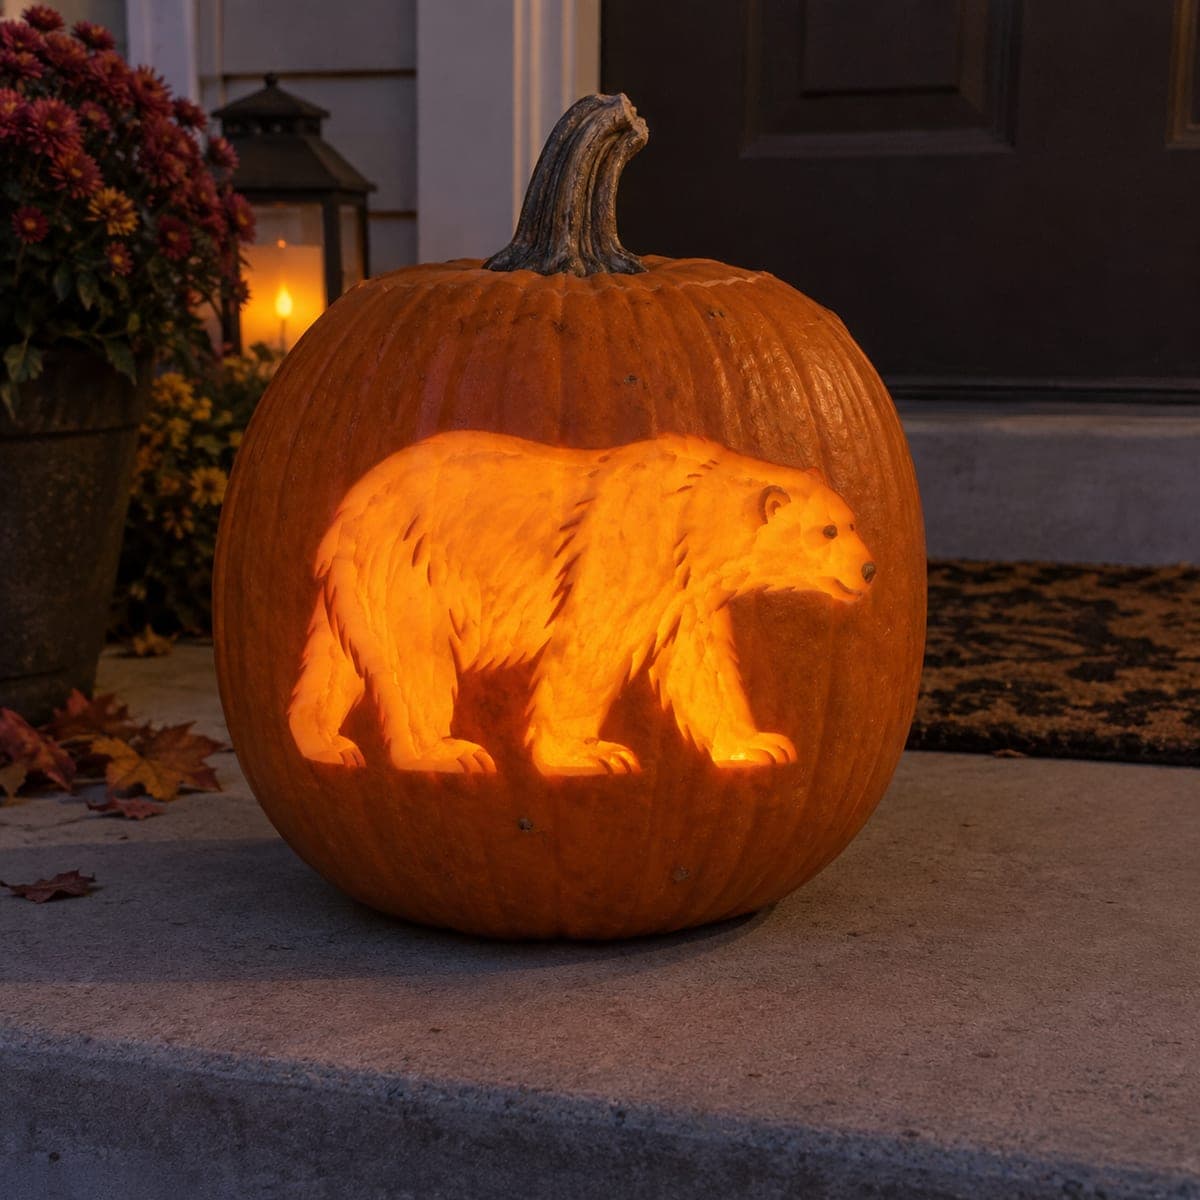
Walking Black Bear Shaded Pumpkin Carving

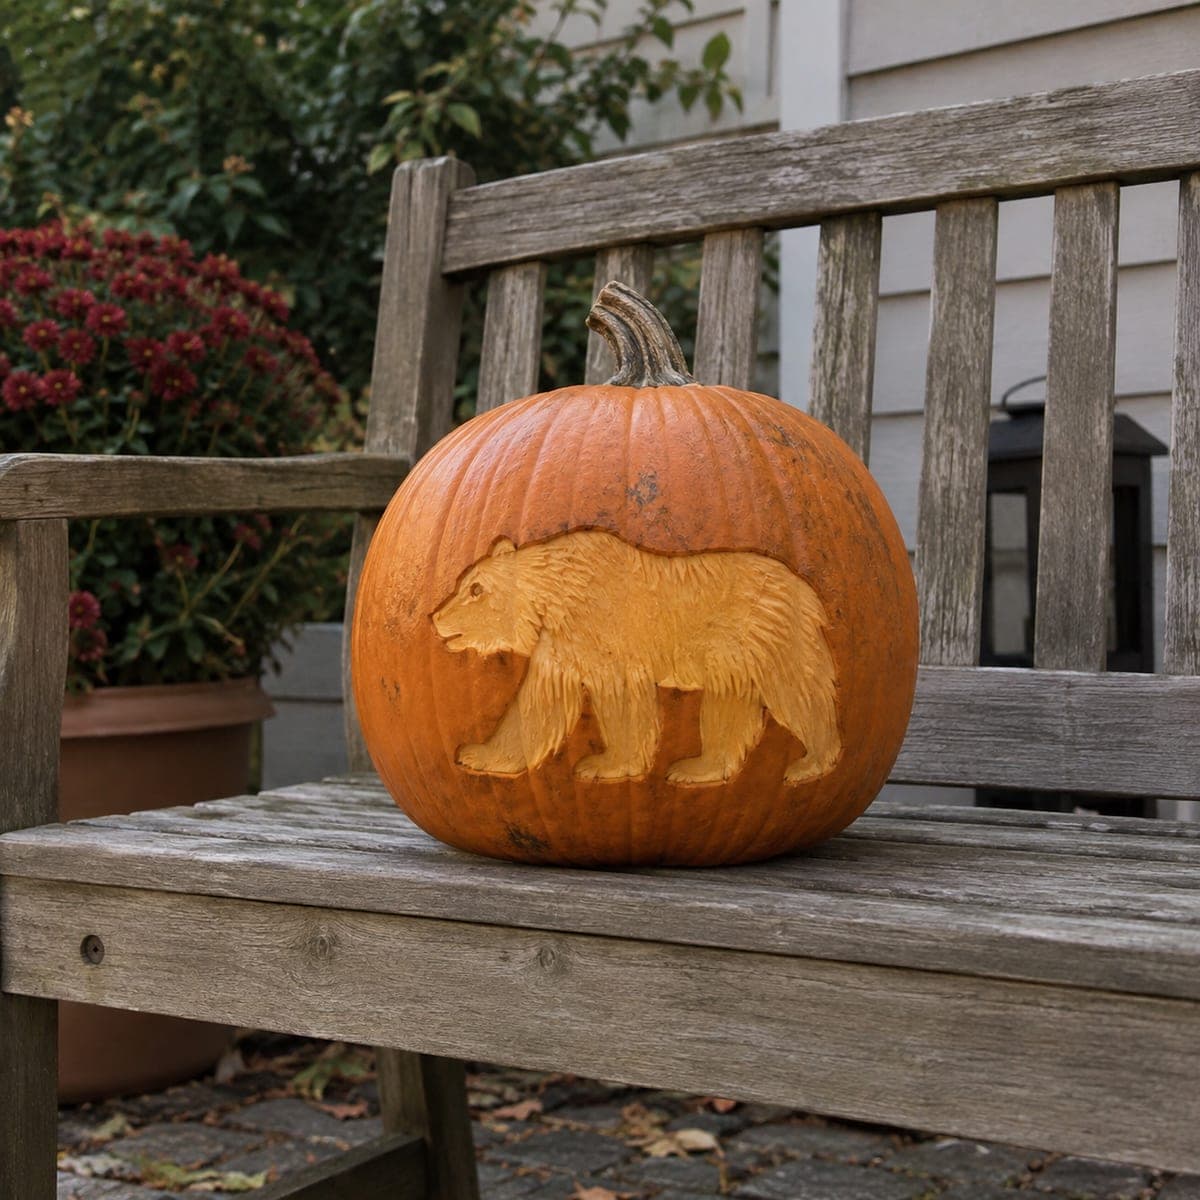
A bear ambles across this pumpkin in full profile, its shaggy coat rendered with hundreds of short etched strokes that glow in graduated tones. None of the animal is cut fully through; the depth of each peel controls how much light passes, which is what creates the fur's shadows and highlights. Shave the whole silhouette to a base depth first, then carve the darker muscle lines deeper, and test with a light inside as you go.

This is an AI-generated concept image: a realistic, carvable design idea rather than a photo of a finished carve. AI concepts are always labeled and sit out the leaderboard and the contest.

No ratings yet · Sign in to rate
Comments (0)

  • No comments yet — be the first.

Save without an account. Sign in to like or comment.

Our tips for carving a similar design

The whole trick here is that nothing is cut all the way through. The bear is a shaded silhouette where the depth of each scraped area controls how bright it glows, so thin peels read as fur shadows and deeper peels become highlights. You would rough in the entire body to a base depth first, then work back into it with hundreds of short strokes to build the shaggy coat and the darker muscle lines.

Written by PumpkinCarvingIdeas.com, inspired by the image above. These are our suggestions, not instructions from the uploader. This approach to the AI concept has not been tested on a real pumpkin.

From pumpkin to porch

  1. Transfer the profile and plan your tones

    Since this is a concept image and no real pumpkin exists, start by picking a smooth, broad pumpkin that gives you a flat working area for the full body. Tape a bear stencil to the front and poke the outline and the main fur direction lines with a pin or transfer tool. Before you cut anything, mentally sort the design into three zones: darkest shadows, mid fur, and bright highlights along the back and head. A little planning now keeps the shading from going muddy later.

  2. Gut it and thin the wall behind the bear

    Have an adult open a lid from the bottom or back so you never break the front surface. Scoop the pulp and scrape the inside wall behind the bear area down to about one inch thick. A thinner wall lets your shallow peels glow more evenly. Keep the rest of the shell thicker for strength.

  3. Shave the whole silhouette to a base depth

    Using a ribbon or loop tool, remove just the outer skin across the entire bear shape so it all peels to a soft, even orange. Work slowly and keep the depth consistent, because this base layer is your mid tone. Do not outline the bear with a full cut, since the glow should fade into the dark skin around it. Drop an LED light inside and check that the whole body lights up gently.

  4. Carve the fur with short directional strokes

    Now build texture with many short scoops that follow the direction the coat grows, curving down the shoulders, along the belly, and down each leg. Leave the fur strokes shallower where you want shadow and go deeper where you want a highlight. Keep every stroke connected to the surrounding surface so nothing pops loose. Step back often to read the shape from a few feet away.

  5. Deepen the muscle lines and shape the head

    Go back into the darker separations, the line under the belly, behind the front leg, and around the face, by carving those areas thinner so they glow brightest. Carve the snout, ear, and the small eye dimple with careful, light passes so the face stays readable. Reserve the very thinnest peel for the top edge of the back to give a bright rim of light. Test with the LED constantly and stop before any spot turns into a full hole.

  6. Light it and set the scene

    Wipe the carved surface, then coat the exposed flesh with a little petroleum jelly to slow drying and keep the tones crisp. Set a battery LED inside, warm white or amber, rather than a candle so the fine texture does not scorch. Place it on a porch step where the low glow catches the fur detail. Snap a photo at dusk when the graduated shading shows best.

Gather your supplies

Check things off as you get ready.

Work on a stable surface, keep your free hand out of the cutting path, and have an adult handle sharp tools.

Three levels of light

  • Leave intact

    The background field around the bear and the ribbed upper pumpkin stay as untouched dark skin.

  • Peel & shade

    The base-shaved body and the shallow fur strokes glow as soft mid orange.

  • Cut through

    Nothing is cut fully through; the thinnest deep peels along the back rim and belly line read as the brightest highlights.

Learn the carving basics

Before you start cutting

How do I keep the shading from looking flat?

Vary your depth on purpose instead of scraping everything the same. Leave shadow zones like the underbelly and leg gaps shallower so they stay dim, and carve the back and shoulder highlights thinner so more light passes. Checking with the LED inside every few minutes is the fastest way to catch flat spots.

What if I accidentally cut all the way through?

A small breakthrough is not the end of the design. Note where it happened and lighten your touch, then let the surrounding fur strokes blend the bright spot into a highlight. If it is large, you can back it with a thin piece of pumpkin skin from the scooped lid pressed against the inside wall.

How long will a shaded pumpkin like this last?

Peeled surfaces dry faster than cut ones because so much flesh is exposed. Coat the carved area with petroleum jelly and store the pumpkin in a cool spot or the fridge overnight when it is not on display. Expect two to four good nights before the fur texture starts to soften.

Your take belongs here, too.

Changed a detail? Made it simpler? Share a photo of your version and tell the community what worked.

Share your pumpkin

More pumpkins like this

You've reached the end · 8 pumpkins
The Patch Report

Fresh pumpkins, in your inbox.

The best new carvings, ideas worth stealing, and how-tos for carving season. Short, seasonal, and gone by November.

A short email during carving season. Unsubscribe anytime. See our privacy policy.