Halloween Pumpkin Carving Contest · Starts October 1st · $500 in prizes
← Back to ideas
@ai_concepts
Jul 9, 2026
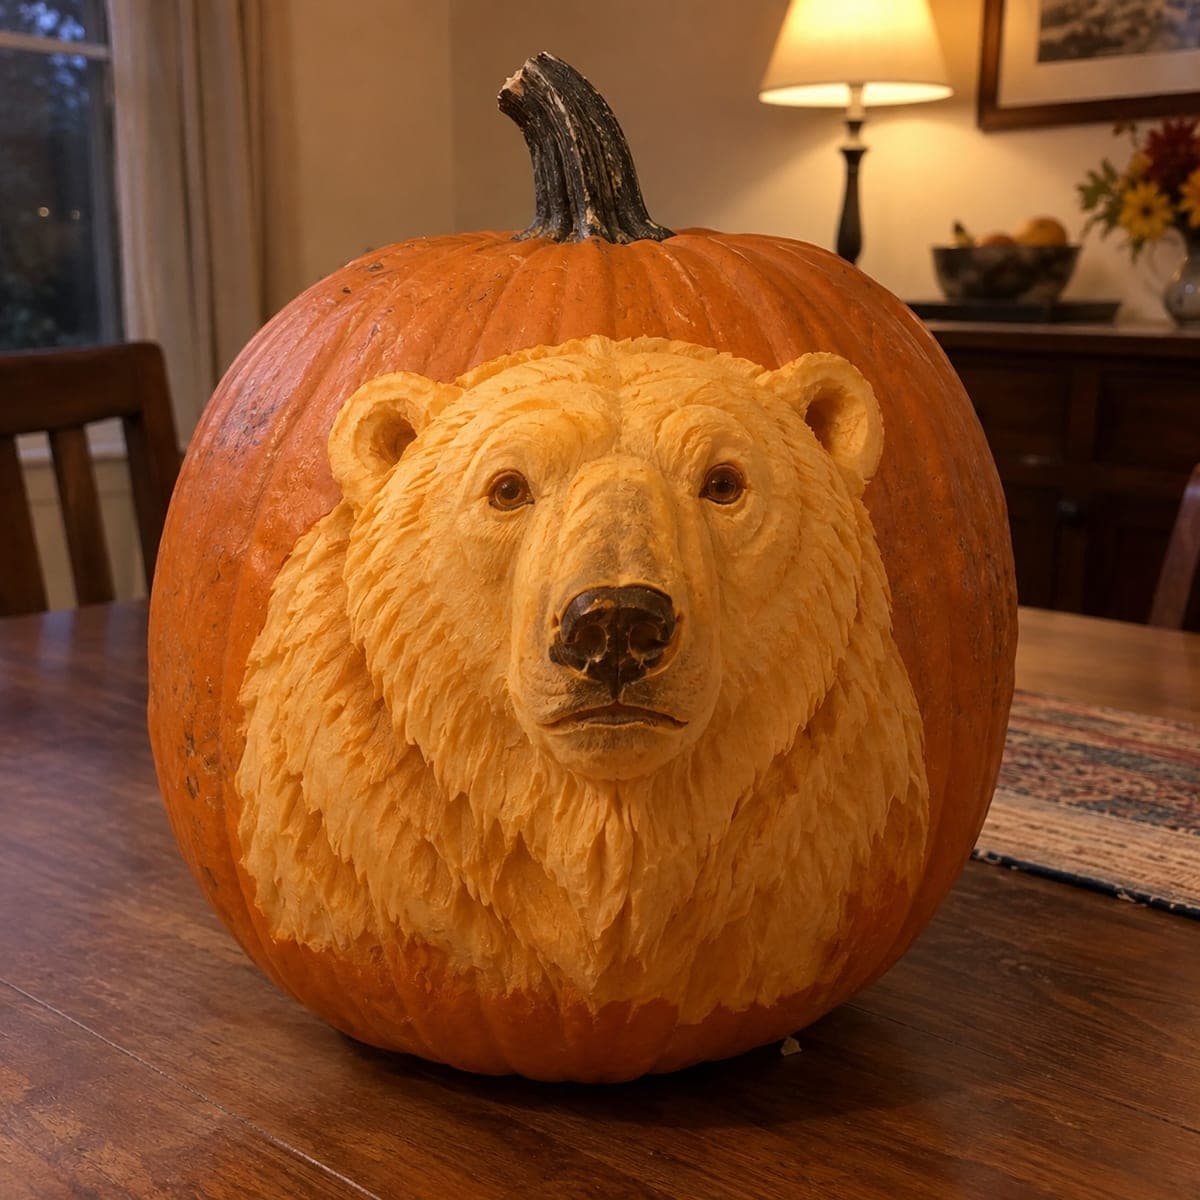
Polar Bear Head Sculpted Pumpkin CarvingAI
0

Polar Bear Head Sculpted Pumpkin Carving

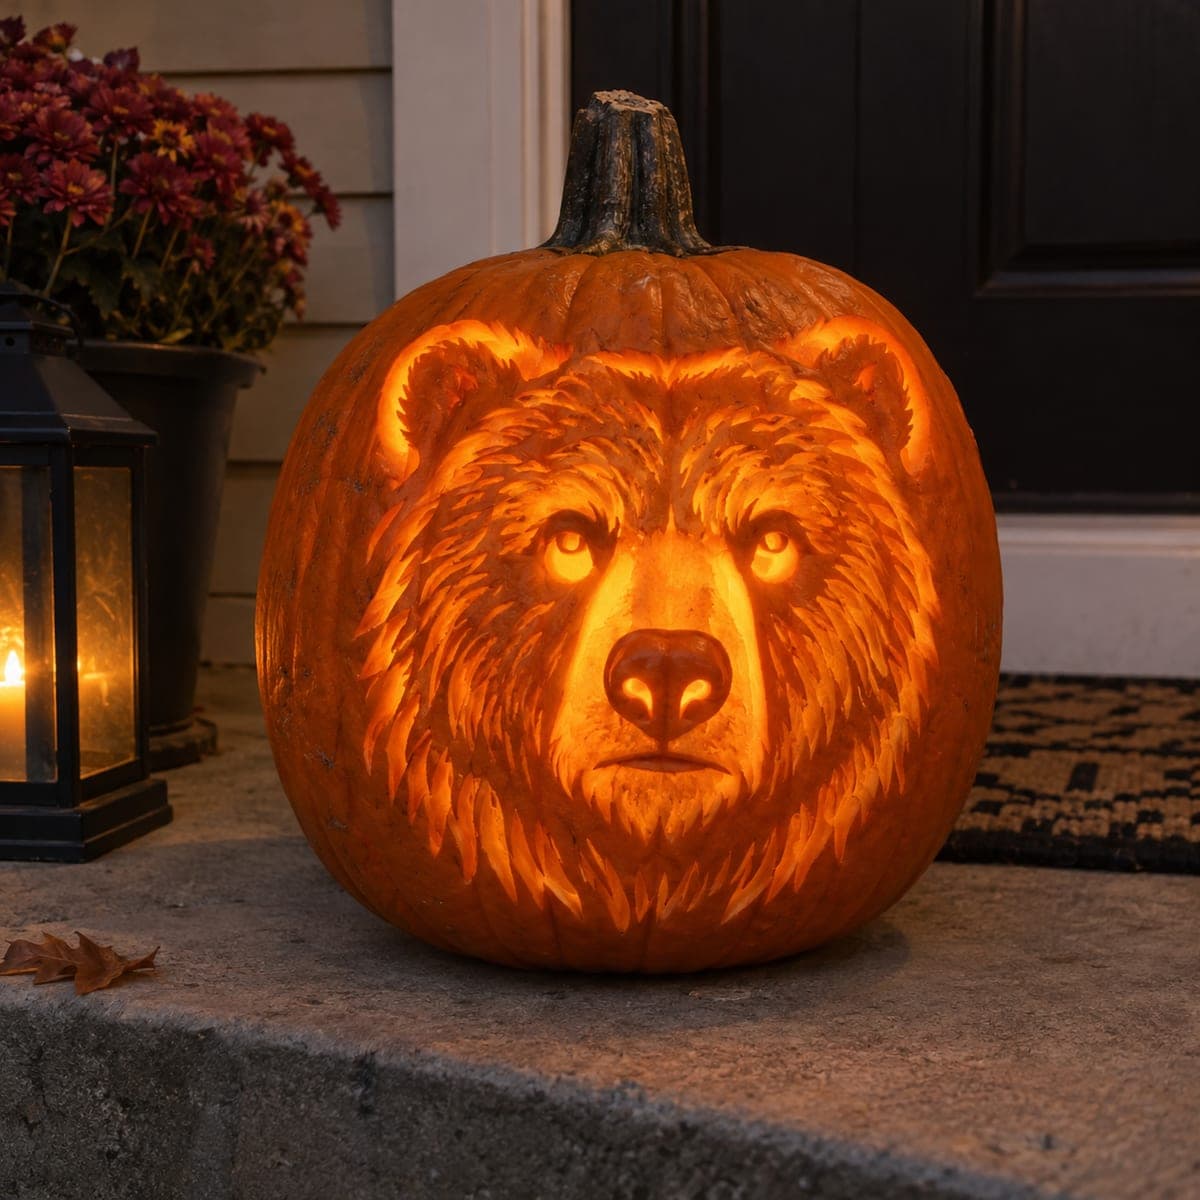
A polar bear's head emerges from this pumpkin in full sculpted relief, from the rounded ears down through the layered chest fur, with a dark carved nose as the focal point. This is subtractive sculpture more than carving: rough out the skull shape with a ribbon loop, then refine the muzzle and brow before texturing the fur in short overlapping strokes. Rub the cut surfaces with lemon juice to slow browning. Best displayed unlit where side light can model the face.

This is an AI-generated concept image: a realistic, carvable design idea rather than a photo of a finished carve. AI concepts are always labeled and sit out the leaderboard and the contest.

No ratings yet · Sign in to rate
Comments (0)

  • No comments yet — be the first.

Save without an account. Sign in to like or comment.

Our tips for carving a similar design

The core trick here is subtractive relief sculpture, where you carve away the skin and shell to leave the bear's head standing proud instead of cutting light holes. Plan the whole face on the front bulge of the pumpkin, roughing the skull mass first, then refining the muzzle, brow, and ears before adding fur. The dark carved nose is the focal point, so leave that skin intact and shape everything else around it.

Written by PumpkinCarvingIdeas.com, inspired by the image above. These are our suggestions, not instructions from the uploader. This approach to the AI concept has not been tested on a real pumpkin.

From pumpkin to porch

  1. Pick the pumpkin and plan the face

    Choose a tall, round pumpkin with a smooth, blemish-free front panel wide enough for the whole head. Leave the pumpkin solid, since a relief sculpture needs the full wall thickness to carve into, so do not gut it. Lightly sketch the head outline, ears, brow, muzzle, and nose with a washable marker. Keep the nose centered on the roundest part so it reads as the focal point.

  2. Rough out the skull mass

    Use a ribbon loop tool to scoop away the skin and top layer of shell around the head outline, dropping the background back so the head sits forward. Work in broad passes and step back often to check the overall dome of the skull. Do not chase detail yet, just establish high points at the brow and muzzle and low points at the cheeks and neck. Adults should handle all sharp and looped tools.

  3. Refine the muzzle, brow, and ears

    Switch to a smaller loop and a detail knife to define the eye sockets, the ridge of the brow, and the taper of the muzzle. Round the two ears and hollow a shallow cup inside each, keeping the rim thick so they stay strong. Leave the eyes and nose as raised skin islands you can darken later. Take thin shavings so you can correct as you go rather than cutting too deep.

  4. Carve the nose and eyes as dark accents

    Peel the skin off the eyes only slightly and shape two small domes, then press or carve fine detail into the nose so it reads darker than the pale flesh. The contrast between the untouched dark nose skin and the lighter carved fur gives the face its life. Keep the nostrils shallow and rounded rather than pierced through. Work slowly here since this small area carries the whole expression.

  5. Texture the fur in short strokes

    Using a small V gouge or a fine loop, carve short, overlapping directional strokes flowing down from the crown, out across the cheeks, and down the layered chest. Vary the stroke length and let the rows overlap like real fur so no flat spots remain. Angle the strokes to follow the form of the head and neck. Rub lemon juice over all cut surfaces to slow browning and keep the pale fur bright.

  6. Light it and photograph

    This is a sculpture, not a lantern, so display it unlit and use raking side light from a lamp or window to model the face and cast soft shadows in the fur. Avoid placing a light inside, since cutouts would break the solid form. Mist the carving with water and keep it cool between viewings to slow drying. Photograph within a day or two while the flesh is still pale and crisp.

Gather your supplies

Check things off as you get ready.

Work on a stable surface, keep your free hand out of the cutting path, and have an adult handle sharp tools.

Three levels of light

  • Leave intact

    The nose and eyes, left as untouched dark skin for contrast against the pale fur

  • Peel & shade

    The face, ears, and brow, peeled to the pale flesh so they glow softly under side light

  • Cut through

    No full cutouts on this design, since it is a solid relief sculpture rather than a lantern

Learn the carving basics

Before you start cutting

Should I hollow out the pumpkin first?

No, leave it solid. A relief sculpture carves down into the wall thickness, so you need the full shell to work into. Gutting it would leave you nothing to sculpt and risk collapsing the face.

How do I keep the pale carved fur from browning?

Rub lemon juice over every cut surface as soon as you expose it, and reapply if you work over several hours. Between viewings, keep the pumpkin cool and mist it lightly, then store it somewhere out of warm air. Even so, plan to photograph it within a day or two while it looks crisp.

Why display it unlit instead of adding an LED?

This design reads through carved depth and shadow, not through glowing holes. Raking side light from a lamp or window models the muzzle and fur far better than an internal light. An interior LED would only show through if you cut openings, which would ruin the solid sculpted form.

Your take belongs here, too.

Changed a detail? Made it simpler? Share a photo of your version and tell the community what worked.

Share your pumpkin

More pumpkins like this

You've reached the end · 8 pumpkins
The Patch Report

Fresh pumpkins, in your inbox.

The best new carvings, ideas worth stealing, and how-tos for carving season. Short, seasonal, and gone by November.

A short email during carving season. Unsubscribe anytime. See our privacy policy.