Halloween Pumpkin Carving Contest · Starts October 1st · $500 in prizes
← Back to ideas
@ai_concepts
Sep 13, 2026
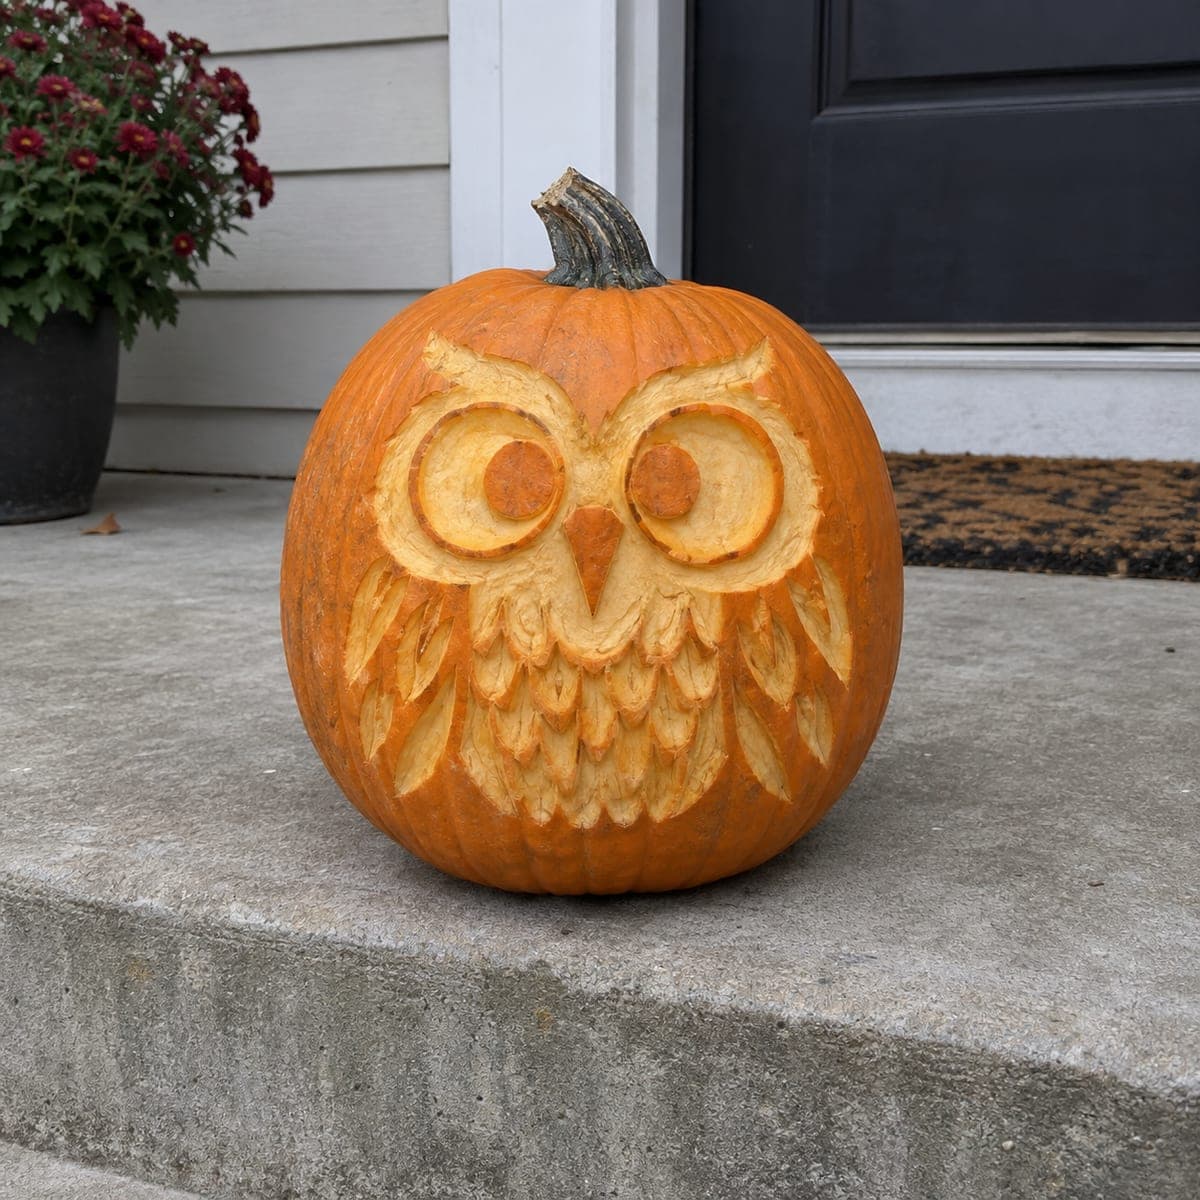
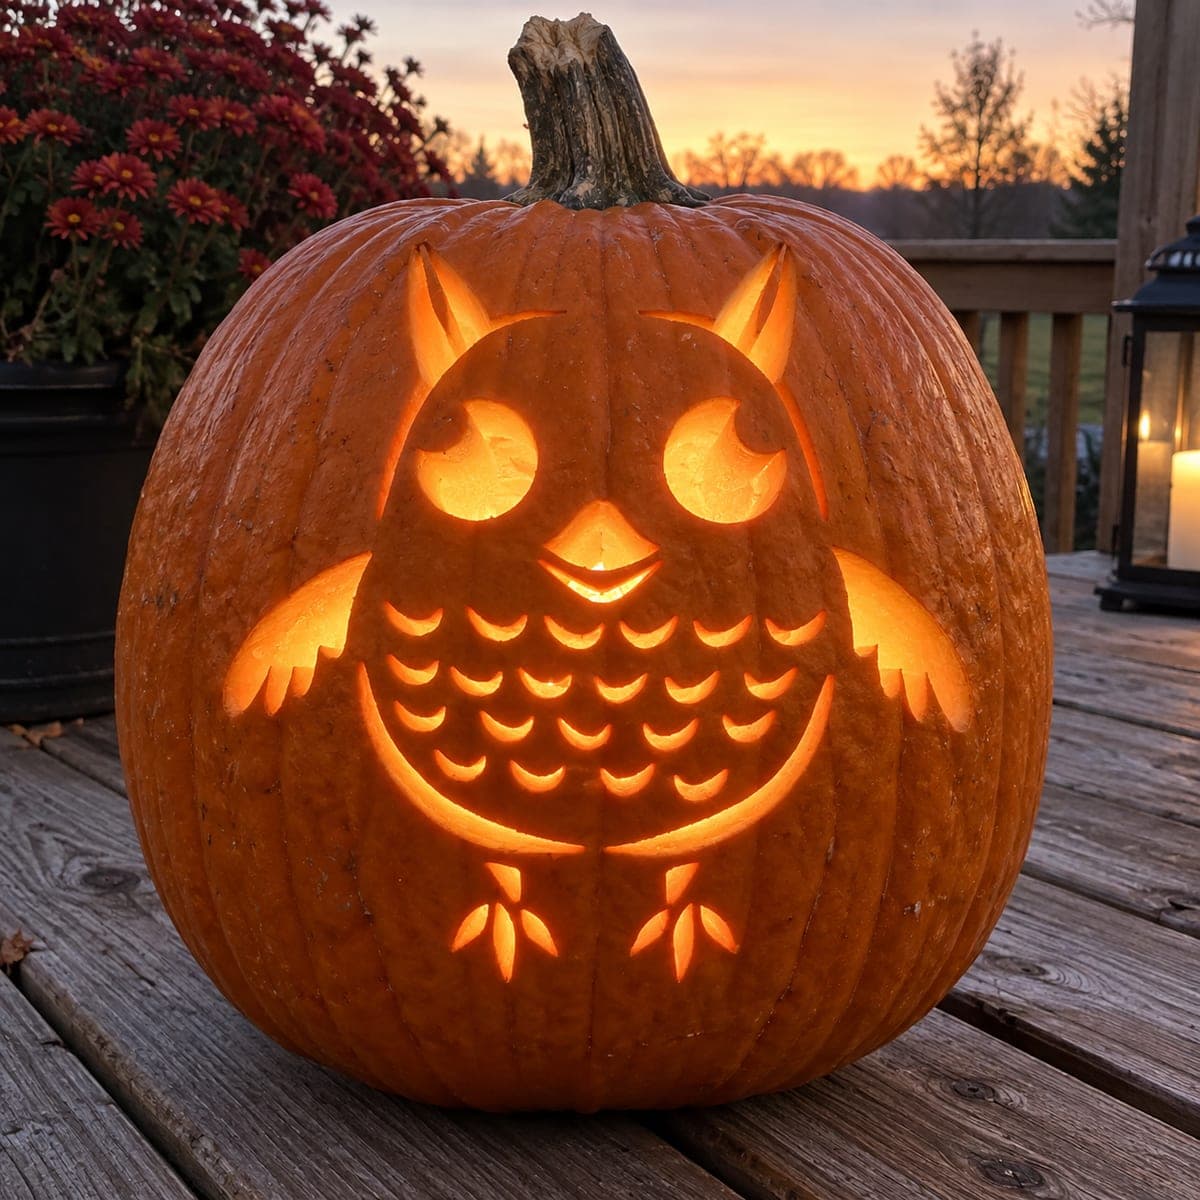
Owl Face Shaded Glowing Pumpkin on the PorchAI
0

Owl Face Shaded Glowing Pumpkin on the Porch

A wide-eyed owl stares out from a pumpkin with deep, shaded feather detail around the face disc and striking illuminated eyes that glow amber when the candle inside is lit. The design combines shading and selective cutout work so the eyes emit a concentrated burst of light while the surrounding feather texture remains in warm relief. Pair this owl pumpkin carving idea with a lantern on your front porch for a cohesive fall vignette. Carve the eye openings completely through the rind, then shade the feather detail outward in graduated layers to the edges of the face disc.

This is an AI-generated concept image: a realistic, carvable design idea rather than a photo of a finished carve. AI concepts are always labeled and sit out the leaderboard and the contest.

No ratings yet · Sign in to rate

Comments (0)

  • No comments yet — be the first.

Save without an account. Sign in to like or comment.

Our tips for carving a similar design

The core trick here is contrast: the eyes are cut fully through the rind for a bright amber burst, while every feather around them is only shaded into the skin for soft relief. Plan the whole face as a disc, keep the two eyes as the only true openings, and build the feather texture in graduated layers from the center outward. This is an AI concept image, so treat it as one way you could approach a similar design rather than a copy of a real pumpkin.

Written by PumpkinCarvingIdeas.com, inspired by the image above. These are our suggestions, not instructions from the uploader. This approach to the AI concept has not been tested on a real pumpkin.

From pumpkin to porch

  1. Transfer the owl layout

    Pick a smooth, round pumpkin with a flat-ish front face. Tape your owl stencil on and poke the outlines with a pin or transfer tool, marking the two eye circles, the beak, the ear tufts, and the rows of feathers. Step back and check the eyes are level and centered before you cut anything. A clear map now keeps the shading readable later.

  2. Open the pumpkin from the back or bottom

    Instead of a top lid, have an adult cut an access hole in the back or the base so the front stays clean for the carving. Scoop the insides and thin the front wall to about one inch where the eyes will glow. A thinner wall makes shading easier and lets the eye light read warmer. Save the pulp scraps for later touch ups.

  3. Shade the feathers first

    Using a loop or ribbon tool, skin the top layer of rind to create each feather, working from the face disc outward in overlapping rows. Peel deeper where you want a brighter glow and leave more skin where you want shadow, so the feathers gain depth. Round the edges of the ear tufts and the raised brow ridge for a three dimensional look. Take your time here, since this graduated texture is what sells the owl.

  4. Carve the beak and brow relief

    Lower the area around the beak so it stands proud, then lightly peel the sides to catch the light. Keep the brow ridge above the eyes slightly raised to frame that stern owl stare. Do not cut through anywhere in this zone; it is all surface shading. Leave small skin bridges between feather groups so nothing feels flimsy.

  5. Cut the eyes through last

    Once all the shading is done, cut the two eye openings completely through the rind with a small serrated saw. Cut big openings last so the pumpkin stays sturdy while you work. Leave a thin ring of skin at the edge of each eye if you want a rim of dimmer glow around the bright center. Clean the inner cuts so light passes cleanly.

  6. Light it and stage the porch

    Drop in one or two battery LED lights, never a candle, and aim them toward the eyes for that concentrated amber burst. Set the pumpkin near a lantern and a pot of mums to match the cozy porch vibe. Snap your photo in the dark so the eyes and feather relief both show. Mist the cut areas or rub them with a little petroleum jelly to slow drying.

Gather your supplies

Check things off as you get ready.

Work on a stable surface, keep your free hand out of the cutting path, and have an adult handle sharp tools.

Three levels of light

  • Leave intact

    The shadowed feather tips, outer face disc edges, and brow ridge kept as untouched skin

  • Peel & shade

    The overlapping feather rows and cheeks skin-peeled to varying depths for soft graduated relief

  • Cut through

    The two owl eyes cut fully through for the brightest concentrated amber glow

Learn the carving basics

Before you start cutting

How do I keep the eyes bright but the feathers soft?

Cut only the eyes all the way through the rind, and leave every feather as shaded, skin-peeled relief. The full openings pass the most light, so the eyes read as a sharp amber burst. The peeled feathers only glow dimly, which keeps the face disc looking textured rather than washed out.

Should I use a top lid or a back opening?

Use a back or bottom access hole for this one. The owl face fills the front, and a traditional top lid is fine too, but a rear opening keeps the front surface uninterrupted for your shading. It also makes it easy to reach in and reposition the LED toward the eyes.

The feather shading feels overwhelming, where do I start?

Start at the face disc around the eyes and work outward one row at a time. Peel each feather a little deeper toward its base and leave skin at the tips so they overlap naturally. Doing the center first gives you a reference for depth as you move to the chest feathers.

Your take belongs here, too.

Changed a detail? Made it simpler? Share a photo of your version and tell the community what worked.

Share your pumpkin

More pumpkins like this

You've reached the end · 8 pumpkins
The Patch Report

Fresh pumpkins, in your inbox.

The best new carvings, ideas worth stealing, and how-tos for carving season. Short, seasonal, and gone by November.

A short email during carving season. Unsubscribe anytime. See our privacy policy.