Halloween Pumpkin Carving Contest · Starts October 1st · $500 in prizes
← Back to ideas
@ai_concepts
Aug 28, 2026
Wide-Eyed Owl Relief Carved PumpkinAI
0

Wide-Eyed Owl Relief Carved Pumpkin

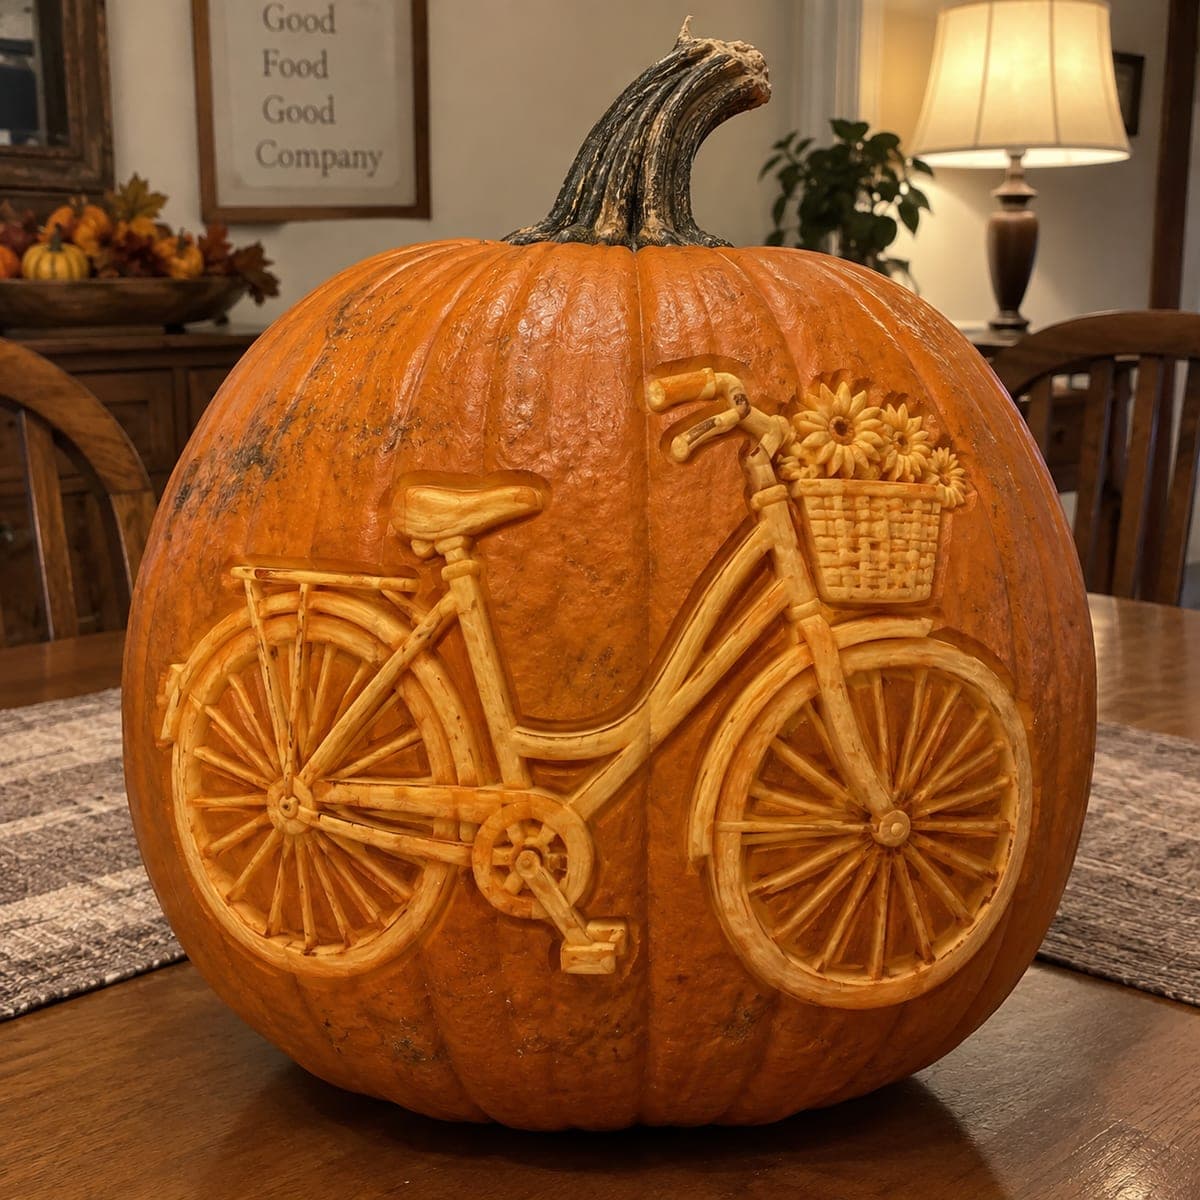
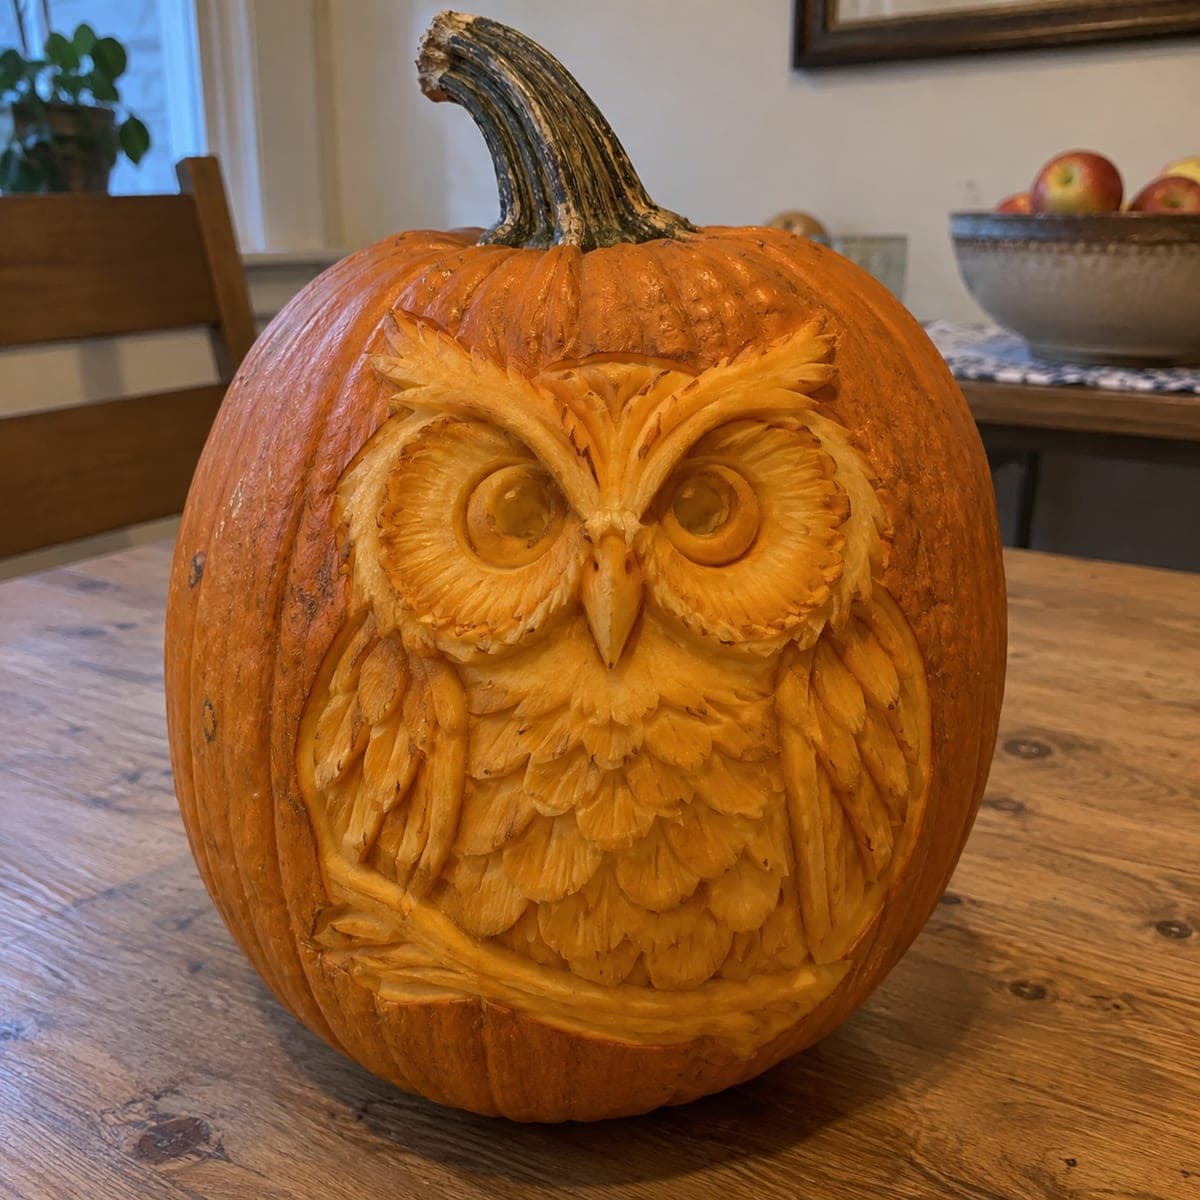
A plump owl grips a branch and stares directly at the viewer, its feathers and talons carved in dramatic three-dimensional relief that makes this pumpkin look almost like a ceramic sculpture. Every layer of feathering from the facial disc to the breast to the wing coverts is shaped with gouges and loop tools, giving the bird real texture and depth. Work from the outermost feather rows inward and carve the large round eyes last to preserve their shape. An expert-level pumpkin carving idea that doubles as a fall home decor piece even before Halloween.

This is an AI-generated concept image: a realistic, carvable design idea rather than a photo of a finished carve. AI concepts are always labeled and sit out the leaderboard and the contest.

No ratings yet · Sign in to rate
Comments (0)

  • No comments yet — be the first.

Save without an account. Sign in to like or comment.

Our tips for carving a similar design

The whole trick here is surface relief rather than cut-through openings. You remove skin at different depths so the owl glows in layers, with the facial disc, breast, and wing feathers shaped by scooping shallow flesh instead of punching holes. Work from the outer feather rows toward the center and save the round eyes for last so their shape stays crisp.

Written by PumpkinCarvingIdeas.com, inspired by the image above. These are our suggestions, not instructions from the uploader. This approach to the AI concept has not been tested on a real pumpkin.

From pumpkin to porch

  1. Prep and transfer the design

    Pick a large, wide pumpkin with a smooth, blemish-free front so the relief reads clearly. Cut a lid from the bottom or the back, not the top, so the stem stays intact and you keep the front panel uninterrupted. Scrape the inside wall behind the owl down to about one inch thick for even glow. Tape your owl stencil over the front and poke or trace the main outlines: facial disc, eyes, beak, breast, wings, and the branch and talons.

  2. Outline and set the depth of field

    With a small detail knife, score the outer edge of the whole owl and the branch so the body sits forward of the background. Gently peel the skin off the flat background around the bird to push it back visually. Establish which areas are highest, the facial disc and beak, and which sit lower, the wing tips and branch. Keeping these depth levels planned early stops the relief from going flat.

  3. Carve the outer feathers first

    Start at the outermost wing and breast feathers and use a U-gouge to scoop each feather in overlapping rows. Round the bottom edge of every feather and taper toward the shaft so light catches the curve. Always carve from the outer rows inward so each new row tucks under the last, the way real plumage layers. Take shallow passes and remove more flesh only where you want a brighter dip.

  4. Shape the facial disc and beak

    Use a loop tool to sweep the fine radiating lines of the facial disc outward from between the eyes. Leave the beak standing proud by carving down around it, then bevel its edges to a soft point rather than a thin fragile tip. Keep a raised ridge above each eye for the brow that gives the owl its stern look. Blend the disc into the breast feathers so there is no hard seam.

  5. Carve the eyes and branch last

    Now cut the two large round eyes, leaving a small raised dot in each for a catchlight so the stare stays lively. Keep the pupils as skin-thin peeled windows or shallow cuts, not big open holes, so the face keeps its sculpted look. Shape the branch and talons in low relief, curving each toe over the perch and leaving bridges of flesh so nothing snaps. Clean up stray edges with the detail knife.

  6. Light it and photograph

    Set a warm LED puck or a short string of battery lights inside, never a candle, since relief carving traps heat and thin flesh scorches. Test the glow in a dark room and deepen any feather that stays too dark. Mist the cut surfaces and wrap the pumpkin in plastic in the fridge overnight to slow drying. Shoot your photo within a day or two while the feather edges are still sharp.

Gather your supplies

Check things off as you get ready.

Work on a stable surface, keep your free hand out of the cutting path, and have an adult handle sharp tools.

Three levels of light

  • Leave intact

    The flat background around the owl and the darkest recesses between wing feathers stay as untouched skin.

  • Peel & shade

    The facial disc, breast, and layered wing feathers are skin-peeled at varying depths for a soft, dim orange glow that shapes the relief.

  • Cut through

    Only the round eyes get cut thin or nearly through for the brightest points, with a tiny raised catchlight left in each.

Learn the carving basics

Before you start cutting

This is an expert design, so where should a first attempt focus?

Spend your energy on the facial disc and eyes, since that is what makes people recognize an owl. Rough the wing feathers in simple overlapping scoops rather than chasing every barb. A clean face with strong brows carries the whole piece even if the feathers stay loose.

How do I keep the feathers from looking flat under light?

Vary the depth from feather to feather instead of scooping them all the same. Carve the outer rows shallow and dip a little deeper as you move toward the center so shadows stack up. Test the pumpkin lit partway through so you can deepen any feather that disappears.

Will the beak and talons break off?

They will if you carve them as thin standing points, so keep them in low relief instead. Leave the beak connected to the face on all sides and shape the talons as raised ridges over the branch with flesh bridges underneath. Nothing here needs to stand free of the pumpkin wall.

Your take belongs here, too.

Changed a detail? Made it simpler? Share a photo of your version and tell the community what worked.

Share your pumpkin

More pumpkins like this

You've reached the end · 8 pumpkins
The Patch Report

Fresh pumpkins, in your inbox.

The best new carvings, ideas worth stealing, and how-tos for carving season. Short, seasonal, and gone by November.

A short email during carving season. Unsubscribe anytime. See our privacy policy.