Halloween Pumpkin Carving Contest · Starts October 1st · $500 in prizes
← Back to ideas
@ai_concepts
Sep 1, 2026
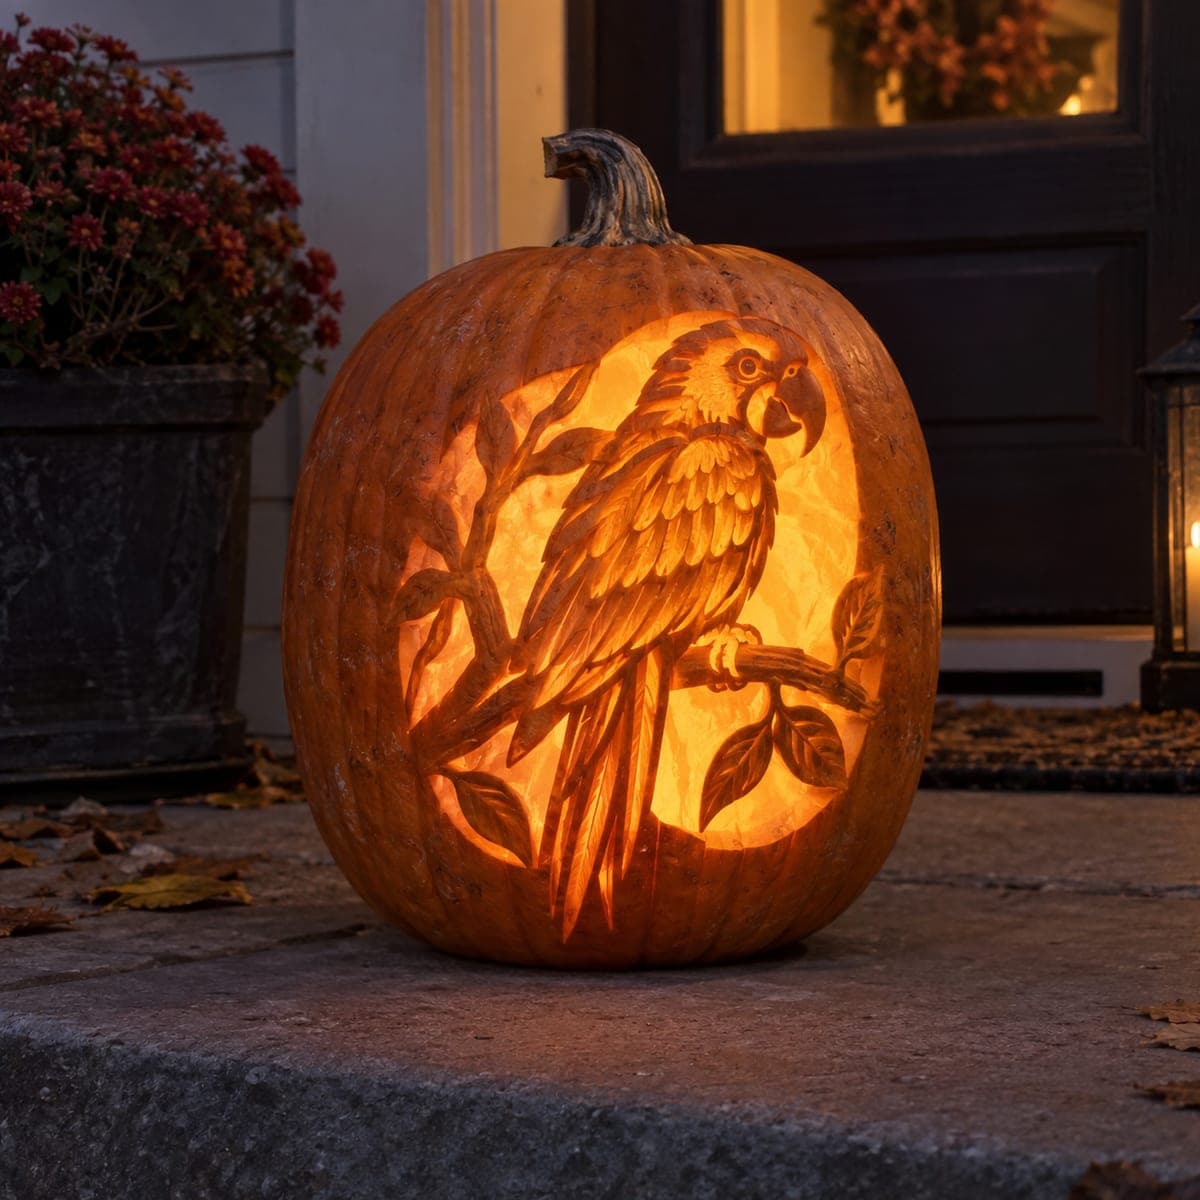
Perched Owl Pumpkin Carving With Layered FeathersAI
0

Perched Owl Pumpkin Carving With Layered Feathers

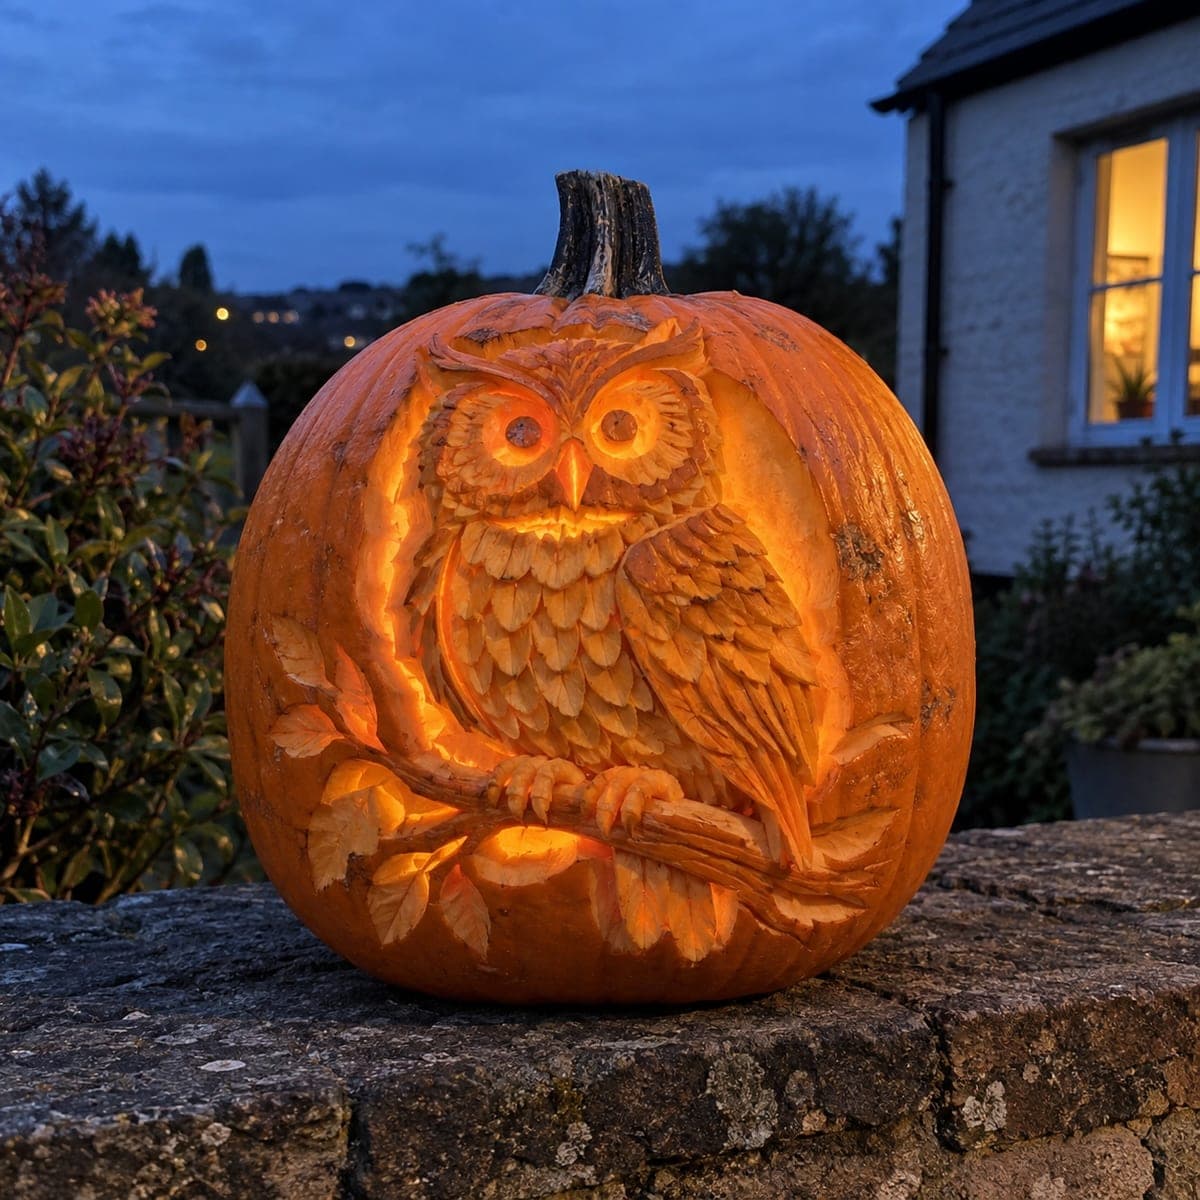
An owl perches on a leafy branch in this glowing pumpkin, its ear tufts, ringed eyes, and breast feathers etched in overlapping layers that light up like embers at dusk. The feather stacking is the advanced part; work top to bottom so each row of gouges overlaps the one below like shingles. Carve the eyes deepest so they burn brightest, and stand it on a garden wall where the evening sky frames the glow.

This is an AI-generated concept image: a realistic, carvable design idea rather than a photo of a finished carve. AI concepts are always labeled and sit out the leaderboard and the contest.

No ratings yet · Sign in to rate
Comments (0)

  • No comments yet — be the first.

Save without an account. Sign in to like or comment.

Our tips for carving a similar design

The core trick here is stacked relief shading, where you peel the skin in overlapping rows so the feathers read like shingles and glow like embers. You keep almost the whole surface intact and control brightness by how deep you shave, cutting all the way through only at the eyes. Plan the owl top to bottom, from ear tufts down to the branch, so each feather row overlaps the one below.

Written by PumpkinCarvingIdeas.com, inspired by the image above. These are our suggestions, not instructions from the uploader. This approach to the AI concept has not been tested on a real pumpkin.

From pumpkin to porch

  1. Prep the pumpkin and transfer the design

    Pick a tall, smooth pumpkin and cut a wide access hole in the bottom, not the top, so the stem stays as the owl's perch backdrop. Scrape the inside wall behind the owl down to about one inch so light passes evenly. Tape your owl stencil over the flattest face and poke through the main outlines with a pin, marking the eyes, ear tufts, body, wing, and branch. Remove the paper and connect the dots with a washable marker.

  2. Outline the owl and branch

    With a fine detail knife or a lino gouge, score shallow lines along the owl's silhouette, the wing edge, and the branch. These score lines set your borders so shaded areas do not bleed into each other. Do not cut deep yet, just break the skin. Keep the branch and leaf stems as connected bridges so nothing weakens the front.

  3. Shade the ear tufts and face rings

    Start at the top and use a small U gouge to peel the skin off the ear tufts, working in short strokes that follow the feather direction. Carve the ringed facial disks by shaving shallow curves that spiral toward the eyes. Leave the beak and the darkest brow lines as untouched skin so they stay dark for contrast. Peeling only the top layer here gives a soft mid glow.

  4. Stack the breast and wing feathers

    This is the advanced part, so take your time. Work top to bottom in rows, gouging a scalloped edge for each feather so it overlaps the row below like roof shingles. Vary your depth, shaving a little deeper toward the bottom of each feather to suggest a shadow, and keep the wing feathers longer and narrower than the breast feathers. Wipe away pulp often so you can read the layers as they build.

  5. Cut the eyes and finish the branch

    Now carve the two eyes all the way through the wall so they burn brightest, then leave a thin ring of peeled skin around each for the amber iris. Shade the branch and leaves last with shallow gouges, keeping the twig outlines as raised bridges for strength. Do any small full cutouts only after all shading is done so the shell stays firm. Clean up stray edges with the detail knife.

  6. Light it and photograph at dusk

    Drop a bright LED puck or a string of LEDs inside through the bottom hole and never use a candle near these thin shaded areas. Set the pumpkin on a garden wall as the sky goes blue so the warm glow reads against the cool background. Rotate it until the eyes and breast catch the most light. Mist the cut edges with water and refrigerate overnight to keep the feathers crisp for a few days.

Gather your supplies

Check things off as you get ready.

Work on a stable surface, keep your free hand out of the cutting path, and have an adult handle sharp tools.

Three levels of light

  • Leave intact

    The beak, the dark brow lines, and the outer background skin stay untouched and dark.

  • Peel & shade

    The facial disks, ear tufts, stacked breast and wing feathers, and the branch glow at a soft mid level.

  • Cut through

    The two eyes are cut through for the brightest burning highlights.

Learn the carving basics

Before you start cutting

How do I keep the layered feathers from looking flat?

Vary your gouge depth within each feather, shaving a touch deeper along the bottom edge to cast a shadow. Always work top to bottom so each row overlaps the one below like shingles. The overlap and the depth changes are what create the layered, dimensional look.

Since this is a concept image, can a real pumpkin hold this much detail?

Yes, this design is built from shallow shading rather than fragile cutouts, so the shell stays strong. Keep the branch, leaf stems, and the rings around the eyes as connected bridges instead of free cuts. Only the two small eyes go all the way through, which a normal pumpkin wall handles easily.

Why cut the access hole in the bottom instead of the top?

A bottom hole lets you set the pumpkin down over the light and keeps the stem intact above the owl for a natural framing. It also avoids a dark lid shadow across the top of your carving. Just scrape the back wall thin so the glow spreads evenly through all the feathers.

Your take belongs here, too.

Changed a detail? Made it simpler? Share a photo of your version and tell the community what worked.

Share your pumpkin

More pumpkins like this

You've reached the end · 8 pumpkins
The Patch Report

Fresh pumpkins, in your inbox.

The best new carvings, ideas worth stealing, and how-tos for carving season. Short, seasonal, and gone by November.

A short email during carving season. Unsubscribe anytime. See our privacy policy.