Halloween Pumpkin Carving Contest · Starts October 1st · $500 in prizes
← Back to ideas
@ai_concepts
Sep 14, 2026
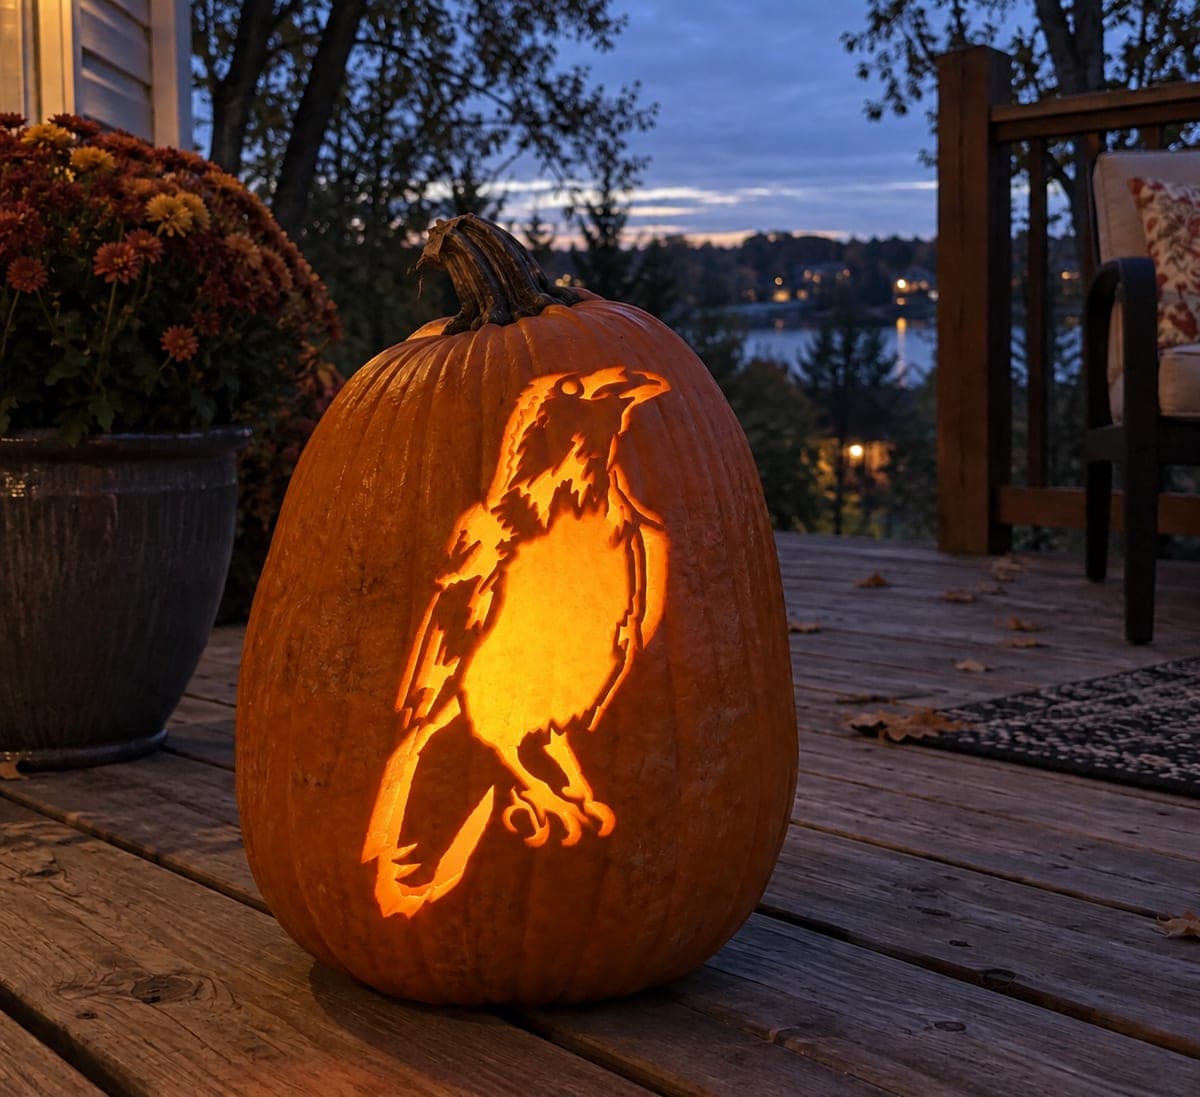
Perched Bird With a Long Tail Pumpkin
1/2
AI
0

Perched Bird With a Long Tail Pumpkin

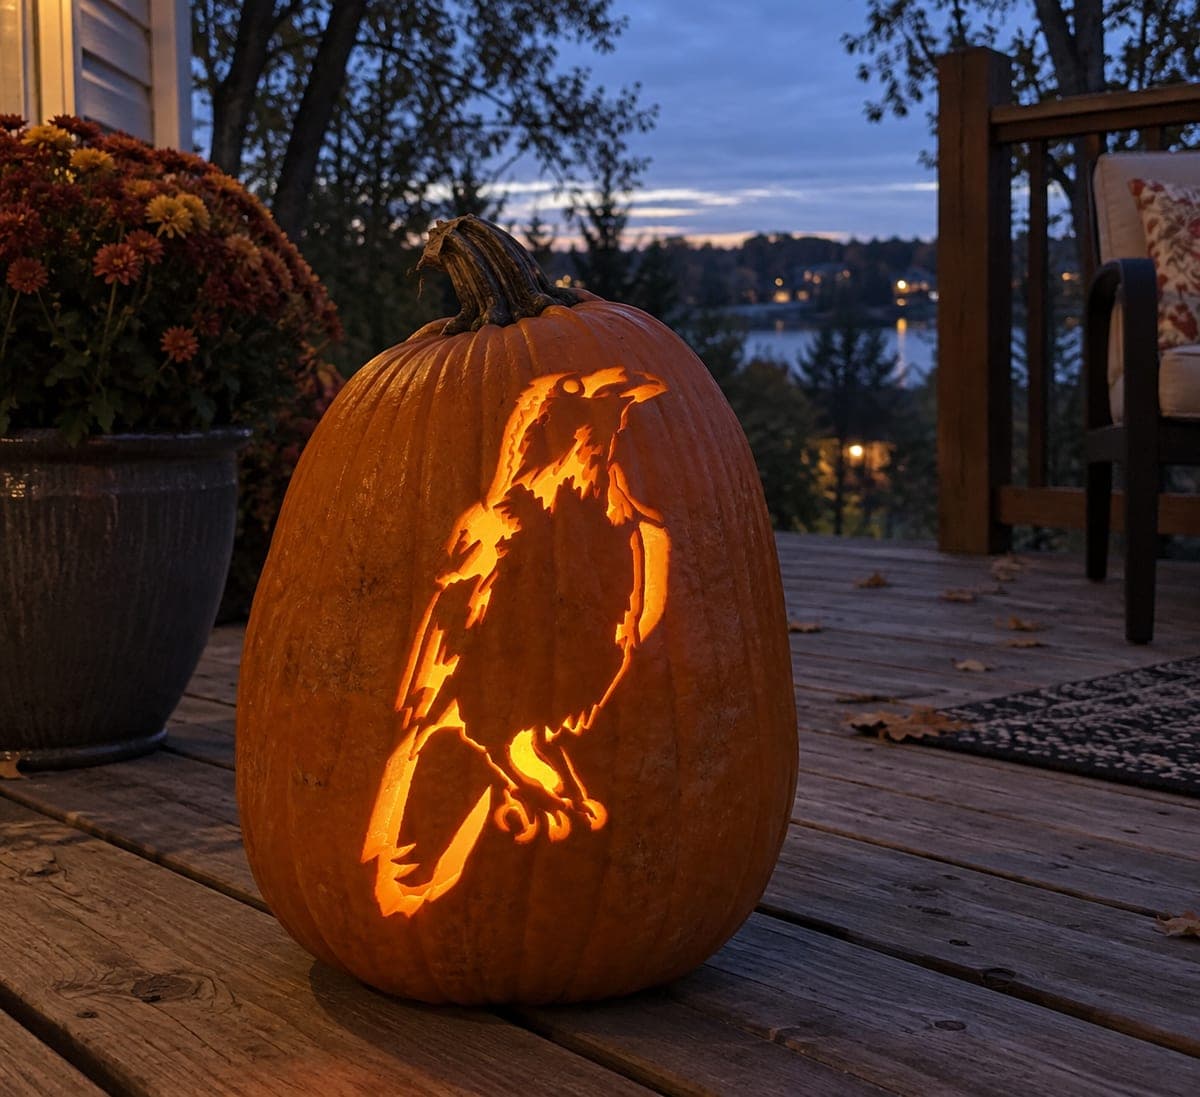
A perched crow or raven faces right with ruffled chest feathers, a sharp beak, and taloned feet gripping a branch stub in this detailed animal pumpkin carving idea, executed in shading rather than full cutout. Surface peeling at varying depths creates the feather texture and the contrast between the bright chest and darker wings. Keep the beak and talon tips as lightly peeled thin sections so they glow warmly; go too deep and they risk snapping off. Photographed on a waterfront deck at dusk, the shaded bird portrait glows with a subtlety that full cutouts cannot match.

This is an AI-generated concept image: a realistic, carvable design idea rather than a photo of a finished carve. AI concepts are always labeled and sit out the leaderboard and the contest.
No ratings yet · Sign in to rate

Comments (0)

  • No comments yet — be the first.

Save without an account. Sign in to like or comment.

Our tips for carving a similar design

The core trick here is shading, not cutting all the way through. You peel the pumpkin skin at different depths so the chest glows bright, the wings stay darker, and the beak and talons hold a warm, subtle light. A single silhouette cutout behind the bird would give you the shape, but the real character comes from layered peeling across the feathers.

Written by PumpkinCarvingIdeas.com, inspired by the image above. These are our suggestions, not instructions from the uploader. This approach to the AI concept has not been tested on a real pumpkin.

From pumpkin to porch

  1. Transfer the perched bird pattern

    Choose a tall pumpkin with a smooth, wide face to hold the detail. Tape your bird stencil flat against the surface and poke closely spaced dots along every line with a pin or transfer tool. Pay extra attention to the beak, chest, wing edges, and talons since those separate the light zones. Peel the paper and connect the dots lightly with a marker if the outline is hard to read.

  2. Open the pumpkin and thin the wall

    Cut a lid from the back or the bottom so the front stays clean, and have an adult handle the knife. Scoop out the seeds and pulp thoroughly. On the carving face, scrape the inner wall down to about one inch so light passes through the peeled areas evenly. A consistent wall is what makes shading glow smoothly rather than in patches.

  3. Peel the bright chest first

    Using a shallow gouge or a lino cutter, remove the outer skin across the bird's chest and belly to expose the pale flesh underneath. Go a little deeper here than anywhere else so this becomes the brightest shaded zone. Keep your strokes even and smooth to avoid tool ridges. Work in from the center so you can judge the glow as you go.

  4. Shade the wings and tail darker

    Peel the wing and long tail feathers more lightly, leaving more skin than on the chest so they read as darker layers. Vary the depth feather by feather to build texture and separation. Leave thin lines of untouched skin between feather groups to keep the shapes crisp. Step back often to check the contrast under a light.

  5. Keep the beak and talons thin, not open

    For the sharp beak and the gripping talon tips, peel a thin section so they glow warmly, but do not cut through. These fine points snap off if you go too deep, so stop while there is still a little firmness. Leave small bridges of skin where the talons wrap the branch stub so nothing detaches. Save the eye as a tiny full cutout for a bright accent.

  6. Light it and photograph at dusk

    Drop in a battery LED and never a candle, since flames dull the subtle shading and are a fire risk. Set the pumpkin outside as the sky goes blue to get that soft dusk contrast. Rotate it until the chest reads brightest and the wings fade back naturally. Mist the peeled areas lightly if the flesh dries and dulls before your photo.

Gather your supplies

Check things off as you get ready.

Work on a stable surface, keep your free hand out of the cutting path, and have an adult handle sharp tools.

Three levels of light

  • Leave intact

    The background, the darkest wing edges, and the thin outlines between feather groups stay as untouched skin.

  • Peel & shade

    The wings, long tail, beak, and talons get peeled at varying shallow depths for a dim warm glow.

  • Cut through

    Only the tiny eye is cut fully through for a single bright point of light.

Learn the carving basics

Before you start cutting

This is an AI concept image, so can a real pumpkin look like this?

Yes, a shaded bird portrait like this is achievable on a real pumpkin, but it takes patience with peeling depths. The picture is a concept, so treat it as a target rather than a finished result. Keep the beak and talons as thin peeled sections instead of delicate cutouts so they survive.

How do I keep the beak and talon tips from snapping off?

Do not cut through those points at all. Peel just the outer skin so they glow while keeping the flesh behind them intact and firm. Leave small skin bridges where the talons meet the branch stub so nothing hangs loose.

How do I get the chest to look brighter than the wings?

Depth controls brightness in shading. Peel the chest deeper so more light comes through, and leave more skin on the wings and tail so they stay dim. Test the contrast with your LED inside before you commit to going any deeper.

Your take belongs here, too.

Changed a detail? Made it simpler? Share a photo of your version and tell the community what worked.

Share your pumpkin

More pumpkins like this

You've reached the end · 8 pumpkins
The Patch Report

Fresh pumpkins, in your inbox.

The best new carvings, ideas worth stealing, and how-tos for carving season. Short, seasonal, and gone by November.

A short email during carving season. Unsubscribe anytime. See our privacy policy.