Halloween Pumpkin Carving Contest · Starts October 1st · $500 in prizes
← Back to ideas
@ai_concepts
Jul 19, 2026
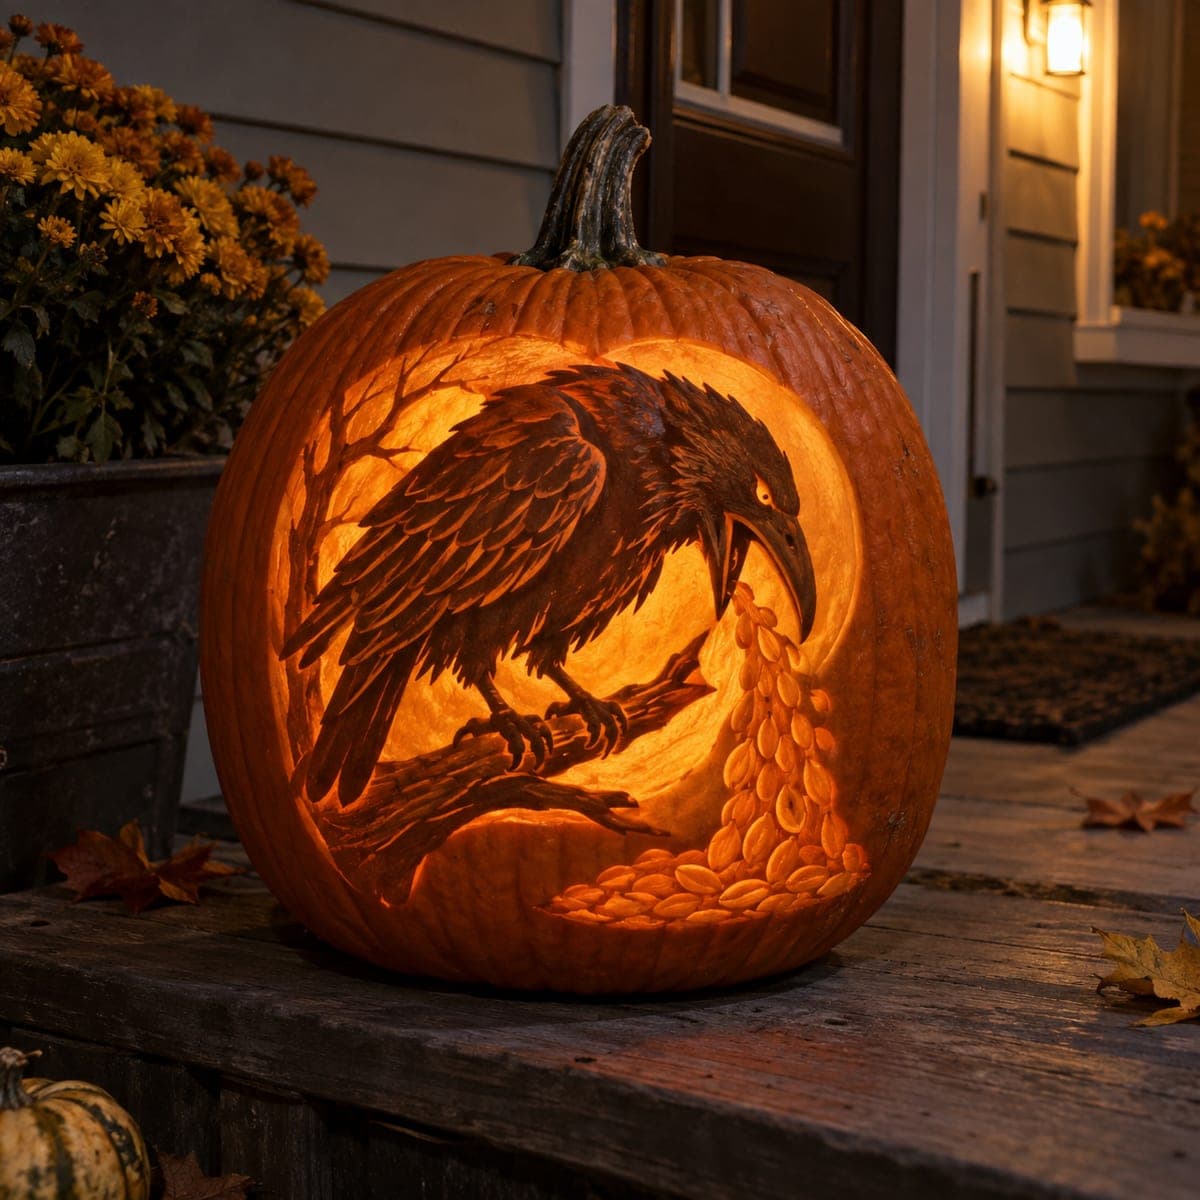
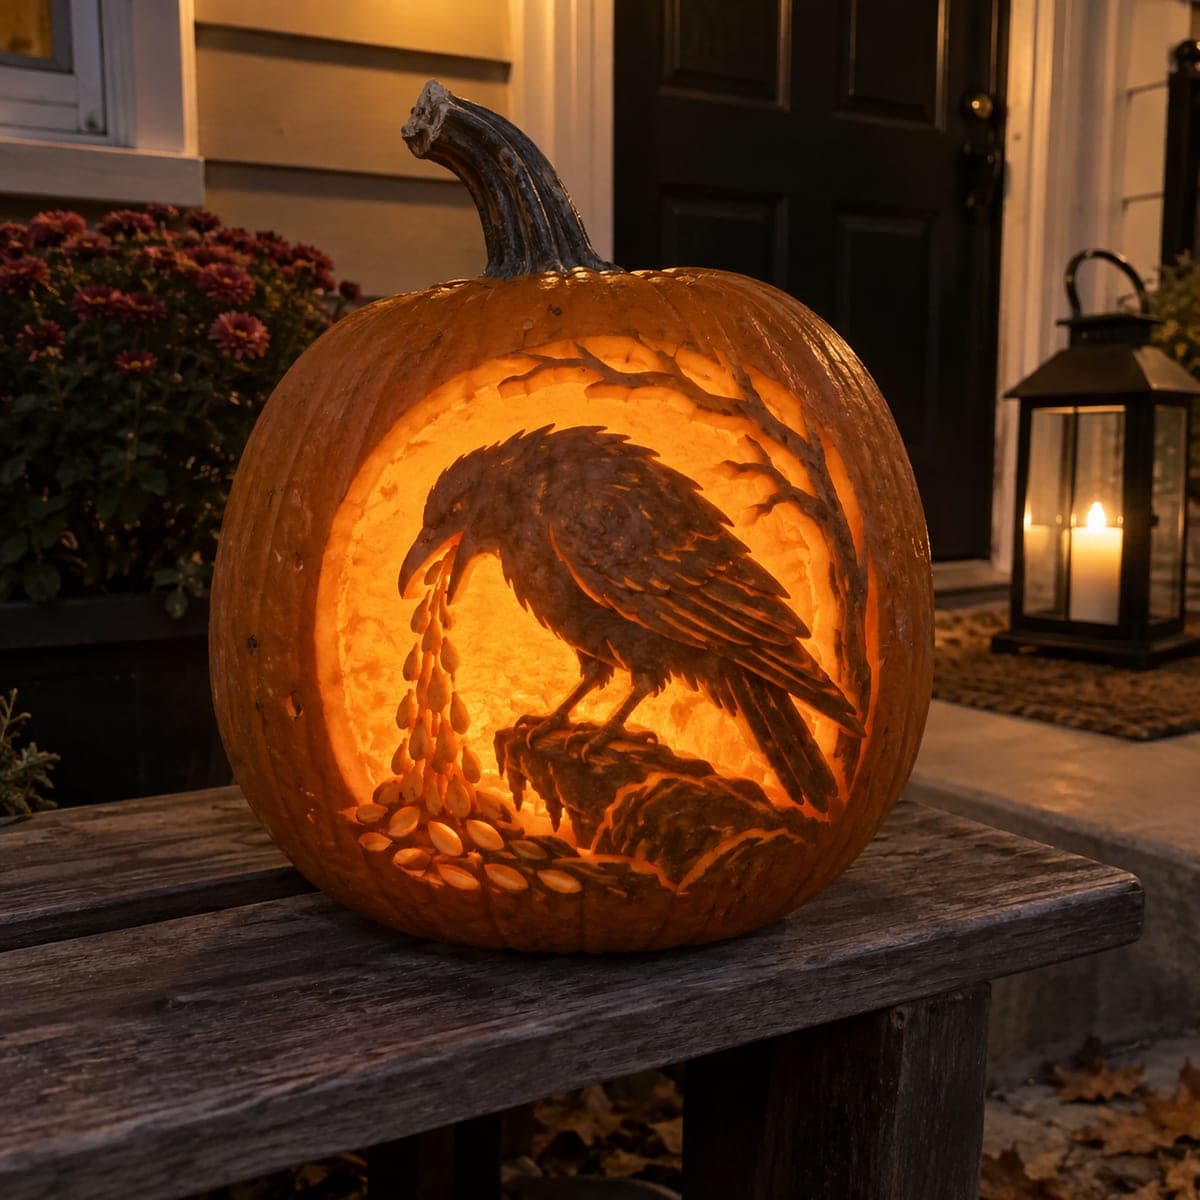
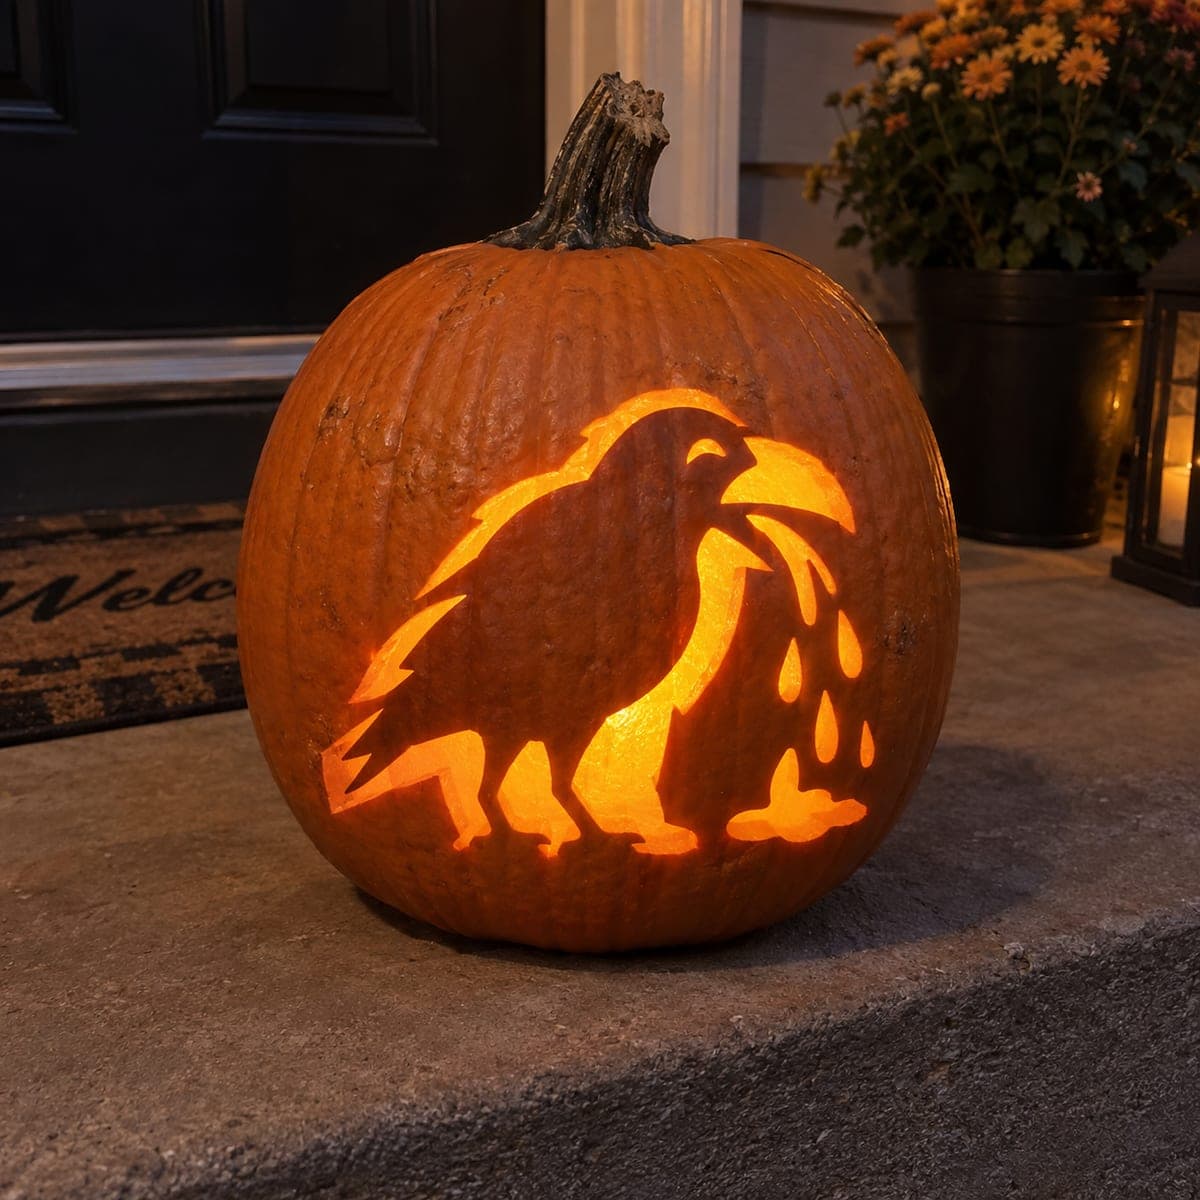
Raven on Branch Shaded Pumpkin Carving at NightAI
0

Raven on Branch Shaded Pumpkin Carving at Night

A raven perches on a gnarled branch with its wings folded and beak open, surrounded by a carved oval vignette of bare winter trees, the entire scene executed in relief shading that glows gold from within. This atmospheric pumpkin carving idea draws on Gothic and literary imagery and suits a porch display aimed at adults and older teens. Carve the background tree branches at the shallowest depth so they appear lighter, then carve the raven body progressively deeper so it reads as a dark silhouette against the glowing background. Pair with a warm Edison-bulb candle for the richest amber tones.

This is an AI-generated concept image: a realistic, carvable design idea rather than a photo of a finished carve. AI concepts are always labeled and sit out the leaderboard and the contest.
No ratings yet · Sign in to rate

Comments (0)

  • No comments yet — be the first.

Save without an account. Sign in to like or comment.

Our tips for carving a similar design

The core trick here is relief shading, where you scrape skin away at different depths so the light reads in layers instead of simple black and white. The plan is to leave the raven mostly untouched as a dark silhouette, peel the background oval and bare branches for a soft gold glow, and reserve a few true cutouts for the brightest accents. Since this is a concept image, treat it as a target look you build up slowly rather than a finished pumpkin to copy exactly.

Written by PumpkinCarvingIdeas.com, inspired by the image above. These are our suggestions, not instructions from the uploader. This approach to the AI concept has not been tested on a real pumpkin.

From pumpkin to porch

  1. Prep the pumpkin and cut the lid

    Pick a tall, broad pumpkin with a smooth front panel for the scene. An adult should cut an access hole in the back or bottom rather than the top so the stem stays intact as shown. Scoop the inside clean and thin the carving wall to about one inch so light passes through the shaded areas. A thinner wall makes relief shading glow more evenly.

  2. Transfer the raven and tree design

    Print or draw the raven, its branch perch, and the oval of bare winter trees, then tape the pattern flat against the front. Poke closely spaced dots along every outline with a pin or a poking tool. Remove the paper and darken the dots with a washable marker so you can see the map. Keep the raven and branch outlines crisp since they carry the whole image.

  3. Peel the background oval first

    Using a ribbon or loop tool, scrape only the skin off the oval area behind the raven to expose the pale flesh. Work slowly and keep the depth shallow and even so this zone reads as a mid glow. Leave the bare tree branches even shallower, barely skimmed, so they stay lighter than the sky around them. This is your background layer, so do not carve through anywhere yet.

  4. Shade the raven in deepening layers

    Leave the darkest parts of the raven, the head, back, and folded wing edges, as untouched skin. Then lightly scrape the chest and tail feathers to hint at texture while keeping them dark overall. Carve the branch under its feet a little deeper than the raven so it separates. Step back often and check the contrast against a light before going deeper.

  5. Add the brightest cutouts last

    Once the shading looks right, cut fully through only where you want the strongest light, such as small gaps between branches or a few glowing accent shapes near the base. Cut big openings last so the pumpkin wall stays strong while you do the delicate scraping. Keep any thin slivers of skin as bridges so nothing snaps off. Clean up ragged edges from the inside.

  6. Light it and photograph at dusk

    Set a warm white LED or an Edison-bulb style battery light inside, never a real candle near this much detail. Adjust the light position until the shaded raven and glowing sky both read clearly. Photograph at dusk on a porch or bench so the amber glow stands out against the blue evening light. Mist the cut edges with water and refrigerate overnight to keep it fresh longer.

Gather your supplies

Check things off as you get ready.

Work on a stable surface, keep your free hand out of the cutting path, and have an adult handle sharp tools.

Three levels of light

  • Leave intact

    The raven's head, back, and folded wing stay as untouched dark skin for a strong silhouette.

  • Peel & shade

    The oval sky behind the bird and the bare tree branches are skin-peeled for a soft gold glow.

  • Cut through

    A few small gaps between branches and base accents are cut through for the brightest light.

Learn the carving basics

Before you start cutting

How do I keep the raven dark while the background glows?

Control depth, not just outlines. Leave the raven's skin fully intact so little light passes through, and scrape the surrounding oval down to the pale flesh so it glows. The bigger the depth difference between the two, the sharper your silhouette will read once lit.

What light gives the warm amber color in the image?

A warm white LED or an Edison-bulb style battery light produces those rich gold tones without the fire risk of a candle. Avoid cool blue-white lights, which flatten the shading and wash out the mood. Try a flickering warm LED if you want a little movement.

Since this is a concept image, can a real pumpkin look this detailed?

Yes, with patience and a thin wall, though the finest feather texture will be softer on a real pumpkin. Focus on getting three clear depth layers rather than chasing every tiny line. Practice the shading on a scrap section first to learn how deep to scrape before the light breaks through.

Your take belongs here, too.

Changed a detail? Made it simpler? Share a photo of your version and tell the community what worked.

Share your pumpkin

More pumpkins like this

You've reached the end · 8 pumpkins
The Patch Report

Fresh pumpkins, in your inbox.

The best new carvings, ideas worth stealing, and how-tos for carving season. Short, seasonal, and gone by November.

A short email during carving season. Unsubscribe anytime. See our privacy policy.