Halloween Pumpkin Carving Contest · Starts October 1st · $500 in prizes
← Back to ideas
@ai_concepts
Jul 30, 2026
Raven Spilling Pumpkin Seeds Relief CarvingAI
0

Raven Spilling Pumpkin Seeds Relief Carving

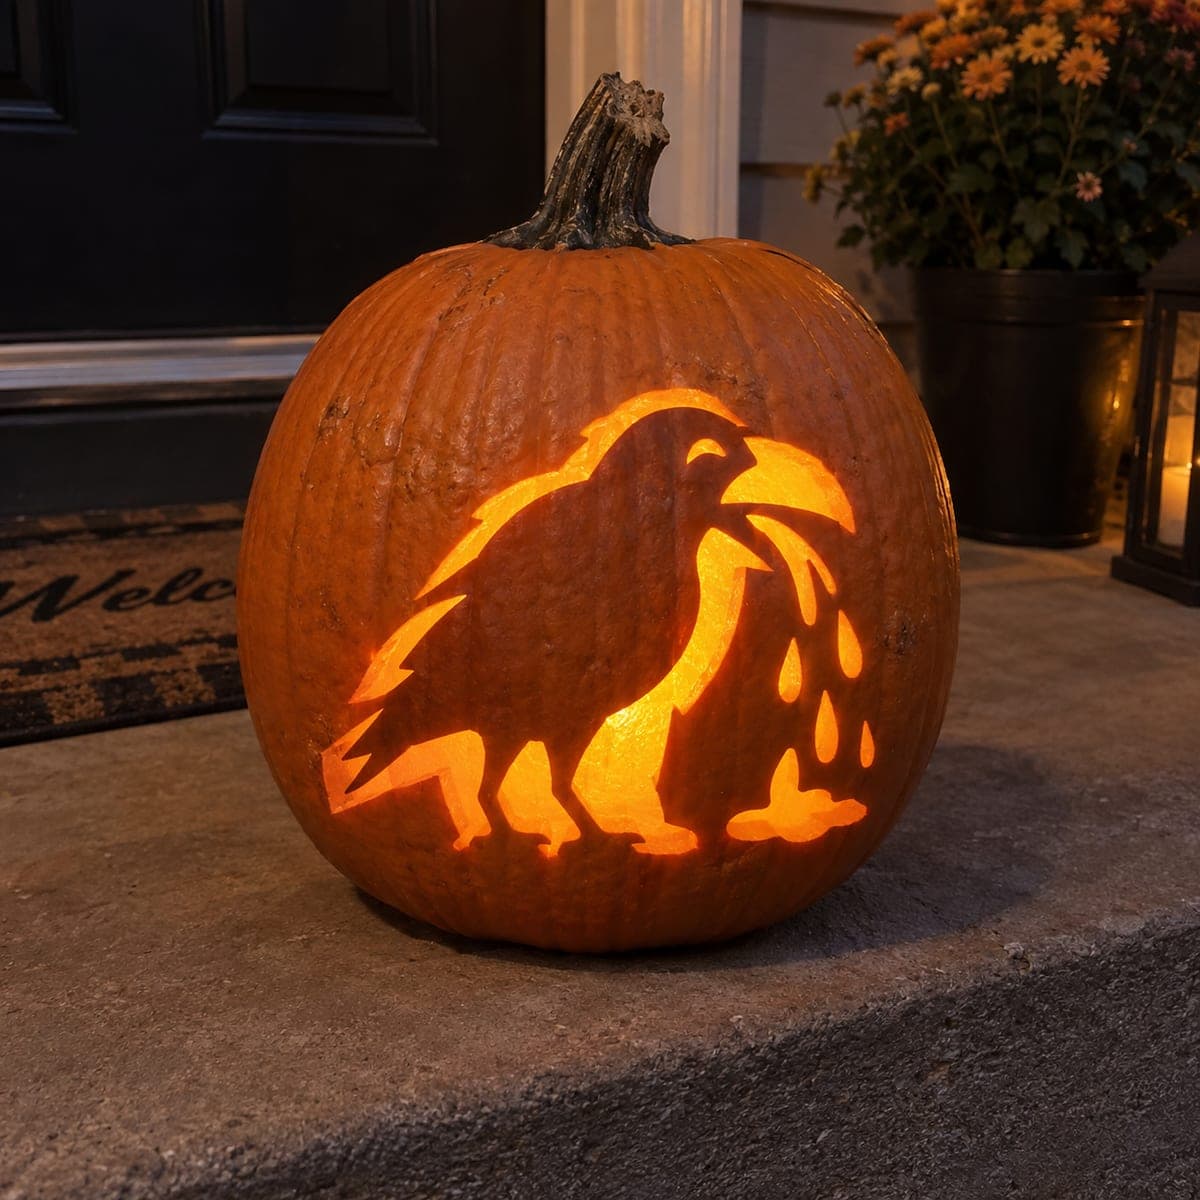
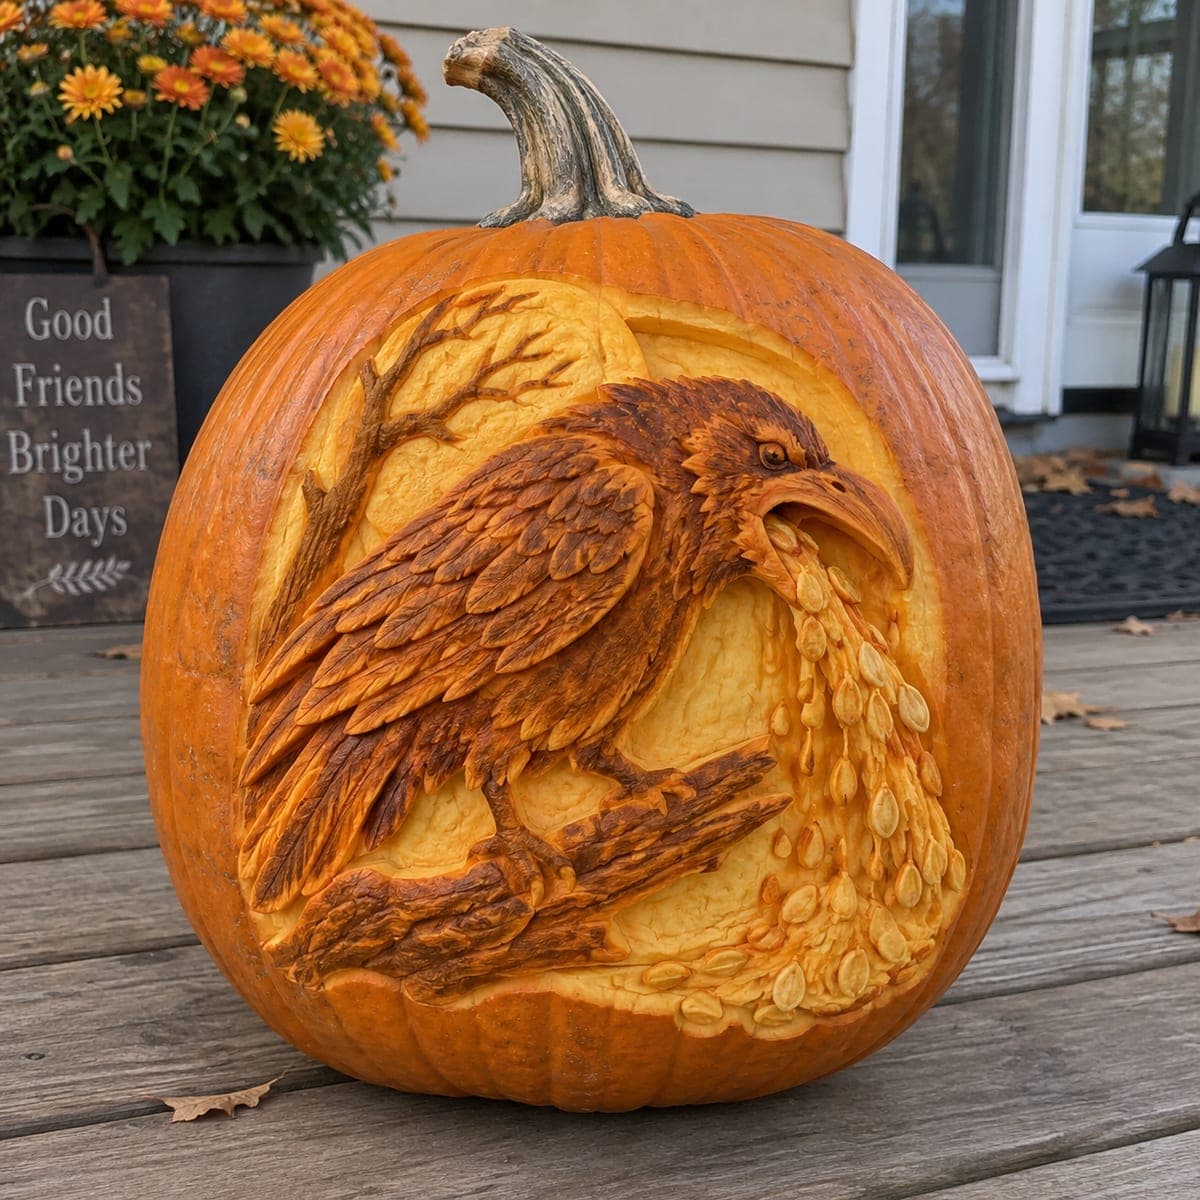
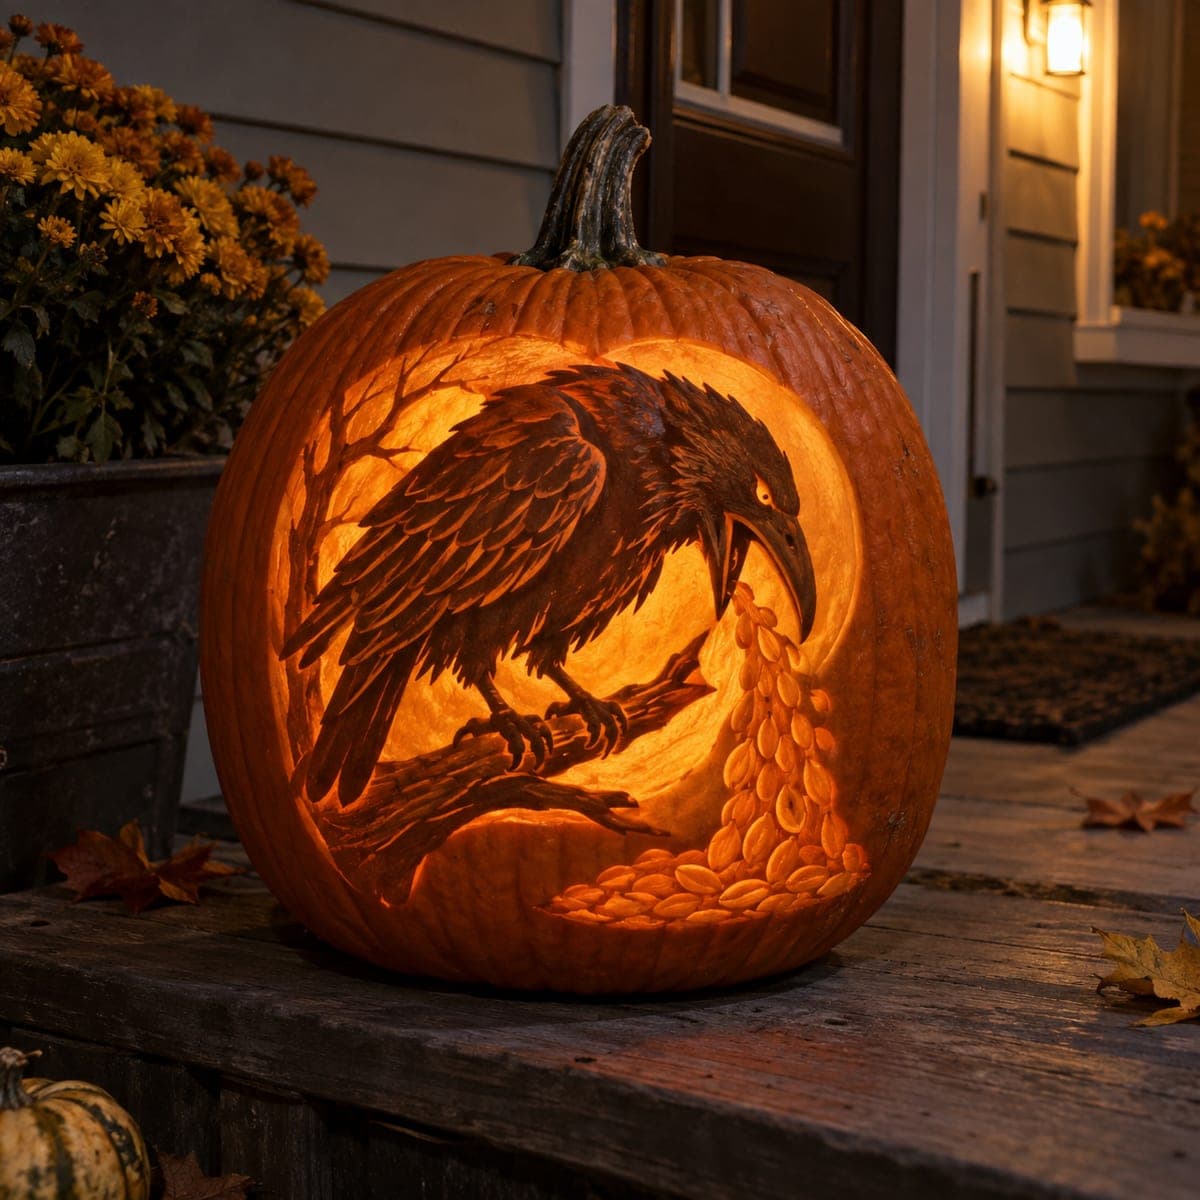
Perched on a gnarled branch before a pale carved moon, this sculpted raven tips its beak open and pours a cascade of real-looking pumpkin seeds down the rind. Every feather is individually shaved, and the seed spill is undercut so it appears to tumble free. Carve the smooth moon background first to set your deepest layer, then build the bird's feather texture in rows. A clever, slightly macabre showstopper for a fall porch.

This is an AI-generated concept image: a realistic, carvable design idea rather than a photo of a finished carve. AI concepts are always labeled and sit out the leaderboard and the contest.

No ratings yet · Sign in to rate
Comments (0)

  • No comments yet — be the first.

Save without an account. Sign in to like or comment.

Our tips for carving a similar design

The clever trick here is turning the pumpkin's own seeds into a cascade spilling from the raven's open beak, so the shell becomes part of the story. Everything is relief carving with no cut through openings, meaning you shave skin and flesh to different depths rather than making windows. Set the smooth pale moon as your deepest, brightest layer first, then build the bird forward in raised rows so the feathers catch light and stay dark against the glow.

Written by PumpkinCarvingIdeas.com, inspired by the image above. These are our suggestions, not instructions from the uploader. This approach to the AI concept has not been tested on a real pumpkin.

From pumpkin to porch

  1. Prep and transfer the layout

    Pick a large, wide pumpkin with a thick, blemish free wall so you have room to carve deep relief. Cut a lid or a back access hole and scrape the front wall down to an even inch or so of thickness. Tape your raven, branch, and moon pattern in place and poke or trace the main outlines. Keep the pattern simple at this stage, just the big shapes of bird, branch, moon, and the path of the seed spill.

  2. Carve the moon background

    Shave the smooth moon area first since it is your deepest and brightest layer. Use a loop or ribbon tool to take the flesh down evenly so the surface reads as pale and glowing when lit. Leave the raven and branch standing proud as raised masses above this recessed background. Feather the edges gently so the moon curves back rather than dropping off with a hard step.

  3. Rough in the raven and branch

    Round the raised bird mass so the chest, wing, and head read as a three dimensional form before you add any texture. Establish the head, the down curved beak, and the arc of the folded wing as separate planes. Carve the gnarled branch under the feet with long shallow grooves for bark. Keep the beak and branch tips slightly thick for now so nothing snaps while you refine.

  4. Shade the feathers in rows

    Working from the tail forward, shave each feather as a small raised scallop with a shadow line beneath it, overlapping the rows like shingles. Vary the depth so the back feathers sit lower and the wing coverts pop forward. Use a fine detail loop for the tight feathers around the face and a V gouge for the crisp edges. Take your time here, since this shading is what sells the whole piece.

  5. Sculpt the spilling seeds

    Below the open beak, carve teardrop shaped seed forms and undercut the edges of each one so they look like they are tumbling free of the rind. Let the seeds thin out and scatter as they fall toward the base, some raised, some barely there. Keep the undercuts shallow so no seed shape breaks loose. This cascade is fragile, so carve it near the end and handle the pumpkin gently afterward.

  6. Refine, light, and photograph

    Step back, add fine detail to the eye, beak edge, and branch bark, and deepen any shadow lines that got lost. Drop a battery LED inside, never a candle, and aim it toward the moon so the pale background glows behind the dark bird. Coat the cut surfaces with a thin layer of petroleum jelly to slow drying and browning. Shoot your photo the same evening on the porch while the shading is crisp.

Gather your supplies

Check things off as you get ready.

Work on a stable surface, keep your free hand out of the cutting path, and have an adult handle sharp tools.

Three levels of light

  • Leave intact

    The raven's body, wing, and head keep the darkest skin and shallow flesh so the bird reads as a shadow.

  • Peel & shade

    The gnarled branch and the falling seeds are shaved to a mid depth for a soft dim orange glow.

  • Cut through

    The moon background is scraped deepest for the brightest pale light, with no full openings on this relief design.

Learn the carving basics

Before you start cutting

This is shown as a concept image, so can a raven this detailed actually be carved?

Yes, a similar relief raven is achievable, though it takes hours and patience. The key is treating it as sculpting layers rather than cutting holes, so the whole design stays structurally sound. Keep the beak and seed tips slightly thick and undercut them only a little so nothing snaps off.

How do I keep the spilling seeds from breaking loose?

Carve the seeds last, after the heavy work is done, so you are not stressing them while roughing other areas. Undercut each seed only shallowly, just enough to catch a shadow and suggest it is tumbling free. Leave small hidden bridges of flesh connecting delicate seeds to the wall.

Should I light it from inside if there are no cutouts?

An interior LED still helps because the deeply shaved moon will glow through the thin wall. Angle the light toward the pale background so the dark raven stands out in front of it. You can also add a small external light on the porch to rake across the feather texture and show off the shading.

Your take belongs here, too.

Changed a detail? Made it simpler? Share a photo of your version and tell the community what worked.

Share your pumpkin

More pumpkins like this

You've reached the end · 8 pumpkins
The Patch Report

Fresh pumpkins, in your inbox.

The best new carvings, ideas worth stealing, and how-tos for carving season. Short, seasonal, and gone by November.

A short email during carving season. Unsubscribe anytime. See our privacy policy.