Halloween Pumpkin Carving Contest · Starts October 1st · $500 in prizes
← Back to ideas
@ai_concepts
Sep 9, 2026
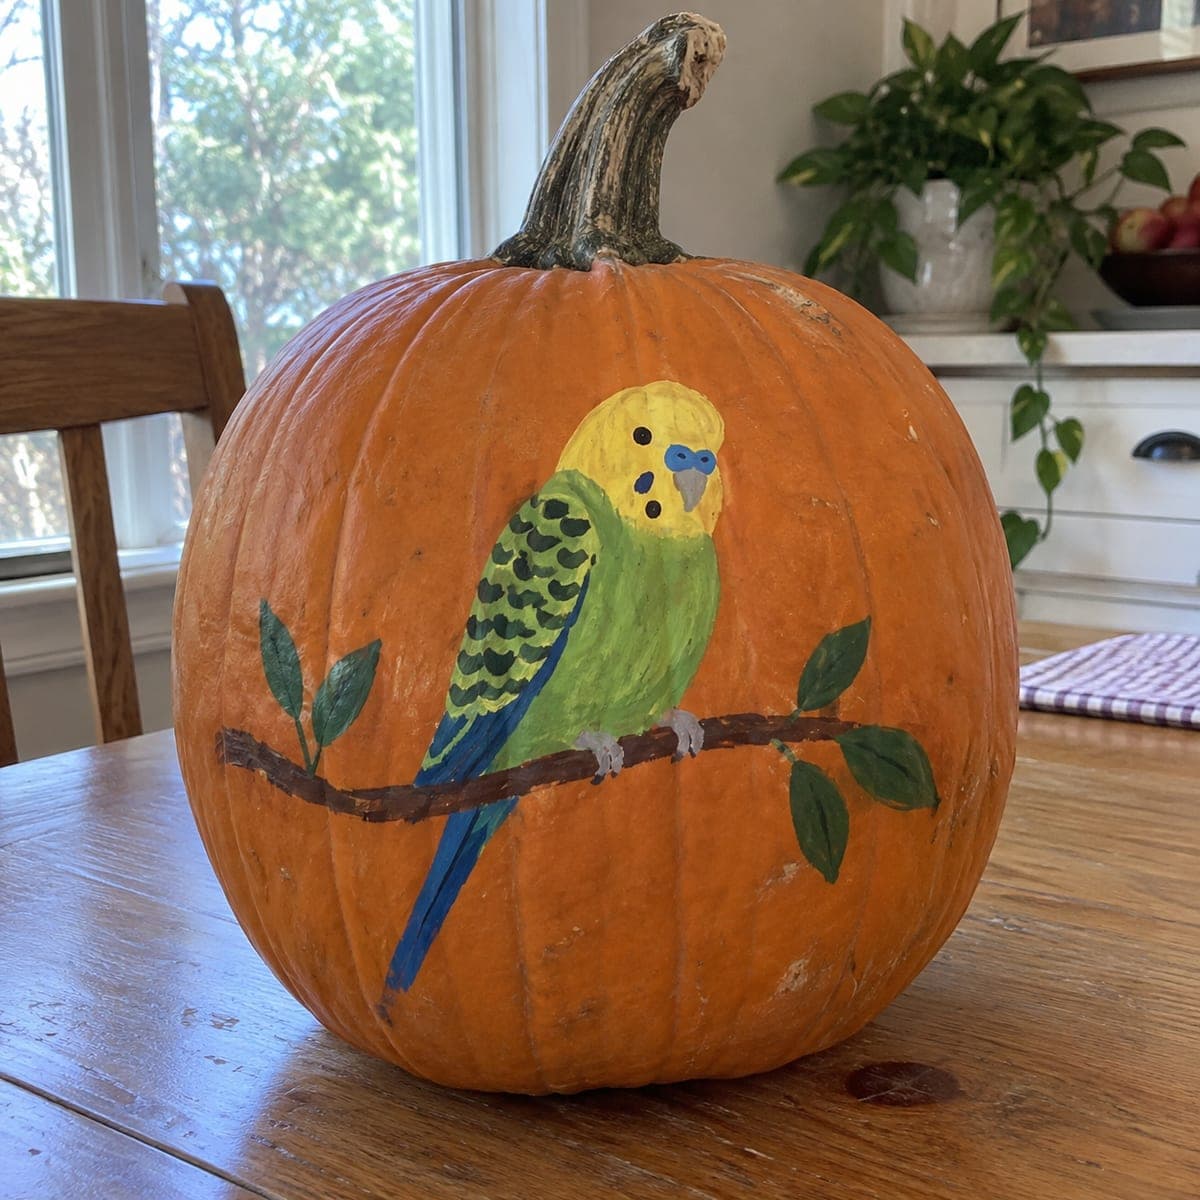
Perched Budgie Parakeet Relief Carved PumpkinAI
0

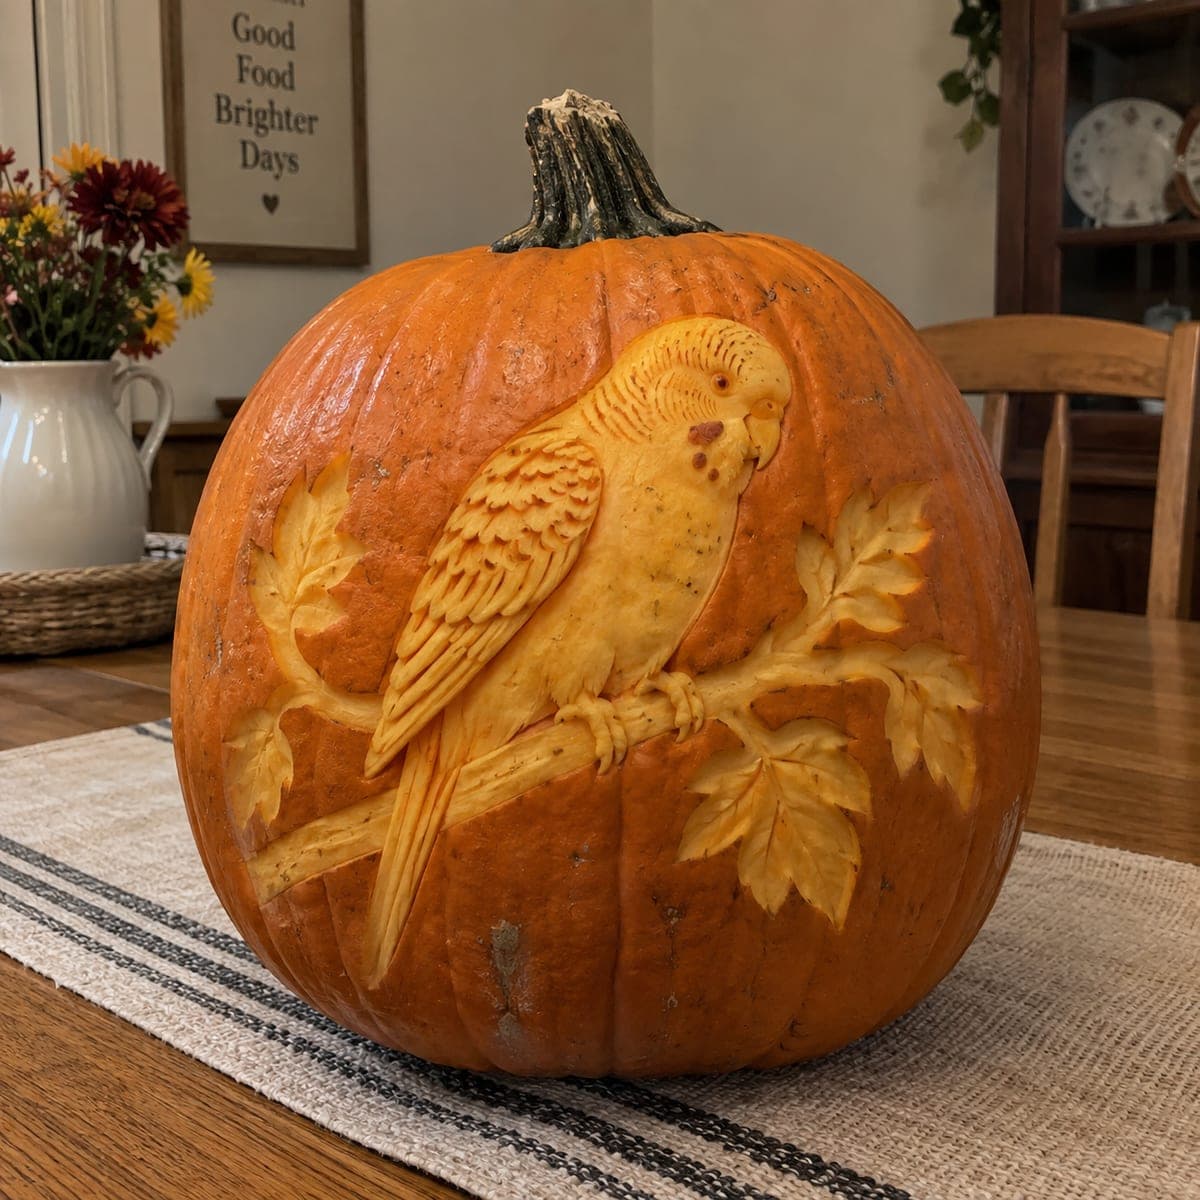
Perched Budgie Parakeet Relief Carved Pumpkin

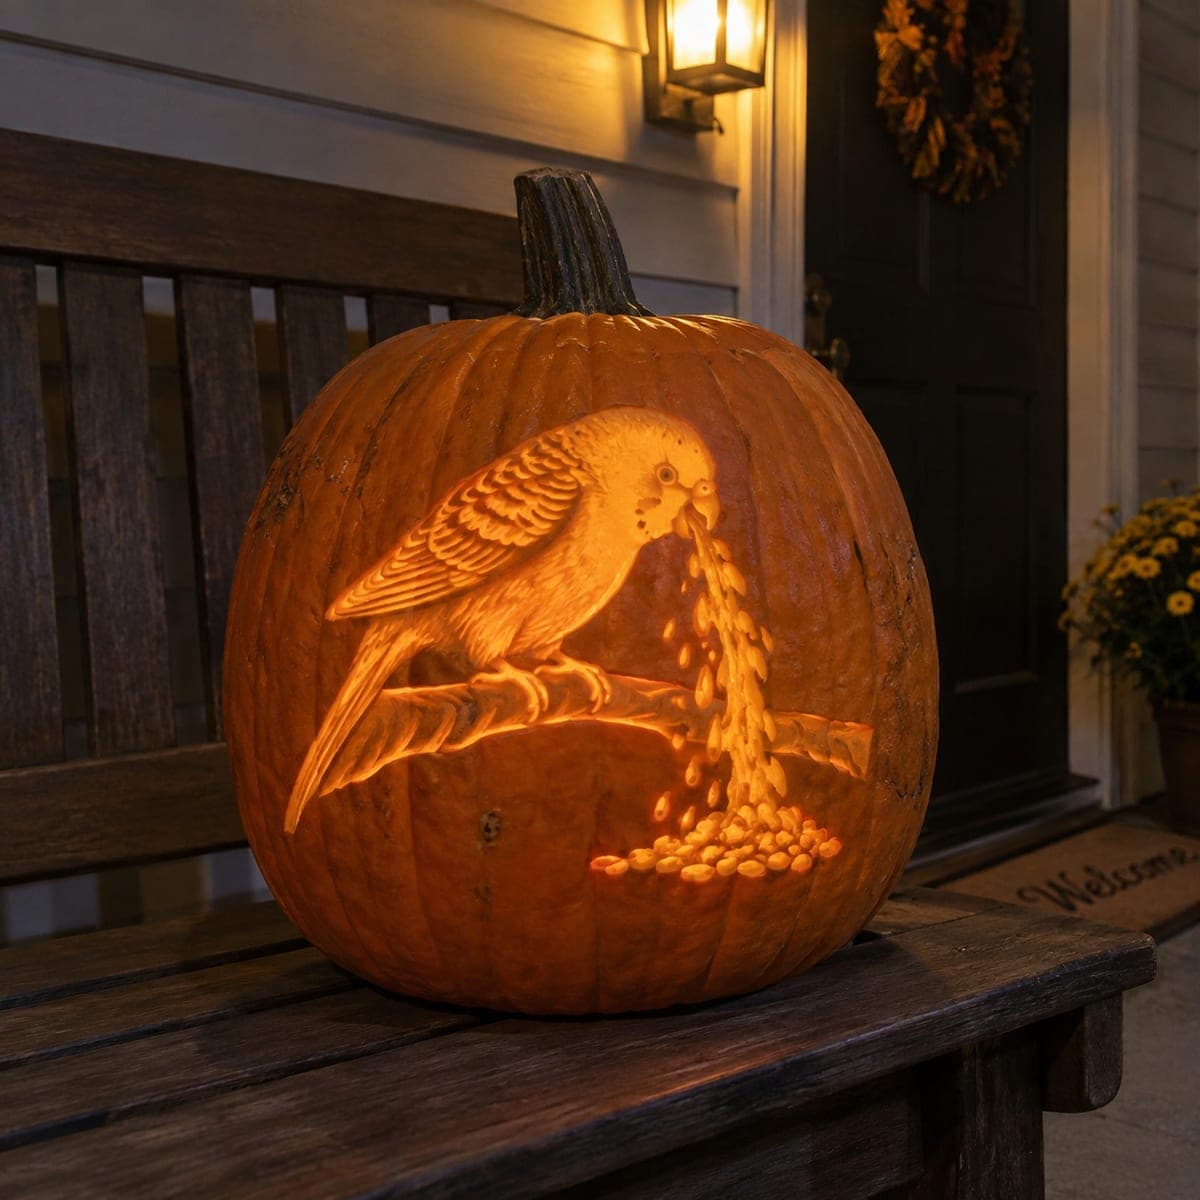
A budgie parakeet sits on a leafy branch in this detailed relief carving, with scalloped wing feathers and serrated leaves cut at graduated depths. The bird pops because the background is lowered around it, leaving the body raised like a wood carving. Work outside-in: drop the background first, shape the branch and leaves, and save the fine feather scalloping for last with a small V-gouge. A striking centerpiece for bird lovers that needs no candle at all.

This is an AI-generated concept image: a realistic, carvable design idea rather than a photo of a finished carve. AI concepts are always labeled and sit out the leaderboard and the contest.

No ratings yet · Sign in to rate
Comments (0)

  • No comments yet — be the first.

Save without an account. Sign in to like or comment.

Our tips for carving a similar design

The core trick here is relief carving, where you lower the background skin around the bird so the body stands raised like a wood carving. Nothing is cut all the way through, so the whole design glows from surface depth rather than a candle. Plan to work outside-in: drop the background first, shape the branch and leaves at mid depth, then save the delicate feather scalloping for last.

Written by PumpkinCarvingIdeas.com, inspired by the image above. These are our suggestions, not instructions from the uploader. This approach to the AI concept has not been tested on a real pumpkin.

From pumpkin to porch

  1. Transfer the design and clean the shell

    Pick a smooth, tall pumpkin with a broad flat face for the bird. Tape your budgie-and-branch pattern in place and poke the outlines with a transfer tool, or trace them with a washable marker. Keep the top intact since this design needs no lid and no candle. Wipe the surface dry so your lines stay crisp.

  2. Lower the background around the bird

    Using a wide loop or ribbon tool, peel away the pumpkin skin everywhere outside the bird, branch, and leaves. Take it down an even eighth to quarter inch so the subject sits proudly raised. Keep the edges of the budgie clean and vertical so the silhouette reads sharply. This is the step that makes the bird pop, so go slow and check depth as you circle the shape.

  3. Shape the branch and leaves at graduated depths

    Carve the branch so it appears to pass behind the bird's feet, cutting it slightly deeper where it tucks under the body. Give the leaves serrated edges and lower the ones farther back a touch more than the front ones to build layers. A small U-gouge works well for the central leaf veins. Vary your depth so light rakes across the different planes.

  4. Round and model the body

    Switch to gentle scooping to round the chest, head, and folded wing so they are not flat. Leave the head and upper back a little higher than the tail. Define the beak and the cheek spots by carving shallow shadows around them. Step back often to make sure the bird still reads as one rounded form.

  5. Scallop the feathers with a V-gouge

    Save the finest detail for last. With a small V-gouge, cut short overlapping scallops down the wing to suggest layered feathers, working from the shoulder toward the tail. Add fine parallel lines along the long tail feathers and tiny stipple marks on the head. Keep a light hand here since these shallow cuts only need to catch shadow, not go deep.

  6. Clean up and photograph

    Brush out loose pulp with a dry pastry brush and even out any ragged edges. Because there is no cutout, a raking desk lamp or a small LED placed to the side brings out the relief best. Rub cut edges with a little petroleum jelly to slow drying. Shoot your photo the same day while the contrast is fresh.

Gather your supplies

Check things off as you get ready.

Work on a stable surface, keep your free hand out of the cutting path, and have an adult handle sharp tools.

Three levels of light

  • Leave intact

    The lowered background and the darkest recesses behind the branch stay as untouched or lightly shaded skin for contrast.

  • Peel & shade

    The bird's body, branch, and leaves are skin-peeled and modeled so they glow softly and catch a side light.

  • Cut through

    Nothing is cut fully through on this design, so keep every element as relief shading rather than open holes.

Learn the carving basics

Before you start cutting

Do I need a light inside this pumpkin?

No, this is a relief carving with no cutouts, so an interior candle or LED would not shine through. Instead, light it from the side with a lamp or puck LED to rake across the surface. That angled light is what reveals the feather scallops and layered leaves.

How do I keep the raised bird from looking flat?

Round the chest, head, and wing with gentle scooping instead of leaving them level with the outline. Keep the head and upper back slightly higher than the tail. Small shadow cuts around the beak and cheek spots add depth, and a side light does the rest.

What is the safest order so I do not break the fine feathers?

Work outside-in and save all delicate detail for last. Drop the background first, then shape the branch and leaves at mid depth, then round the body, and only then scallop the feathers with a light hand. Cutting the tiny feather lines early risks tearing them while you handle the rest.

Your take belongs here, too.

Changed a detail? Made it simpler? Share a photo of your version and tell the community what worked.

Share your pumpkin

More pumpkins like this

You've reached the end · 8 pumpkins
The Patch Report

Fresh pumpkins, in your inbox.

The best new carvings, ideas worth stealing, and how-tos for carving season. Short, seasonal, and gone by November.

A short email during carving season. Unsubscribe anytime. See our privacy policy.