Halloween Pumpkin Carving Contest · Starts October 1st · $500 in prizes
← Back to ideas
@ai_concepts
Sep 14, 2026
Scalloped-Feather Owl PumpkinAI
0

Scalloped-Feather Owl Pumpkin

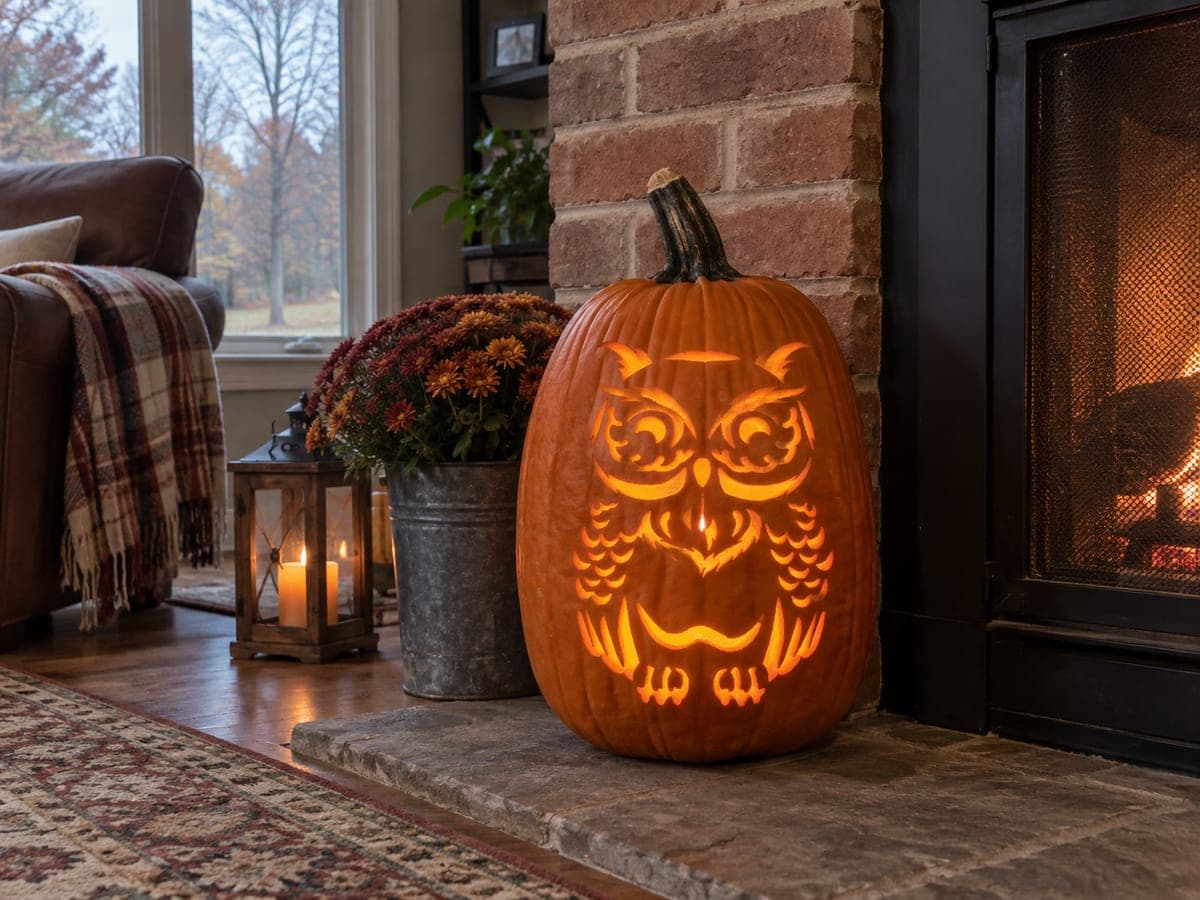
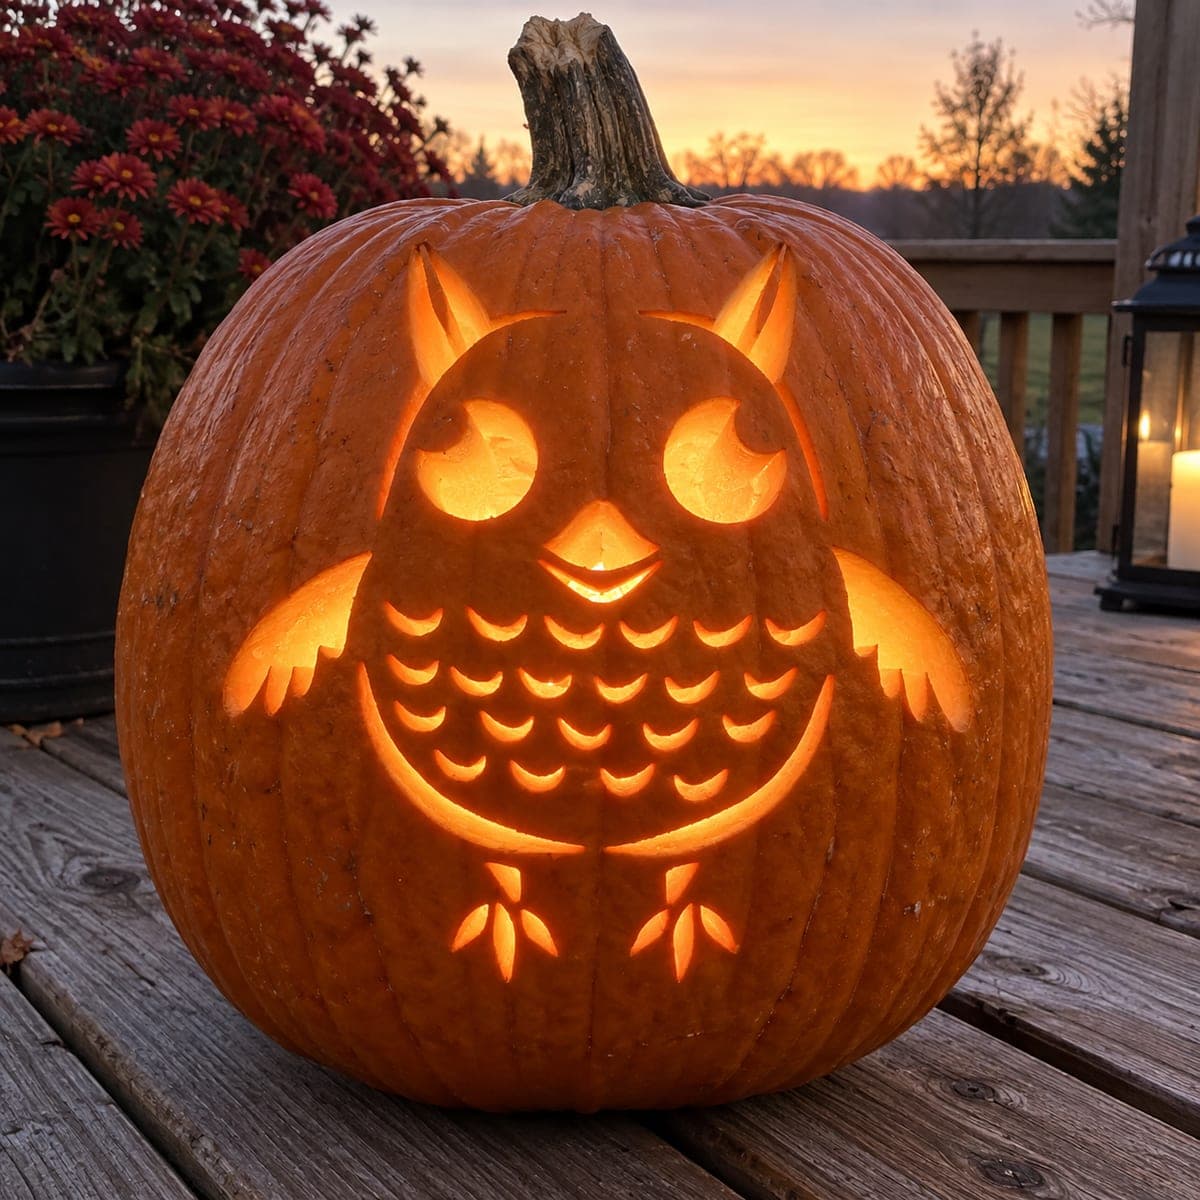
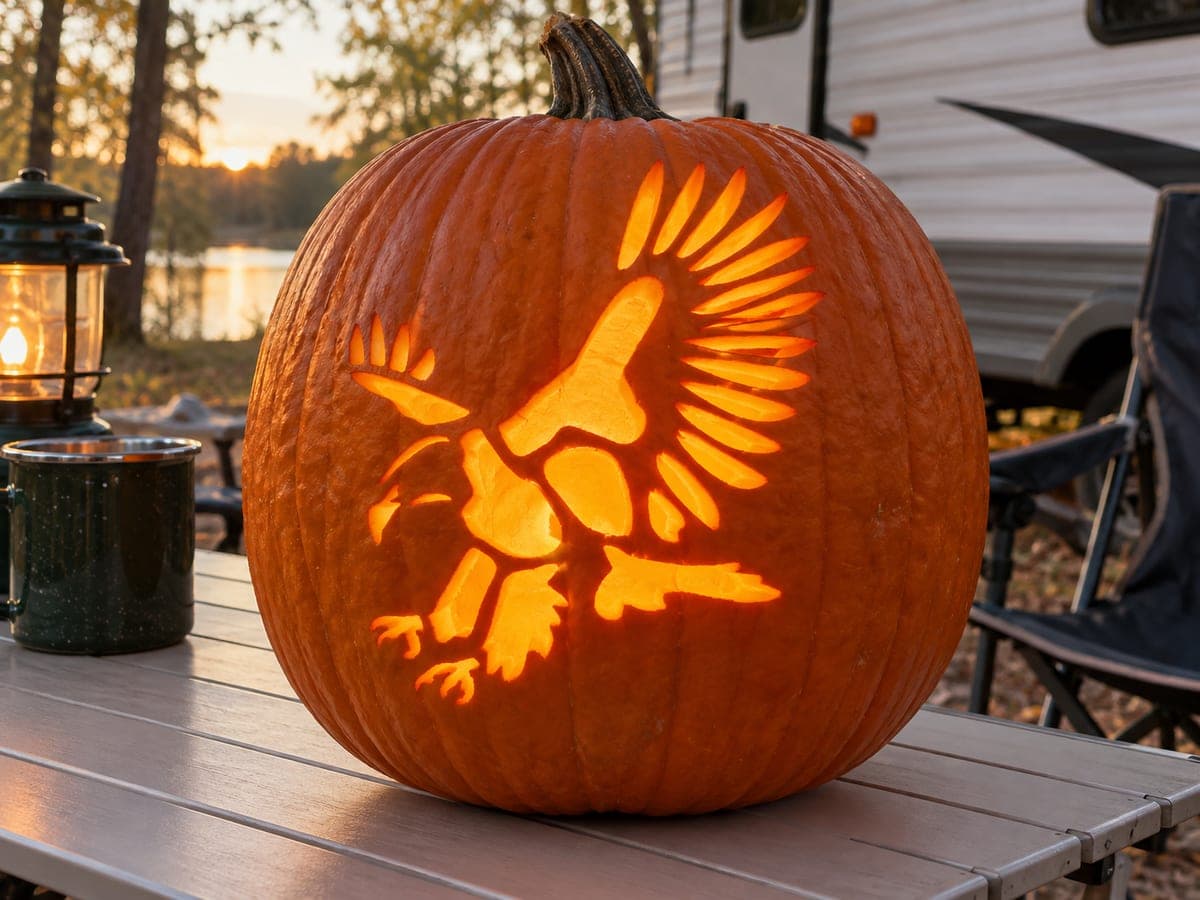
This scalloped-feather owl pumpkin carving idea shows a plump owl face-on with two large glowing eyes, small ear tufts, a smiling beak, and five rows of curved scallop shapes covering the breast and belly. The cutout technique pierces each scallop individually, so the finished jack-o-lantern radiates light through dozens of small curved arches arranged in a tight grid. Carve the scallop rows starting from the bottom and working upward so that cut sections above don't drip pumpkin flesh onto areas you still need to see.

This is an AI-generated concept image: a realistic, carvable design idea rather than a photo of a finished carve. AI concepts are always labeled and sit out the leaderboard and the contest.

No ratings yet · Sign in to rate
Comments (0)

  • No comments yet — be the first.

Save without an account. Sign in to like or comment.

Our tips for carving a similar design

The trick here is the tight grid of small curved scallops, each pierced separately so light escapes through dozens of little arches rather than one big hole. Plan the design in layers: big glowing eyes and beak up top, then five rows of overlapping feather scallops down the breast, with wings, ear tufts, and feet framing the edges. Keep the walls between scallops intact so the grid stays strong and the owl holds its round shape.

Written by PumpkinCarvingIdeas.com, inspired by the image above. These are our suggestions, not instructions from the uploader. This approach to the AI concept has not been tested on a real pumpkin.

From pumpkin to porch

  1. Pick a tall round pumpkin and open the back

    Choose a big, round pumpkin with a smooth face so the scallop grid has room to spread. Cut a wide access hole in the back rather than the top, which keeps the stem and the front face fully intact. Scoop the insides and thin the front wall to about one inch so your tools glide through evenly. A thinner wall makes those small scallops much easier to pierce cleanly.

  2. Transfer the owl pattern

    Tape your stencil flat against the front, snipping the edges so the paper hugs the curve. Use a poking tool to dot along every line: the two round eyes, ear tufts, beak, wing edges, feet, and each individual scallop. Take your time here because the scallops sit in a tight grid and accurate dots keep the rows aligned. Peel the paper and connect any faint dots with a washable marker.

  3. Cut the eyes, beak, and feet first

    Start with the large shapes while the pumpkin is sturdiest. Cut the two big eyes as full openings for the brightest glow, leaving a small crescent of skin at the top of each for that sleepy lidded look. Pierce the little triangular beak and the thin slit of the smile, then cut the seed-shaped toes at the feet. Adults should handle the knife and saw, cutting slowly with the blade angled straight in.

  4. Pierce the scallops from the bottom up

    Work the five feather rows starting at the belly and moving upward so falling flesh never lands on lines you still need to see. Cut each scallop as its own small curved arch, leaving a clean bridge of pumpkin between every one so the grid stays connected. Keep the openings modest and evenly spaced for that repeating shingled feather look. Push scraps out from the back as you go to keep the front clean.

  5. Shade the ear tufts and wings

    For the two pointed ear tufts and the side wings, skin off just the outer layer instead of cutting all the way through. Use a shaving tool or the edge of a spoon to remove the orange skin so those areas glow a soft dim orange. This gives the owl dimension without weakening the shell. Leave the surrounding pumpkin skin untouched so the tufts and wings read as separate shapes.

  6. Light it and take the photo

    Drop in a battery LED light, warm white or orange, and set it low in the base so it spreads up through the whole grid. Skip candles since the many small scallops trap heat and the thin bridges can scorch. Photograph at dusk with the background darker than the pumpkin so the arches pop. A second small light near the eyes can boost that friendly glowing stare.

Gather your supplies

Check things off as you get ready.

Work on a stable surface, keep your free hand out of the cutting path, and have an adult handle sharp tools.

Three levels of light

  • Leave intact

    The body background, the crescent eyelids, and the skin between scallops stay dark to define shapes

  • Peel & shade

    The ear tufts and side wings get skin-shaved for a soft dim orange glow

  • Cut through

    The two big eyes, beak, smile, feet, and each scallop are cut through for the brightest light

Learn the carving basics

Before you start cutting

How do I keep the scallop grid from falling apart?

Leave a solid bridge of pumpkin between every scallop instead of connecting them. Keep each opening small and cut the walls straight in rather than undercutting them. If the front feels flimsy, thin the wall a little less so there is more material holding the grid together.

Why cut the scallops from the bottom upward?

As you pierce sections, loose flesh and juice tend to drip downward. Working from the belly up means the mess falls onto areas you have already finished rather than onto lines you still need to see. It keeps your guide marks visible and your cuts accurate.

Should the eyes be full cutouts or shaded?

Cut the eyes all the way through so they glow brightest and give the owl its friendly face. Leave a thin crescent of skin at the top of each eye to suggest a lowered lid. That small untouched arch reads as sleepy without dimming the light much.

Your take belongs here, too.

Changed a detail? Made it simpler? Share a photo of your version and tell the community what worked.

Share your pumpkin

More pumpkins like this

You've reached the end · 8 pumpkins
The Patch Report

Fresh pumpkins, in your inbox.

The best new carvings, ideas worth stealing, and how-tos for carving season. Short, seasonal, and gone by November.

A short email during carving season. Unsubscribe anytime. See our privacy policy.