Halloween Pumpkin Carving Contest · Starts October 1st · $500 in prizes
← Back to ideas
@ai_concepts
Sep 14, 2026
Fierce Great Horned Owl Face PumpkinAI
0

Fierce Great Horned Owl Face Pumpkin

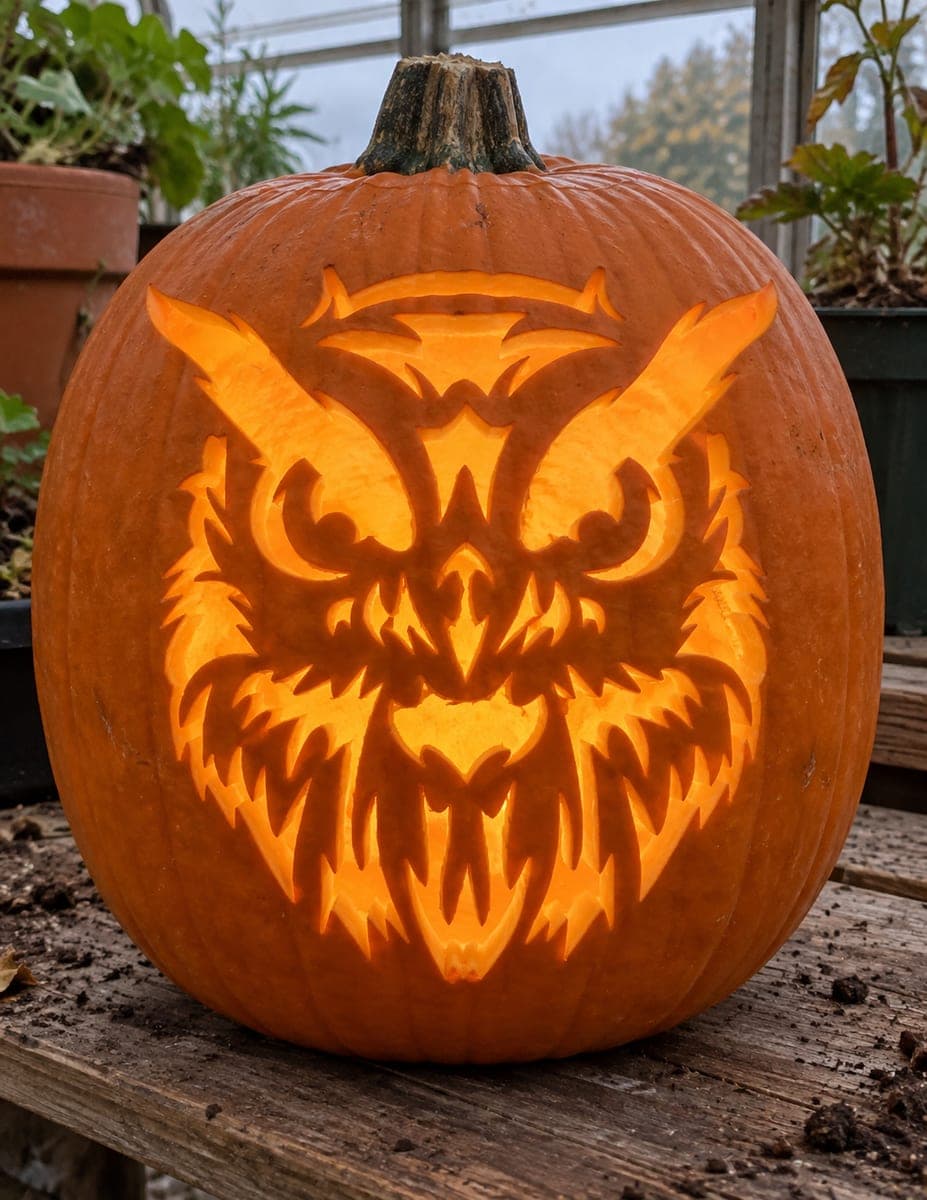
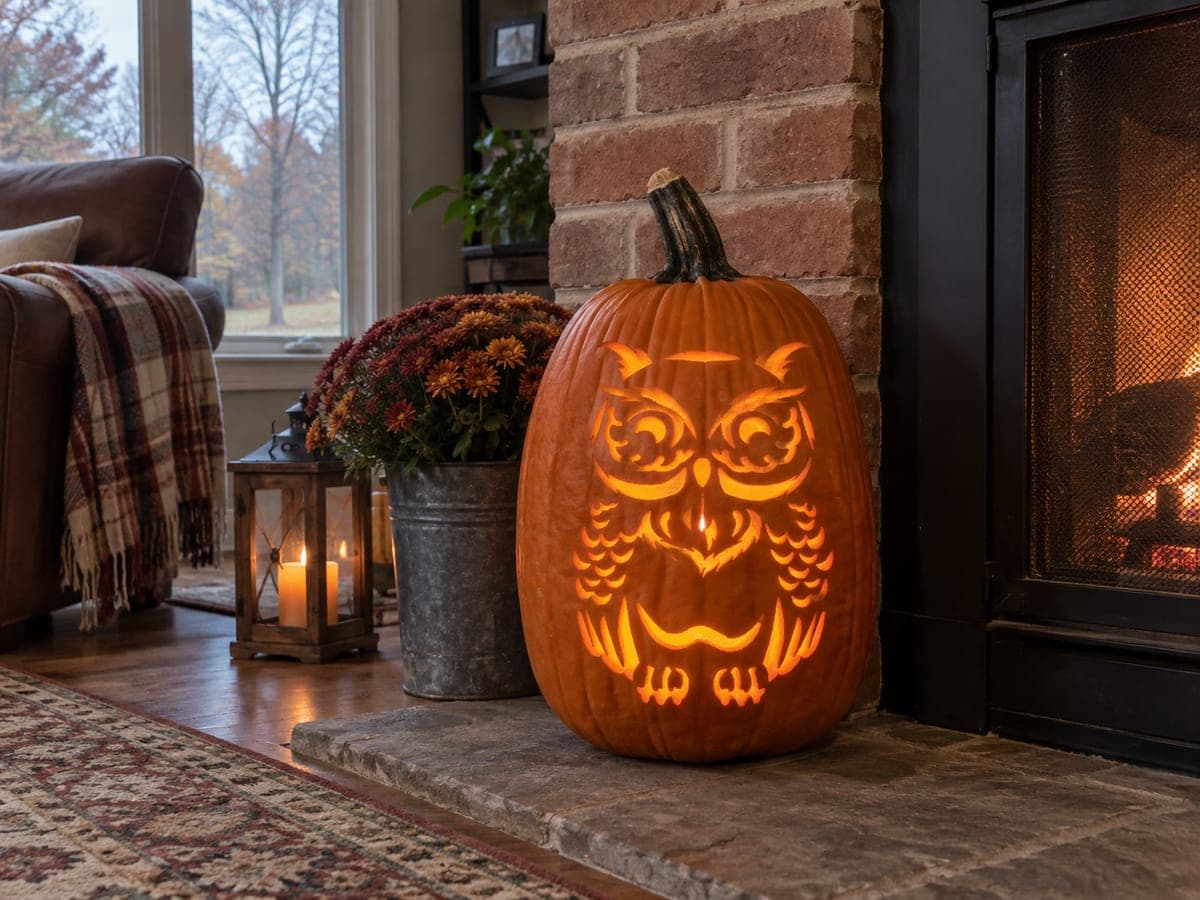
A fierce great horned owl glares from this pumpkin carving, its wide face filled with radiating feather spikes, hooked beak, and prominent ear tufts that spread nearly to the pumpkin's edge. The design is cut entirely through the rind so warm light streams from every jagged feather gap and crevice. Carve the beak and eye sockets first since they anchor the face, then work outward through the feather spikes; leaving at least a half-inch of skin between adjacent cuts keeps the broad wing-like shape from cracking under its own weight.

This is an AI-generated concept image: a realistic, carvable design idea rather than a photo of a finished carve. AI concepts are always labeled and sit out the leaderboard and the contest.

No ratings yet · Sign in to rate
Comments (0)

  • No comments yet — be the first.

Save without an account. Sign in to like or comment.

Our tips for carving a similar design

The core trick here is a full cutout design where every jagged feather gap, the hooked beak, and the angry brow are cut clean through the rind so light pours out from all of them. The plan is to anchor the face first with the eyes and beak, then work outward through the radiating spikes and the two big ear tufts, always leaving enough skin between cuts to hold the broad shape together. Because this is an AI concept, no real pumpkin was carved, but the design translates cleanly to a real one if you keep the spike spacing generous.

Written by PumpkinCarvingIdeas.com, inspired by the image above. These are our suggestions, not instructions from the uploader. This approach to the AI concept has not been tested on a real pumpkin.

From pumpkin to porch

  1. Prep the pumpkin and plan the opening

    Pick a tall, evenly rounded pumpkin with a smooth front face wide enough for the ear tufts to spread near the edges. Cut a lid from the bottom or the back rather than the top so the stem stays intact and you avoid weakening the crown near the brow. Scoop the inside until the front wall is about one inch thick so your blade passes through easily. A thinner wall also lets the light glow evenly through the many small cuts.

  2. Transfer the stencil and study the bridges

    Tape the owl pattern smoothly over the front, clipping the paper at the curves so it lies flat. Poke the design through with a transfer tool or pin, following every feather spike, the eye sockets, the beak, and the ear tufts. Before cutting, look at where thin skin separates one spike from the next and mark those as keep zones. Aim to leave at least a half inch of skin between adjacent cuts so the wide face does not crack under its own weight.

  3. Cut the eyes and beak first

    Start with the two angry eye sockets and the hooked beak since they anchor the whole face and set your spacing for everything else. Use a fine detail saw and make slow, straight-in strokes, letting the blade do the work instead of forcing it. Remove each piece by pushing it gently inward once fully cut. Getting these central shapes right first gives you a reference for how aggressive the surrounding spikes should feel.

  4. Work outward through the feather spikes

    Move from the center of the face out toward the cheeks, cutting the radiating feather spikes one at a time. Cut the small interior slivers before the larger openings so the pumpkin stays rigid while you handle the detailed work. Keep your non-cutting hand clear of the blade path and reposition the pumpkin rather than reaching around it. Save the largest gaps near the chin and outer cheeks for last so the wall holds its strength as long as possible.

  5. Finish the ear tufts and brow

    Cut the two big ear tufts and the heavy brow ridge last, since they are the largest openings and reach nearly to the pumpkin's edge. Support the skin around each tuft with your fingers as you finish the cut so a long piece does not snap free early. Clean up any ragged edges with a small blade held at a slight angle. Step back and check that the glare reads clearly from a few feet away.

  6. Light it and photograph

    Set a battery LED light or two inside, never a candle, since the many cutouts need bright, even light and the thin spikes could scorch over a flame. Warm white LEDs give that orange glow that makes the feathers pop. Coat the cut edges with petroleum jelly to slow drying and keep the spikes crisp. Photograph it at dusk against a dark background so the streaming light carries the fierce expression.

Gather your supplies

Check things off as you get ready.

Work on a stable surface, keep your free hand out of the cutting path, and have an adult handle sharp tools.

Three levels of light

  • Leave intact

    The broad skin bridges between feather spikes stay uncut and dark, which is what defines each spike shape.

  • Peel & shade

    You could shave a thin layer along a few outer feather tips for a soft dim glow that adds depth without another full cutout.

  • Cut through

    The eyes, hooked beak, brow, ear tufts, and every jagged feather gap are cut fully through for the brightest streaming light.

Learn the carving basics

Before you start cutting

How do I keep the wide face from cracking with so many cuts?

Leave at least a half inch of skin between adjacent cuts and cut the small interior slivers before the big openings. Save the largest gaps near the ear tufts, brow, and chin for last so the wall stays rigid while you do the fine work. Carving from the bottom instead of the top also keeps the crown strong.

What is the best order for cutting the face?

Cut the eye sockets and beak first because they anchor the whole expression and set your spacing. Then work outward through the feather spikes toward the cheeks. Finish with the two ear tufts and brow ridge since those are the biggest openings and reaching them last keeps the pumpkin stable.

Since this is a concept image, will it actually work on a real pumpkin?

Yes, the design is structurally sound if you keep the spike spacing generous and the front wall about an inch thick. The feather spikes read as intentional shapes rather than fragile threads, so nothing here is too thin to hold. Just handle the long ear tufts gently as you finish those cuts.

Your take belongs here, too.

Changed a detail? Made it simpler? Share a photo of your version and tell the community what worked.

Share your pumpkin

More pumpkins like this

You've reached the end · 8 pumpkins
The Patch Report

Fresh pumpkins, in your inbox.

The best new carvings, ideas worth stealing, and how-tos for carving season. Short, seasonal, and gone by November.

A short email during carving season. Unsubscribe anytime. See our privacy policy.