Halloween Pumpkin Carving Contest · Starts October 1st · $500 in prizes
← Back to ideas
@ai_concepts
Aug 26, 2026
White Pumpkin Owl Sculpture With Feathered LayersAI
0

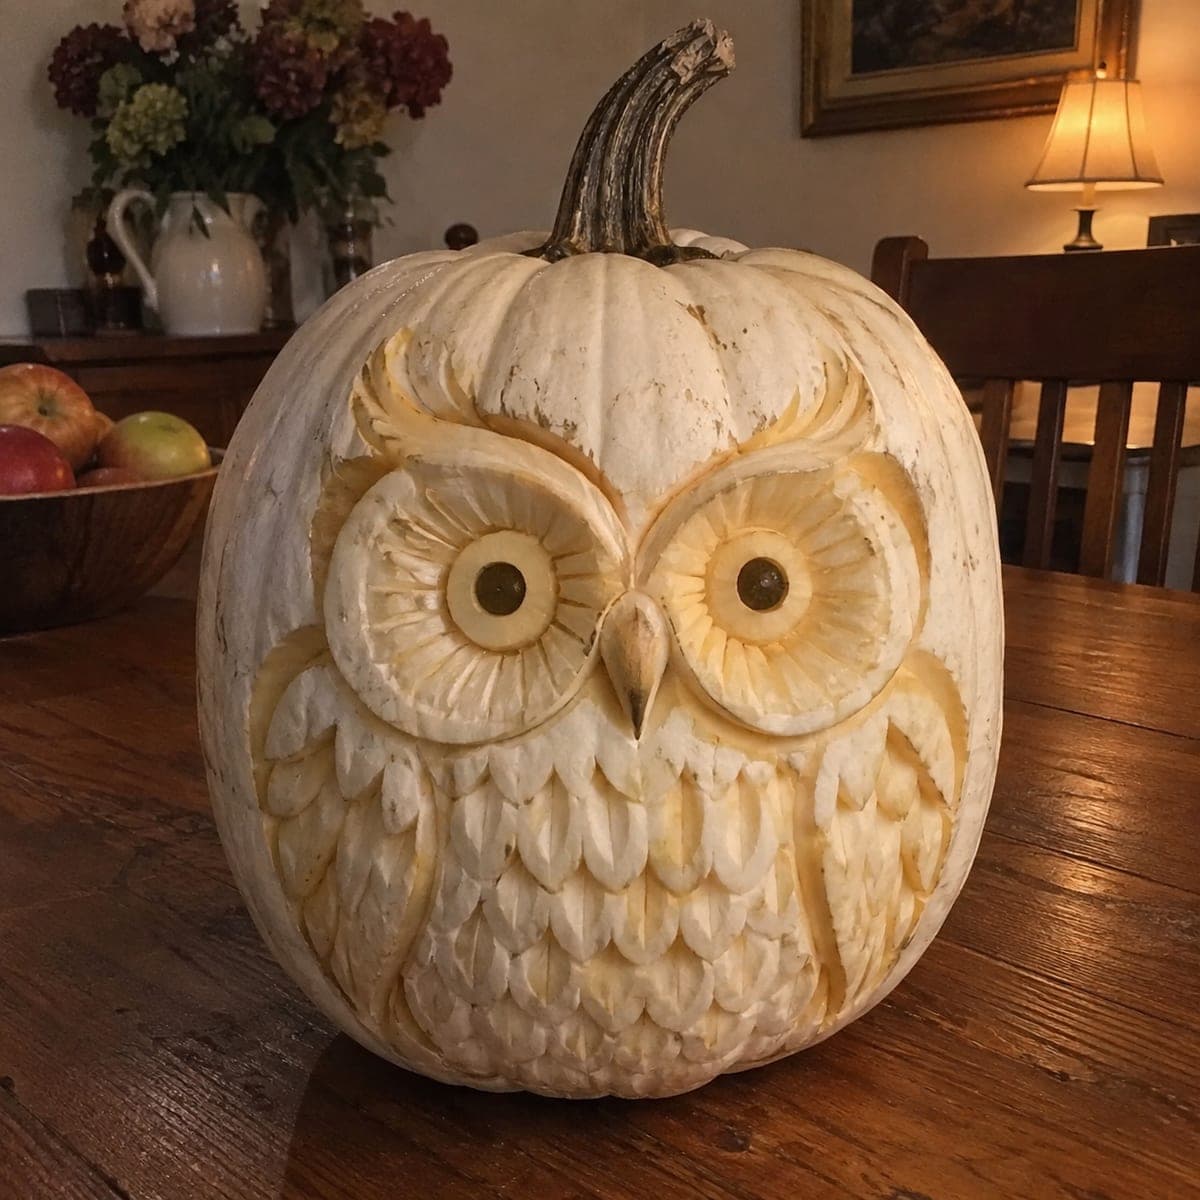
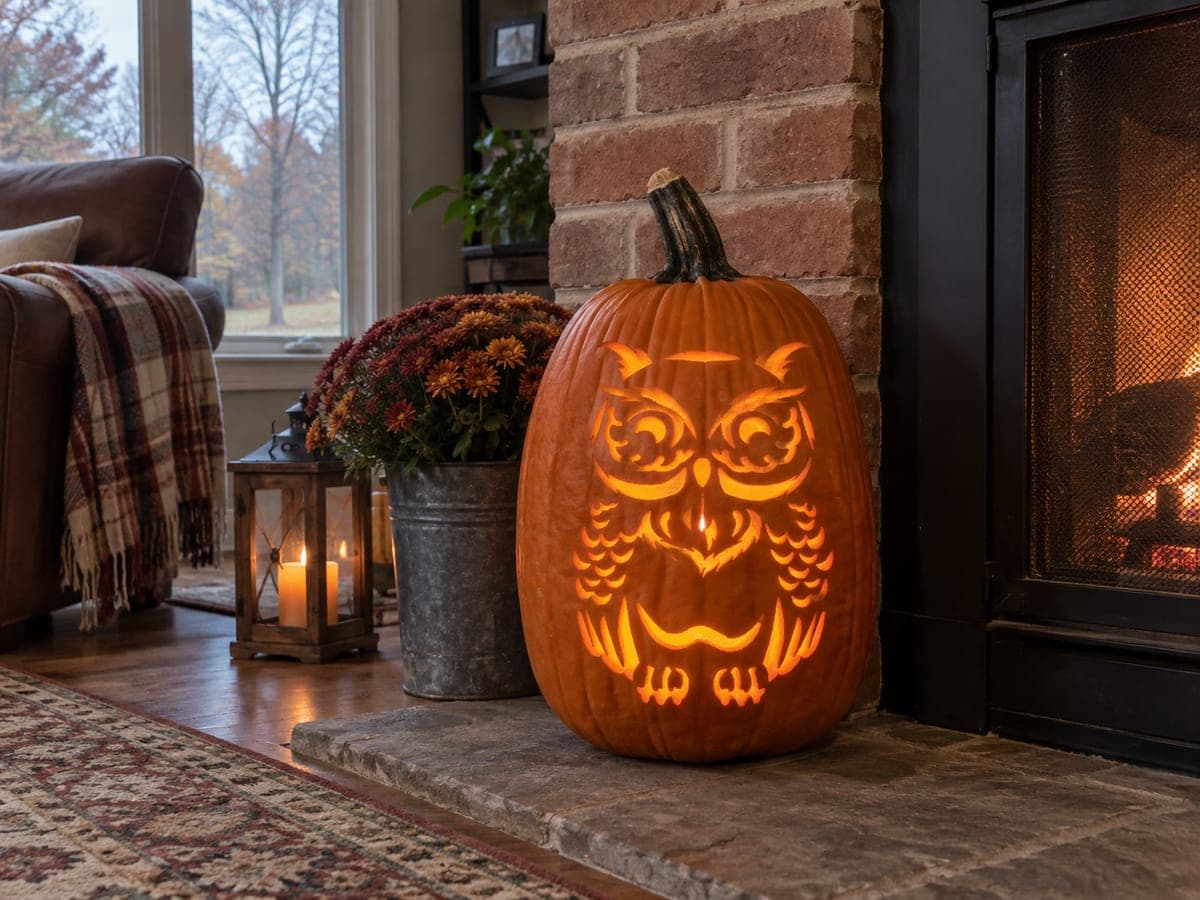
White Pumpkin Owl Sculpture With Feathered Layers

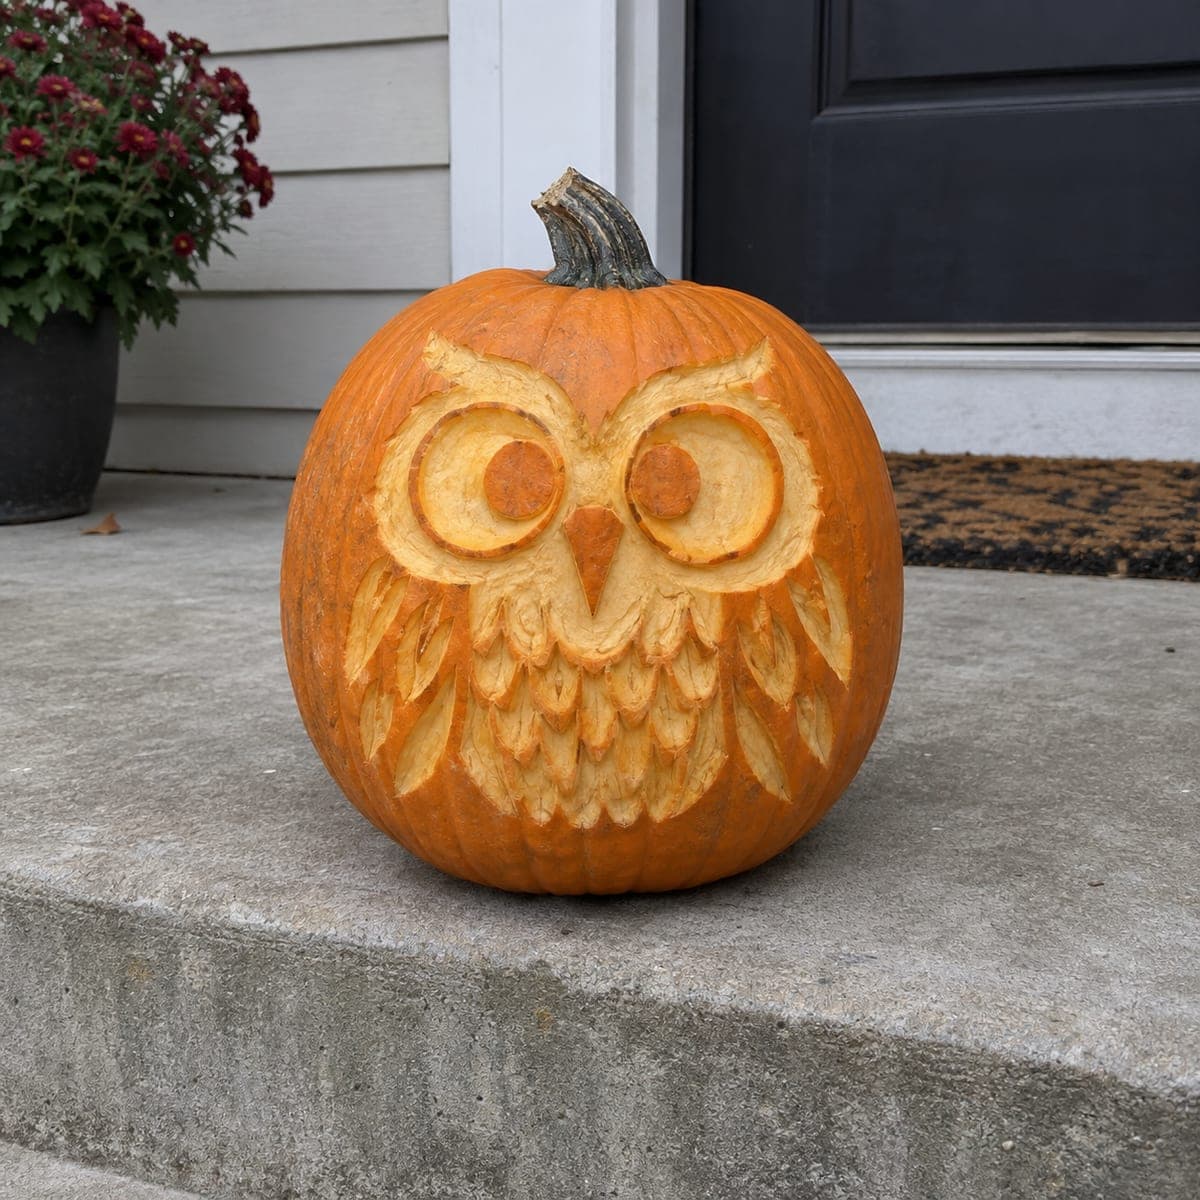
Carved from a white pumpkin, this wide-eyed owl is built from overlapping sculpted feathers that cascade down its chest like shingles. The pale rind gives it the look of carved ivory, and the ringed eyes are cut as layered discs around dark centers. Shape the big eye rings and beak before feathering the body, always slicing away from finished areas. It makes an elegant mantel piece that skips the spooky factor entirely.

This is an AI-generated concept image: a realistic, carvable design idea rather than a photo of a finished carve. AI concepts are always labeled and sit out the leaderboard and the contest.

No ratings yet · Sign in to rate
Comments (0)

  • No comments yet — be the first.

Save without an account. Sign in to like or comment.

Our tips for carving a similar design

The core trick here is relief carving rather than cutouts, shaving the white rind to different depths so light and shadow do all the work. Start with the two big eye rings and the beak as raised anchors, then feather the whole chest in overlapping layers that step downward like shingles. Because a white pumpkin reads like carved ivory, the whole face stays a soft glow with no harsh openings.

Written by PumpkinCarvingIdeas.com, inspired by the image above. These are our suggestions, not instructions from the uploader. This approach to the AI concept has not been tested on a real pumpkin.

From pumpkin to porch

  1. Pick a pale pumpkin and plan the face

    Choose a smooth white or ghost pumpkin that sits flat and has a broad, round front. This is an AI concept, so no real pumpkin was carved, but you can build a similar owl by first sketching the two big eye circles, a small triangular beak between them, and the brow feathers arching up toward the stem. Keep the design centered and leave the top third for the smooth crown. Mark everything lightly in pencil or washable marker before any blade touches the rind.

  2. Gut lightly and thin the front wall

    An adult should cut a lid or a bottom access hole and scoop the pumpkin, but only remove enough seed pulp to reach about a one inch wall on the carving face. You want the wall thick enough to hold relief detail without wobbling. Shaving detail into a thick wall keeps the sculpture strong. A bottom hole lets you set the pumpkin over an LED later without a gaping top.

  3. Establish the eye rings and beak first

    Using a small loop or ribbon tool, sculpt the raised ring around each eye by carving away the area just outside it so the ring stands proud. Leave a slightly darker skin disc at each center for the pupil, then peel a thin band around it for the iris glow. Shape the beak as a small raised triangle between the eyes, rounding it gently so it catches light on top. Always slice away from these finished features so a slip does not gouge them.

  4. Feather the brow and face

    Carve the arching brow feathers above the eyes with short curved strokes, lifting each feather edge so it casts a thin shadow. Work outward from the eyes toward the sides of the head, keeping every stroke shallow and consistent. Overlap the feathers slightly like scales so the eye reads them as a soft mask. Rinse away shavings often so you can judge the depth as you go.

  5. Shingle the chest in rows

    Below the beak, sculpt the chest feathers in horizontal rows, each new row tucking under the one above it. Carve the lower edge of each feather a touch deeper to create the shingled shadow line that gives the cascade its depth. Keep feathers attached to the rind and never cut fully through, since the whole effect relies on relief, not holes. Vary feather size slightly, larger near the wings and smaller down the center, for a natural look.

  6. Light it low and photograph

    Slip a warm LED puck under or inside the pumpkin so the peeled areas glow softly and the untouched crown stays pale. Because there are almost no cutouts, this owl shows best in a dim room with a little side lamp to rake across the feather shadows. Wipe the carved surface with a damp cloth, then shoot slightly above eye level to catch the layered chest. A light coat of petroleum jelly on the cut edges slows drying if you want it to last a few days.

Gather your supplies

Check things off as you get ready.

Work on a stable surface, keep your free hand out of the cutting path, and have an adult handle sharp tools.

Three levels of light

  • Leave intact

    The smooth crown above the brows and the outer sides of the head stay untouched for a pale, solid look, plus the dark disc at each pupil center.

  • Peel & shade

    The eye rings, iris bands, beak, and every sculpted feather are shaved to thin skin so they glow a soft dim orange.

  • Cut through

    Almost nothing is cut fully through on this relief design; at most a tiny pinhole in each pupil if you want a bright glint from the LED.

Learn the carving basics

Before you start cutting

Do I need to cut all the way through anywhere?

Not really. This owl is a relief sculpture, so its depth comes from shaving the rind at different levels rather than open holes. Keep every feather and the eye rings attached to the pumpkin. Only consider a tiny pupil pinhole if you want a small bright catchlight.

Why a white pumpkin instead of orange?

The pale rind reads like carved ivory and keeps the mood elegant rather than spooky, which suits a feathered owl. White skin also shows subtle shadow lines from the feather layers more clearly. An orange pumpkin works too, it will just look warmer and more traditional.

How do I keep the feathers from looking flat?

Carve the lower edge of each feather slightly deeper than the top so it throws a thin shadow, and overlap each row under the one above it. Work in consistent shallow passes and rinse shavings often to check depth. Rake a side light across the surface as you go to see which feathers need more definition.

Your take belongs here, too.

Changed a detail? Made it simpler? Share a photo of your version and tell the community what worked.

Share your pumpkin

More pumpkins like this

You've reached the end · 8 pumpkins
The Patch Report

Fresh pumpkins, in your inbox.

The best new carvings, ideas worth stealing, and how-tos for carving season. Short, seasonal, and gone by November.

A short email during carving season. Unsubscribe anytime. See our privacy policy.