Halloween Pumpkin Carving Contest · Starts October 1st · $500 in prizes
← Back to ideas
@ai_concepts
Sep 25, 2026
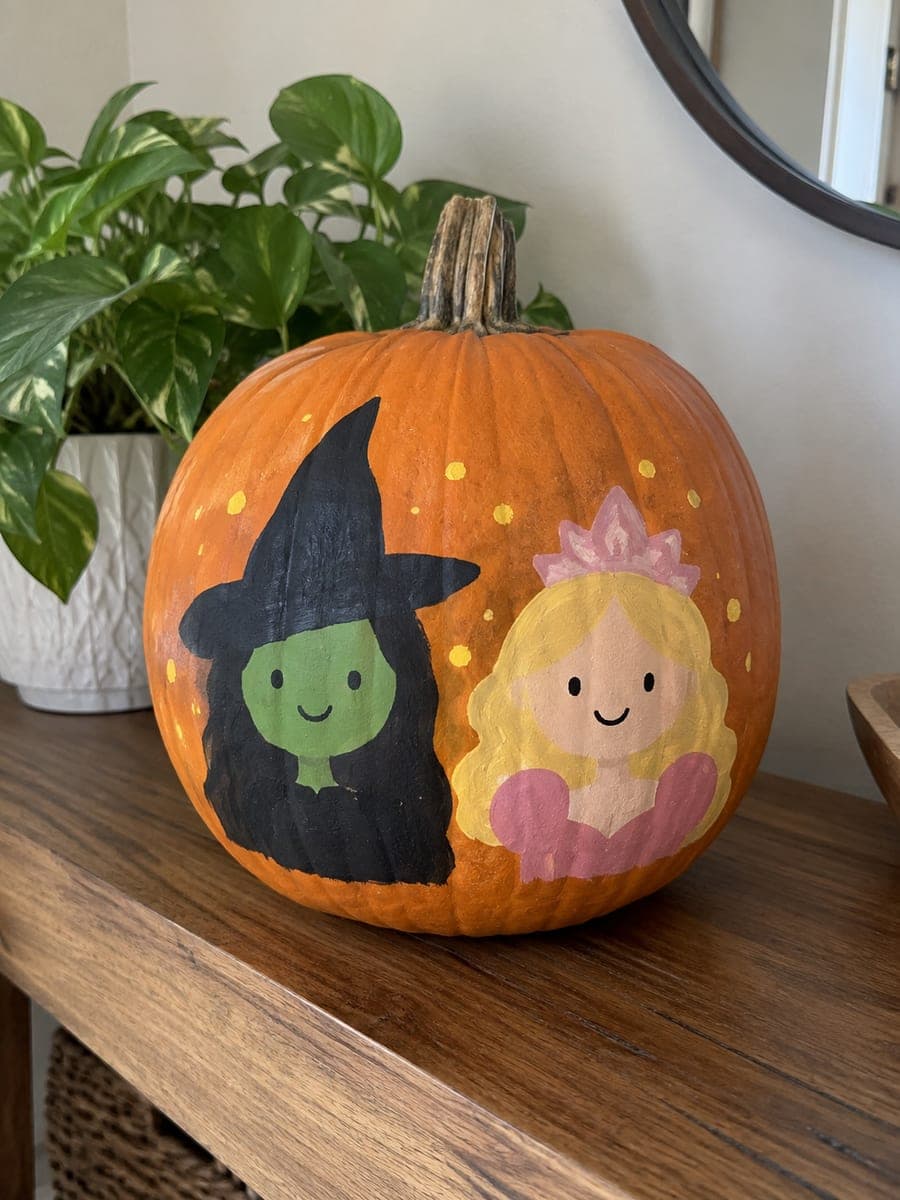
Painted Elphaba No-Carve Pumpkin from WickedAI
0

Report this carving

Tell us what is wrong. Reports are private.

Painted Elphaba No-Carve Pumpkin from Wicked

This no-carve Elphaba pumpkin keeps the rind intact while flat acrylic paint brings the Wicked witch to life in vivid greens and black. Lay down the face in a medium green first, then add the deep black hat and coat details with a liner brush. A sharp white highlight on the eyes keeps the portrait from looking flat. Seal with matte varnish so the design stays crisp through October.

No ratings yet · Sign in to rate
Comments (0)

  • No comments yet — be the first.

Save without an account. Sign in to like or comment.

Our tips for carving a similar design

Flat acrylic in rich greens, deep black, and sharp white paints Elphaba's portrait onto the intact rind without a single cut. Building from the face outward, adding hat and coat over dried base layers, keeps the color boundaries clean and the palette balanced. A white highlight on the eyes prevents the portrait from looking flat under any lighting condition.

From pumpkin to porch

  1. Clean the surface

    Wipe the pumpkin with rubbing alcohol on a cloth and let it dry fully. Alcohol removes field residue that causes acrylic to peel. Choose the most visible face of the pumpkin and mark its center with a faint pencil cross before sketching begins.

  2. Sketch Elphaba's features

    Pencil in the face shape, hat outline, and collar in light strokes. Elphaba's distinctive features are the tall pointed hat with a low brim, straight angular jaw, and dark flowing hair. Keep the face proportions realistic rather than cartoonish for the most striking result.

  3. Paint the base face in medium green

    Fill the face area with a medium leafy green using a flat brush. Two coats give full opacity over the orange rind. Let the first coat dry completely before the second. Keep the edge of the face shape clean by trimming with a fine brush on the second coat.

  4. Add the black hat and coat

    Fill the hat and coat areas with flat black acrylic. Use a wide brush for the hat body and a medium brush for the coat neckline. Extend the black into the hair area as well, building it in organic flowing shapes rather than stiff geometric blocks.

  5. Paint facial details and highlights

    Use a fine liner brush to add dark green or black shadows around the eyes, nose bridge, and jaw. Paint the eye irises in dark brown or black, then add a small sharp white highlight dot in each eye. This highlight is the most important accent in the whole design as it brings the portrait to life.

  6. Seal and set up display lighting

    Apply matte varnish spray once all paint is fully dry (at least one hour). For nighttime display, position a warm spotlight or string light in front of the pumpkin rather than inside it. The painted portrait reads best lit from outside.

Written with AI to match this design

Gather your supplies

Check things off as you get ready.

Work on a stable surface, keep your free hand out of the cutting path, and have an adult handle sharp tools.

Three levels of light

  • Leave intact

    Unpainted orange rind around the portrait provides natural warm contrast.

  • Peel & shade

    None. The shell is fully intact.

  • Cut through

    None. Use an outside spotlight or porch lamp for nighttime visibility.

Learn the carving basics

Before you start cutting

What green paint shade is closest to Elphaba's iconic skin tone?

A mid-tone natural leaf green, slightly warm rather than cool or lime, is the most recognizable. Mix a tiny amount of yellow into a standard medium green if the paint looks too teal. Avoid neon or fluorescent greens that read more like Halloween decorations than a theatrical skin tone.

How do I keep the hat edges crisp where they meet the green face area?

Let the green face layer dry completely first. Then trace the hat boundary in pencil and fill the hat with black, using a fine liner brush right along the boundary line before switching to a wider brush to fill the rest of the hat body. Working outward from the boundary keeps the edge sharp.

Can younger carvers do this design?

Yes, this is one of the most kid-friendly Wicked designs since no blades are involved. Simplify the face to larger color blocks and skip the detailed liner brushwork if the painter is young. A bold Elphaba hat silhouette in black with a green painted beneath it is recognizable and achievable for children aged six and up with some adult guidance.

Your take belongs here, too.

Changed a detail? Made it simpler? Share a photo of your version and tell the community what worked.

Share your pumpkin

More pumpkins like this

You've reached the end · 8 pumpkins
The Patch Report

Fresh pumpkins, in your inbox.

The best new carvings, ideas worth stealing, and how-tos for carving season. Short, seasonal, and gone by November.

A short email during carving season. Unsubscribe anytime. See our privacy policy.
