Halloween Pumpkin Carving Contest · Starts October 1st · $500 in prizes
← Back to ideas
@ai_concepts
Sep 25, 2026
Painted Friendly Dog Face Pumpkin with Blue CollarAI
0

Report this carving

Tell us what is wrong. Reports are private.

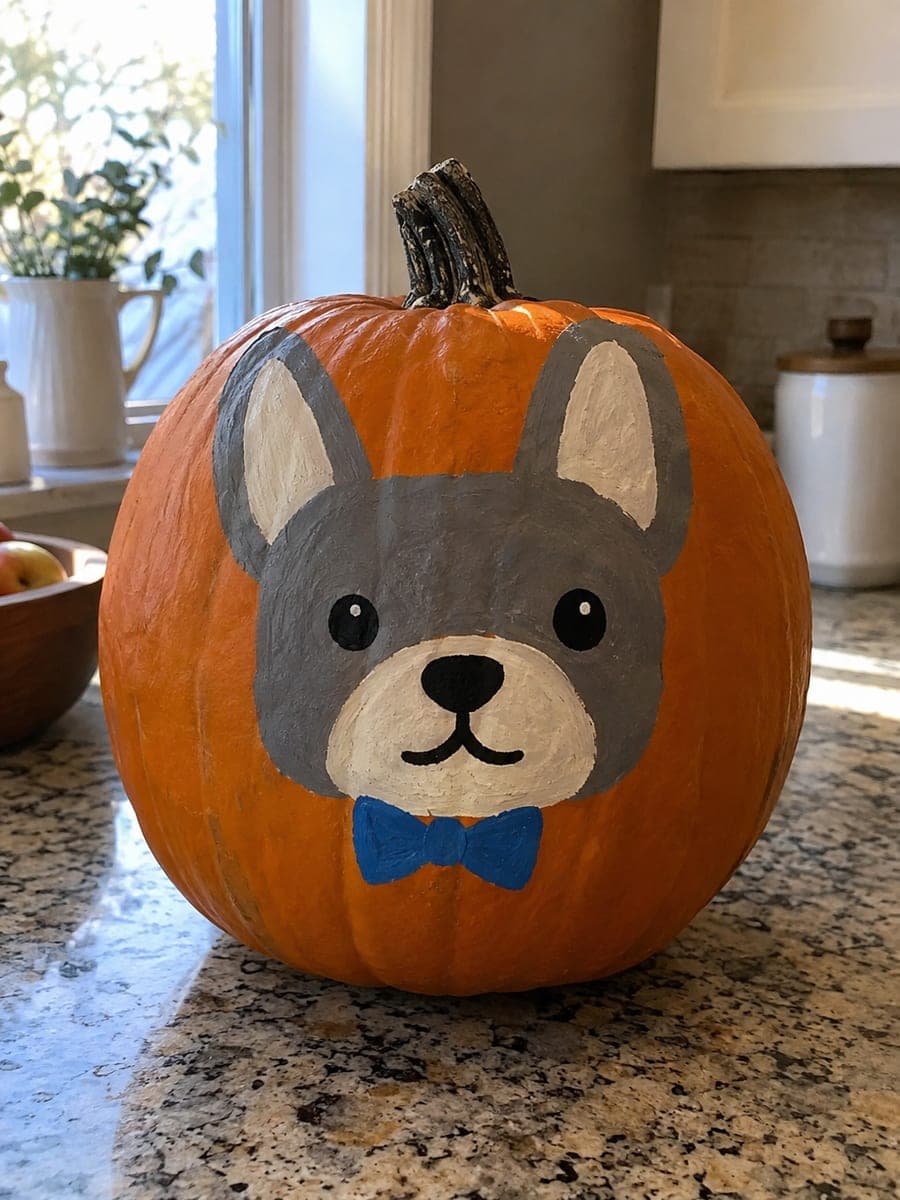
Painted Friendly Dog Face Pumpkin with Blue Collar

Flat rounded painted shapes in warm tan and cream tones, a dark nose patch and a bright blue collar make this no-carve dog pumpkin carving idea a cheerful, mess-free project for any skill level. Block in the face color first, add the muzzle patch and ear tones once dry, and finish with the nose, eyes and collar in a final detail pass. A gel pen or fine round brush makes the cleanest collar stitching lines. Because the rind is never cut, this pumpkin decoration is equally safe for front porches and apartment windowsills.

No ratings yet · Sign in to rate

Comments (0)

  • No comments yet — be the first.

Save without an account. Sign in to like or comment.

Our tips for carving a similar design

Warm tan and cream shapes built up in three passes, a face layer first, then the muzzle patch and ear tones, then the nose, eyes and collar details, create a friendly dog expression with minimal painting skill required. The bright blue collar is the visual anchor at the base of the face and goes on in the final pass.

From pumpkin to porch

  1. Clean and dry the pumpkin

    Wipe the pumpkin with a damp cloth and let it dry fully. The tan base coat needs good adhesion to the rind, so a dry, lightly scuffed surface works better than a waxy one. A very light pass with fine sandpaper helps paint grip on particularly smooth rinds.

  2. Sketch the face layout

    Use a chalk pencil to sketch the outer head shape, the muzzle patch position and the collar band location. Keep the face taking up most of the front panel so the features are clearly visible from a distance.

  3. Block in the face color

    Apply two coats of warm tan acrylic to the full face area. Let each coat dry completely. Use a medium flat brush for broad coverage and a fine round brush to neaten the ear edges and cheek curves.

  4. Add the muzzle patch and ear tones

    Paint a lighter cream muzzle patch centered in the lower face area. Add a slightly darker tan tone along the ear edges to separate them from the face. These subtle tone differences give the dog dimension without requiring advanced shading skills.

  5. Paint the collar, nose, eyes and details

    Paint the bright blue collar band across the lower face using a flat brush. Add a dark brown or black nose oval, round eyes and any collar stitch details with a fine round brush or a gel pen. Collar stitching reads best as short parallel dashes along both edges of the band.

  6. Seal and display

    Once all layers are dry, apply one coat of clear matte varnish to protect the design from outdoor moisture. Display on a porch, windowsill or entry table. A soft warm light source from one side brings out the layered tones nicely.

Written with AI to match this design

Gather your supplies

Check things off as you get ready.

Work on a stable surface, keep your free hand out of the cutting path, and have an adult handle sharp tools.

Three levels of light

  • Leave intact

    The bare orange rind visible around and behind the painted shapes

  • Peel & shade

    None, the rind is left fully intact

  • Cut through

    None; a lamp or outdoor spotlight placed to the side shows the painted layers at their best

Learn the carving basics

Before you start cutting

How do I get the blue collar to look clean over the tan face paint?

Let the tan layer dry for at least 30 minutes before applying the blue. Use a flat brush slightly narrower than the collar band and load it with full-opacity blue paint. Apply in a single pass rather than scrubbing back and forth, which can lift the layer below.

What kind of brush makes the cleanest collar stitching?

A fine round brush with a good point makes clean dash marks. A 0 or 00 size works well. Alternatively, a fine-tip black gel pen draws crisp dashes on dry acrylic paint and requires no brush control at all.

Can I add a name tag to the collar for a personalized touch?

Yes, a small circular or bone-shaped tag painted in gold or silver hanging from the collar center is a charming addition. Paint it on in the final detail pass with a fine round brush and add the pet's initial with a toothpick dipped in contrasting paint.

Your take belongs here, too.

Changed a detail? Made it simpler? Share a photo of your version and tell the community what worked.

Share your pumpkin

More pumpkins like this

You've reached the end · 8 pumpkins
The Patch Report

Fresh pumpkins, in your inbox.

The best new carvings, ideas worth stealing, and how-tos for carving season. Short, seasonal, and gone by November.

A short email during carving season. Unsubscribe anytime. See our privacy policy.