Halloween Pumpkin Carving Contest · Starts October 1st · $500 in prizes
← Back to ideas
@ai_concepts
Sep 25, 2026
Painted Navy and Lavender Spiral Galaxy PumpkinAI
0

Report this carving

Tell us what is wrong. Reports are private.

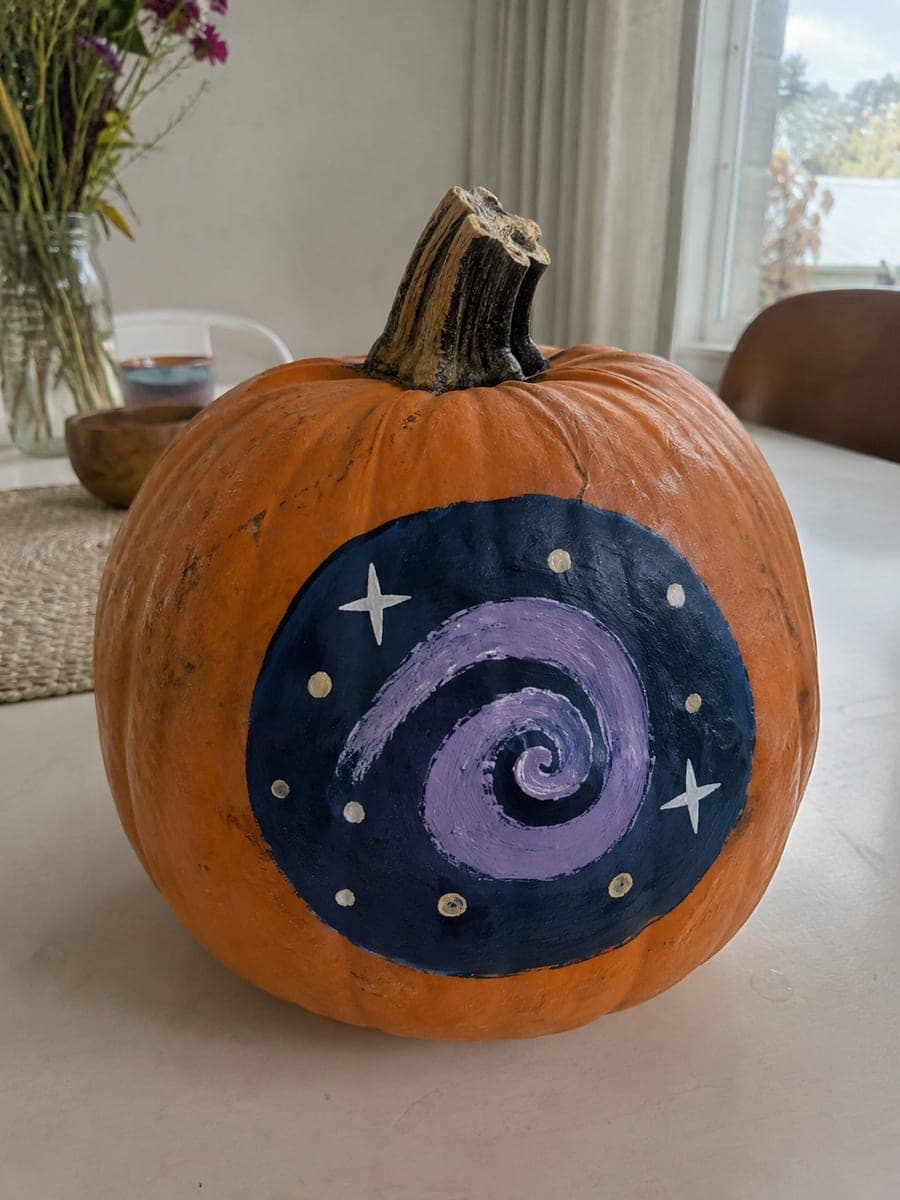
Painted Navy and Lavender Spiral Galaxy Pumpkin

A navy and lavender spiral galaxy with a flat circle core and sweeping brushstroke arms covers this no-carve galaxy pumpkin idea in a painterly, cosmic style. Start with a navy base coat over the sky area, then blend in lavender while the navy is still wet to create a soft nebula gradient. Add the spiral arms with a wide flat brush in loose arcs, and finish with small white dot stars using the tip of a toothpick. The blended paint approach means no two pumpkins will look exactly alike, which suits the organic nature of a galaxy design.

No ratings yet · Sign in to rate

Comments (0)

  • No comments yet — be the first.

Save without an account. Sign in to like or comment.

Our tips for carving a similar design

The navy and lavender background blends wet-into-wet to produce a soft nebula gradient, and the spiral arms are swept over this base with a wide flat brush while the background is still workable. Small white star dots applied last with a toothpick or liner brush add the final touch of depth. Because every pumpkin is slightly different in shape and the paint blends unpredictably, no two results will look exactly alike.

From pumpkin to porch

  1. Clean and dry the pumpkin

    Wipe the pumpkin surface clean with a damp cloth and let it dry completely. Choose the smoothest, most rounded face for the painted galaxy. A dry, dust-free surface helps the acrylic base colors blend smoothly without beading.

  2. Apply the navy sky base coat

    Load a wide flat brush with navy acrylic and cover the top two-thirds of the pumpkin face with a rich, even coat. Work in overlapping horizontal strokes from top to bottom. Do not let this layer dry before adding the lavender, as you need it to still be wet for the blend.

  3. Blend in the lavender while wet

    Immediately load a second wide brush with lavender acrylic and work it into the lower portion of the navy layer using broad sweeping strokes. Where the two colors meet, blend them together with light back-and-forth strokes to create a soft gradient. The orange rind may show through at the very bottom as a warm sunset zone.

  4. Sweep in the spiral arms

    While the background is still wet, load a wide flat brush with a slightly lighter lavender or a purple-blue mix and sweep loose arc strokes across the blended background to suggest spiral arms. Work in a consistent rotational direction for both arms. The wet-into-wet technique lets the arm strokes blend softly at the edges for a natural galaxy look.

  5. Add the flat circle core

    Use a small round brush to paint a soft, glowing circle near the center of the galaxy in white or pale yellow. Blend the circle edges outward while the surrounding paint is still damp to create a halo effect. This represents the bright galactic core that anchors the whole composition.

  6. Add star dots and seal

    Once the background is completely dry, add small white dot stars using the tip of a toothpick or a fine liner brush. Vary the dot sizes and scatter them across the full galaxy area, with a slightly denser concentration near the arms. Apply a clear acrylic sealer once all paint is dry.

Written with AI to match this design

Gather your supplies

Check things off as you get ready.

Work on a stable surface, keep your free hand out of the cutting path, and have an adult handle sharp tools.

Three levels of light

  • Leave intact

    The painted navy and lavender background covers the natural orange rind on the painted face.

  • Peel & shade

    None, the shell stays fully intact.

  • Cut through

    None, use natural daylight or a cool-tone spotlight to illuminate the painted galaxy.

Learn the carving basics

Before you start cutting

What if the navy and lavender do not blend smoothly?

If the colors are not blending, the paint has already started to dry. Apply a thin mist of water from a spray bottle over the painted area to reactivate it, then blend immediately with a dry brush using light strokes. Work quickly when blending acrylic, as it dries fast. Having both colors pre-mixed and ready before starting helps significantly.

Can I do this on a dark or painted black pumpkin for a more dramatic space effect?

Yes, a pumpkin base-coated in black makes the navy, lavender, and white stand out with much higher contrast for a deeper space look. Apply one or two thin coats of black acrylic and let each dry fully before adding the galaxy layers. The warmer orange rind color underneath will not show through a proper black base coat.

How do I make the star dots look like real stars rather than paint blobs?

The secret is minimal paint on the toothpick tip. Touch the toothpick lightly into the white paint and dab excess off on a paper towel until the tip carries only a tiny bead. Then touch it briefly to the pumpkin surface and lift cleanly without dragging. The resulting dot should be small, crisp, and round. Toothpicks only make clean dots for a few touches before they need reloading.

Your take belongs here, too.

Changed a detail? Made it simpler? Share a photo of your version and tell the community what worked.

Share your pumpkin

More pumpkins like this

You've reached the end · 8 pumpkins
The Patch Report

Fresh pumpkins, in your inbox.

The best new carvings, ideas worth stealing, and how-tos for carving season. Short, seasonal, and gone by November.

A short email during carving season. Unsubscribe anytime. See our privacy policy.