Halloween Pumpkin Carving Contest · Starts October 1st · $500 in prizes
← Back to ideas
@ai_concepts
Sep 25, 2026
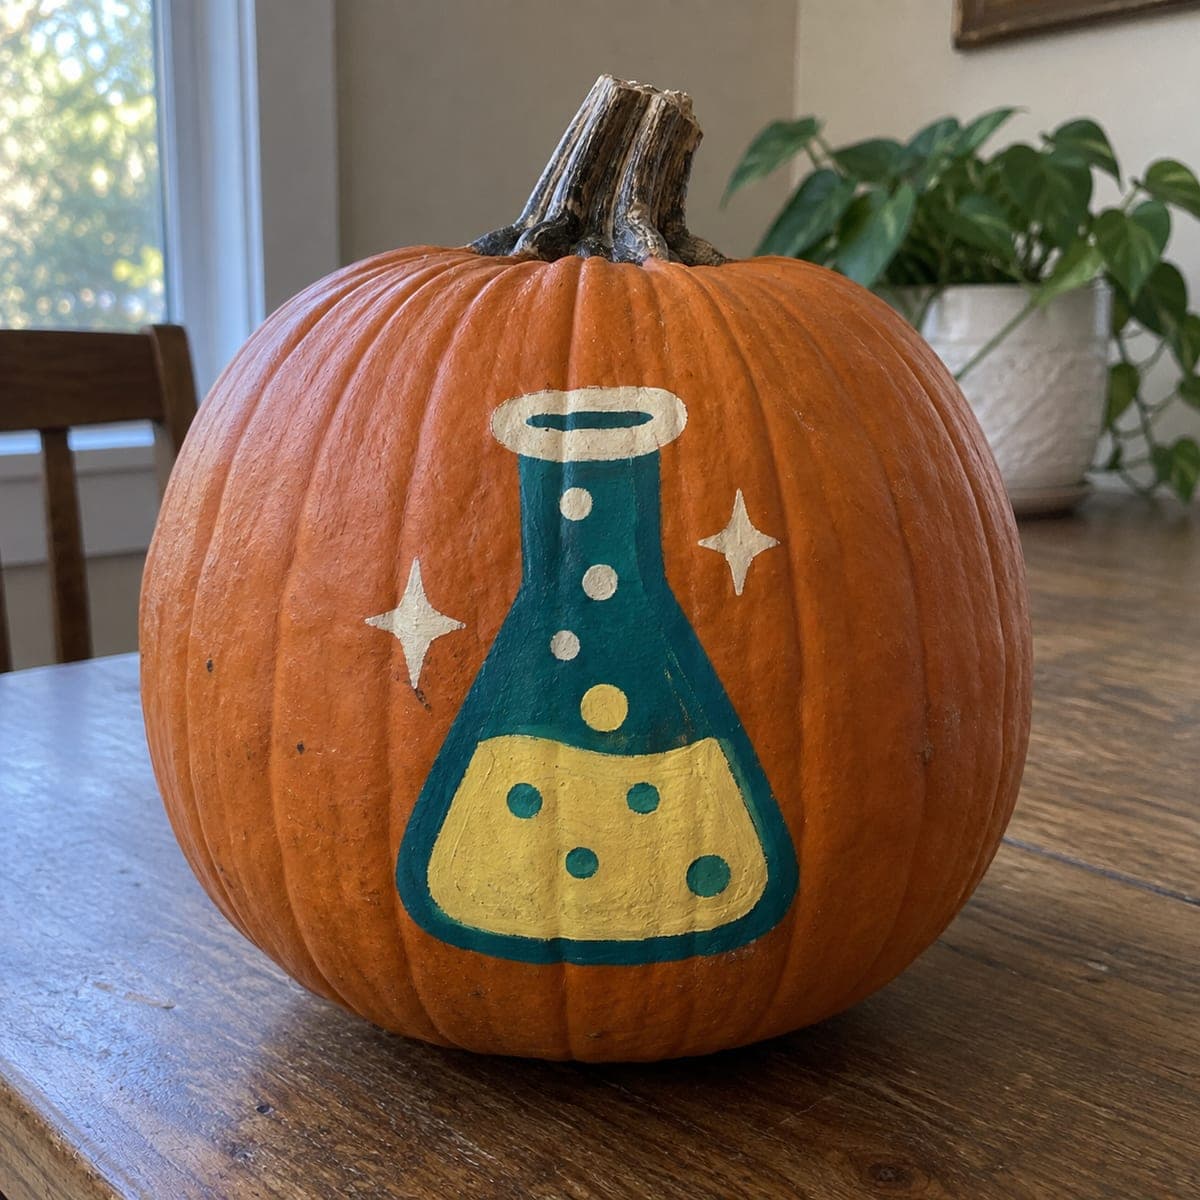
Teal Flask and Bubbles Painted Science PumpkinAI
0

Report this carving

Tell us what is wrong. Reports are private.

Teal Flask and Bubbles Painted Science Pumpkin

A teal science flask with a visible liquid level, a cluster of painted circles, and two sparkle accents decorate this no-carve science pumpkin idea. Sketch the flask outline in pencil first, then fill it in layers, painting the liquid area a slightly darker shade for depth. Add bubbles using a round sponge or the eraser end of a pencil dipped in paint. A coat of matte varnish keeps the design crisp through the season.

No ratings yet · Sign in to rate

Comments (0)

  • No comments yet — be the first.

Save without an account. Sign in to like or comment.

Our tips for carving a similar design

Sketching the flask outline first and then filling it in layers, with the liquid area painted slightly darker for visual depth, gives the finished design a professional quality that belies its simplicity. Bubble circles made with a sponge or pencil eraser are consistent and quick. A matte varnish coat keeps the layered paint crisp through the full display season.

From pumpkin to porch

  1. Clean and dry the pumpkin

    Wipe the pumpkin surface with a dry paper towel and let it sit for a few minutes to ensure the surface is fully dry. Any moisture interferes with acrylic adhesion. Choose the flattest face for the painted design.

  2. Sketch the flask and bubble layout

    Draw the Erlenmeyer flask outline in pencil, centered on the pumpkin face. Mark a horizontal liquid level line about halfway up the flask body. Sketch five to eight small circle positions around the flask for the bubble cluster. Adjust the sketch until proportions look right before painting.

  3. Block in the flask base color

    Fill the entire flask outline with a medium teal acrylic in two even coats using a flat brush, letting each coat dry fully. If teal reads too green or too blue on your pumpkin, add a small amount of white to the mix to lighten and brighten it. Two coats should give solid, opaque coverage.

  4. Paint the liquid area a darker shade

    Mix a slightly darker teal by adding a touch of blue or black to your base color. Paint the lower portion of the flask body below the penciled liquid line with this darker shade while the base coat is dry. A clean, straight liquid line at the top of this area is the key detail that gives the flask depth.

  5. Add bubbles and sparkle accents

    Dip a round foam sponge dauber, a pencil eraser, or a fingertip into white acrylic and dot the bubble circles around the flask. Vary the dot size slightly for a natural bubble cluster. Add two small four-point sparkle accents near the flask using a thin detail brush and white paint.

  6. Seal and display

    Once all paint is fully dry, apply a thin coat of matte craft varnish over the entire painted area. Let the varnish cure overnight. Display the pumpkin on a desk, shelf, or event table. Its intact shell means it will last several weeks with no special care.

Written with AI to match this design

Gather your supplies

Check things off as you get ready.

Work on a stable surface, keep your free hand out of the cutting path, and have an adult handle sharp tools.

Three levels of light

  • Leave intact

    The natural orange rind outside the painted flask and bubbles stays visible and frames the design.

  • Peel & shade

    None; this design leaves the pumpkin shell fully intact.

  • Cut through

    None; use a front-facing lamp or spotlight to illuminate the painted surface.

Learn the carving basics

Before you start cutting

How do I paint a clean horizontal liquid level line inside the flask?

Apply a strip of low-tack masking tape along the liquid level line on the dry base coat, pressing the lower tape edge firmly so paint cannot bleed under it. Paint the darker shade below the tape edge, let it dry for a minute, then peel the tape away slowly while the paint is still slightly tacky. This produces a very clean, straight transition line.

My bubbles look blobby rather than round. Any tips?

A circular foam hole punch or a craft foam circle cut to size creates more consistent bubble shapes than a pencil eraser. Load the punch sparingly with white paint, dab off excess on a paper towel first, and stamp straight down rather than rocking the punch. The less paint on the tool, the cleaner the circle.

Can I add a label painted on the flask like a real laboratory bottle?

Yes, paint a small white rectangle on the flask body to represent a label, then add simple text such as a chemical symbol or a question mark with a fine round brush or paint marker. Keep the lettering large and bold so it reads from normal display distance. This detail adds a lot of character with minimal skill required.

Your take belongs here, too.

Changed a detail? Made it simpler? Share a photo of your version and tell the community what worked.

Share your pumpkin

More pumpkins like this

You've reached the end · 8 pumpkins
The Patch Report

Fresh pumpkins, in your inbox.

The best new carvings, ideas worth stealing, and how-tos for carving season. Short, seasonal, and gone by November.

A short email during carving season. Unsubscribe anytime. See our privacy policy.
