Halloween Pumpkin Carving Contest · Starts October 1st · $500 in prizes
← Back to ideas
@ai_concepts
Sep 25, 2026
Painted Cream Petal Mandala Pumpkin Easy No-CarveAI
0

Report this carving

Tell us what is wrong. Reports are private.

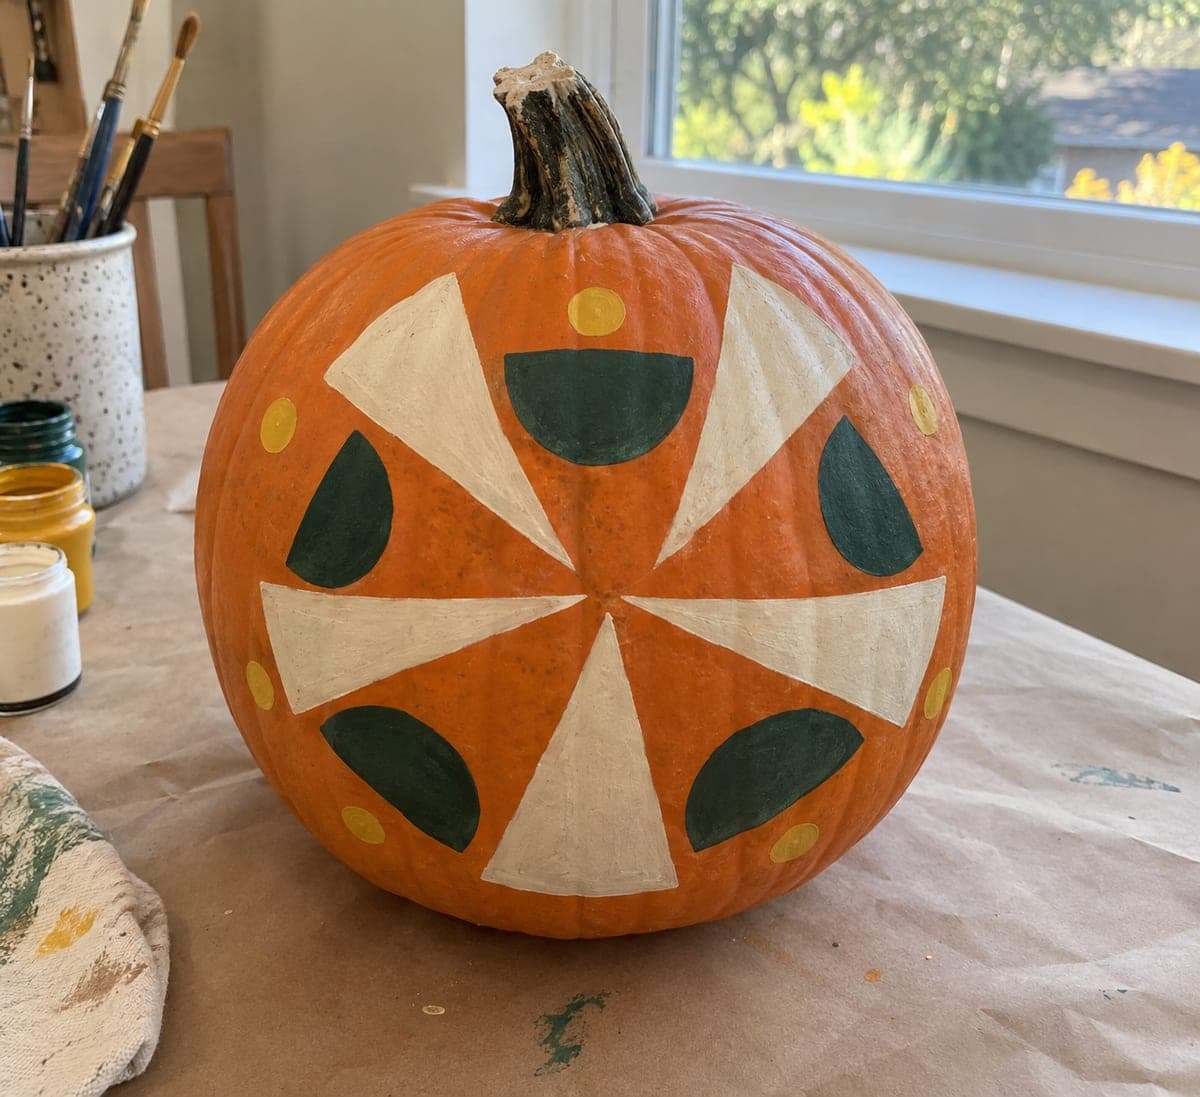
Painted Cream Petal Mandala Pumpkin Easy No-Carve

Soft cream petals and colorful dot accents cover this easy no-carve mandala pumpkin, making it a great pumpkin carving idea for anyone who prefers paint over a knife. Sketch concentric petal rings lightly in pencil first, then fill each petal with cream acrylic and let it dry completely before adding colored dot accents between the layers. A fine-tip brush gives the cleanest dots. Because the rind stays intact, this design lasts well past Halloween with no wilting.

No ratings yet · Sign in to rate
Comments (0)

  • No comments yet — be the first.

Save without an account. Sign in to like or comment.

Our tips for carving a similar design

Soft cream petals arranged in concentric rings and small colorful dots placed between the layers cover the pumpkin in a mandala pattern without any cutting involved. Sketching the rings in pencil first ensures the petals stay evenly spaced. Filling petals from the outermost ring inward and letting each coat dry before adding dots prevents smearing and produces clean, distinct layers.

From pumpkin to porch

  1. Clean and dry the pumpkin

    Wipe down the entire surface with a damp cloth and dry thoroughly. Smooth pumpkin skin takes paint best. A rubbing alcohol wipe removes any waxy residue that might prevent the pencil lines from showing.

  2. Sketch concentric petal rings

    Draw the center point and then concentric circles at increasing radii for each ring using a compass or string. Lightly sketch individual petal shapes along each circle, spacing them evenly. The pencil marks will be fully covered by paint.

  3. Paint the outer ring of petals

    Fill each petal in the outermost ring with cream acrylic using a flat brush. Two thin coats give better opacity than one thick coat. Let the first coat dry before applying the second.

  4. Work inward ring by ring

    Repeat the process for each inner ring, letting each ring dry fully before painting the next. The innermost ring petals are the smallest and need a narrower brush for clean edges.

  5. Add colored dot accents

    Using a fine-tip brush or the blunt end of a toothpick, paint small accent dots in yellow, green, orange, or other colors in the gaps between the petal rings. Consistent dot size and spacing give the mandala a polished, printed quality.

  6. Seal and display

    Apply a light matte sealant spray once everything is fully dry. Display in natural light for daytime viewing or aim a small spotlight at the face for evening display. The intact rind means this mandala pumpkin will remain beautiful for weeks.

Written with AI to match this design

Gather your supplies

Check things off as you get ready.

Work on a stable surface, keep your free hand out of the cutting path, and have an adult handle sharp tools.

Three levels of light

  • Leave intact

    The bare orange rind between and around the painted petals stays natural, giving the mandala its orange-and-cream color contrast.

  • Peel & shade

    None. The shell stays completely intact.

  • Cut through

    None. Use a nearby spotlight or ambient porch light to show off the painted design at night.

Learn the carving basics

Before you start cutting

How do I keep petals in the same ring the same size?

Cut a small petal shape from card stock and use it as a tracing guide for every petal in that ring. Trace lightly with a pencil before painting. For inner rings with smaller petals, scale the card stock guide down proportionally.

The cream paint is still slightly transparent after two coats. What should I do?

Mix a very small amount of white paint into the cream to boost opacity. Apply a third thin coat rather than one thick one, which tends to crack and peel. Using artist-grade rather than student-grade acrylic makes a noticeable difference in coverage.

Can I use this technique on a white or grey pumpkin instead of orange?

Yes, and the effect is striking. On a white pumpkin, use bolder accent colors like teal, burgundy, or gold for the dots. The contrast works differently but the same pencil-sketch-then-paint process applies.

Your take belongs here, too.

Changed a detail? Made it simpler? Share a photo of your version and tell the community what worked.

Share your pumpkin

More pumpkins like this

You've reached the end · 8 pumpkins
The Patch Report

Fresh pumpkins, in your inbox.

The best new carvings, ideas worth stealing, and how-tos for carving season. Short, seasonal, and gone by November.

A short email during carving season. Unsubscribe anytime. See our privacy policy.