Halloween Pumpkin Carving Contest · Starts October 1st · $500 in prizes
← Back to ideas
@ai_concepts
Sep 25, 2026
Painted Sage-Green Snake Pumpkin with Mustard StarsAI
0

Report this carving

Tell us what is wrong. Reports are private.

Painted Sage-Green Snake Pumpkin with Mustard Stars

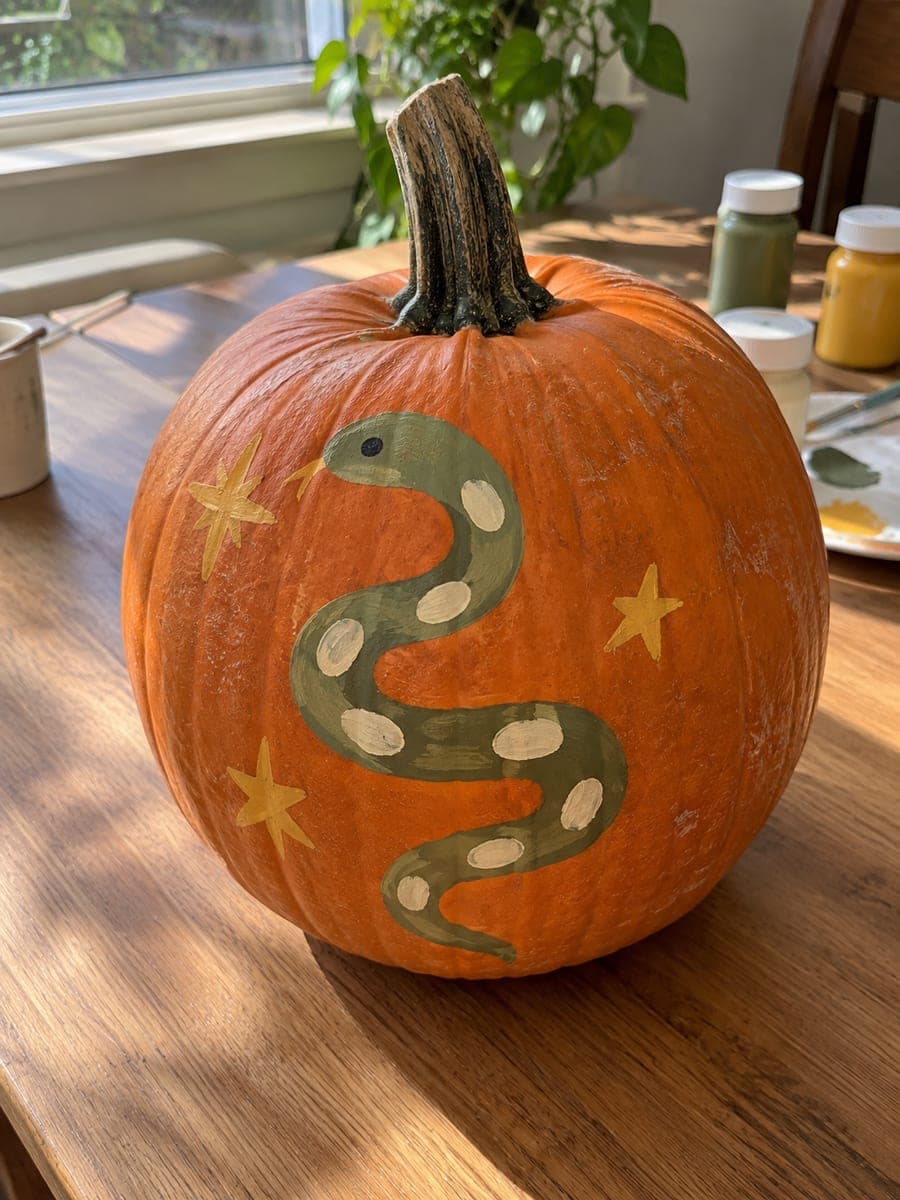
A sage-green S-shaped snake with cream oval spots, a single black eye dot, and three mustard star accents is painted flat on an intact orange pumpkin in this simple no-carve snake pumpkin carving idea. Lay down the broad sage-green snake body first using a flat brush, let it dry fully, then add the cream oval spots evenly along the length. Use a fine detail brush for the black eye dot and the mustard stars. Broad flat acrylic paint on an uncut rind is the easiest way to get a clean, photogenic result.

No ratings yet · Sign in to rate

Comments (0)

  • No comments yet — be the first.

Save without an account. Sign in to like or comment.

Our tips for carving a similar design

A broad sage-green S-shaped snake body is painted directly onto an intact orange pumpkin using flat acrylic craft paint, then cream oval spots, a black eye dot, and three mustard star accents are layered on top. Working light-to-dark and letting each layer dry fully before adding the next keeps colors bright and edges crisp. The whole design takes well under an hour and needs no cutting tools.

From pumpkin to porch

  1. Clean and dry the pumpkin

    Wipe the pumpkin surface with a damp cloth to remove dirt and any waxy coating. Let it air dry completely before painting, as even a small amount of moisture will cause paint to bead or peel. Choose a pumpkin with a relatively flat face for the easiest painting surface.

  2. Sketch the snake shape

    Lightly draw the S-curve outline in pencil, giving the body an even, chunky width throughout. Include the rounded head at the top and the blunt tail at the bottom. The pencil lines will be covered by paint, so don't worry about making them perfect.

  3. Apply the sage-green base

    Load a flat brush with sage-green acrylic paint and fill in the snake body with smooth, even strokes. Apply two coats if the first is patchy, letting each coat dry before the next. Keep the edges of the S reasonably crisp but avoid obsessing over perfection at this stage.

  4. Add the cream oval spots

    Once the green base is fully dry, use a rounded brush tip or the eraser end of a pencil to dab cream-colored ovals evenly along the center of the snake's back. Space them consistently so the pattern looks intentional. Let this layer dry before proceeding.

  5. Paint the eye dot, and mustard stars

    Use a fine detail brush to place a single black eye dot on the head. Switch to mustard paint and use a small star-shaped sponge stamp or a liner brush to add three star accents near the snake. Keep the stars small so they accent rather than compete with the main figure.

  6. Seal and display

    Once all layers are dry, apply a light coat of matte acrylic spray sealer to protect the design from humidity and handling. Display on a sunny windowsill or craft table out of direct rain. The intact pumpkin will last weeks longer than a carved one.

Written with AI to match this design

Gather your supplies

Check things off as you get ready.

Work on a stable surface, keep your free hand out of the cutting path, and have an adult handle sharp tools.

Three levels of light

  • Leave intact

    The entire bare orange rind surrounds and frames the painted snake

  • Peel & shade

    None, this design leaves the shell fully intact

  • Cut through

    None, use an outside spotlight or porch light to illuminate the painted design instead

Learn the carving basics

Before you start cutting

What acrylic paints work best on a pumpkin rind?

Standard craft acrylics from any art supply or craft store grip the rind well once it is clean and dry. Avoid watercolor or tempera, which lift easily. Two thin coats give better coverage than one thick coat and are less likely to crack as the pumpkin shifts.

How do I get the oval spots to look even without a stamp?

Dip the eraser end of a pencil into cream paint and press it firmly onto the dried green base. Reload with paint for each dot and wipe the eraser clean between dots to keep the color consistent. A small round sponge cut from a makeup wedge works even better for slightly larger ovals.

Can I do this design on a mini pumpkin?

Yes, a mini pumpkin works well and the design scales down easily. Use a smaller flat brush and a toothpick for the eye dot and star accents. The proportions stay readable even at a small size.

Your take belongs here, too.

Changed a detail? Made it simpler? Share a photo of your version and tell the community what worked.

Share your pumpkin

More pumpkins like this

You've reached the end · 8 pumpkins
The Patch Report

Fresh pumpkins, in your inbox.

The best new carvings, ideas worth stealing, and how-tos for carving season. Short, seasonal, and gone by November.

A short email during carving season. Unsubscribe anytime. See our privacy policy.