Halloween Pumpkin Carving Contest · Starts October 1st · $500 in prizes
← Back to ideas
@ai_concepts
Aug 26, 2026
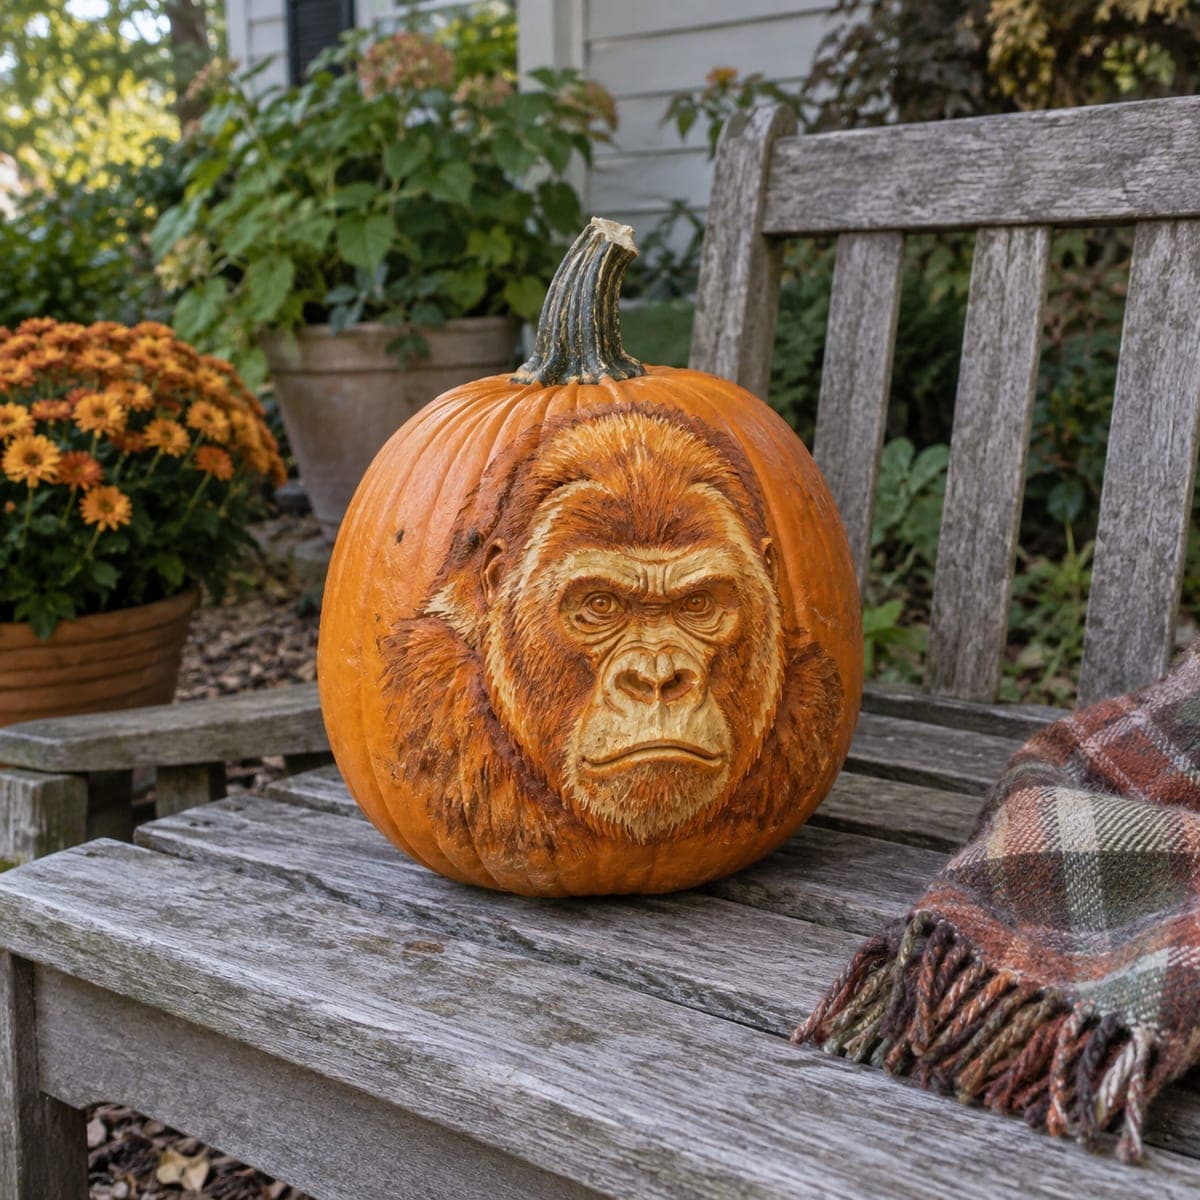
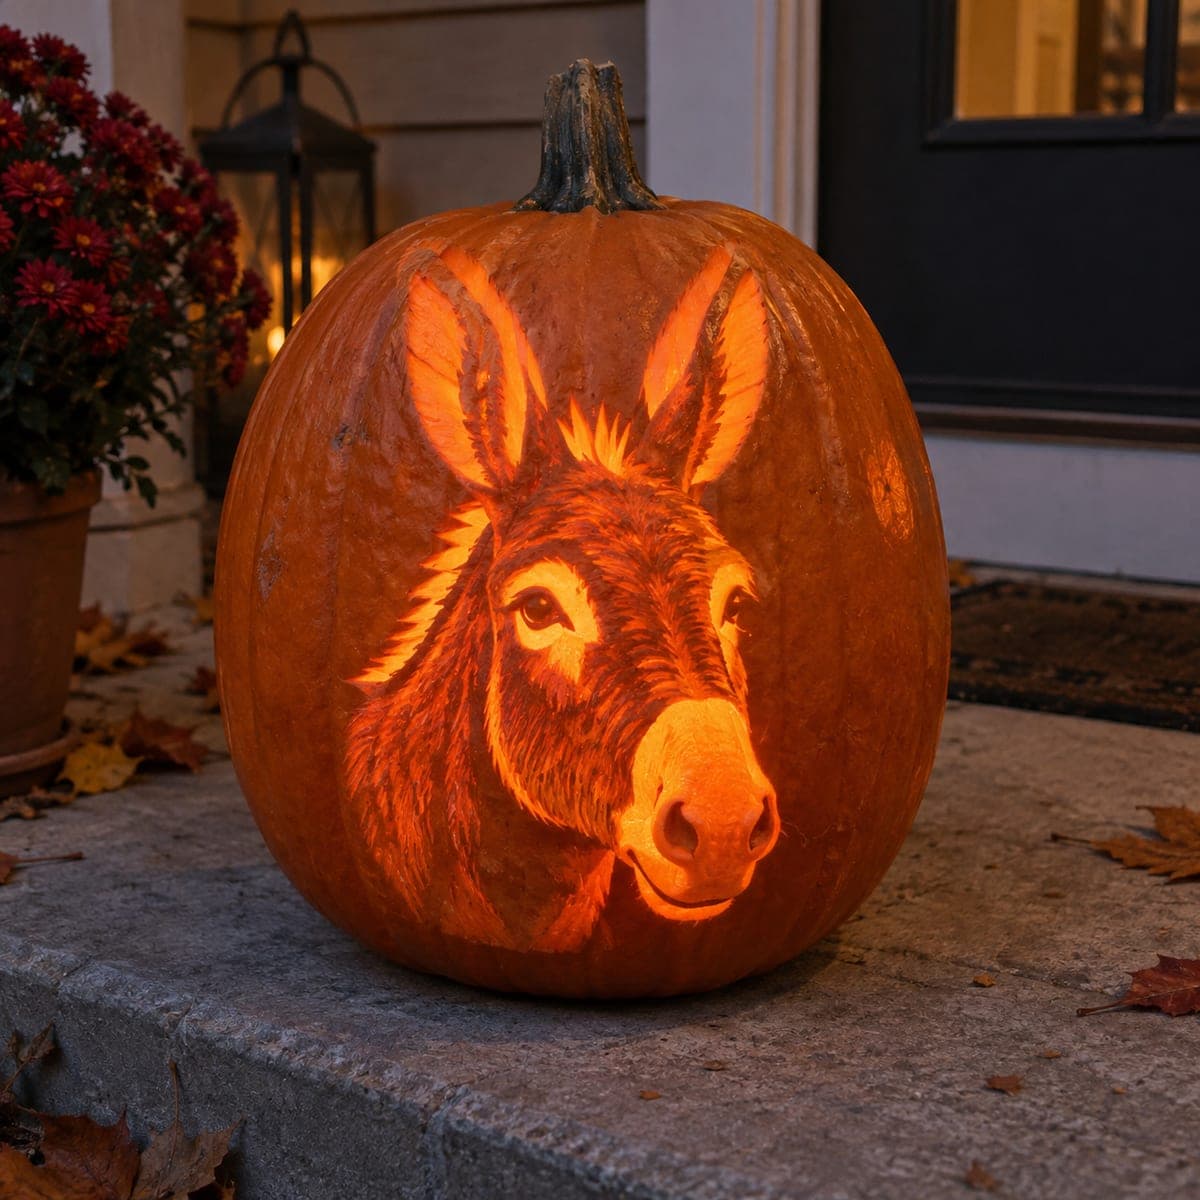
Realistic Gorilla Portrait Shaded Pumpkin CarvingAI
0

Realistic Gorilla Portrait Shaded Pumpkin Carving

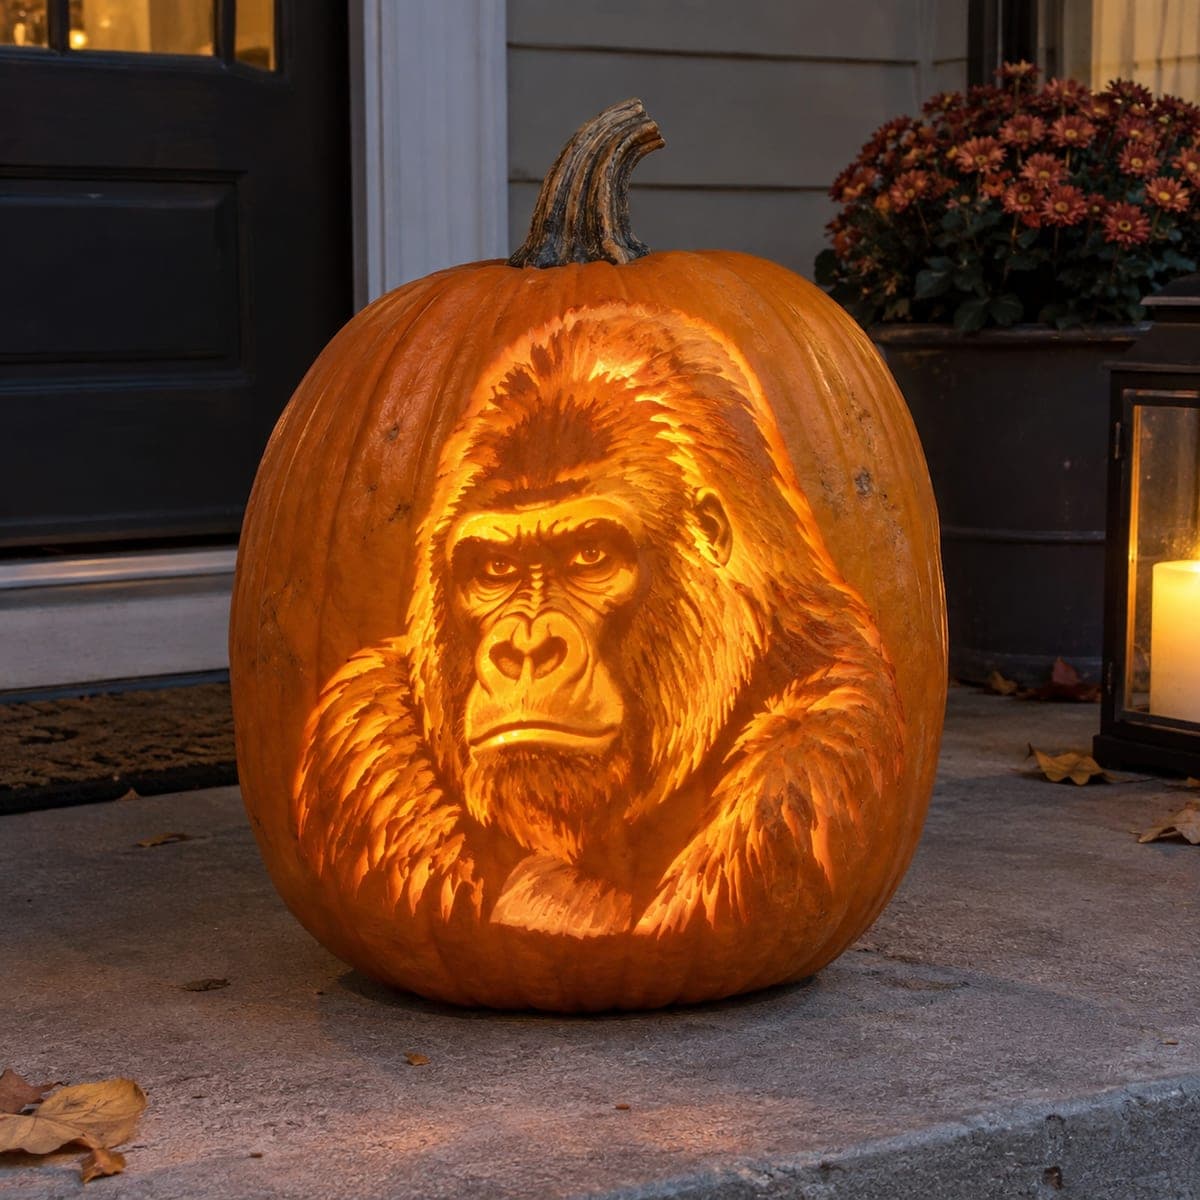
A brooding silverback gorilla stares out of this pumpkin, built entirely from etched fur strokes that glow at different depths. Every layer of skin is peeled a little deeper where the light should be brightest, which is what gives the face its lifelike shading. Work from a printed reference taped to the shell, carve the brightest highlights around the eyes and muzzle first, and light it with a warm LED puck for the richest tones.

This is an AI-generated concept image: a realistic, carvable design idea rather than a photo of a finished carve. AI concepts are always labeled and sit out the leaderboard and the contest.

No ratings yet · Sign in to rate
Comments (0)

  • No comments yet — be the first.

Save without an account. Sign in to like or comment.

Our tips for carving a similar design

This design skips outright cutouts almost entirely and relies on shading, where you peel the pumpkin skin to different depths so more or less light glows through each area. The core trick is treating the flesh like a sculpting medium: the thinner you scrape, the brighter it reads, which is how you build a lifelike gorilla face from fur strokes alone. Plan your values before you cut, working brightest around the eyes and muzzle and keeping the outer fur and background darker.

Written by PumpkinCarvingIdeas.com, inspired by the image above. These are our suggestions, not instructions from the uploader. This approach to the AI concept has not been tested on a real pumpkin.

From pumpkin to porch

  1. Pick a big pumpkin and prep it

    Choose a large pumpkin with a wide, smooth face so you have room for all the fur detail. Cut a lid from the bottom rather than the top so the stem stays intact, then hollow the inside and scrape the carving wall down to an even thickness of about one inch. A thinner, uniform wall makes shading much more predictable. Wipe the surface dry before you transfer your pattern.

  2. Transfer a printed reference

    Print a high-contrast gorilla portrait sized to your pumpkin and tape it flat to the shell, snipping the edges so it hugs the curve. Use a poking tool or pin to dot the main boundaries: the eyes, brow, nostrils, mouth, and the outline where fur meets background. Mark a few value zones too, noting which patches will be brightest. Peel the paper and connect your dots lightly with a washable marker.

  3. Open the brightest highlights first

    With a fine loop or ribbon tool, carve the very brightest spots around the eyes, the top of the muzzle, and the nose bridge by scraping the skin off and thinning the flesh the most there. These areas should be your deepest shaving, almost translucent, but never punch all the way through. Working these key features first sets your value range so everything else can be judged against them. Go slow and check often against a light.

  4. Build the fur in graded layers

    Switch to short, directional strokes that follow the way the fur grows, dragging the tool outward from the face into the mane and shoulders. Scrape deeper where the reference shows light hitting the fur and leave the skin thicker in the shadowed valleys between strands. This gradient of depths is what creates the soft, three-dimensional coat. Keep thin ridges of skin between strokes intact so nothing tears loose.

  5. Deepen shadows and finish the background

    Leave the outermost fur edges and the surrounding background as untouched skin so they stay dark and frame the face. For the darkest recesses, like under the brow and inside the nostrils, barely scrape or leave them fully skinned. Step back frequently, light the pumpkin from inside, and adjust any area that reads too flat by shaving a touch more. Resist cutting clean holes anywhere, since this whole portrait lives in the shading.

  6. Light it and photograph

    Set a warm-toned LED puck light inside, never a candle, since the thin walls and detail can scorch and dry out fast. Warm light deepens the orange tones and makes the fur feel richest. Mist the carved surface with water and a little lemon juice to slow browning, and place it on a shaded front porch out of direct sun. Shoot at dusk so the glow reads against a dim background.

Gather your supplies

Check things off as you get ready.

Work on a stable surface, keep your free hand out of the cutting path, and have an adult handle sharp tools.

Three levels of light

  • Leave intact

    The outer mane edges and the area around the head stay as untouched skin so they read dark and frame the portrait.

  • Peel & shade

    The bulk of the fur, cheeks, and shoulders get skin peeled to varying mid depths for a soft dim glow that shapes the coat.

  • Cut through

    Nothing is cut fully through; the brightest zones around the eyes and muzzle are scraped nearly translucent for the strongest light.

Learn the carving basics

Before you start cutting

This is an expert shading piece, so how do I avoid cutting a hole by accident?

Work with a headlamp or backlight so you can constantly judge how much flesh remains. Scrape in thin passes rather than digging deep once, and stop the moment an area starts to feel soft or glow too hot. Leaving even a couple millimeters of flesh keeps the wall intact while still letting light through.

How do I make the fur look directional and real?

Study your reference and note which way the hair flows on each part of the face and mane. Pull every tool stroke in that same direction, and vary the length and depth so strands overlap. The eye reads the pattern as fur even when each mark is simple.

How long will a shaded carving like this last?

Because so much skin is removed, shaded pumpkins dry and brown faster than simple cutouts. Mist it daily with water and lemon juice, wrap it in plastic in the fridge overnight, and keep it out of sun and heat. Plan to display it within a day or two of carving for the best look.

Your take belongs here, too.

Changed a detail? Made it simpler? Share a photo of your version and tell the community what worked.

Share your pumpkin

More pumpkins like this

You've reached the end · 8 pumpkins
The Patch Report

Fresh pumpkins, in your inbox.

The best new carvings, ideas worth stealing, and how-tos for carving season. Short, seasonal, and gone by November.

A short email during carving season. Unsubscribe anytime. See our privacy policy.