Halloween Pumpkin Carving Contest · Starts October 1st · $500 in prizes
← Back to ideas
@ai_concepts
Aug 6, 2026
Ring-Necked Pheasant Etched Pumpkin DesignAI
0

Ring-Necked Pheasant Etched Pumpkin Design

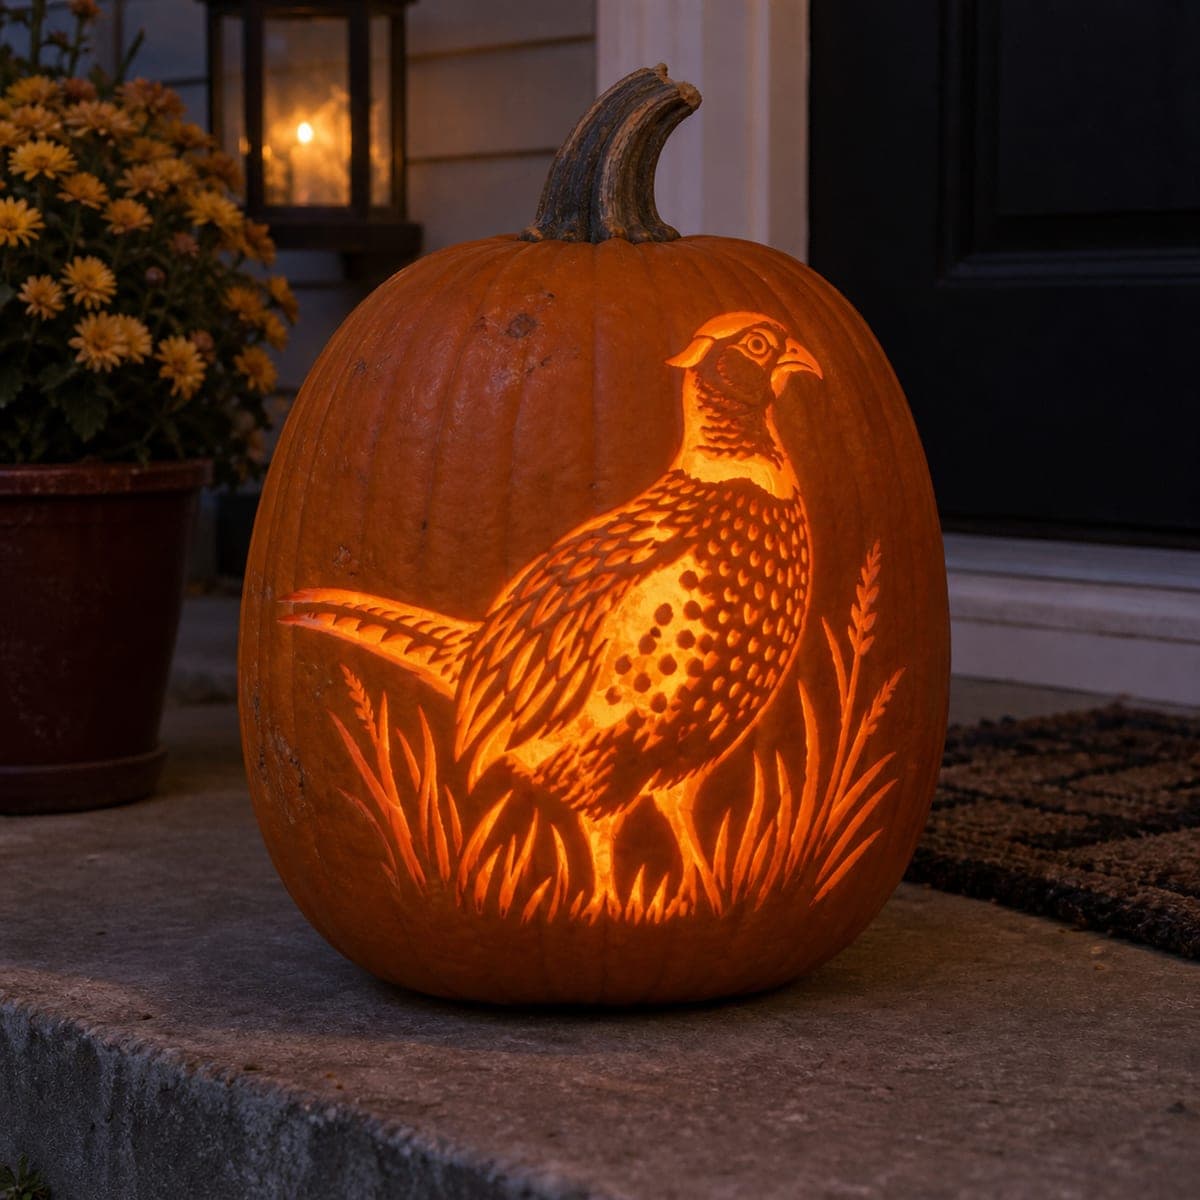
A ring-necked pheasant stands proudly on this fall pumpkin, its spotted plumage and long tail feathers etched into the rind with impressive line detail. The skin-peeling technique reveals the paler inner flesh while the orange skin forms the background, giving a natural two-tone look without any lighting needed. Trace the bird silhouette first with a ballpoint pen, then peel the skin using a clay-sculpting tool or potato peeler for the broad feather areas and a paring knife for fine lines. A great harvest-season pumpkin carving idea for bird hunters and nature lovers.

This is an AI-generated concept image: a realistic, carvable design idea rather than a photo of a finished carve. AI concepts are always labeled and sit out the leaderboard and the contest.
No ratings yet · Sign in to rate

Comments (0)

  • No comments yet — be the first.

Save without an account. Sign in to like or comment.

Our tips for carving a similar design

The whole design lives on the surface, so the trick is contrast: peel away the orange skin to expose the paler flesh underneath and let the untouched rind read as background. Plan the pheasant as a two-tone image with a solid body, a speckled breast, and long sweeping tail lines. Nothing needs to be cut through, which keeps the shape strong and forgiving.

Written by PumpkinCarvingIdeas.com, inspired by the image above. These are our suggestions, not instructions from the uploader. This approach to the AI concept has not been tested on a real pumpkin.

From pumpkin to porch

  1. Pick and prep the pumpkin

    Choose a large, round pumpkin with a smooth, blemish-free side wide enough to hold the bird from beak to tail tip. Wipe the surface clean and dry it well so your transfer lines show clearly. Since this design is etched rather than lit, you can leave the pumpkin uncut, or scoop a small access hole in the back later if you want to add an LED. Set it on a stable table at a comfortable working height.

  2. Transfer the pheasant outline

    Tape your stencil flat against the pumpkin, snipping the paper edges so it hugs the curve. Trace the full silhouette with a ballpoint pen, pressing hard enough to dent the skin, including the body, the pointed tail, the legs, and the head. Mark the boundaries of the speckled breast area and the layered feather sections too. Remove the paper and go over any faint lines so you have a clear map.

  3. Peel the broad feather areas

    Using a clay-sculpting loop tool or a potato peeler, gently scrape away only the thin orange skin inside the body, exposing the lighter flesh for a soft glow. Keep the peeling shallow and even so the whole bird reads as one bright tone. Work from the center of each shape outward and stop cleanly at your pen lines. Take your time here, since this is the largest area and sets the two-tone effect.

  4. Cut the fine feather and tail lines

    Switch to a small paring knife or a detail carving blade for the crisp lines in the wing, tail, and neck. Make shallow V-grooves so the flesh shows as thin bright strokes against the peeled body and darker background. Leave narrow ribs of skin between grooves so the feather rows stay distinct and the surface stays sturdy. Adults should handle all knife work, cutting slowly with the blade angled away from your holding hand.

  5. Add the speckled breast and details

    Dot the breast with the tip of your knife or a small round tool to create the pheasant's spotted plumage, spacing the marks to suggest volume. Carve the eye, beak, and legs last since they are small and delicate. Step back often to check that the head reads clearly and the tail keeps its long tapered flow. Clean up any ragged edges with a light second pass.

  6. Finish and photograph

    Brush away loose bits and wipe the etched areas with a damp cloth. Rub a thin coat of petroleum jelly into the peeled flesh to slow browning and keep the contrast crisp for a day or two. Set the pumpkin in bright, indirect daylight on a bench or porch to show off the natural two-tone look. If you added a back hole, tuck in a battery LED for a subtle evening glow through the thinnest lines.

Gather your supplies

Check things off as you get ready.

Work on a stable surface, keep your free hand out of the cutting path, and have an adult handle sharp tools.

Three levels of light

  • Leave intact

    The untouched orange rind around the bird stays dark and forms the background.

  • Peel & shade

    The pheasant's body and breast are skin-peeled to the pale flesh for a soft mid glow.

  • Cut through

    Only the thin V-grooves in the wing and tail feathers cut a bit deeper for the brightest fine lines.

Learn the carving basics

Before you start cutting

Do I need to light this pumpkin at all?

No. The design works purely on daylight contrast between the peeled flesh and the orange skin, so it looks complete unlit. If you want a nighttime version, scoop a small hole in the back and drop in an LED, which will let the thinnest carved lines glow faintly.

How deep should I peel for the feather areas?

Just deep enough to remove the orange skin and reach the lighter flesh, usually about an eighth of an inch. Going deeper wastes flesh and can make the tone uneven or too translucent. Keep the depth consistent across the whole body so the pheasant reads as one clean shape.

How do I keep the long tail from looking messy?

Draw the tail lines confidently before you carve, following the natural taper toward the tip. Cut each groove in one smooth motion and leave thin ribs of skin between them so the feather rows stay crisp. Working slowly from the body outward helps the strokes stay parallel and clean.

Your take belongs here, too.

Changed a detail? Made it simpler? Share a photo of your version and tell the community what worked.

Share your pumpkin

More pumpkins like this

You've reached the end · 8 pumpkins
The Patch Report

Fresh pumpkins, in your inbox.

The best new carvings, ideas worth stealing, and how-tos for carving season. Short, seasonal, and gone by November.

A short email during carving season. Unsubscribe anytime. See our privacy policy.