Halloween Pumpkin Carving Contest · Starts October 1st · $500 in prizes
← Back to ideas
@ai_concepts
Sep 14, 2026
Rocket Flying Through Stars PumpkinAI
0

Rocket Flying Through Stars Pumpkin

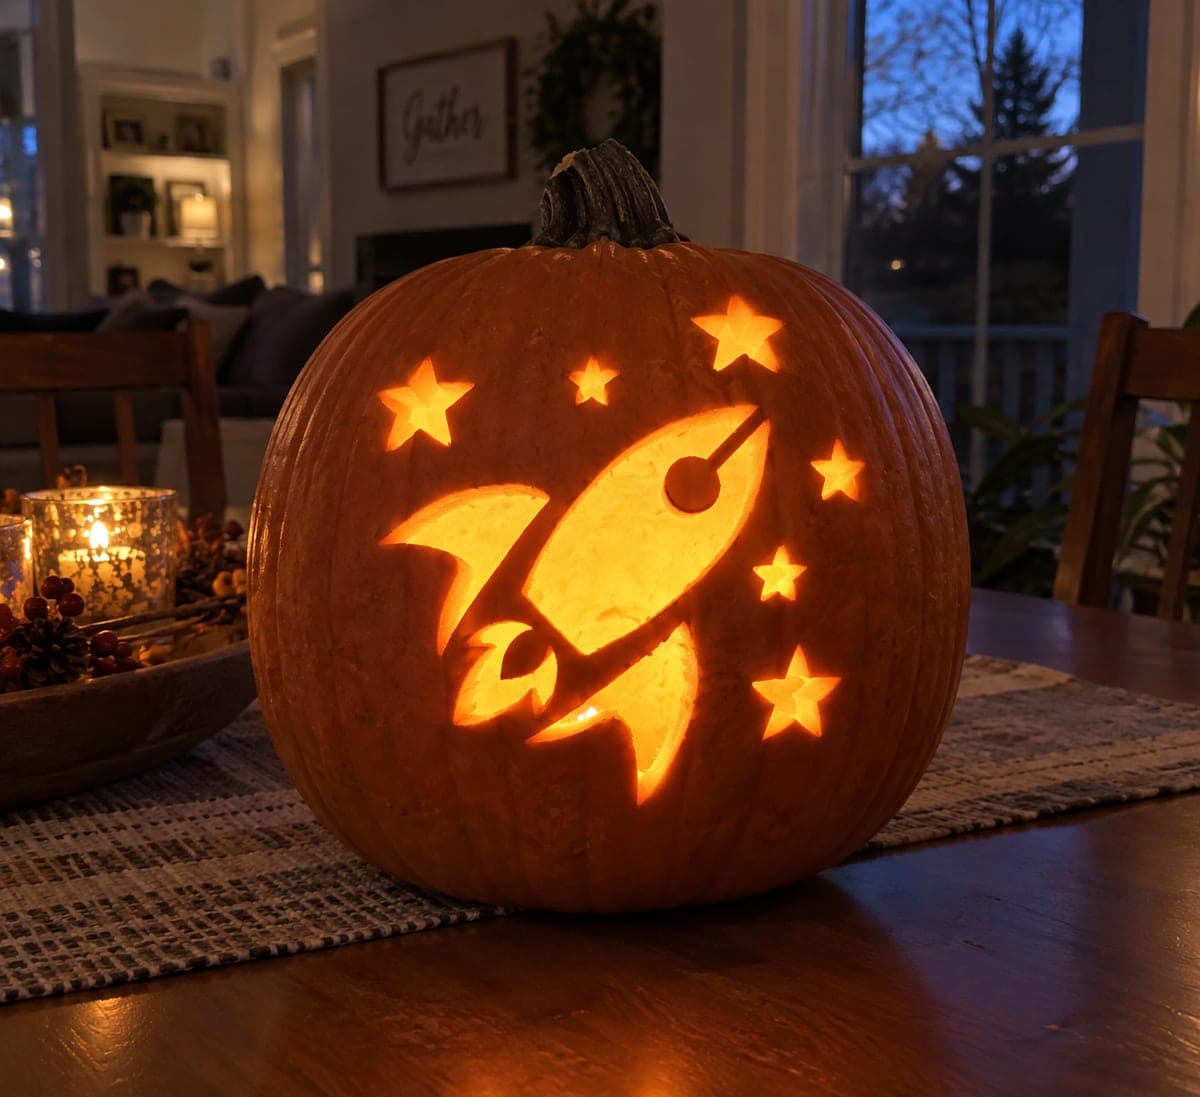
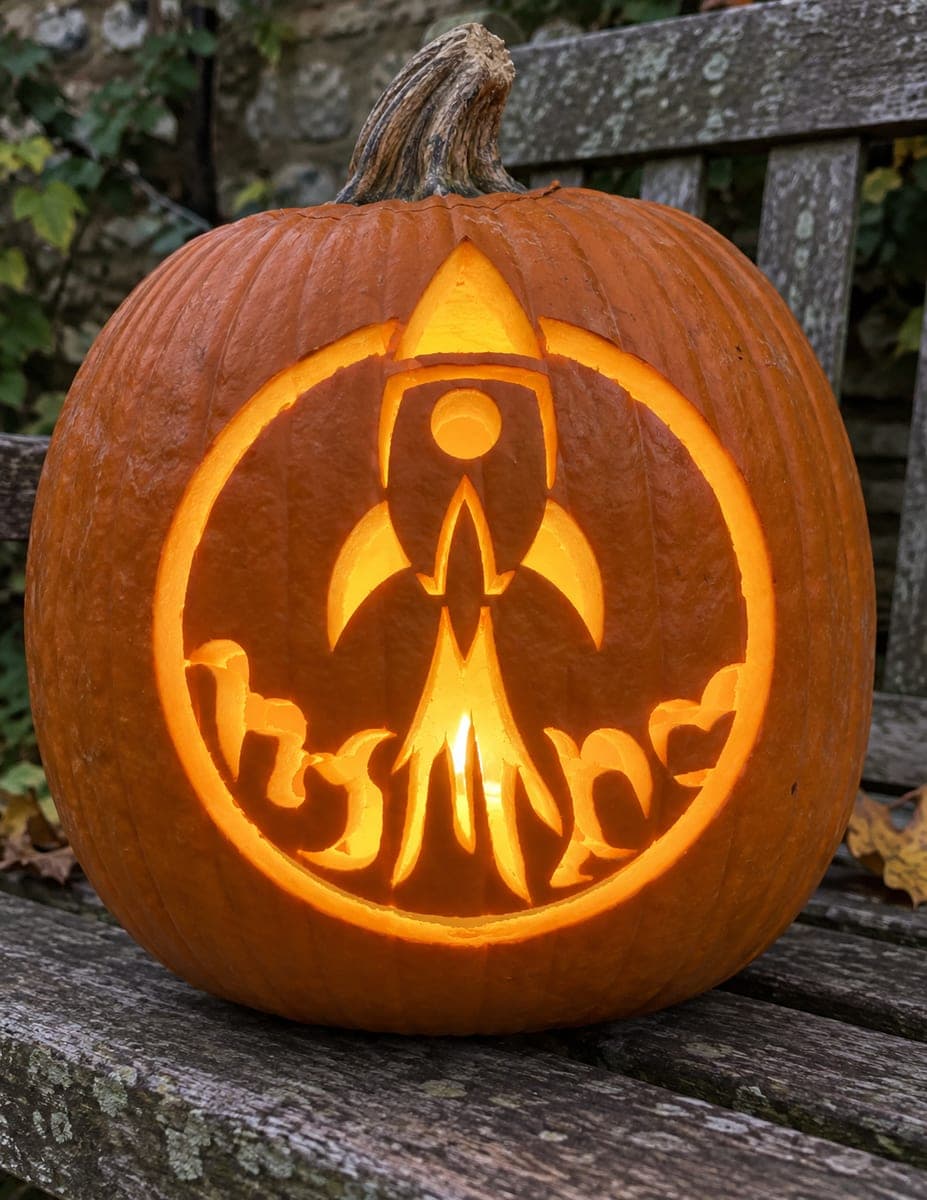
A retro rocket ship angles diagonally upward to the right with swept-back fins and a flame trail below, surrounded by eight five-pointed stars of varying sizes scattered across the pumpkin face, all cut through as glowing openings in this space-themed pumpkin carving idea. The stars range from small single-point accents near the edges to larger multi-point shapes that balance the composition. Carve all the stars before tackling the rocket so the wall is not yet weakened by the large central cutout when you are punching out the many star points.

This is an AI-generated concept image: a realistic, carvable design idea rather than a photo of a finished carve. AI concepts are always labeled and sit out the leaderboard and the contest.

No ratings yet · Sign in to rate
Comments (0)

  • No comments yet — be the first.

Save without an account. Sign in to like or comment.

Our tips for carving a similar design

The core trick here is a diagonal rocket built almost entirely from clean cutouts, framed by eight stars of different sizes to fill the empty space around it. Cut every star first while the pumpkin wall is still strong, then open the larger rocket body last so the face does not flex while you work. Keep a couple of thin bridges in the rocket to hold the nose cone, window, and fins in place.

Written by PumpkinCarvingIdeas.com, inspired by the image above. These are our suggestions, not instructions from the uploader. This approach to the AI concept has not been tested on a real pumpkin.

From pumpkin to porch

  1. Pick a tall pumpkin and open a lid

    Choose a pumpkin with a broad, fairly flat front so the rocket and stars sit in one clean plane. An adult should cut a lid at an angle around the stem so it drops back in without falling through, or cut a hatch in the back for easier LED access. Scoop the insides and scrape the front wall down to about one inch thick. A thinner wall makes both the stars and the rocket much easier to punch through cleanly.

  2. Transfer the stencil

    Print the rocket and eight stars at a size that fills the face, then tape the paper snug and smooth out wrinkles. Poke closely spaced dots along every line with a pin or a poker tool, paying extra attention to the five sharp points on each star. Peel the paper and darken the dotted outlines with a washable marker so you can read them in low light. Take a photo before you cut so you have a reference if a line rubs away.

  3. Cut all the stars first

    Start with the smallest single-point accent stars near the edges, then work up to the larger multi-point shapes. Use a fine carving saw and gentle sawing motion, entering at each inner corner and cutting toward the points so the tips stay crisp. Push the pieces out from behind with a fingertip once each star is fully outlined. Doing every star now keeps the wall strong before you remove the big central shape.

  4. Outline and open the rocket

    Saw the rocket body, nose cone, and swept-back fins as one connected shape, cutting slowly around the tight fin angles. Leave a small uncut bridge where the round window meets the body so the window disc does not fall out, or cut the window as its own small opening. Cut the flame trail below as a separate shape so a thin strip of skin separates it from the rocket base. Save the largest openings for last and support the wall with your free hand as you finish.

  5. Clean the edges and add the antenna

    Go back over every cut and shave the inside edges at a slight bevel angle so more light spills through. Trim any ragged star points with the tip of your knife for sharp, even shapes. The little antenna ball at the nose is fragile, so keep it as a small round cutout rather than a thin projecting piece. Wipe away leftover marker with a damp paper towel.

  6. Light it and photograph

    Set one or two battery LED tea lights or a small puck light inside, never a candle, since the many openings pull in air. Warm white light gives the cozy orange glow that suits a space scene. Rub a little petroleum jelly on the cut edges to slow drying and keep the star points from curling. Photograph in a dim room so the stars and rocket read as bright shapes against the dark pumpkin.

Gather your supplies

Check things off as you get ready.

Work on a stable surface, keep your free hand out of the cutting path, and have an adult handle sharp tools.

Three levels of light

  • Leave intact

    The wide pumpkin face around the design stays untouched and dark, giving the stars and rocket a clean night-sky backdrop.

  • Peel & shade

    Optional skin-peeling on a soft haze around the flame trail can add a dim orange glow like engine smoke without cutting through.

  • Cut through

    The rocket body, fins, flame, window, and all eight stars are cut fully through for the brightest light.

Learn the carving basics

Before you start cutting

How do I keep the star points from tearing?

Cut each star with a fine saw and enter at the inner corners, then draw the blade out toward each point rather than pushing in from the tip. Keep the wall around one inch thick so the points are supported as you cut. Push the piece out gently from behind once the whole star is outlined.

Won't the window and nose cone fall out?

Leave a thin uncut bridge of skin where the round window touches the rocket body so the disc stays anchored, or carve the window as its own small opening instead of removing a floating circle. Handle the nose antenna as a small round cutout, not a thin sticking-out piece, so nothing snaps off.

This is an AI concept, so can a real pumpkin look like this?

Yes, the design works on a real pumpkin as long as you cut the stars before the large rocket so the wall stays firm. Keep the antenna ball and fin tips slightly chunkier than they might appear in the image, since very thin projections break easily. Support the face with your free hand when opening the big central shape.

Your take belongs here, too.

Changed a detail? Made it simpler? Share a photo of your version and tell the community what worked.

Share your pumpkin

More pumpkins like this

You've reached the end · 8 pumpkins
The Patch Report

Fresh pumpkins, in your inbox.

The best new carvings, ideas worth stealing, and how-tos for carving season. Short, seasonal, and gone by November.

A short email during carving season. Unsubscribe anytime. See our privacy policy.