Halloween Pumpkin Carving Contest · Starts October 1st · $500 in prizes
← Back to ideas
@ai_concepts
Sep 14, 2026
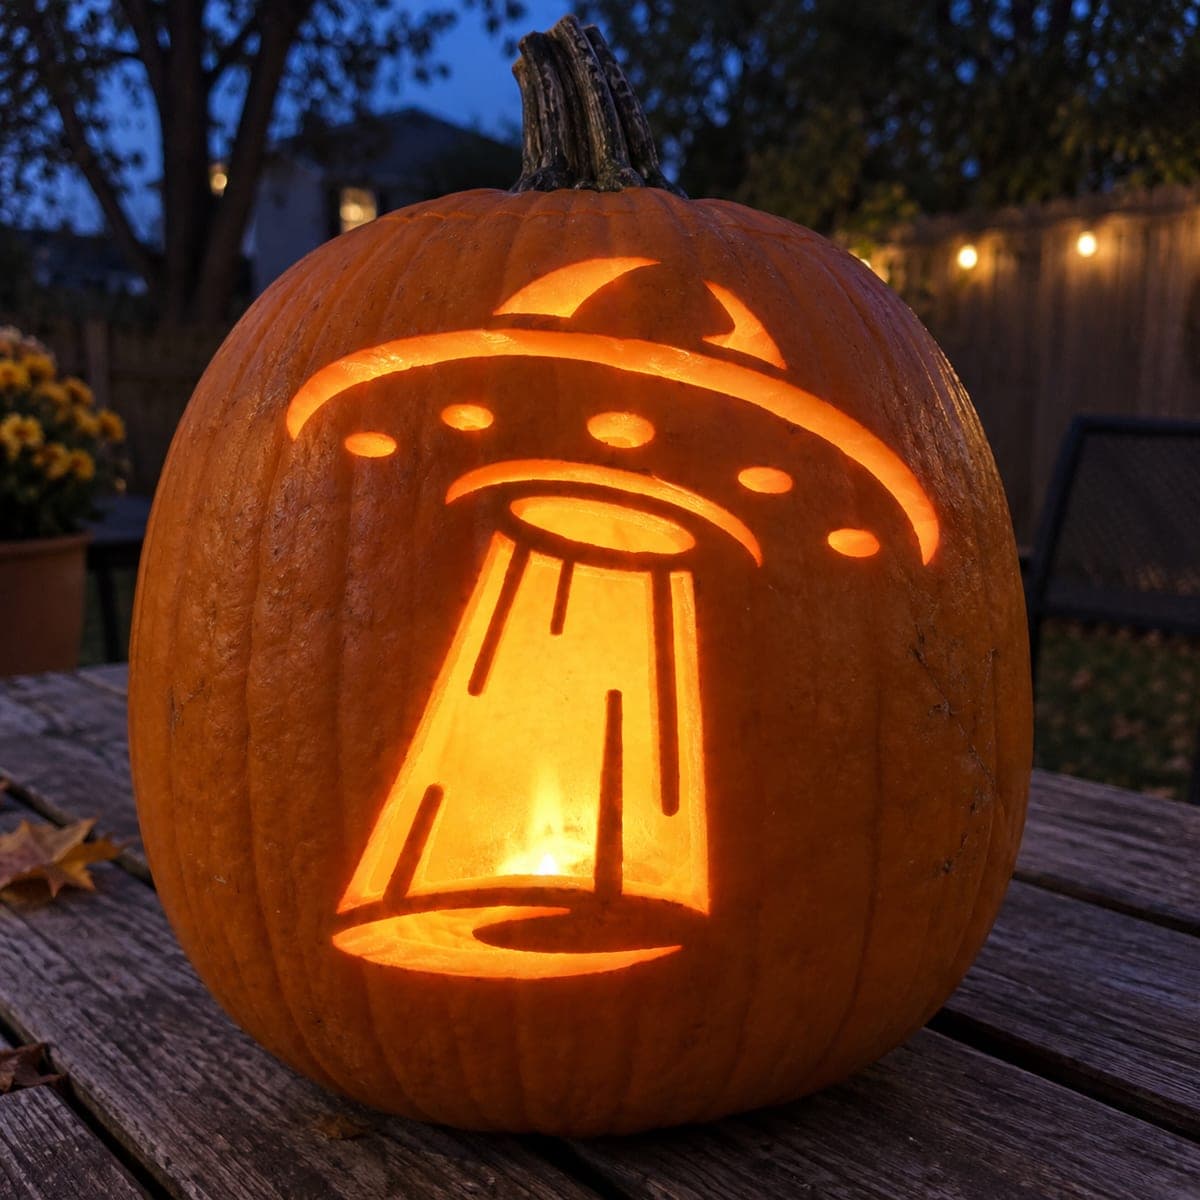
Striped Flying Saucer PumpkinAI
0

Striped Flying Saucer Pumpkin

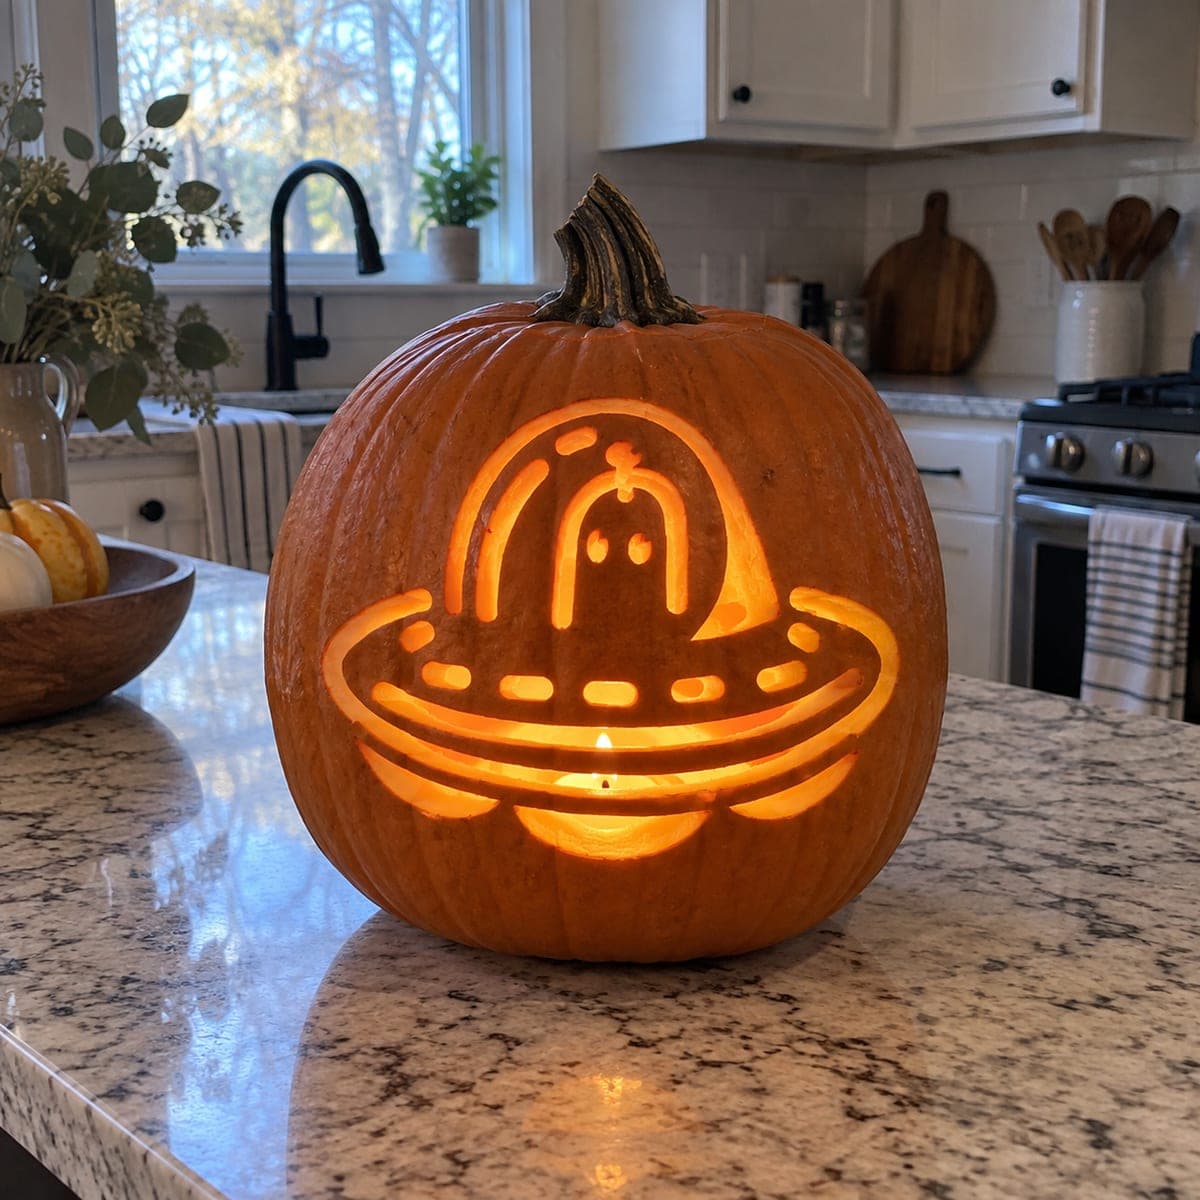
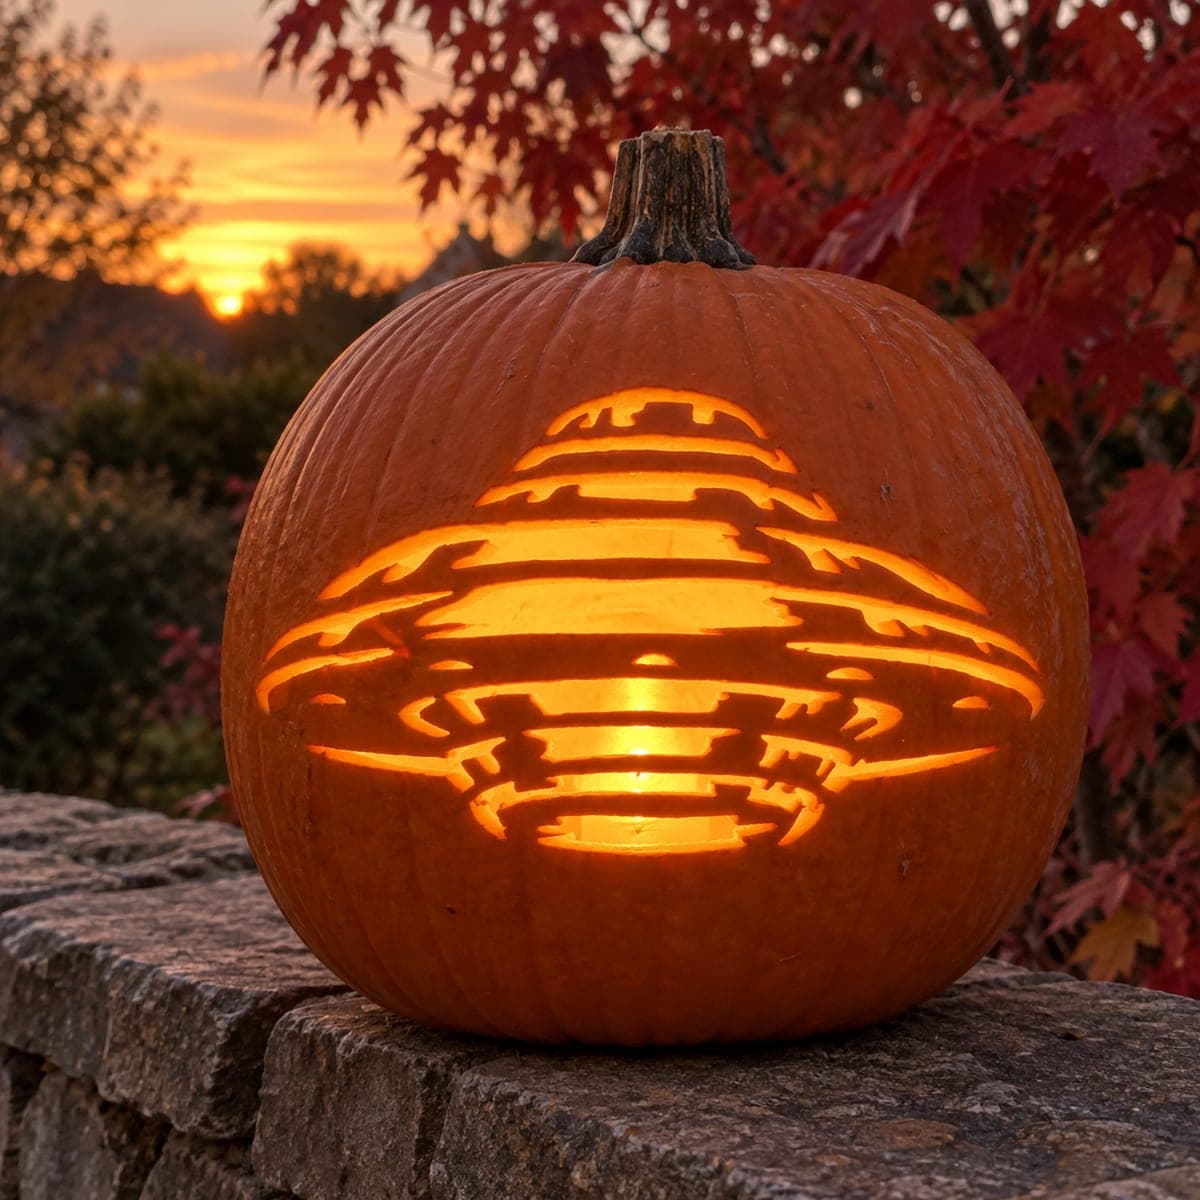
A flying saucer rendered entirely in horizontal stacked stripes glows from the pumpkin face, with a domed top, a wide middle band, and a narrow bottom rim all cut as separate glowing layers connected by thin rind bridges. Each stripe is pierced through so the candle glow unifies them into one luminous saucer shape from any distance. Carve the narrowest stripe on the bottom rim last, since it is the most likely to crack if the surrounding wall is disturbed first. The warm sunset-colored glow of a real candle suits this UFO pumpkin carving idea better than a cool white LED.

This is an AI-generated concept image: a realistic, carvable design idea rather than a photo of a finished carve. AI concepts are always labeled and sit out the leaderboard and the contest.
No ratings yet · Sign in to rate

Comments (0)

  • No comments yet — be the first.

Save without an account. Sign in to like or comment.

Our tips for carving a similar design

The whole trick here is building one saucer shape entirely from stacked horizontal stripes, each cut clean through so the light merges them into a single hovering craft. You plan the design as a series of parallel bands, widest in the middle and narrowing toward the domed top and the thin bottom rim, all held together by slim uncut rind bridges. Carve from the safest stripes to the most fragile so the wall stays supported the whole time.

Written by PumpkinCarvingIdeas.com, inspired by the image above. These are our suggestions, not instructions from the uploader. This approach to the AI concept has not been tested on a real pumpkin.

From pumpkin to porch

  1. Plan and transfer the striped layout

    Since this is an AI concept, treat it as a look to recreate rather than a real pumpkin. Print or draw a saucer made of horizontal bands: a small domed top, a wide central band, and a narrow bottom rim. Tape the pattern flat against the side of the pumpkin and poke the outline of each stripe with a pin or transfer tool. Mark the thin rind bridges between stripes clearly so you remember to leave them intact.

  2. Prep the pumpkin

    Have an adult cut a lid or, better, a bottom access hole so the shell stays strong across the face. Scoop out the seeds and pulp, then thin the carving wall from inside to about one inch where the stripes will go. A thinner wall cuts more cleanly and lets more light through. Blot the inside dry before you start detailing.

  3. Cut the domed top stripes first

    Start at the top of the saucer where the stripes are shorter and the surrounding shell is most supported. Use a small saw or detail blade and cut each stripe fully through, following your pin marks. Leave the marked rind bridges between bands so the design does not sag. Work slowly and let the blade do the work rather than forcing it.

  4. Open the wide middle band

    Move to the broad central stripes that give the saucer its width. These are the largest openings, so cut them after the top is done to keep the shell rigid as long as possible. Keep each bridge between stripes at least a quarter inch wide so nothing tears. Support the cut piece with your free hand as it releases.

  5. Save the narrow bottom rim for last

    The thin bottom stripe is the most fragile and cracks easily if the wall around it is already open. Carve it only after every other stripe is finished. Make gentle, shallow passes and ease the sliver of pumpkin out carefully. If a bridge feels weak, leave a little extra rind rather than risking a break.

  6. Light it and photograph at dusk

    Drop in a warm-toned LED, ideally one with a flicker or amber glow to echo a candle without the fire risk. A warm light suits this saucer far better than cool white, which flattens the layers. Set the pumpkin at dusk against a dark background so the stripes read as one hovering craft. Snap your photo while there is still a little color in the sky.

Gather your supplies

Check things off as you get ready.

Work on a stable surface, keep your free hand out of the cutting path, and have an adult handle sharp tools.

Three levels of light

  • Leave intact

    The untouched orange skin around and between the stripes stays dark, framing the saucer.

  • Peel & shade

    Optional skin-peeled halos just outside the outer stripes can add a faint dim glow suggesting a beam.

  • Cut through

    Every stripe of the saucer is cut fully through for the brightest, unified light.

Learn the carving basics

Before you start cutting

How do I keep the thin stripes from breaking?

Leave clear rind bridges between each band, at least a quarter inch wide, and never cut two adjacent stripes without keeping the bridge between them. Carve from the top down and save the narrow bottom rim for last, since it is the weakest point. Thinning the wall evenly also helps the cuts release without cracking.

What order should I cut the stripes in?

Start with the short domed top stripes while the shell is fully intact, then open the wide middle band, and finish with the fragile bottom rim. This keeps the surrounding wall supported for as long as possible. Cutting the biggest openings before the smallest ones would leave the thin rim likely to snap.

Can I use a candle like the caption suggests?

We recommend a warm-toned or flicker LED instead of an open flame, since the many cutouts and thin bridges are close together and a real candle adds heat and fire risk. You can still get that cozy sunset glow by choosing an amber LED rather than cool white. It gives the same unified saucer look safely.

Your take belongs here, too.

Changed a detail? Made it simpler? Share a photo of your version and tell the community what worked.

Share your pumpkin

More pumpkins like this

You've reached the end · 8 pumpkins
The Patch Report

Fresh pumpkins, in your inbox.

The best new carvings, ideas worth stealing, and how-tos for carving season. Short, seasonal, and gone by November.

A short email during carving season. Unsubscribe anytime. See our privacy policy.