Halloween Pumpkin Carving Contest · Starts October 1st · $500 in prizes
← Back to ideas
@ai_concepts
Sep 14, 2026
Seated Winged Dragon PumpkinAI
0

Seated Winged Dragon Pumpkin

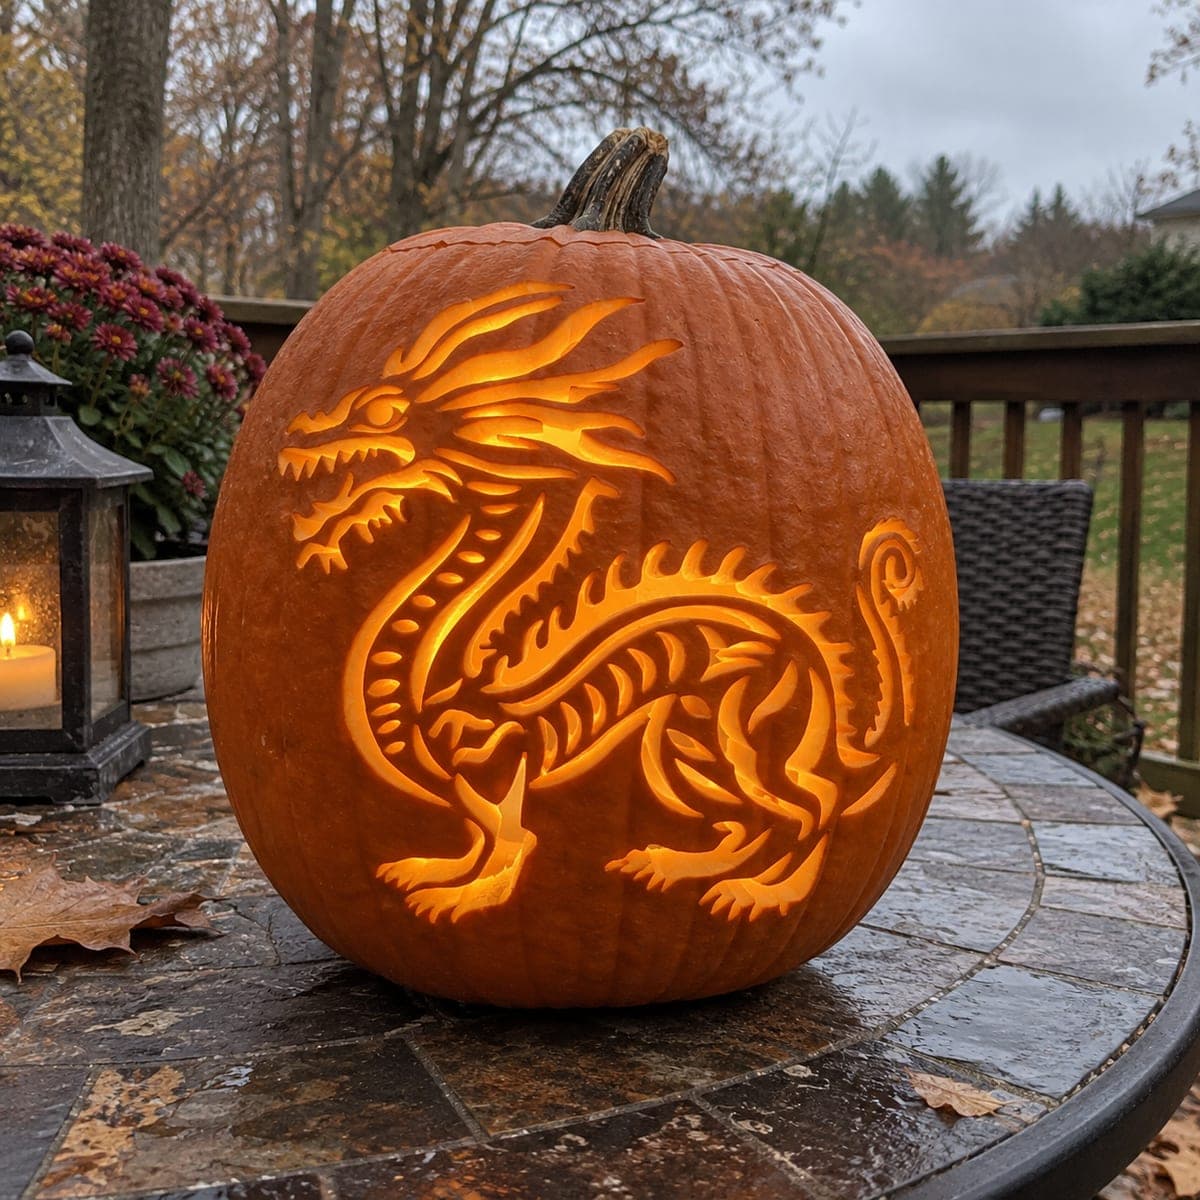
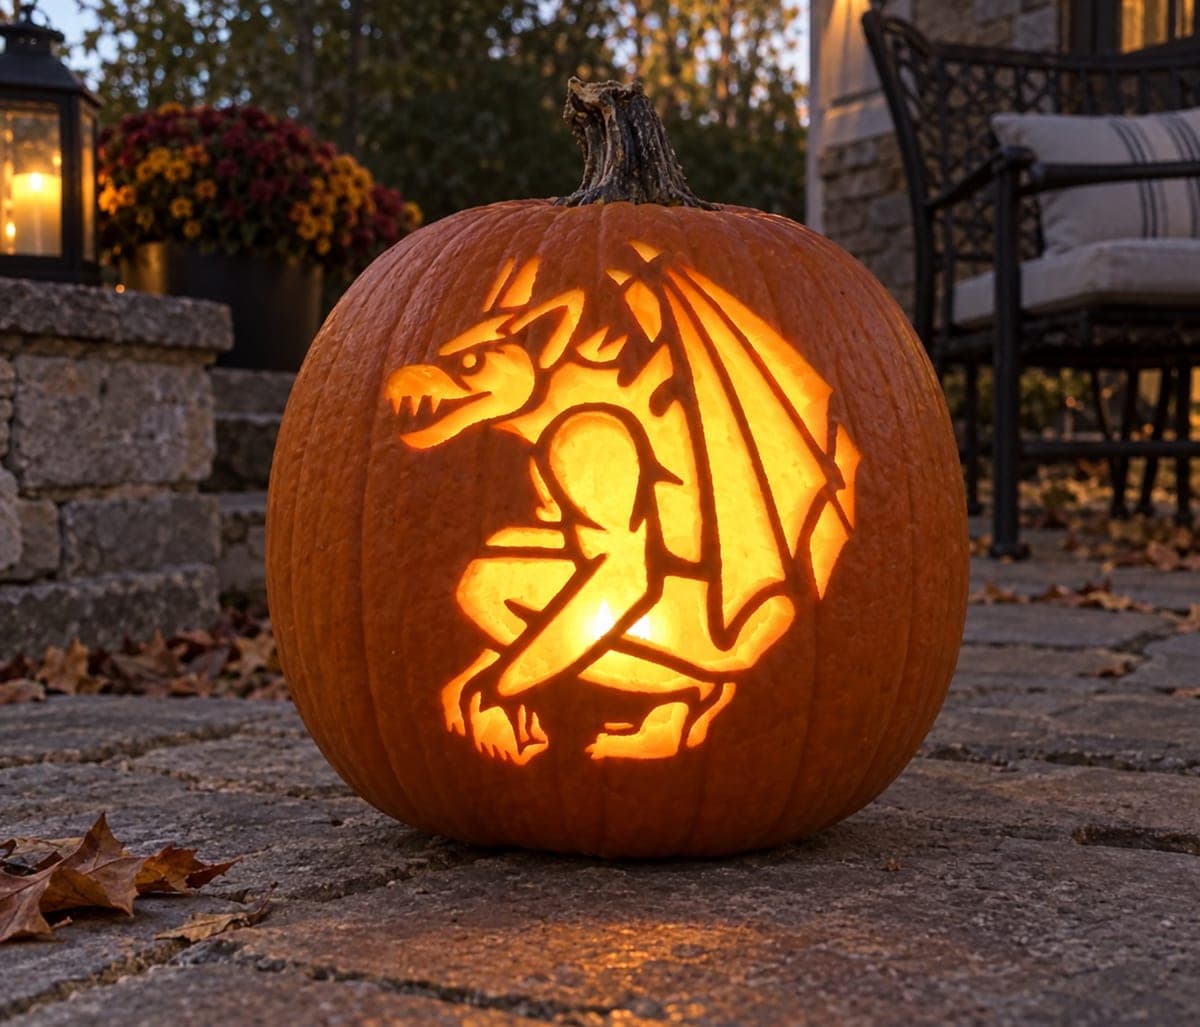
A crouching dragon with a detailed head, clawed feet, and a large arched wing behind its body is pierced through the pumpkin as a complex cutout that glows richly when lit from inside. The wing membranes, body outline, and facial detail are all separate cut sections held together by dark skin bridges, making this one of the more involved dragon pumpkin carving ideas in terms of planning. Begin with the small facial features and claw tips before opening the large wing panels, since removing the wing area early would leave the pumpkin wall too flexible to support detail work.

This is an AI-generated concept image: a realistic, carvable design idea rather than a photo of a finished carve. AI concepts are always labeled and sit out the leaderboard and the contest.
No ratings yet · Sign in to rate

Comments (0)

  • No comments yet — be the first.

Save without an account. Sign in to like or comment.

Our tips for carving a similar design

This design's core trick is holding a busy dragon shape together with thin dark skin bridges while opening large wing panels for a rich glow. The plan is to carve small before big: lock in the head, teeth, and claw tips first, then open the wing membranes and body gaps last so the pumpkin wall stays firm throughout. Because this is a concept image, treat it as a target to build toward rather than a finished pumpkin to copy exactly.

Written by PumpkinCarvingIdeas.com, inspired by the image above. These are our suggestions, not instructions from the uploader. This approach to the AI concept has not been tested on a real pumpkin.

From pumpkin to porch

  1. Pick a tall pumpkin and plan the layout

    Choose a large, evenly round pumpkin with a smooth front panel wide enough for the seated dragon and its arched wing. Wipe the surface clean and dry it. Print or draw your stencil sized to fit, and mark where the head, wing, body outline, and clawed feet will sit. Confirm the wing has enough room to arch behind the body without running off the shoulder of the pumpkin.

  2. Open the lid and clean out the shell

    Have an adult cut a lid from the bottom or the back rather than the top, so the stem stays intact and the base sits flat. Scoop the seeds and scrape the inside of the front wall down to about one inch thick. A thinner, even wall is easier to pierce and lets more light through. Save the pulp scraping for last touch-ups if a bridge feels too thick.

  3. Transfer the pattern and pinprick the lines

    Tape the stencil flat against the front and poke closely spaced holes along every line with a pin or awl. Pay special attention to the tiny facial details and the narrow membrane divisions in the wing. Peel the paper and connect the dots lightly with a marker so you can see the full dragon before any cutting. Mark clearly which sections stay as skin bridges so you do not cut them by accident.

  4. Carve the small details first

    Start with the facial features, the jagged teeth, the eye, and the sharp claw tips using a fine carving saw or a detail knife. Cut slowly and keep each stroke short around the fangs and toes so the thin points stay attached. Leave a bit of skin between neighboring teeth so none of them break loose. Finishing these delicate spots while the pumpkin wall is still solid gives you the cleanest edges.

  5. Open the wing panels and body gaps last

    Once the small work is done, cut the large wing membranes and the open spaces around the body. Remove one panel at a time and leave the dark skin bridges between them intact, since those bridges define the wing ribs and the body outline. Cutting these big openings last keeps the shell rigid while you handle the fussy areas. If a bridge feels weak, widen it slightly rather than risk a tear.

  6. Light it and take your photo

    Drop in a battery LED light or two, never a candle, so the interior glows without heat near the thin walls. Set the pumpkin on a flat surface at dusk and check that the wing panels read bright while the bridges stay dark. Nudge the light toward the front to push glow through the deepest cutouts. Snap your photo while the sky is still a little blue for the best contrast.

Gather your supplies

Check things off as you get ready.

Work on a stable surface, keep your free hand out of the cutting path, and have an adult handle sharp tools.

Three levels of light

  • Leave intact

    The skin bridges forming the wing ribs, body outline, and facial lines stay as untouched dark skin.

  • Peel & shade

    Shade the wing membrane surfaces or the dragon's chest by peeling the skin for a dim orange glow if you want softer areas.

  • Cut through

    The open wing panels and the gaps around the body are cut fully through for the brightest light.

Learn the carving basics

Before you start cutting

Why should I cut the wing openings last?

The large wing panels remove a lot of material and make the pumpkin wall flexible. If you open them early, the shell flexes while you try to carve the fine face and claws, which leads to slips and cracks. Finishing the small details first keeps everything rigid and precise.

How do I keep the fangs and claw tips from snapping off?

Use short, controlled strokes with a fine blade and leave a little skin bridge connecting the tip to the surrounding shape. Do not fully isolate a thin point unless it is well supported on both ends. Working slowly on these areas while the pumpkin is still firm gives the best results.

Since this is a concept image, can a real pumpkin look this detailed?

Yes, with careful planning and a firm, thick-walled pumpkin. The key is treating the many separate sections as cutouts held by dark skin bridges rather than trying to remove everything. Keep the bridges a bit wider than the picture suggests so the wing ribs and body lines stay strong.

Your take belongs here, too.

Changed a detail? Made it simpler? Share a photo of your version and tell the community what worked.

Share your pumpkin

More pumpkins like this

You've reached the end · 8 pumpkins
The Patch Report

Fresh pumpkins, in your inbox.

The best new carvings, ideas worth stealing, and how-tos for carving season. Short, seasonal, and gone by November.

A short email during carving season. Unsubscribe anytime. See our privacy policy.