Halloween Pumpkin Carving Contest · Starts October 1st · $500 in prizes
← Back to ideas
@ai_concepts
Jul 22, 2026
Sea Turtle Swimming Through Seaweed Pumpkin SceneAI
0

Sea Turtle Swimming Through Seaweed Pumpkin Scene

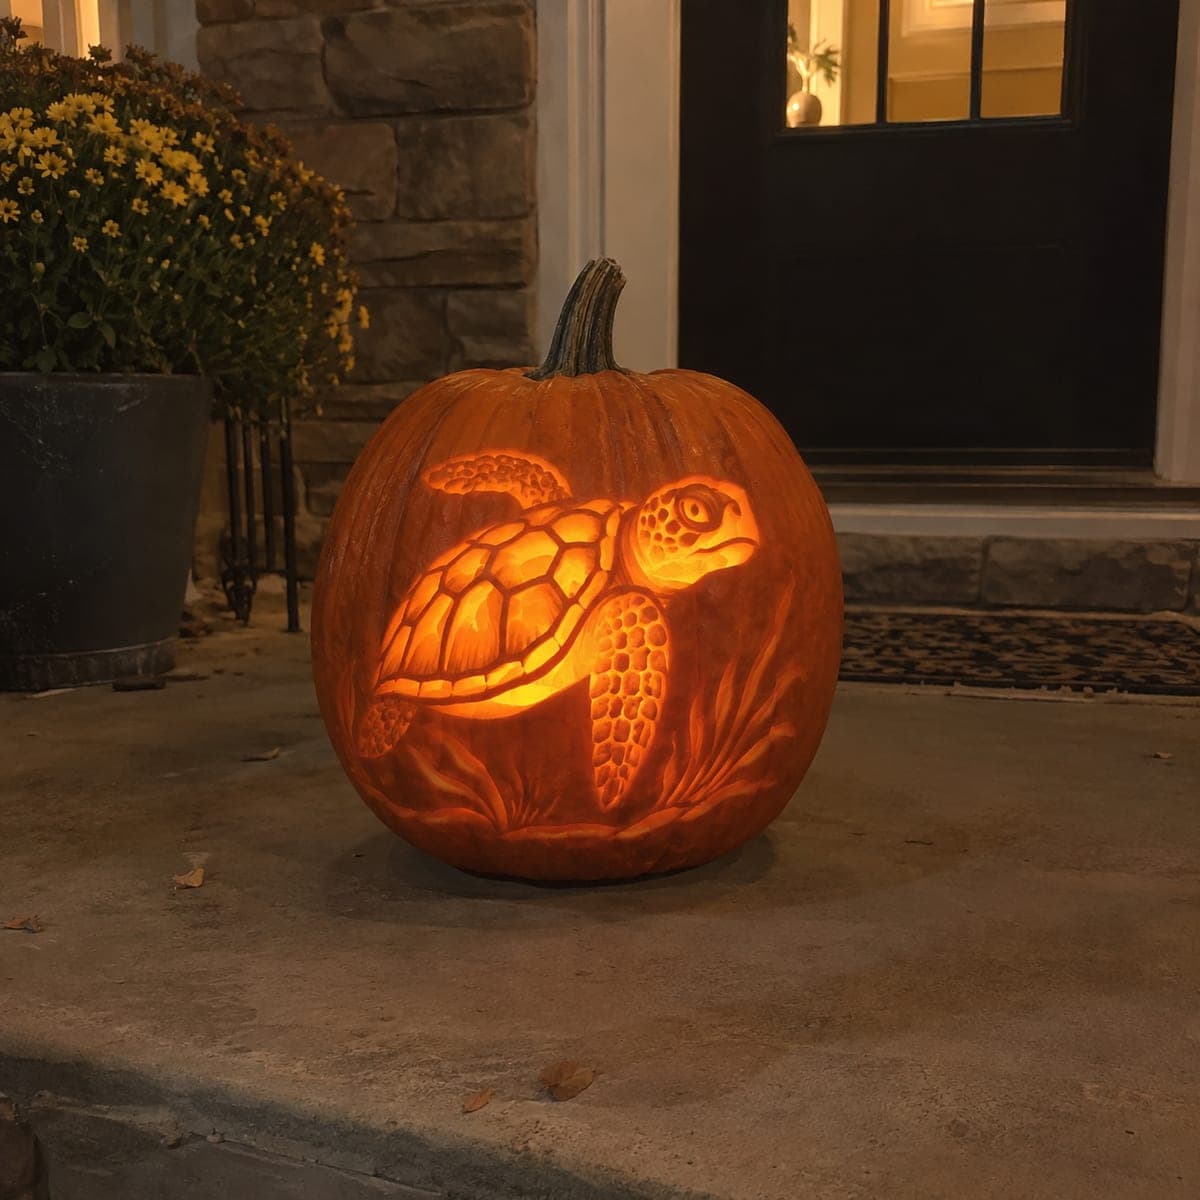
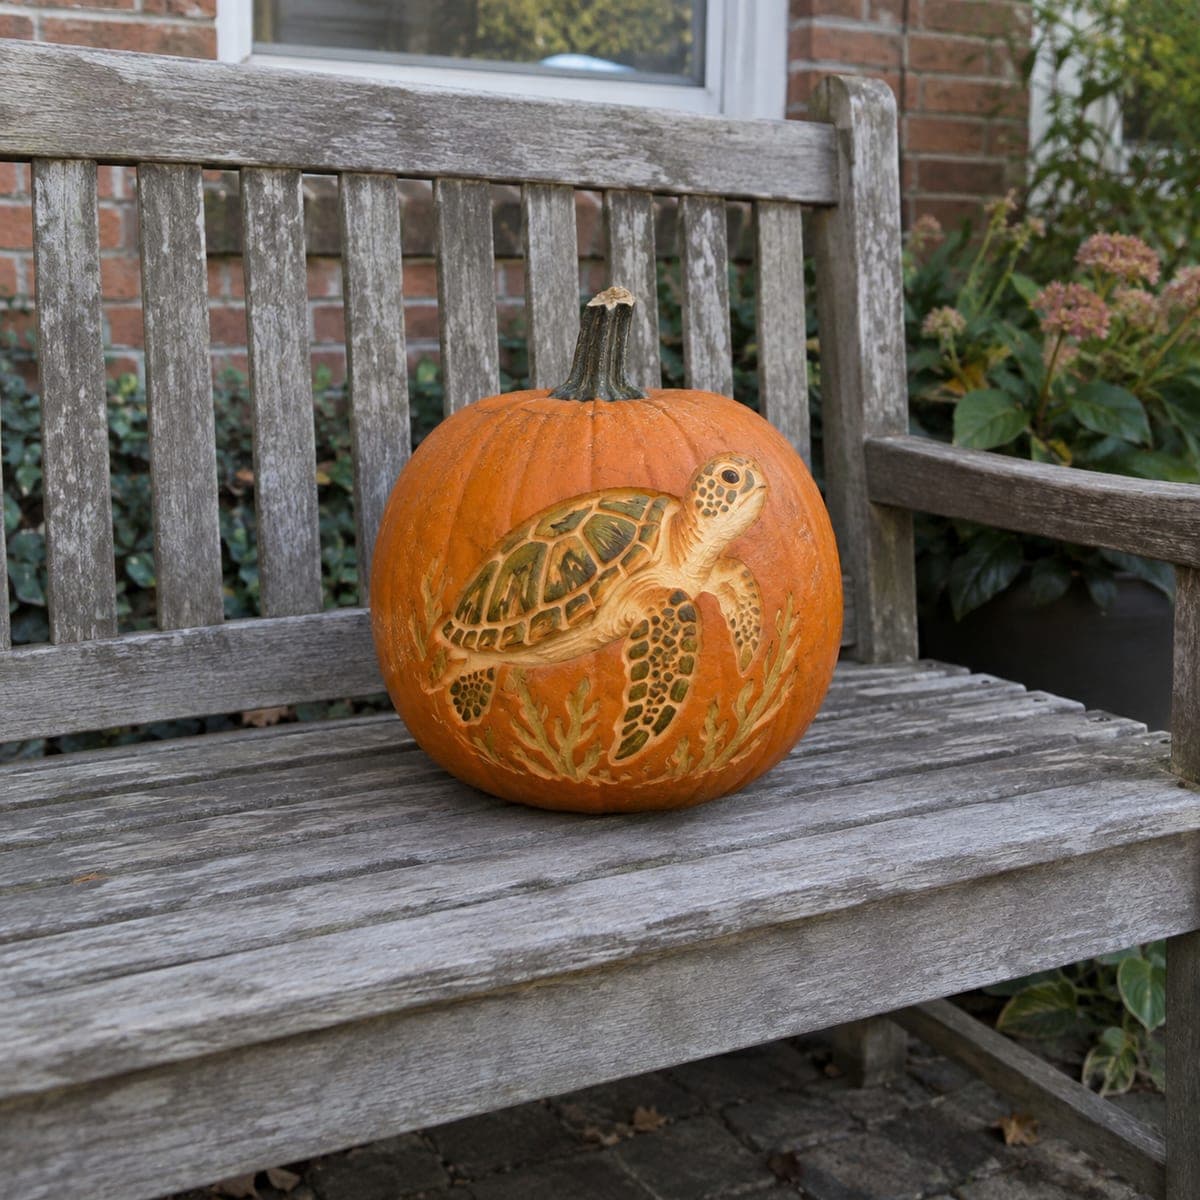
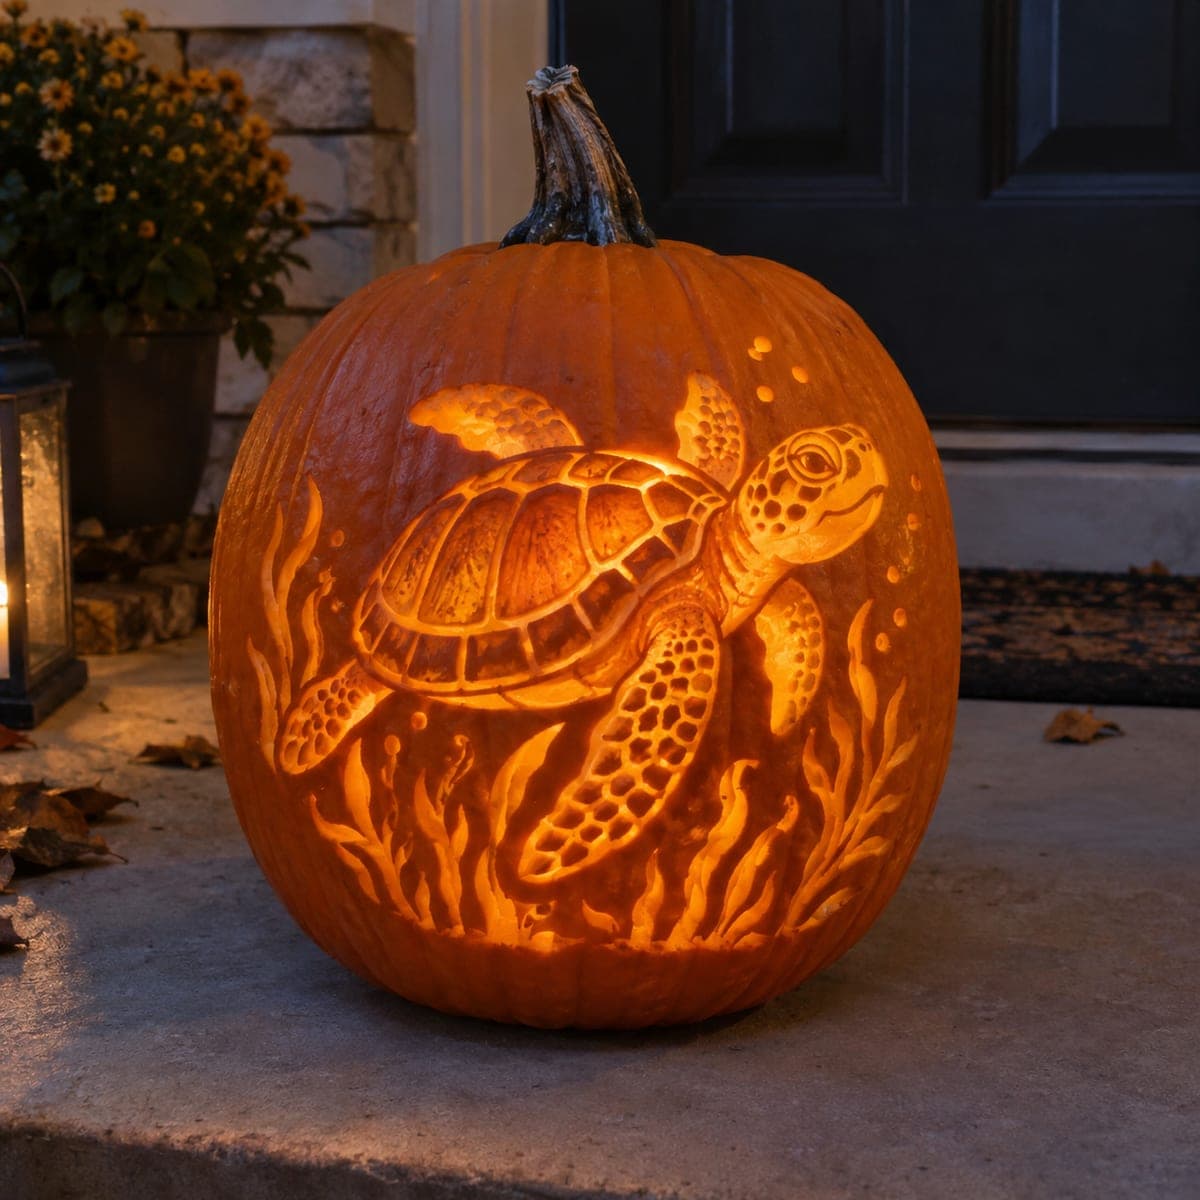
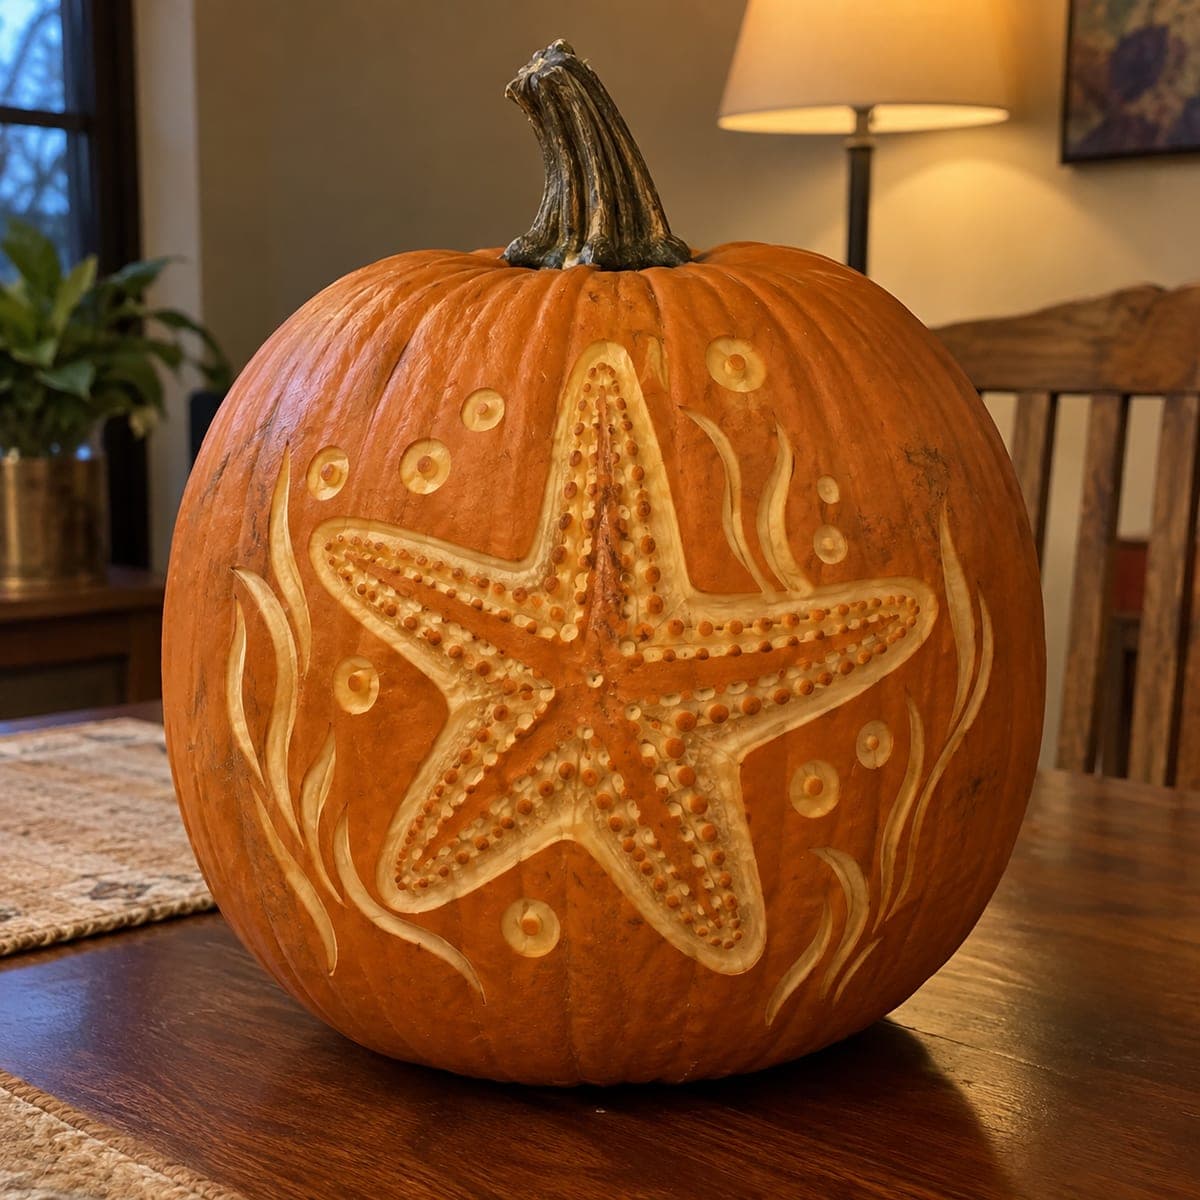
A sea turtle glides through swaying kelp in this glowing underwater scene, with every shell plate, flipper scale, and air bubble etched at a different depth. It is an ambitious full-wrap composition, so plan on several hours and a set of loop tools. Carve the turtle first while the wall is sturdy, then thin the seaweed and background last. The layered glow looks best with a strong cool-white light inside.

This is an AI-generated concept image: a realistic, carvable design idea rather than a photo of a finished carve. AI concepts are always labeled and sit out the leaderboard and the contest.

No ratings yet · Sign in to rate
Comments (0)

  • No comments yet — be the first.

Save without an account. Sign in to like or comment.

Our tips for carving a similar design

The core trick here is depth carving: shaving the pumpkin skin to several thicknesses so the shell, flippers, and kelp each catch a different amount of light. Carve the turtle body first while the wall is still thick and stable, then thin the swaying seaweed and background afterward. A strong cool-white LED behind it all pulls the layers together into one soft, watery glow.

Written by PumpkinCarvingIdeas.com, inspired by the image above. These are our suggestions, not instructions from the uploader. This approach to the AI concept has not been tested on a real pumpkin.

From pumpkin to porch

  1. Transfer and plan your depths

    Print the sea turtle stencil sized to wrap the front face of your pumpkin, then tape it on and poke the outlines with a transfer tool or pushpin. Before you cut anything, mark which zones stay dark, which get peeled, and which cut all the way through. This design has a lot of fine scale work, so a clear map keeps you from over-cutting. Keep the stencil handy to check the pattern as you go.

  2. Open the pumpkin and thin the wall

    Have an adult cut a lid from the bottom or back, not the top, so the stem stays intact and the front stays smooth. Scoop out the pulp and scrape the inside wall behind the turtle down to about one inch thick. A thinner wall makes shading far easier and lets the light travel. Work evenly so no spot gets fragile before you carve the detail.

  3. Carve the turtle shell and body first

    Start with the raised subject while the surrounding wall is still full and supportive. Use a loop tool to peel the skin off the shell plates, leaving the ridge lines between plates slightly thicker so they read as dark seams. Shade the flippers by peeling deeper where you want more glow and leaving thin skin where you want shadow. Keep the eye and mouth details shallow and controlled so the face stays friendly.

  4. Shade the flipper scales and shell texture

    Each scale on the flippers is a small peeled dimple, so take your time with a fine loop or detail gouge. Vary your pressure to get the gradient from bright center to darker edges. Leave narrow bridges of skin between scales so the pattern holds together and does not turn into one big hole. Step back often and check the effect with a light inside.

  5. Thin the seaweed and background last

    Now peel the kelp fronds so they glow a soft mid-orange against the darker water. Cut fully through only a few small accent spots, like the air bubbles and the brightest gaps, to give sharp points of light. Save the largest openings for the very end so the wall stays rigid while you do the delicate work. Cut those big holes gently to avoid cracking a tired wall.

  6. Light it and photograph

    Drop in a strong cool-white LED puck or a battery light stick, never a candle, since the cool tone reads as underwater. Set it low and slightly behind the turtle so the shell catches the most light. Take your photo in near-dark on a porch or step so the layered glow shows off. A light mist of lemon water on the cut surfaces helps it stay fresh for the shoot.

Gather your supplies

Check things off as you get ready.

Work on a stable surface, keep your free hand out of the cutting path, and have an adult handle sharp tools.

Three levels of light

  • Leave intact

    The water background and the dark seams between shell plates stay untouched and dark.

  • Peel & shade

    The shell plates, flipper scales, and kelp fronds get skin-peeled for a soft mid glow.

  • Cut through

    A few air bubbles and the brightest highlight gaps get cut through for full light.

Learn the carving basics

Before you start cutting

This is shown as a concept image. Can a real pumpkin actually hold this much detail?

Yes, with care. The key is thinning the wall to about an inch and leaving small skin bridges between the flipper scales so the pattern does not collapse. Carve the shaded turtle first while the pumpkin is sturdy and save any full cutouts for last.

Do I need to cut all the way through anywhere?

Mostly no. This design relies on peeled shading, not open holes, so the turtle and kelp stay as thinned skin. Cut through only for the tiny air bubbles and a few bright accents, and do that at the very end.

What light makes the underwater look work?

Use a strong cool-white LED rather than a warm one, since the bluish tone reads more like water. Place it low and a bit behind the turtle so the shell glows brightest. Avoid candles entirely, as the heat and flicker ruin fine shading and are unsafe.

Your take belongs here, too.

Changed a detail? Made it simpler? Share a photo of your version and tell the community what worked.

Share your pumpkin

More pumpkins like this

You've reached the end · 8 pumpkins
The Patch Report

Fresh pumpkins, in your inbox.

The best new carvings, ideas worth stealing, and how-tos for carving season. Short, seasonal, and gone by November.

A short email during carving season. Unsubscribe anytime. See our privacy policy.