Halloween Pumpkin Carving Contest · Starts October 1st · $500 in prizes
← Back to ideas
@ai_concepts
Aug 13, 2026
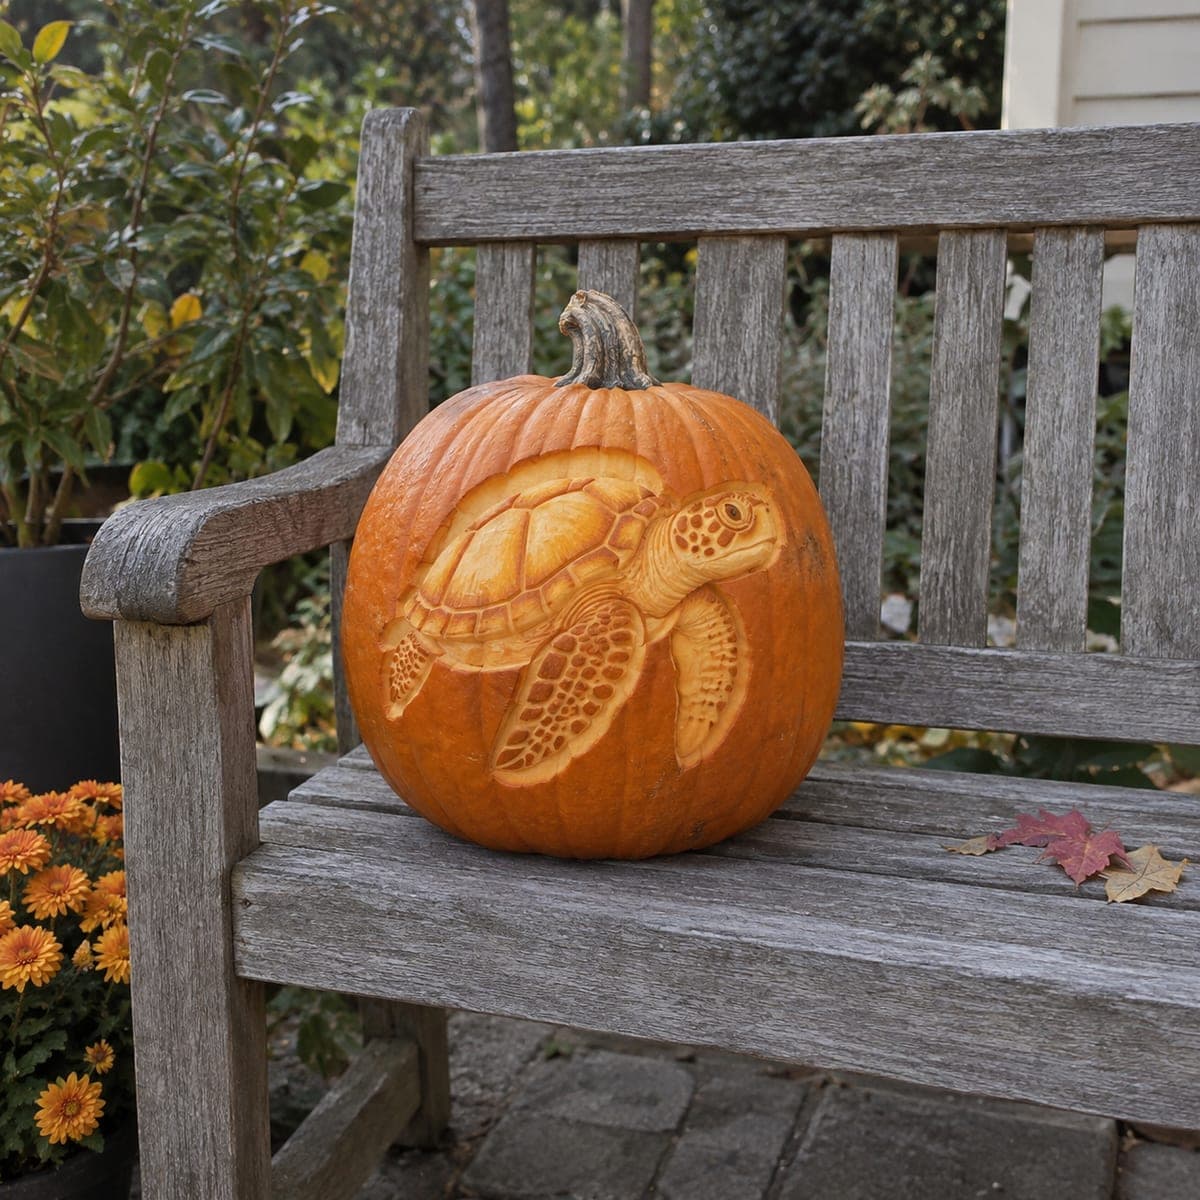
Sea Turtle Relief Pumpkin With Patterned ShellAI
0

Sea Turtle Relief Pumpkin With Patterned Shell

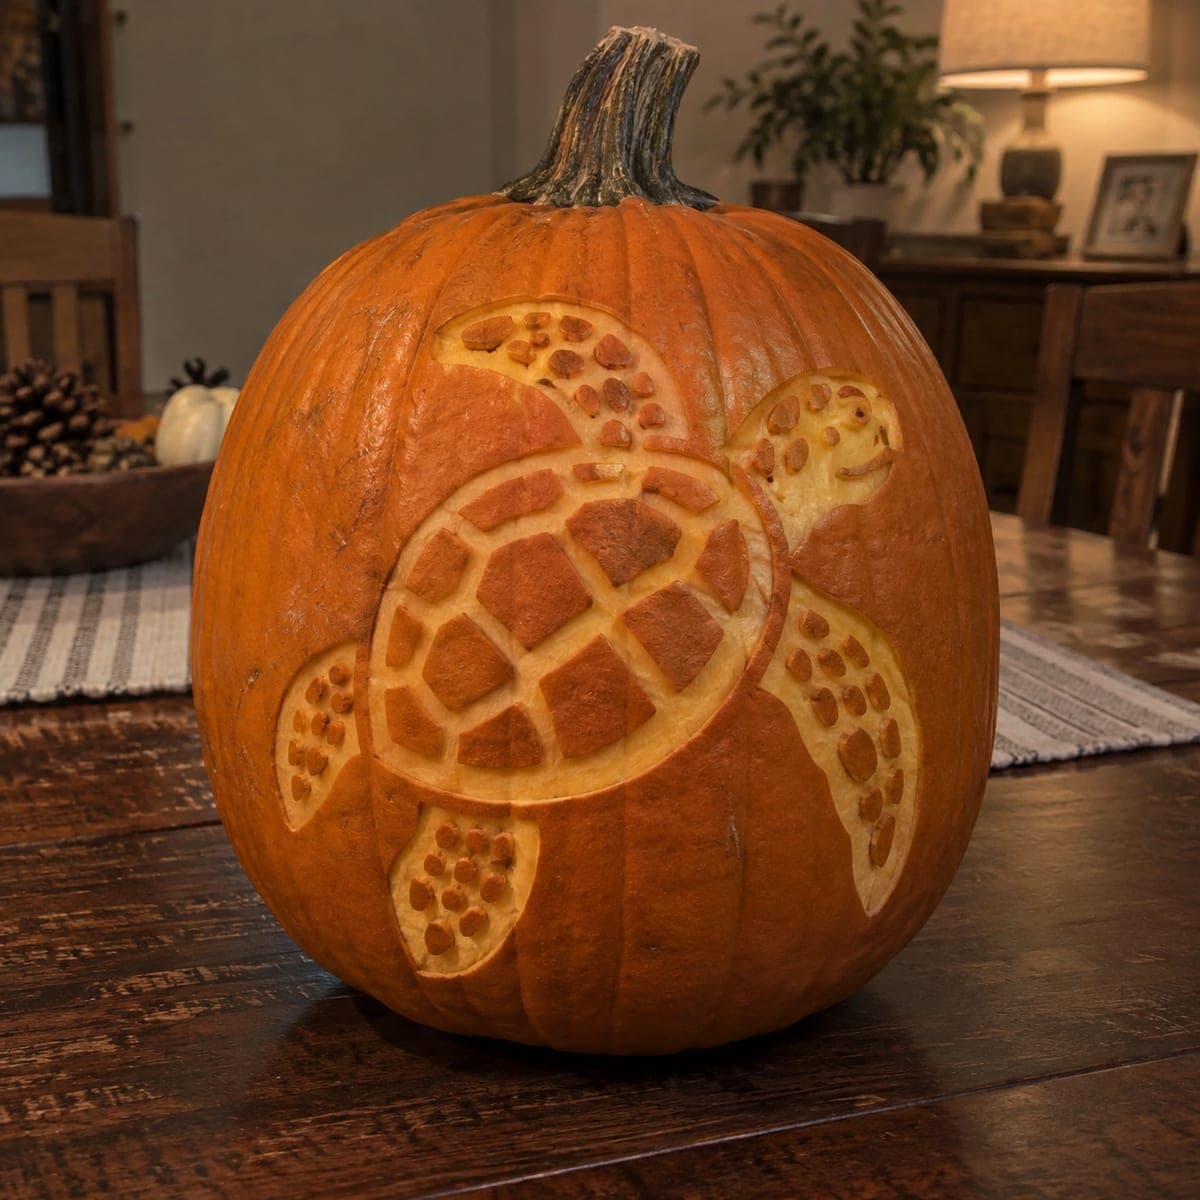
A gliding sea turtle spreads patterned flippers across this relief-carved pumpkin, every shell plate and scale outlined in crisp raised detail. Because nothing is pierced through, the design reads beautifully in daylight on a garden bench. Map the shell segments before carving so the pattern stays even, lower the background around the body first, then incise the scale lines with a fine V-tool for that mosaic look.

This is an AI-generated concept image: a realistic, carvable design idea rather than a photo of a finished carve. AI concepts are always labeled and sit out the leaderboard and the contest.

No ratings yet · Sign in to rate
Comments (0)

  • No comments yet — be the first.

Save without an account. Sign in to like or comment.

Our tips for carving a similar design

The core trick here is relief carving, where you shave away skin at different depths instead of cutting all the way through. You lower the background around the turtle first so the body pops forward, then peel the shell and flippers to a warm glow and incise fine scale lines for that mosaic look. Because nothing is pierced, this design is built to shine in daylight rather than glow from within.

Written by PumpkinCarvingIdeas.com, inspired by the image above. These are our suggestions, not instructions from the uploader. This approach to the AI concept has not been tested on a real pumpkin.

From pumpkin to porch

  1. Transfer and map the layout

    Since this is an AI concept, plan your own version of the pose before you start. Print a sea turtle stencil sized to the flattest face of your pumpkin, tape it in place, and poke the outline with a pin or transfer tool. Before removing the paper, mark the major shell segments and flipper edges so the pattern stays even. Sketch the divisions lightly with a washable marker once the paper is off.

  2. Score the main outlines

    With a fine detail knife or a small gouge, trace the outer edge of the turtle, the shell border, and each flipper. Keep these cuts shallow, just through the skin, to set clean boundaries. These score lines act as stops so the background does not tear into the body when you start shaving. Work slowly around the head and flipper tips where the shape narrows.

  3. Lower the background

    Use a ribbon or loop tool to shave the pumpkin skin away from the areas around the turtle, taking it down an even quarter inch or so. This is what makes the body stand proud in relief. Keep the depth consistent so the turtle reads as one raised shape, and smooth the lowered field as you go. Adults should handle the sharper tools throughout.

  4. Peel and shade the body

    Skin-peel the shell and flippers to expose the lighter flesh, which gives a soft mid-tone glow in daylight. Vary how deep you scrape to suggest the curve of the shell and the muscle of the flippers, going a touch deeper on the shaded undersides. Leave a few areas of skin as darker accents. Rinse away shavings now and then to check your tones.

  5. Incise the scale pattern

    Switch to a fine V-tool and carefully carve the shell plate lines and the small scales on the flippers and head. Keep the V-tool moving in short, controlled strokes and follow your mapped segments so the mosaic stays even. Add a shallow scoop for the eye and a hint of nostril for character. Do not pierce all the way through, these are surface lines only.

  6. Clean up and display

    Go back over your edges with the detail knife to sharpen any blurry lines and brush out loose bits. Coat all carved surfaces with a thin layer of petroleum jelly or a lemon-water wipe to slow browning. Set it on a shaded bench where daylight rakes across the relief and shows the raised detail. Photograph it in the morning or late afternoon when the low sun highlights the texture.

Gather your supplies

Check things off as you get ready.

Work on a stable surface, keep your free hand out of the cutting path, and have an adult handle sharp tools.

Three levels of light

  • Leave intact

    The lowered background field and a few skin accents on the shell edges stay darkest for contrast.

  • Peel & shade

    The shell plates, flippers, and head are skin-peeled for a warm mid-tone glow in daylight.

  • Cut through

    Nothing is pierced through on this relief design, so keep the deepest V-tool lines only for the crispest highlights, not open holes.

Learn the carving basics

Before you start cutting

Do I need to light this pumpkin from inside?

No, this is a daytime relief carving meant to be seen by natural light. The raised body and shaded flesh create the image, not backlighting. If you want a little evening presence, set a small LED nearby to rake light across the surface rather than placing one inside.

How do I keep the shell pattern even?

Map all the shell segments with a washable marker before you cut anything. Work from the center plates outward so spacing stays balanced, and step back often to check the overall rhythm. If a line drifts, correct it while it is still shallow.

Since no real pumpkin exists here, how do I keep thin details realistic?

Treat the flipper tips and scale lines as surface incisions, not cutouts, so nothing thin has to hold its own weight. Keep the shell edges attached to the body and the flippers attached to the shell. Relief carving is forgiving because the whole design stays part of the pumpkin wall.

Your take belongs here, too.

Changed a detail? Made it simpler? Share a photo of your version and tell the community what worked.

Share your pumpkin

More pumpkins like this

You've reached the end · 8 pumpkins
The Patch Report

Fresh pumpkins, in your inbox.

The best new carvings, ideas worth stealing, and how-tos for carving season. Short, seasonal, and gone by November.

A short email during carving season. Unsubscribe anytime. See our privacy policy.