Halloween Pumpkin Carving Contest · Starts October 1st · $500 in prizes
← Back to ideas
@ai_concepts
Sep 14, 2026
Sharp-Eyed Extraterrestrial Face PumpkinAI
0

Sharp-Eyed Extraterrestrial Face Pumpkin

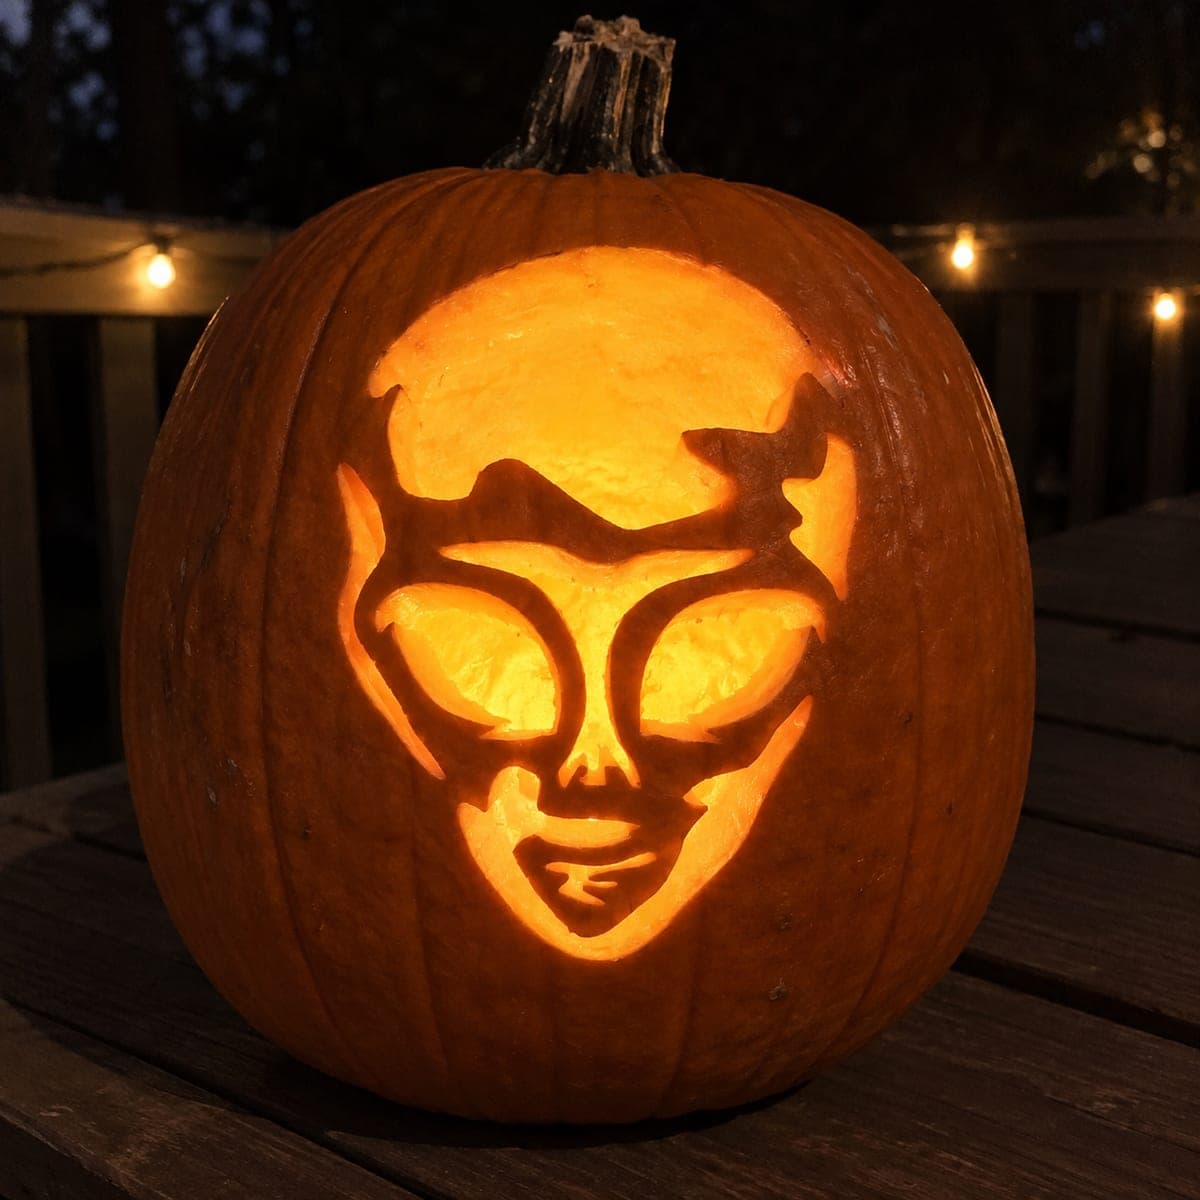
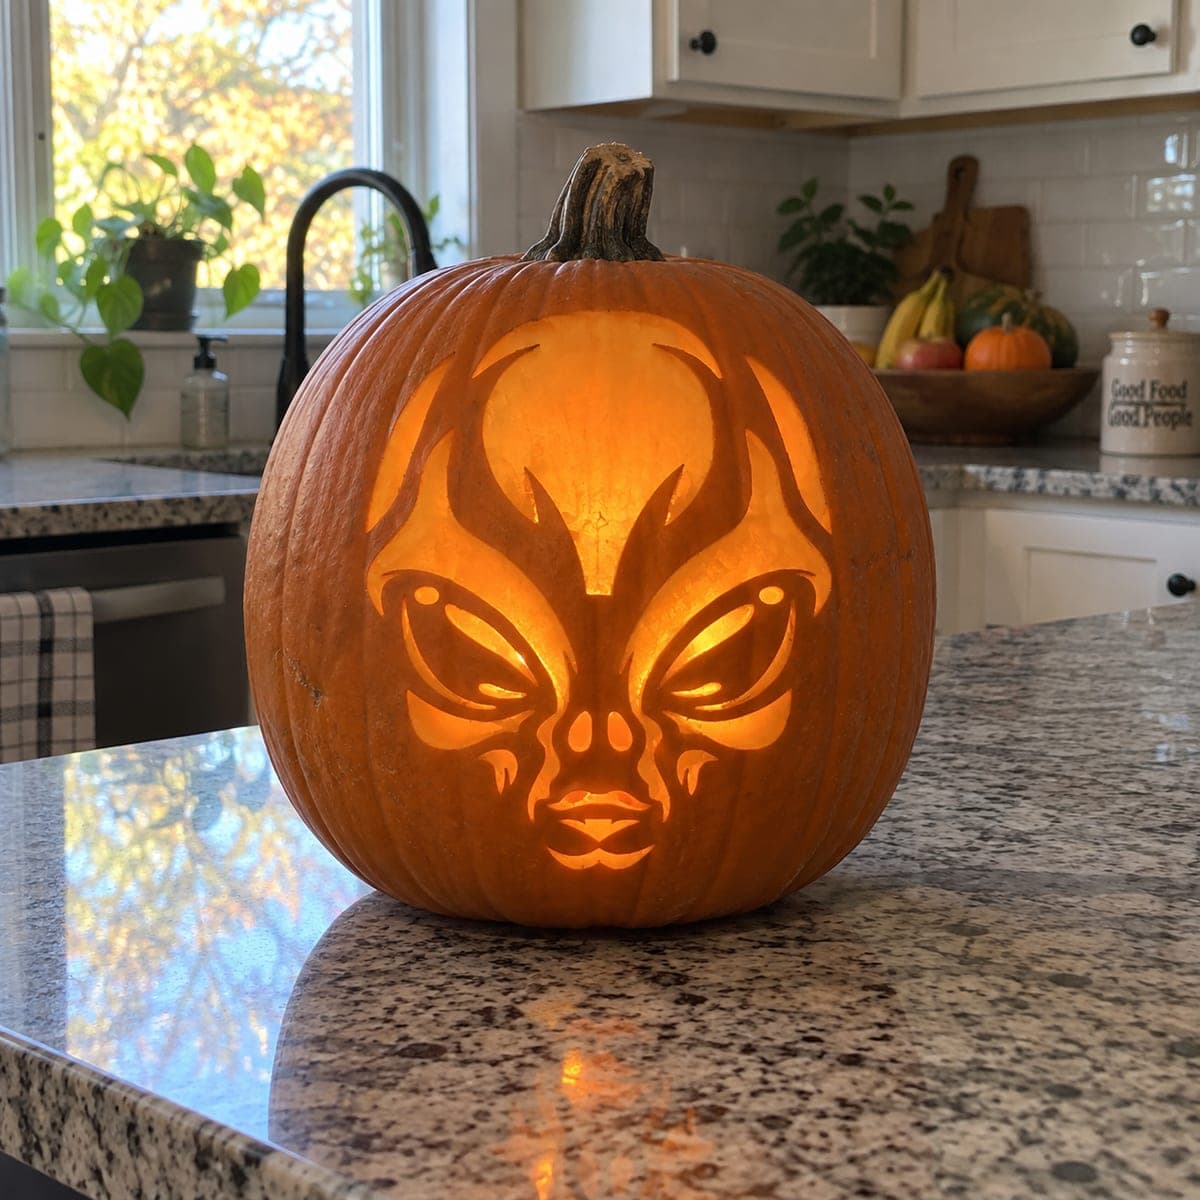
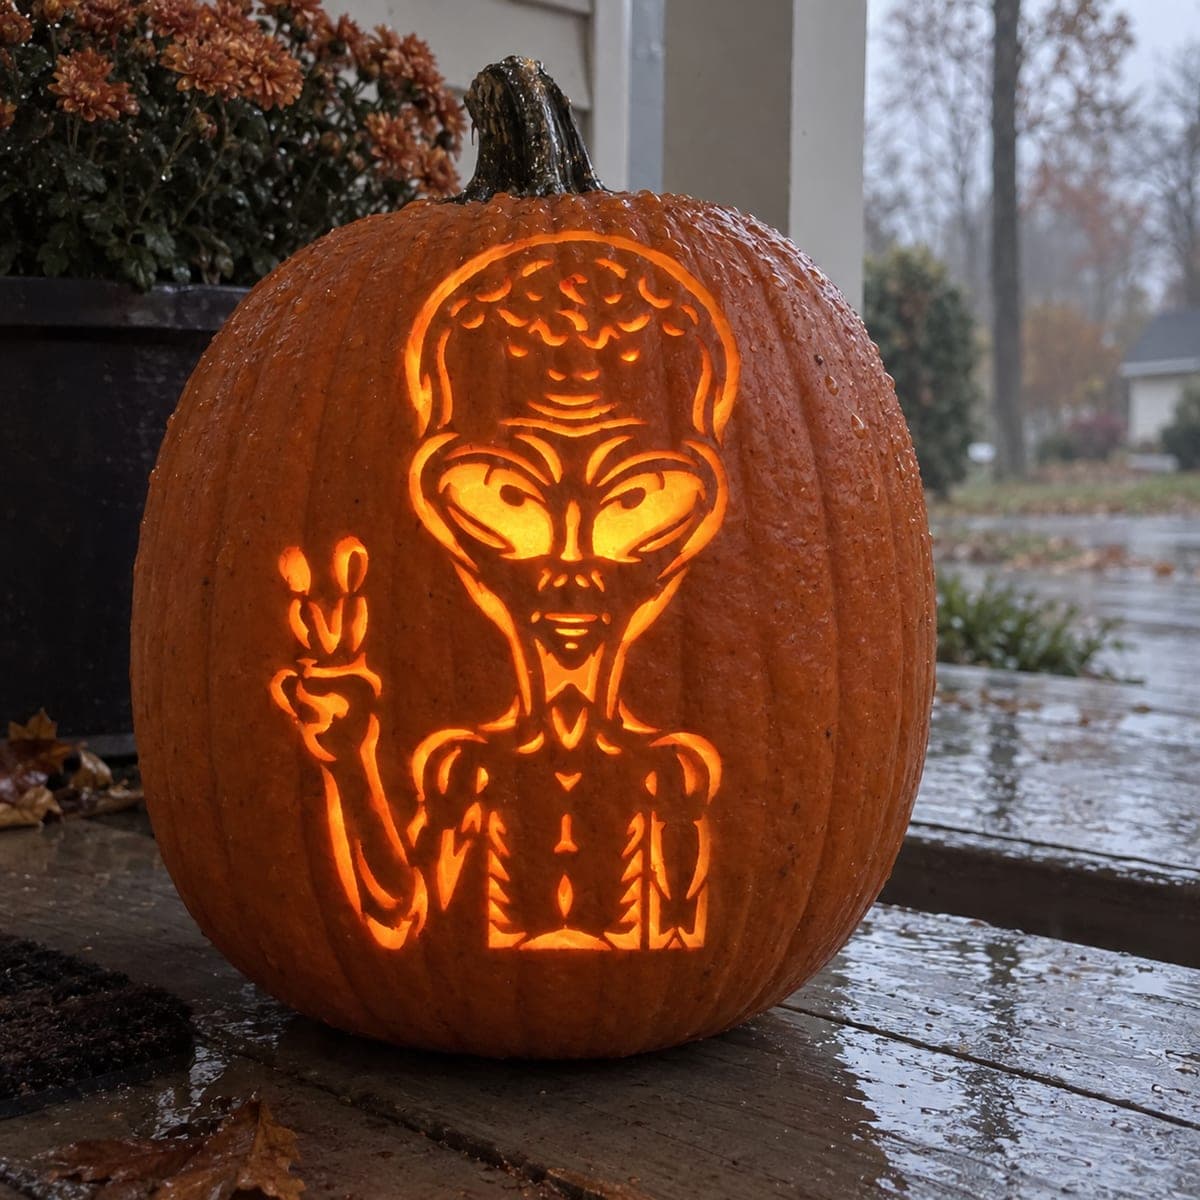
Flame-like spurs radiate from the top of an alien head above angular, sharply swept eyes and a tapered jaw that together make this extraterrestrial face look genuinely threatening. The design is fully cut through, with the dark rind forming the narrow dividers between each glowing eye socket and the spiked crown shapes. Keep those crown spurs connected to the outer rind frame by leaving a small land bridge at the tip of each one, trimming them thinner only after the main face openings are done. A single bright candle inside this scary alien pumpkin carving gives the swept eyes a particularly fierce glow.

This is an AI-generated concept image: a realistic, carvable design idea rather than a photo of a finished carve. AI concepts are always labeled and sit out the leaderboard and the contest.
No ratings yet · Sign in to rate

Comments (0)

  • No comments yet — be the first.

Save without an account. Sign in to like or comment.

Our tips for carving a similar design

The core trick here is letting the dark rind do the drawing. Every glowing shape, the swept eyes, the flame spurs, and the tapered jaw, is a full cutout, while thin strips of untouched skin become the crisp black dividers between them. Plan your cuts so the delicate crown spurs stay anchored to the outer rind until the very end.

Written by PumpkinCarvingIdeas.com, inspired by the image above. These are our suggestions, not instructions from the uploader. This approach to the AI concept has not been tested on a real pumpkin.

From pumpkin to porch

  1. Pick and prep the pumpkin

    Choose a tall, fairly round pumpkin with a smooth front panel wide enough for the full face. Cut a lid from the bottom or the back rather than the top so the stem stays intact as part of the design. Scrape the inside wall behind the face down to about one inch thick with a loop tool. A thinner wall makes the many fine cuts far easier to control.

  2. Transfer the stencil

    Print an alien face pattern sized to your pumpkin and tape it flat, snipping the edges so it hugs the curve. Poke closely spaced dots along every line with a pin or a poker tool, paying extra attention to the narrow dividers between the eyes and the crown spurs. Remove the paper and connect the dots lightly with a washable marker. Double check that each spur still has a clear connection point to the outer frame before you cut.

  3. Cut the small interior details first

    Start with the smallest openings, the eye highlights, the nostril slits, and the little cheek spurs. Use a fine saw blade and take short, gentle strokes, letting the blade do the work instead of forcing it. Cutting the tiny shapes while the surrounding rind is still solid keeps everything stable. Clear each piece by pushing it inward so you do not snap a neighboring bridge.

  4. Open the eyes and jaw

    Move to the large swept eye sockets and the tapered lower jaw. Cut along the pointed corners slowly so the tips stay sharp and clean. Leave the thin skin dividers between the eyes and around the mouth completely intact, since those dark strips are what read as the face structure. Save the biggest openings for last so the panel keeps its strength as long as possible.

  5. Carve and thin the crown spurs

    Now cut the flame-like spurs across the forehead, keeping a small land bridge at the tip of each one so it stays joined to the outer rind. Once the main face openings are finished and the pumpkin feels stable, go back and trim the spurs thinner for a sharper look. Shave carefully from the back edge inward. If a bridge feels fragile, leave it a little thicker rather than risk a break.

  6. Light it and photograph

    Drop in one or two bright LED tea lights or a small LED puck rather than a candle, which keeps the many thin bridges cool and safe. Cluster the light low and centered so it rakes up through the swept eyes for that fierce glow. Turn the pumpkin until the dividers look crisp and dark, then dim the room and shoot from slightly above eye level. A little petroleum jelly on the cut edges slows drying so it looks fresh longer.

Gather your supplies

Check things off as you get ready.

Work on a stable surface, keep your free hand out of the cutting path, and have an adult handle sharp tools.

Three levels of light

  • Leave intact

    The narrow rind dividers between the eyes, around the mouth, and the tips of the crown spurs stay as untouched dark skin to form the face lines.

  • Peel & shade

    Optional shallow skin peeling along the outer edge of the jaw or forehead gives a soft dim halo if you want a bit of glow between the hard cutouts.

  • Cut through

    The swept eye sockets, nostril slits, cheek spurs, mouth, and the flame-like crown shapes are all cut fully through for the brightest light.

Learn the carving basics

Before you start cutting

This is a concept image, so can a design like this really be carved?

Yes, a face like this is achievable on a real pumpkin if you keep the thin dividers and spur tips a little thicker than the picture suggests. The image is an AI concept, so treat it as inspiration rather than proof. Sound bridges and a thinned wall are what make the fine detail hold up.

How do I keep the crown spurs from snapping off?

Leave a small land bridge at the tip of each spur so it stays connected to the outer rind, and do not thin them until the main face openings are done. Work from the back edge when you shave them narrower. If one starts to feel weak, stop and leave it slightly thicker.

Should I use a candle since the caption mentions one?

We recommend a bright LED light instead of a candle. This design has many thin bridges that a flame can scorch or weaken, and an LED gives the same fierce eye glow without the fire risk. A warm-toned LED reads almost identical to candlelight in photos.

Your take belongs here, too.

Changed a detail? Made it simpler? Share a photo of your version and tell the community what worked.

Share your pumpkin

More pumpkins like this

You've reached the end · 8 pumpkins
The Patch Report

Fresh pumpkins, in your inbox.

The best new carvings, ideas worth stealing, and how-tos for carving season. Short, seasonal, and gone by November.

A short email during carving season. Unsubscribe anytime. See our privacy policy.