Halloween Pumpkin Carving Contest · Starts October 1st · $500 in prizes
← Back to ideas
@ai_concepts
Jul 15, 2026
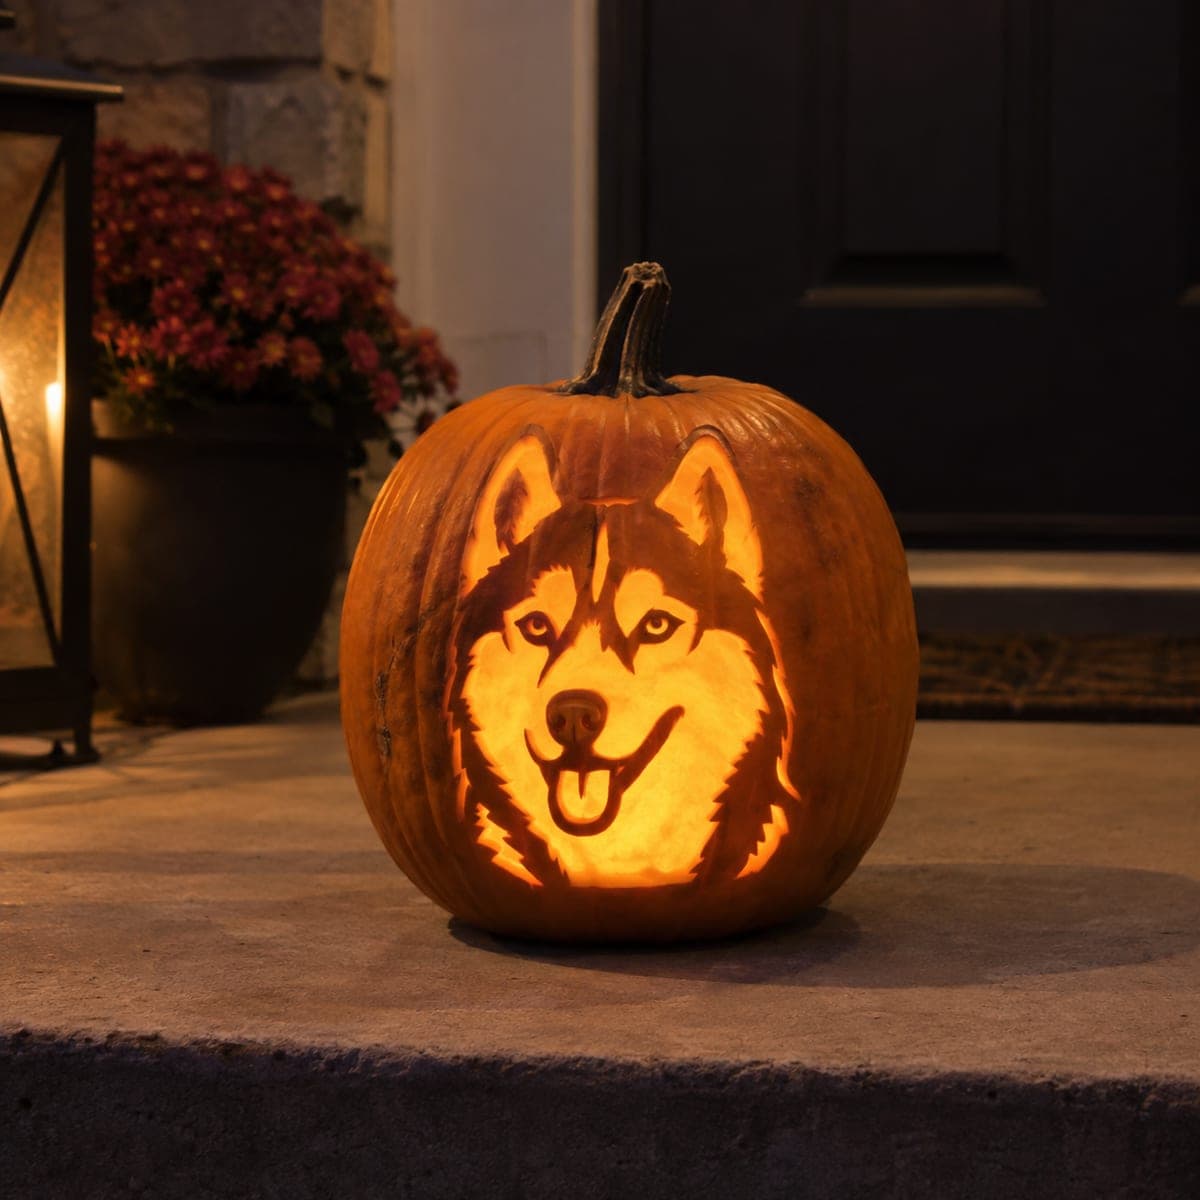
Siberian Husky Face Jack-O-Lantern PortraitAI
0

Siberian Husky Face Jack-O-Lantern Portrait

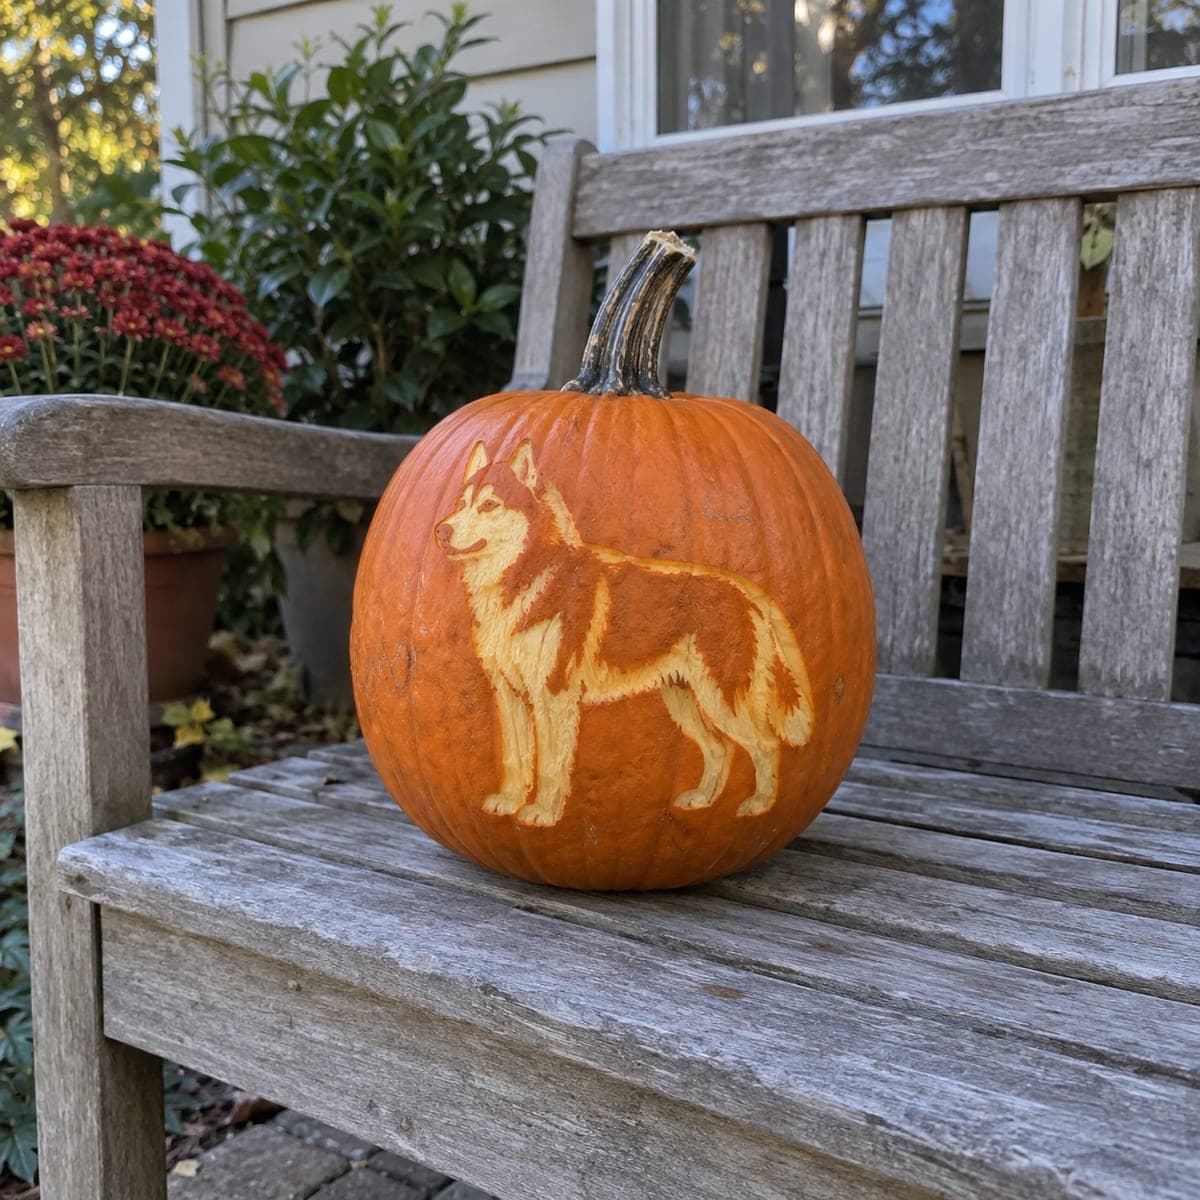
A husky gazes straight out of this jack-o-lantern, tongue out and ears up, with the facial mask built from carved-through highlights and shallow etched fur strokes. The layered depths are what sell the breed's two-tone coat, so work the fully pierced areas first and then shave the surrounding fur texture to half thickness. A warm flickering candle or amber LED gives the coat a realistic glow that a cool white bulb flattens.

This is an AI-generated concept image: a realistic, carvable design idea rather than a photo of a finished carve. AI concepts are always labeled and sit out the leaderboard and the contest.

No ratings yet · Sign in to rate
Comments (0)

  • No comments yet — be the first.

Save without an account. Sign in to like or comment.

Our tips for carving a similar design

The trick here is contrast between fully pierced highlights and shallow shaved fur, which is what makes the husky's two-tone mask read as a real coat. Plan to cut the bright center of the face and muzzle all the way through first, then shave the surrounding fur and ears to half thickness for a softer dim glow. Save the largest open areas for last so the pumpkin wall stays strong while you work the fine strokes.

Written by PumpkinCarvingIdeas.com, inspired by the image above. These are our suggestions, not instructions from the uploader. This approach to the AI concept has not been tested on a real pumpkin.

From pumpkin to porch

  1. Pick a tall pumpkin and print your stencil

    Choose a rounder, taller pumpkin with a smooth flat area on the front to hold the portrait. Print a husky face stencil sized to fit that panel with a margin all around. This is an AI concept image, so treat it as inspiration and pick a pattern with clearly marked cut, shave, and skin zones. A slightly larger face gives you more room for fur detail.

  2. Open the back and hollow it out

    Cut an access hole in the back of the pumpkin, not the top, so the front stays intact for the portrait. Scoop the guts and scrape the inside wall behind the face down to about an inch thick. A thinner wall makes shaving and piercing far easier and lets more light through. Dry the inside with a paper towel before you transfer the pattern.

  3. Transfer and score the outlines

    Tape the stencil flat over the front and poke or trace all the main lines onto the skin. Mark which shapes are full cutouts, which are shave zones, and which stay as untouched skin. Score the outlines lightly first with a detail blade so you have a clear map before removing anything. Take your time here because clean outlines carry the whole design.

  4. Shave the fur and midtone areas

    Using a lino or ribbon tool, skin off the outer layer on the fur, ears, and coat markings to reach the flesh underneath. Aim for a consistent shallow depth so these areas glow a soft dim orange. Use short directional strokes that follow the fur direction to suggest texture. Leave narrow bridges of skin between strokes so nothing weakens or tears.

  5. Cut the bright highlights through

    Now pierce the brightest parts, the center of the face, the muzzle, and the open mouth, all the way through the wall. Keep the eyes, nose, and tongue as small controlled cuts and leave thin bridges so those features stay attached and readable. Cut the largest openings last so the pumpkin holds its shape while you finish. Clean up ragged edges from the inside with your blade.

  6. Light it and photograph

    Set a warm or amber LED inside through the back hole and check the balance in a dark room. If a zone looks too dark, shave it a little thinner until the coat reads evenly. Warm flickering light gives the fur a realistic glow, while cool white tends to flatten it. Rub cut edges with petroleum jelly to slow drying, then photograph it on the porch at dusk.

Gather your supplies

Check things off as you get ready.

Work on a stable surface, keep your free hand out of the cutting path, and have an adult handle sharp tools.

Three levels of light

  • Leave intact

    The dark outer coat, ear tips, and eye and nose details stay as untouched skin for depth

  • Peel & shade

    The gray-and-white fur markings and cheek ruff get shaved thin for a soft dim glow

  • Cut through

    The center of the face, the muzzle, and the open mouth get pierced fully for the brightest light

Learn the carving basics

Before you start cutting

How do I keep the eyes and nose from looking blank when lit?

Leave those features as small cuts with thin skin bridges rather than large openings. The bridges break up the light so the eyes and nose read as detail instead of glowing holes. Keep them shallow and precise, and shave around them to add contrast.

Can I get the two-tone coat without shading experience?

You can, but the layered look depends on hitting two clear depths, full cutouts and half-thickness shaving. Practice a few shave strokes on the scrap you removed from the back to find a consistent depth. If it feels like too much, a bolder stencil with fewer fur zones is a friendlier starting point.

Why cut the back instead of the top?

An intact front gives you a clean uninterrupted panel for the portrait and keeps the design from being split by a lid line. A back hole also makes it easy to swap the LED and vent heat. Just keep the opening large enough to reach your hand and tools inside.

Your take belongs here, too.

Changed a detail? Made it simpler? Share a photo of your version and tell the community what worked.

Share your pumpkin

More pumpkins like this

You've reached the end · 8 pumpkins
The Patch Report

Fresh pumpkins, in your inbox.

The best new carvings, ideas worth stealing, and how-tos for carving season. Short, seasonal, and gone by November.

A short email during carving season. Unsubscribe anytime. See our privacy policy.