Halloween Pumpkin Carving Contest · Starts October 1st · $500 in prizes
← Back to ideas
@ai_concepts
Sep 1, 2026
Simple Goofy Grin Jack-O-Lantern for BeginnersAI
0

Simple Goofy Grin Jack-O-Lantern for Beginners

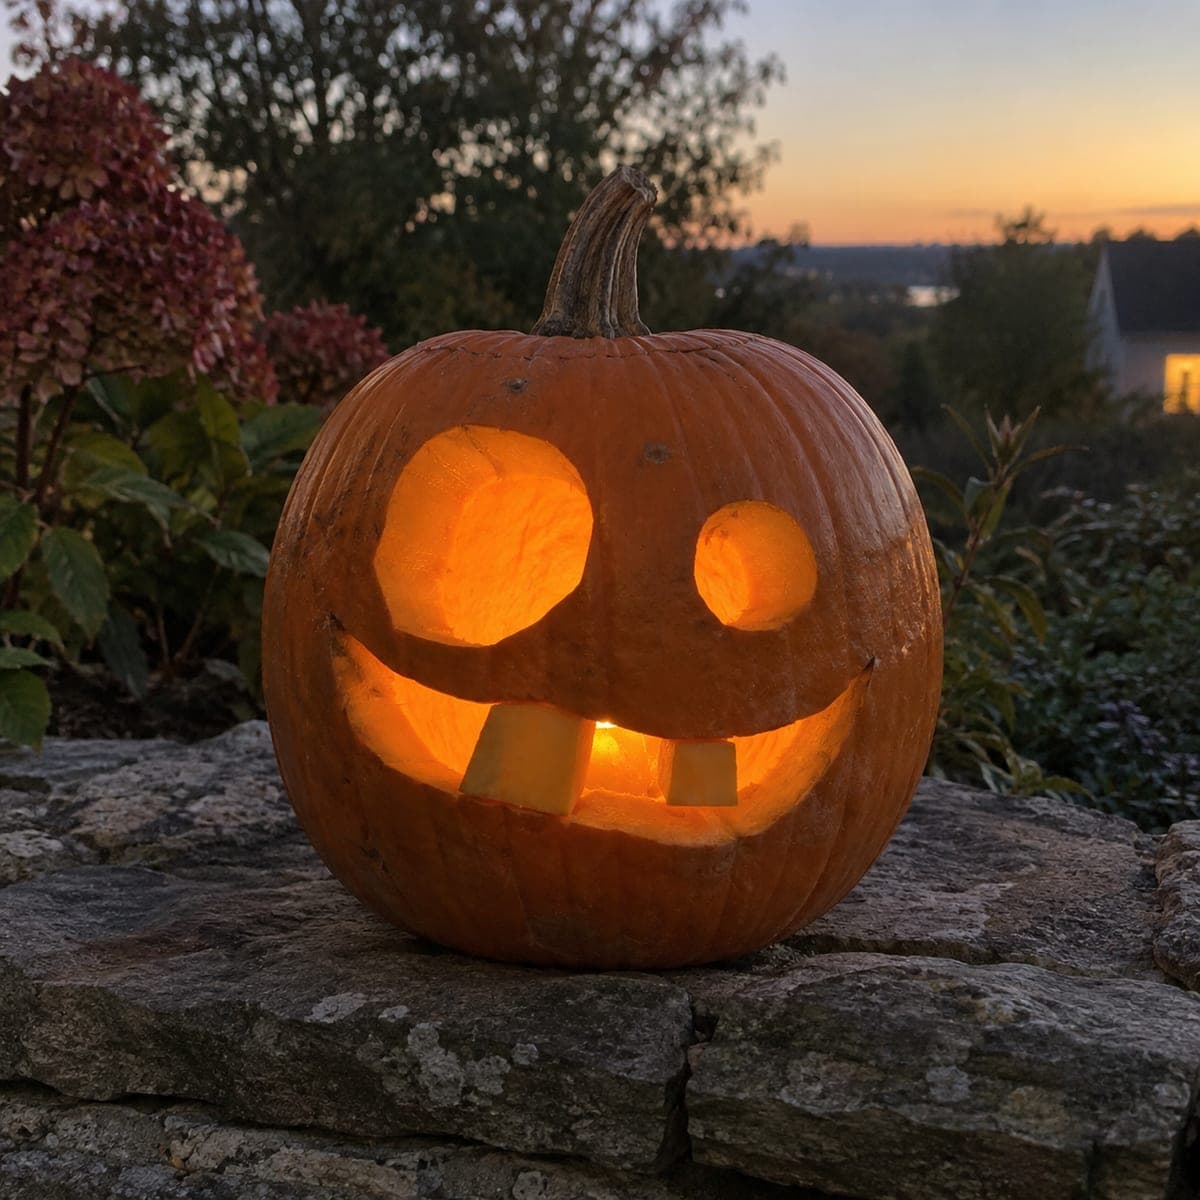
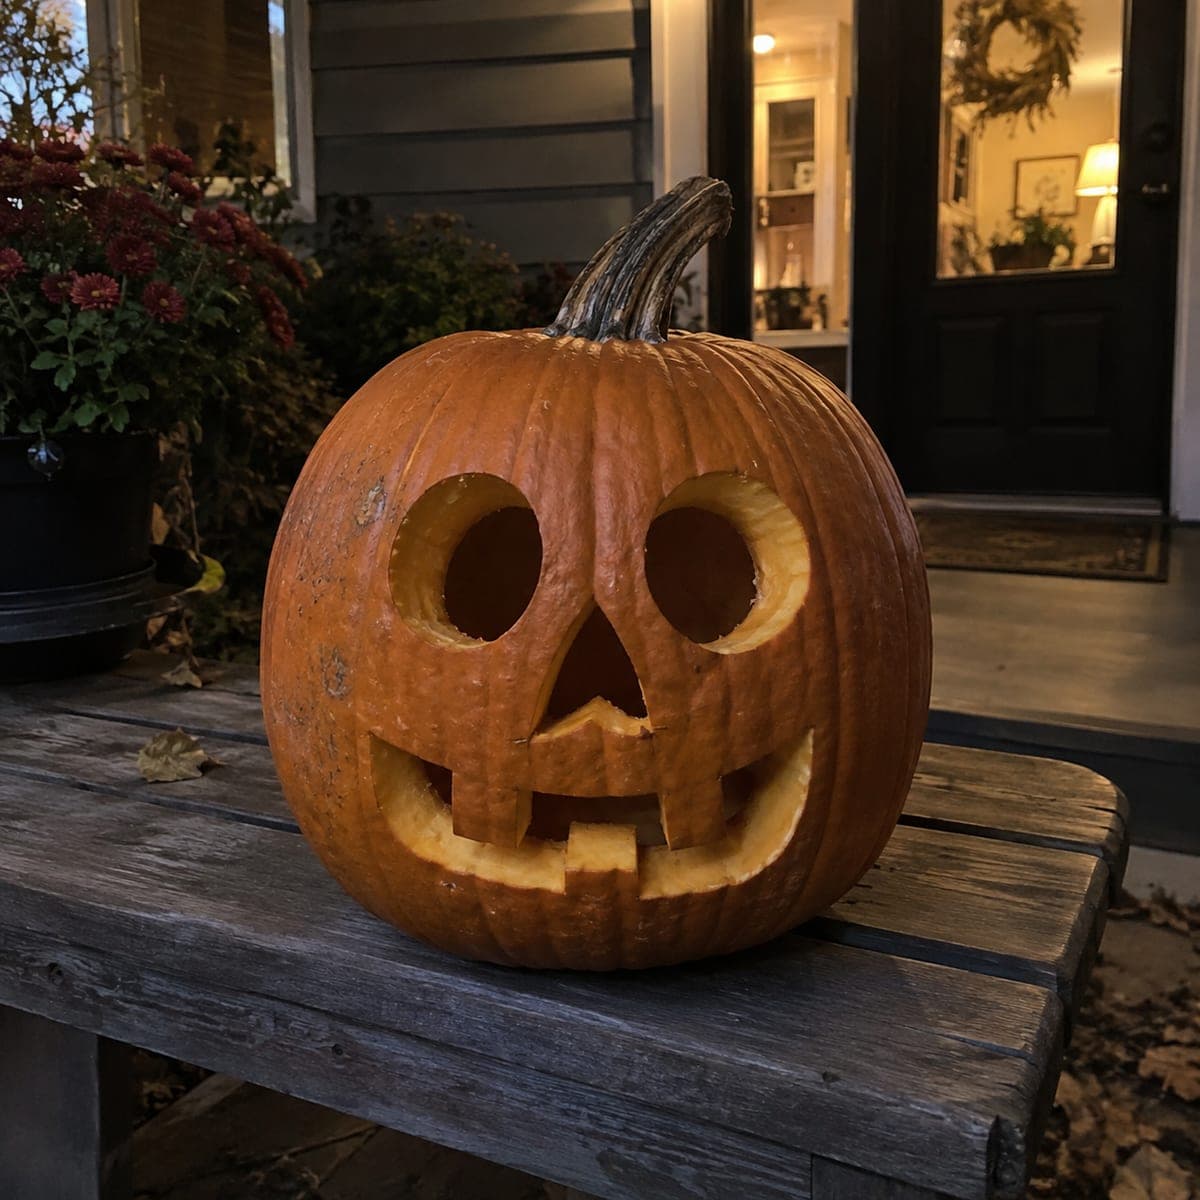
Round cutout eyes and a lopsided toothy smile give this classic pumpkin carving a goofy, friendly charm that requires nothing more than a basic serrated knife and about 20 minutes. This beginner pumpkin carving idea is ideal for first-timers or a quick weekend project with young kids. Scoop the pumpkin clean, draw the face with a marker first, and cut the circular eyes with a small craft saw for smooth edges. Set it unlit on the porch railing for daytime display or add a tea light once the sun goes down.

This is an AI-generated concept image: a realistic, carvable design idea rather than a photo of a finished carve. AI concepts are always labeled and sit out the leaderboard and the contest.

No ratings yet · Sign in to rate
Comments (0)

  • No comments yet — be the first.

Save without an account. Sign in to like or comment.

Our tips for carving a similar design

The whole charm here comes from a few clean shapes: two big round eyes, a small triangle nose, and a wide lopsided smile with a couple of chunky teeth left in place. You could carve a similar pumpkin with nothing more than a serrated knife and a small craft saw, no fine detail work required. The trick is keeping the teeth as solid bridges so the mouth reads as goofy rather than gappy.

Written by PumpkinCarvingIdeas.com, inspired by the image above. These are our suggestions, not instructions from the uploader. This approach to the AI concept has not been tested on a real pumpkin.

From pumpkin to porch

  1. Pick and prep the pumpkin

    Choose a round, tall pumpkin with a flat side to face the porch. Cut a lid at an angle so it cannot fall in, or cut a hole in the back for easy lighting. Scoop out the seeds and pulp, then scrape the front wall down to about one inch thick where the face will go. A thinner wall is much easier to cut cleanly.

  2. Draw the face first

    Sketch the design on with a washable marker before any cutting. Aim for two large circles for the eyes set slightly high, a small triangle nose below and between them, and a wide smile that dips a little to one side for the goofy look. Mark where the teeth will stay so you remember not to cut them. Step back and check the spacing, since a marker line is easy to wipe off and redo.

  3. Cut the round eyes

    Start with the eyes using a small craft saw held straight into the pumpkin. Turn the saw slowly and let it do the work to keep the circles smooth. Push the cut pieces out from the inside with your thumb. Adults should handle the saw, and kids can help scoop and draw.

  4. Cut the nose and mouth outline

    Saw out the small triangle nose next. Then cut the top and bottom lines of the smile, but stop and leave the marked teeth uncut so they stay attached top and bottom. Cutting around the teeth instead of through them keeps them strong. Remove the mouth pieces gently so the teeth do not snap.

  5. Clean up the edges

    Go back over every opening and trim any ragged bits for the crisp look. Lightly bevel the inside edge of the eyes so more light spills out. Wipe away leftover marker lines with a damp cloth. Coat the cut edges with a little petroleum jelly to slow drying.

  6. Light it and display

    Drop in a battery LED tea light rather than a flame, since it is safer on a wooden railing and lasts all evening. Set the pumpkin on the porch and check the glow after dark. Reposition the light if one eye looks brighter than the other. Snap your photo while the face is fresh.

Gather your supplies

Check things off as you get ready.

Work on a stable surface, keep your free hand out of the cutting path, and have an adult handle sharp tools.

Three levels of light

  • Leave intact

    The whole outer skin of the pumpkin stays dark orange for that classic look.

  • Peel & shade

    The teeth and nose bridge can be lightly skin-peeled if you want them to glow instead of staying solid.

  • Cut through

    The two round eyes, the triangle nose, and the open parts of the smile cut fully through for the brightest light.

Learn the carving basics

Before you start cutting

How do I keep the round eyes looking even?

Trace around a jar lid or cup to get matching circles before you cut. Work the saw slowly and let the shape guide you rather than forcing it. If one edge comes out rough, a light trim afterward evens it up.

Will the teeth fall out of the smile?

Not if you leave them attached at both the top and bottom of the mouth instead of cutting all the way around them. Think of each tooth as a small bridge of pumpkin wall. Cut the open gaps beside the teeth and the teeth will hold firm.

This is a concept image, so what size should the real eyes be?

Since no real pumpkin exists here, treat the picture as a guide and scale the eyes to your own pumpkin. Aim for eyes about a third of the face width so plenty of light escapes. Keep the nose small so it does not weaken the wall between the eyes.

Your take belongs here, too.

Changed a detail? Made it simpler? Share a photo of your version and tell the community what worked.

Share your pumpkin

More pumpkins like this

You've reached the end · 8 pumpkins
The Patch Report

Fresh pumpkins, in your inbox.

The best new carvings, ideas worth stealing, and how-tos for carving season. Short, seasonal, and gone by November.

A short email during carving season. Unsubscribe anytime. See our privacy policy.