Halloween Pumpkin Carving Contest · Starts October 1st · $500 in prizes
← Back to ideas
@ai_concepts
Sep 25, 2026
Six-Panel Volleyball Pumpkin on Garden BenchAI
0

Report this carving

Tell us what is wrong. Reports are private.

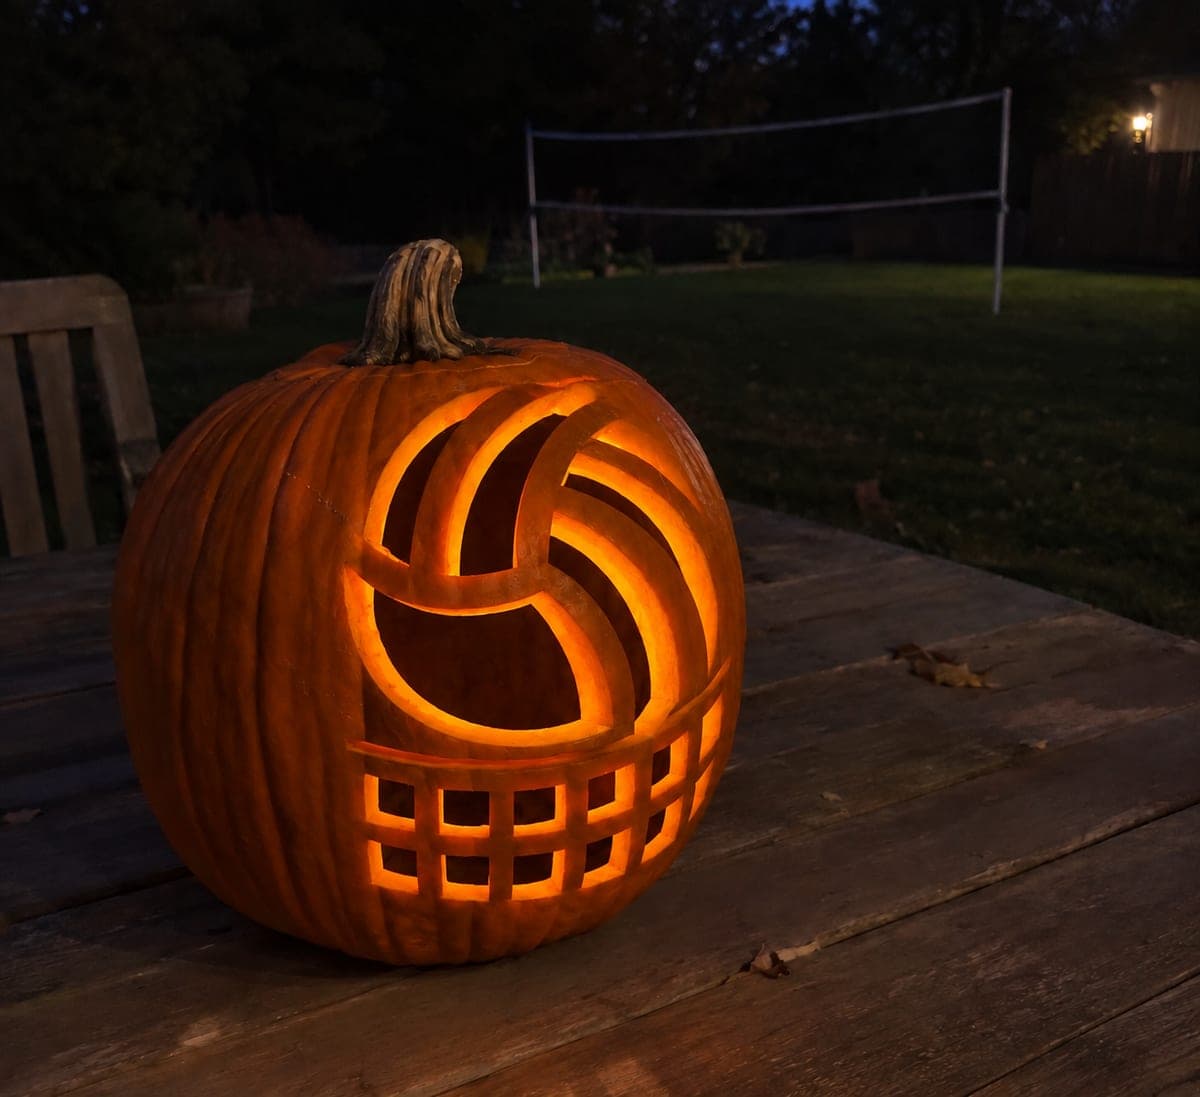
Six-Panel Volleyball Pumpkin on Garden Bench

Six curved apertures separated by broad central and outer rind bands turn this pumpkin into a glowing volleyball in this easy volleyball pumpkin carving idea. Keep the central rind hub wide, as it is the anchor point for all six panels. Cut opposite panels in pairs to keep the design balanced as material is removed. A warm LED inside on a garden bench suits the relaxed outdoor atmosphere.

No ratings yet · Sign in to rate

Comments (0)

  • No comments yet — be the first.

Save without an account. Sign in to like or comment.

Our tips for carving a similar design

Six curved apertures radiate from a central rind hub, separated by broad outer rind bands, to create the classic volleyball panel pattern. The central hub is the structural anchor for all six openings, so its width should never be reduced during carving. Cutting opposite panels in sequence keeps the shell balanced as material is removed.

From pumpkin to porch

  1. Select and prep the pumpkin

    A round, globe-shaped pumpkin suits this design best since the curved panels follow the spherical shape naturally. Cut from the base, hollow the interior, and scrape the inner wall to three-quarters of an inch throughout. A round pumpkin displayed on a level garden bench is immediately readable as a volleyball.

  2. Mark the six panels

    Print or sketch a volleyball panel template scaled to the pumpkin face. Tape and prick all six panel outlines, plus the central hub boundary. Mark the central hub clearly so it is never accidentally cut into during carving. Remove the template and connect the dots with a marker.

  3. Cut the first pair of opposite panels

    Start with the top panel and cut its directly opposite bottom panel next. Use a thin flexible blade following the gentle curves of each panel outline. Short, curved strokes are more controllable than long pushes on a curved surface.

  4. Cut the remaining two pairs

    Work the left-center and right-center panels as the second pair, then the upper-left and lower-right panels as the third. Cutting in opposing pairs ensures the rind loses material evenly and the pumpkin does not develop a structurally weak side early in the process.

  5. Score the outer rind bands if desired

    Use a V-tool to lightly score the outer rim of the carved area to suggest the outer ball seam. This optional step takes only a minute and helps the design read as a complete ball shape from a distance.

  6. Light and display

    Place a warm LED inside the cavity and position the pumpkin on a garden bench with the most symmetrical face toward the viewing direction. At dusk, the six evenly lit panels are clearly readable as a volleyball from across the garden.

Written with AI to match this design

Gather your supplies

Check things off as you get ready.

Work on a stable surface, keep your free hand out of the cutting path, and have an adult handle sharp tools.

Three levels of light

  • Leave intact

    The broad central rind hub and outer rind bands stay solid and dark.

  • Peel & shade

    None; the outer seam is an optional shallow score only.

  • Cut through

    All six curved panel apertures are cut fully through for even glow.

Learn the carving basics

Before you start cutting

Why should I cut opposite panels rather than going around in order?

Cutting opposite panels removes material symmetrically from both sides of the central hub simultaneously, keeping the remaining rind balanced and preventing the shell from developing a weak side that might crack under the pressure of subsequent cuts. Going in sequence around the circle leaves one side progressively more weakened.

How wide should the central hub be?

The central hub should be at least an inch and a half wide, measured from the edge of one panel to the edge of the adjacent panel across the hub. Wider is better for a first attempt. If the template has a narrower hub, enlarge the gap between panels slightly when transferring the template to the pumpkin.

My curved panel cuts look a bit wavy. Will that be noticeable when lit?

Minor waviness in the panel edges is almost invisible when the pumpkin is lit because the viewer's eye focuses on the bright open panels rather than the cut edges. The overall panel shapes and their spacing are what read as the volleyball pattern, not the precision of individual edge lines.

Your take belongs here, too.

Changed a detail? Made it simpler? Share a photo of your version and tell the community what worked.

Share your pumpkin

More pumpkins like this

You've reached the end · 8 pumpkins
The Patch Report

Fresh pumpkins, in your inbox.

The best new carvings, ideas worth stealing, and how-tos for carving season. Short, seasonal, and gone by November.

A short email during carving season. Unsubscribe anytime. See our privacy policy.