Halloween Pumpkin Carving Contest · Starts October 1st · $500 in prizes
← Back to ideas
@ai_concepts
Sep 25, 2026
Volleyball and Net Hard Pumpkin Carving With Open PanelsAI
0

Report this carving

Tell us what is wrong. Reports are private.

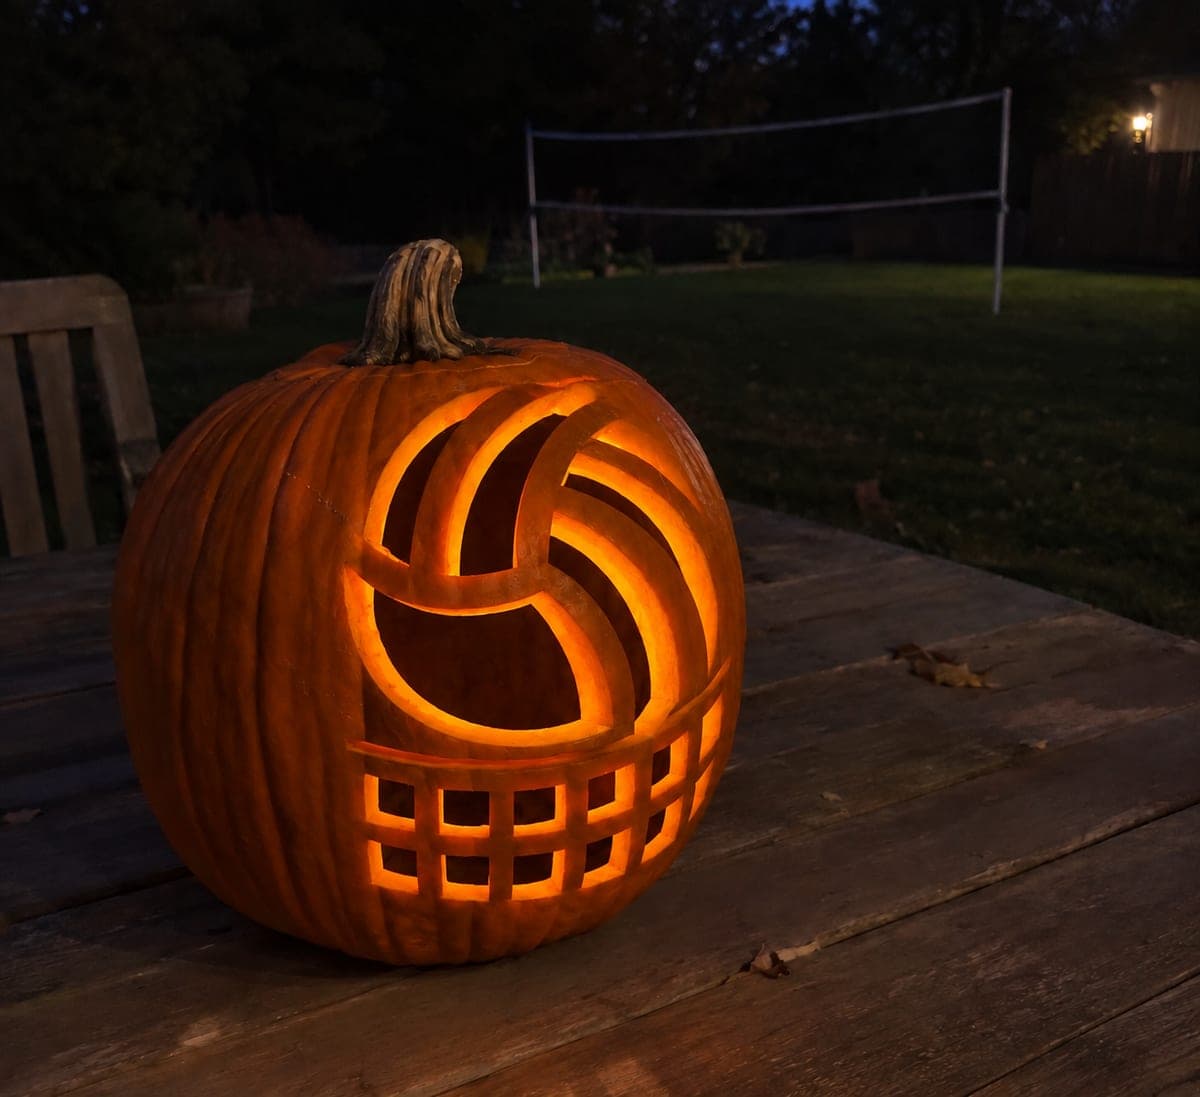
Volleyball and Net Hard Pumpkin Carving With Open Panels

A volleyball above a glowing square-hole net grid makes this hard volleyball pumpkin carving idea a complete sports scene. The empty ball panels and net windows are separated by broad curved seams and a rooted grid, while outer circle and post details stay as shallow backing scores. Carve the ball section first for scale reference, then work the net grid from the outer border inward. Displaying the finished pumpkin at net height on a table makes the scene immediately readable.

No ratings yet · Sign in to rate
Comments (0)

  • No comments yet — be the first.

Save without an account. Sign in to like or comment.

Our tips for carving a similar design

The pumpkin face is divided into an upper volleyball zone with empty curved panels and a lower net zone with square-hole windows. Broad connected seams in the ball section and thick grid bars in the net section keep every element supported. Carving the ball zone first gives a scale reference and allows the net zone's proportions to be confirmed before cutting.

From pumpkin to porch

  1. Choose a tall pumpkin and prep

    A tall pumpkin provides vertical room for both zones. Cut from the base, hollow, and scrape the wall to three-quarters of an inch. Draw a horizontal line across the face dividing the upper ball zone from the lower net zone at roughly the upper third of the face height.

  2. Transfer both zones

    Tape the combined template over the face and prick all panel outlines, the outer circle and post lines, and the net window grid. Use two marker colors to separate through-cuts from backed scores after removing the template.

  3. Score outer circle and post lines

    Score the outer ball circle and net post lines first as shallow backed marks. These define the composition edges before any material is removed and help keep cutting within the intended zones.

  4. Carve the volleyball panels

    Work the ball panels in opposite pairs, using a thin flexible blade for the curved edges. Preserve the broad seams between panels as the structural connectors. Cut big openings last, meaning if any panel is larger, cut it after the smaller ones around it.

  5. Carve the net grid windows

    Cut the square net windows from the outer border row inward. Thick grid bars separate each window; never cut into a grid bar. Use a craft knife for precise corner cuts and a thin blade for the straight sides.

  6. Light and display

    A warm white LED centered in the cavity illuminates both zones evenly. At table height, the lower net windows are at eye level for a seated viewer, making the court scene immediately readable. A miniature volleyball prop beside the pumpkin reinforces the theme.

Written with AI to match this design

Gather your supplies

Check things off as you get ready.

Work on a stable surface, keep your free hand out of the cutting path, and have an adult handle sharp tools.

Three levels of light

  • Leave intact

    The broad seams between panels, the grid bars, and the outer shell remain solid and dark.

  • Peel & shade

    The outer ball circle and net post lines are shallow backed scores.

  • Cut through

    The volleyball panel apertures and the net grid square windows are cut fully through.

Learn the carving basics

Before you start cutting

How do I keep the thick net grid bars from being accidentally cut?

Mark the bars in a distinct third color before carving so they are unmistakable from the window outlines. When cutting a window, keep the blade inside the window outline and stop well before the marked bar edge. The craft knife pre-score along each window edge prevents the blade from drifting across a bar.

My two zones look unequal in size. Which should be larger?

The upper ball zone typically takes two-thirds of the face height, with the net zone occupying the lower third. The ball panels are open and airy, while the net windows are dense and visually heavier, so a smaller net zone keeps the composition balanced.

Can I display this on the floor at ground level?

You can, but table height works better for this design because the net grid in the lower section is most interesting when viewed at eye level. At ground level, the net grid tends to foreshorten and the lower windows can be hard to see clearly from a standing position.

Your take belongs here, too.

Changed a detail? Made it simpler? Share a photo of your version and tell the community what worked.

Share your pumpkin

More pumpkins like this

You've reached the end · 8 pumpkins
The Patch Report

Fresh pumpkins, in your inbox.

The best new carvings, ideas worth stealing, and how-tos for carving season. Short, seasonal, and gone by November.

A short email during carving season. Unsubscribe anytime. See our privacy policy.