Halloween Pumpkin Carving Contest · Starts October 1st · $500 in prizes
← Back to ideas
@ai_concepts
Aug 31, 2026
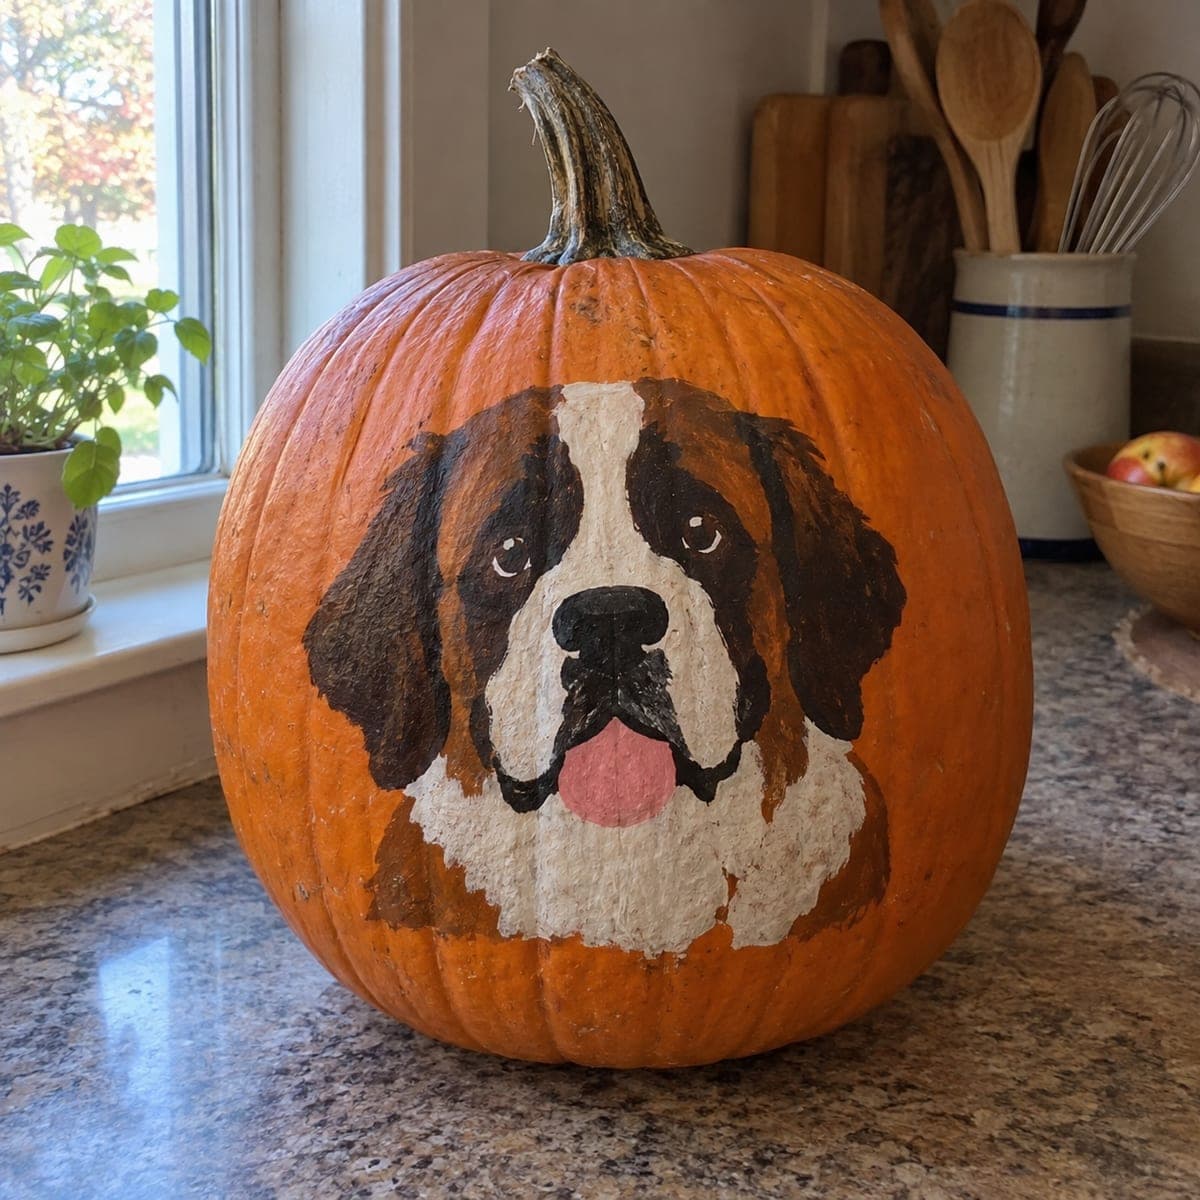
St Bernard Dog Painted Pumpkin PortraitAI
0

St Bernard Dog Painted Pumpkin Portrait

A St Bernard with classic brown, white, and black markings and a happy pink tongue fills the front of this painted pumpkin. It is a forgiving no-carve pumpkin project because the breed's patchy coat hides uneven brushwork. Block in the white blaze and chest first, add the brown patches, then finish with the dark ears and eye masks. Seal it with clear spray so it survives damp fall weather.

This is an AI-generated concept image: a realistic, carvable design idea rather than a photo of a finished carve. AI concepts are always labeled and sit out the leaderboard and the contest.

No ratings yet · Sign in to rate

Comments (0)

  • No comments yet — be the first.

Save without an account. Sign in to like or comment.

Our tips for carving a similar design

The core trick here is layering acrylic paint from light to dark so the St Bernard's patchy coat reads clearly and hides any uneven brushwork. Since no real pumpkin exists in this AI concept, think of it as a no-carve plan: block in the white blaze and chest, add the brown patches, then finish with the dark ears, eye masks, and a pink tongue. A clear sealer at the end keeps it looking crisp through damp fall weather.

Written by PumpkinCarvingIdeas.com, inspired by the image above. These are our suggestions, not instructions from the uploader. This approach to the AI concept has not been tested on a real pumpkin.

From pumpkin to porch

  1. Pick and prep the pumpkin

    Choose a tall, round pumpkin with a smooth front panel and a sturdy stem. Wipe the surface with a damp cloth and let it dry fully so paint grips well. A slightly flattened front gives you the best canvas for the face. Set it on a towel so it does not roll while you work.

  2. Sketch the dog's face

    Lightly pencil the outline of the head, the center white blaze, the two ears, and the muzzle. Keep the eyes about a third down from the top of the head and space them evenly. Mark where the pink tongue will hang below the muzzle. Step back often to check that the face is centered and balanced before any paint goes down.

  3. Block in the white areas

    Paint the white blaze, muzzle, and chest first with two thin coats of white acrylic, letting each coat dry. Thin coats prevent drips and let the orange peek through less. Leave clean edges where the brown patches will sit later. This bright base makes the whole portrait pop against the orange skin.

  4. Add the brown coat patches

    Load a medium brush with warm brown and fill the large patches over the eyes, ears, and sides of the head. Use short, slightly ragged strokes so the fur edges look natural rather than stiff. A St Bernard's coat is uneven, so small imperfections actually help. Let this layer dry before adding darker detail.

  5. Finish the dark details and tongue

    Switch to a small brush and paint the black nose, the dark eye masks, and the deepest shadows inside the ears. Add the round eyes with a dot of white for a catchlight so the face looks alert and happy. Paint the pink tongue below the muzzle and outline it softly. Keep the darkest darks thin so they do not muddy the white.

  6. Seal and stage the photo

    Once everything is bone dry, take the pumpkin outside and mist it with clear acrylic spray sealer in light passes. This protects the paint from moisture and gives a subtle even sheen. Bring it back to a bright windowsill or counter for photos in soft daylight. Natural light shows the coat colors far better than a harsh overhead bulb.

Gather your supplies

Check things off as you get ready.

Work on a stable surface, keep your free hand out of the cutting path, and have an adult handle sharp tools.

Three levels of light

  • Leave intact

    The orange pumpkin skin around the dog stays bare and untouched as the background.

  • Peel & shade

    For a subtle glow option you could lightly shave the skin behind the white chest to warm it, though the classic look keeps it painted.

  • Cut through

    This is a no-carve design, so nothing is cut through and no interior light is used.

Learn the carving basics

Before you start cutting

Do I need to carve anything for this design?

No, this is a fully painted no-carve project, which is why it is forgiving for newer painters. You keep the pumpkin whole and just build up layers of acrylic on the front. If you want a glow, set a battery LED nearby rather than cutting the pumpkin open.

How do I keep the coat colors from looking flat?

Work light to dark and use short, ragged brush strokes along the edges of each patch. Let the white base show slightly at the borders so the brown looks like real fur. A tiny dry-brush of lighter brown over the patches adds fluffy texture.

Will the paint survive on the counter or porch?

Acrylic holds up well once it is dry and sealed. Give it a light coat of clear spray sealer outdoors in a couple of thin passes to guard against damp fall air. Keep the finished pumpkin out of heavy rain and it should last for weeks.

Your take belongs here, too.

Changed a detail? Made it simpler? Share a photo of your version and tell the community what worked.

Share your pumpkin

More pumpkins like this

You've reached the end · 8 pumpkins
The Patch Report

Fresh pumpkins, in your inbox.

The best new carvings, ideas worth stealing, and how-tos for carving season. Short, seasonal, and gone by November.

A short email during carving season. Unsubscribe anytime. See our privacy policy.