Halloween Pumpkin Carving Contest · Starts October 1st · $500 in prizes
← Back to ideas
@ai_concepts
Jul 30, 2026
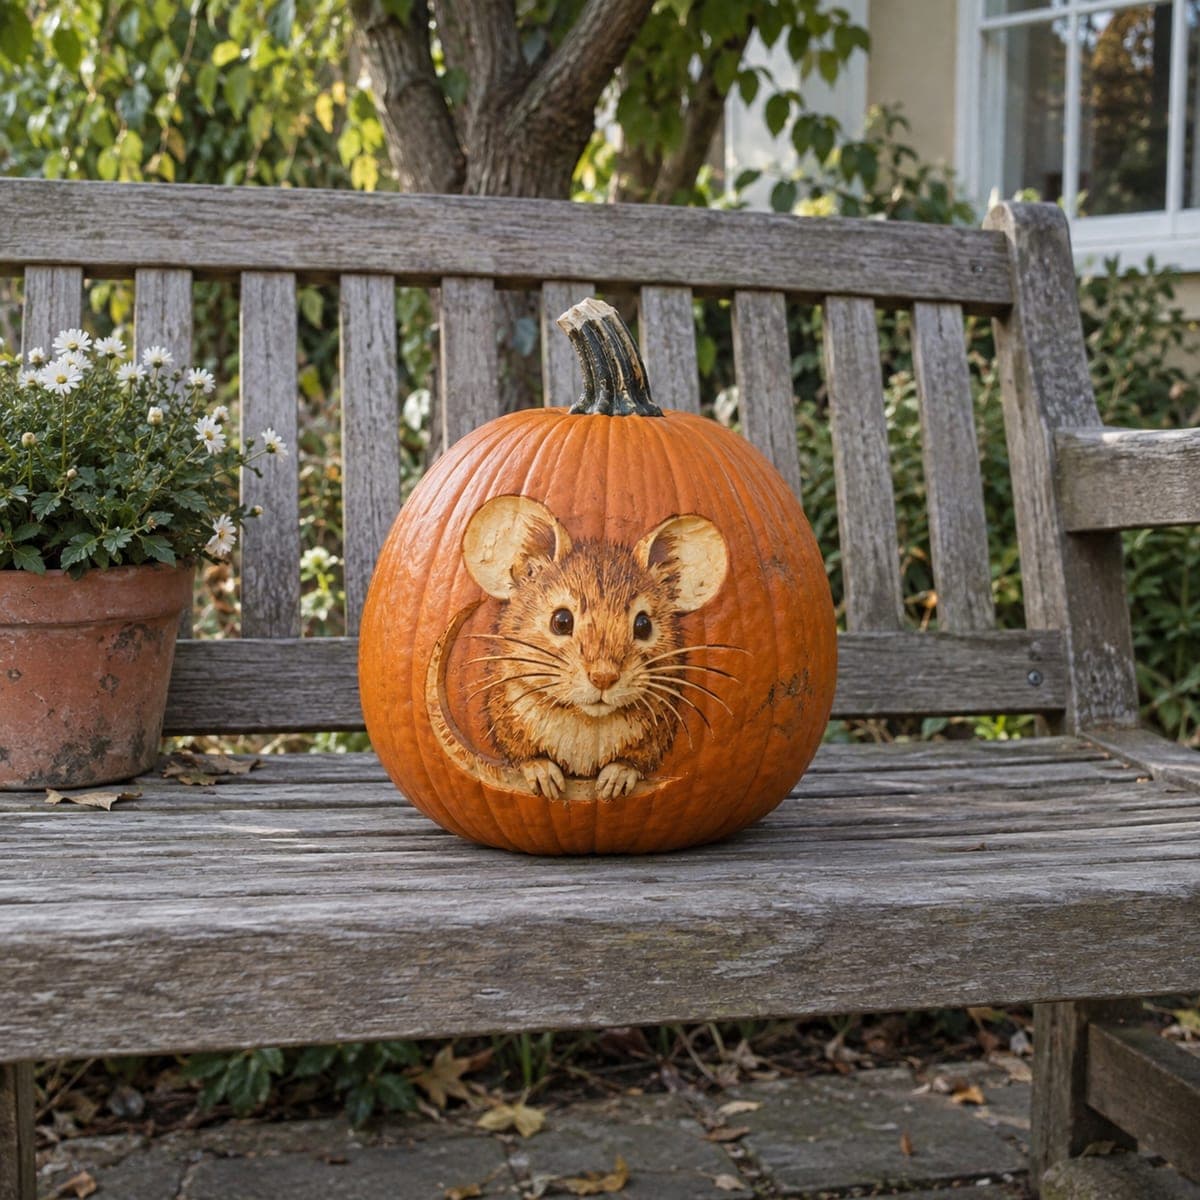
Sweet Field Mouse Etched Luminary PumpkinAI
0

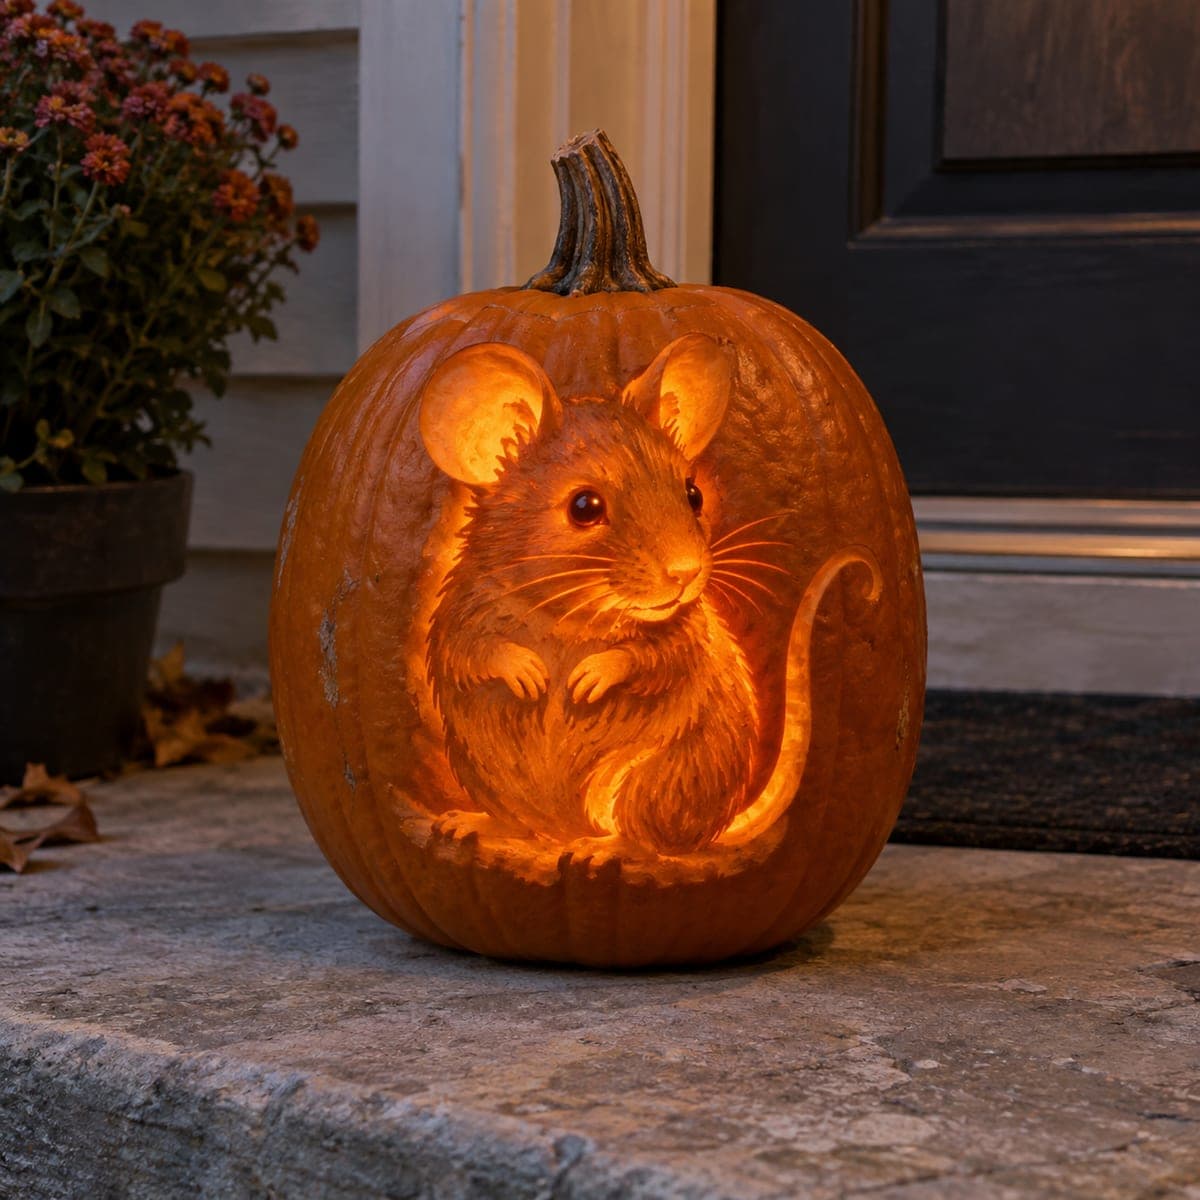
Sweet Field Mouse Etched Luminary Pumpkin

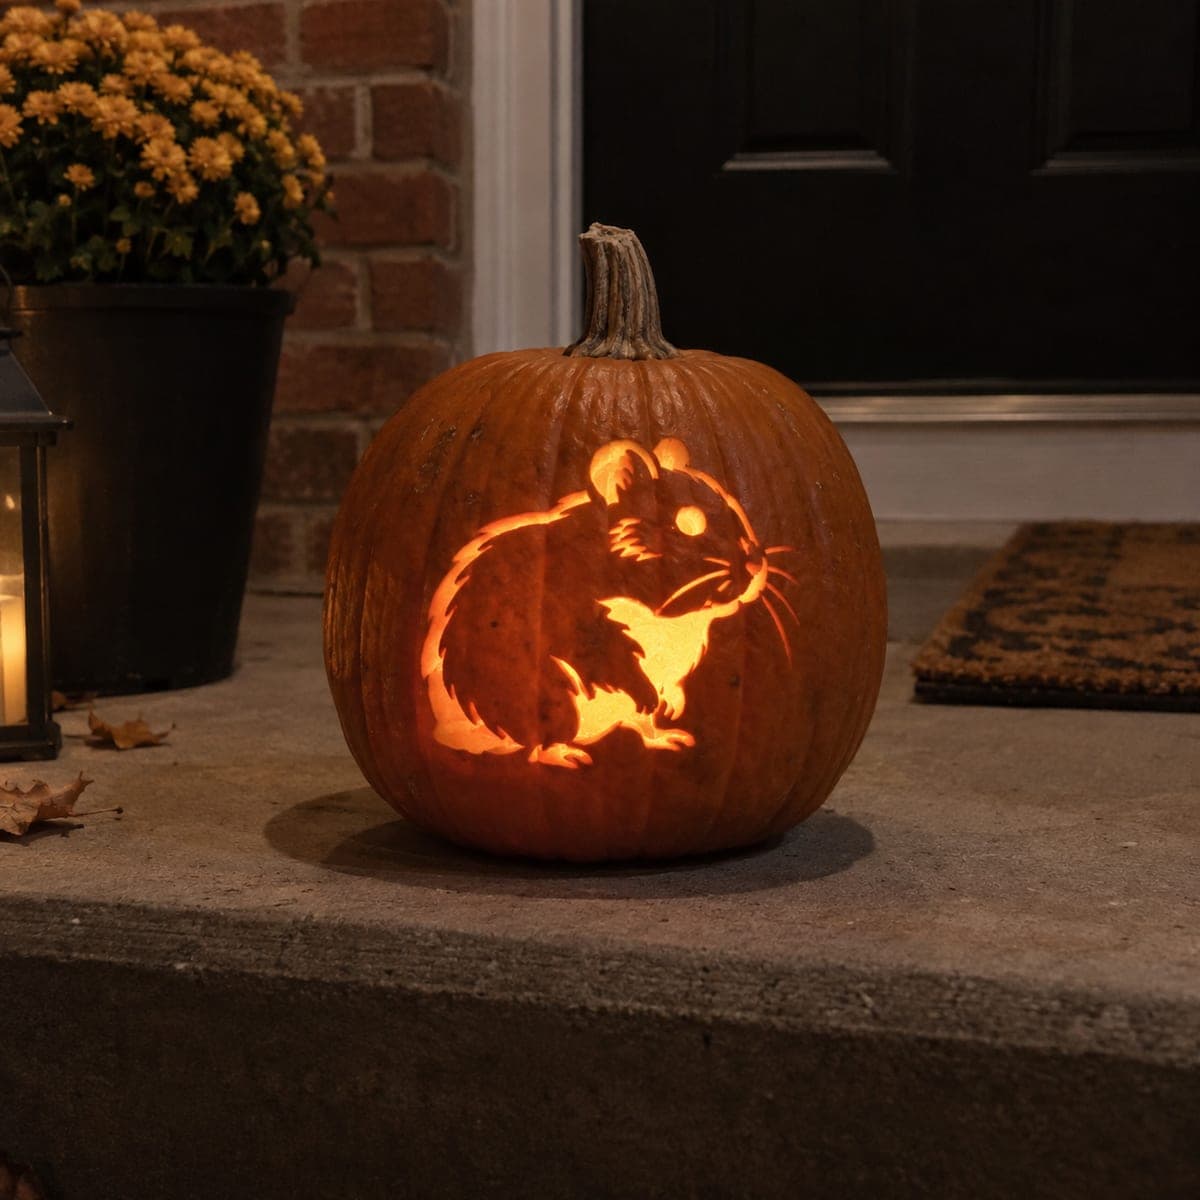
A little mouse sits up on its haunches with a long curling tail, every whisker and tuft of fur etched into the glowing surface. The rounded ears are peeled thinnest so they glow brightest, which draws the eye straight to that gentle face. This is patient V-gouge work over a couple of hours, so transfer a printed pattern first and light it with two LED pucks to fill the whole scene evenly.

This is an AI-generated concept image: a realistic, carvable design idea rather than a photo of a finished carve. AI concepts are always labeled and sit out the leaderboard and the contest.

No ratings yet · Sign in to rate
Comments (0)

  • No comments yet — be the first.

Save without an account. Sign in to like or comment.

Our tips for carving a similar design

The core trick here is depth through shading, not big cutouts. You leave most of the skin intact and use a V-gouge to etch fur, whiskers, and the curling tail, then peel the ears and body thin so light glows through in soft layers. Working outside is untouched dark, mid tones come from peeled skin, and only the tiniest accents get cut fully through.

Written by PumpkinCarvingIdeas.com, inspired by the image above. These are our suggestions, not instructions from the uploader. This approach to the AI concept has not been tested on a real pumpkin.

From pumpkin to porch

  1. Print and transfer the pattern

    Since this is a concept image, pick or draw a sitting mouse pattern with clear fur direction lines. Tape the printout to a tall, smooth pumpkin and poke the outlines with a transfer tool or pushpin. Trace the ears, face, body, and long tail so you have a full map before any cutting. Fur detail is hard to freehand, so a good pattern saves you here.

  2. Open and clean the pumpkin

    Have an adult cut a lid or a bottom opening so you can reach the inside. A bottom cut keeps the front wall smooth for etching and makes it easy to set over LED pucks later. Scrape the inside wall behind the mouse down to about one inch thick so peeled areas will glow. Even thickness gives you even light across the whole scene.

  3. Etch the fur and face first

    Start with a small V-gouge and follow your fur direction lines in short, flicking strokes. Work the face, cheeks, and chest, keeping strokes shallow so you only remove the outer skin. Leave the whiskers as raised uncut lines by carving the shadow gaps on either side of them. Go slow here because this shading is what makes the mouse look soft and real.

  4. Peel the body and ears for glow

    Once fur lines are in, use a loop tool to skin-peel the broad body and the rounded ears down to the pale flesh. Peel the ears thinnest of all so they become the brightest spots and pull the eye to the face. Feather the edges of each peeled area into the etched fur so tones blend instead of jumping. Check the glow by shining a light inside as you go.

  5. Add the tail and tiny cut accents

    Etch the long curling tail as a raised ribbon by carving grooves along both edges. Save any full cutouts for last, such as a thin sparkle in the eyes or a couple of the deepest shadow gaps. Keep whisker tips attached to the skin so nothing snaps off. Cutting these small openings last protects the delicate wall while you work.

  6. Light it and photograph

    Set two LED pucks inside, spaced so light fills both the head and the tail evenly. Avoid open flame since the thin peeled walls dry and scorch fast. Take your photo at dusk on a porch step so the warm glow reads against a dark door. A light mist of water each day helps the etched fur stay fresh longer.

Gather your supplies

Check things off as you get ready.

Work on a stable surface, keep your free hand out of the cutting path, and have an adult handle sharp tools.

Three levels of light

  • Leave intact

    The background pumpkin skin around the mouse stays untouched and dark.

  • Peel & shade

    The body, chest, face, and especially the rounded ears are peeled thin for a soft mid glow.

  • Cut through

    Only tiny accents like eye sparkles and the deepest shadow gaps are cut fully through.

Learn the carving basics

Before you start cutting

How do I keep the whiskers from breaking?

Do not cut the whiskers out as open slots. Instead carve shallow shadow grooves on each side so the whisker itself stays as a raised, attached line of skin. This keeps them structurally sound while still catching light.

Why peel the ears thinner than the body?

Thinner skin lets more light pass, so the ears become the brightest part of the scene. That glow naturally pulls a viewer's eye toward the gentle face. Test with a light inside and peel a little more if the ears look dull.

Can I finish this in one sitting?

Plan for a couple of focused hours since the fur shading is slow, patient work. Break it into stages: transfer, etch fur, peel, then final accents. If you rush the fur strokes the texture flattens out, so take your time.

Your take belongs here, too.

Changed a detail? Made it simpler? Share a photo of your version and tell the community what worked.

Share your pumpkin

More pumpkins like this

You've reached the end · 8 pumpkins
The Patch Report

Fresh pumpkins, in your inbox.

The best new carvings, ideas worth stealing, and how-tos for carving season. Short, seasonal, and gone by November.

A short email during carving season. Unsubscribe anytime. See our privacy policy.