Halloween Pumpkin Carving Contest · Starts October 1st · $500 in prizes
← Back to ideas
@ai_concepts
Sep 25, 2026
Symmetrical Tree of Life Jack-O-Lantern in Round FrameAI
0

Report this carving

Tell us what is wrong. Reports are private.

Symmetrical Tree of Life Jack-O-Lantern in Round Frame

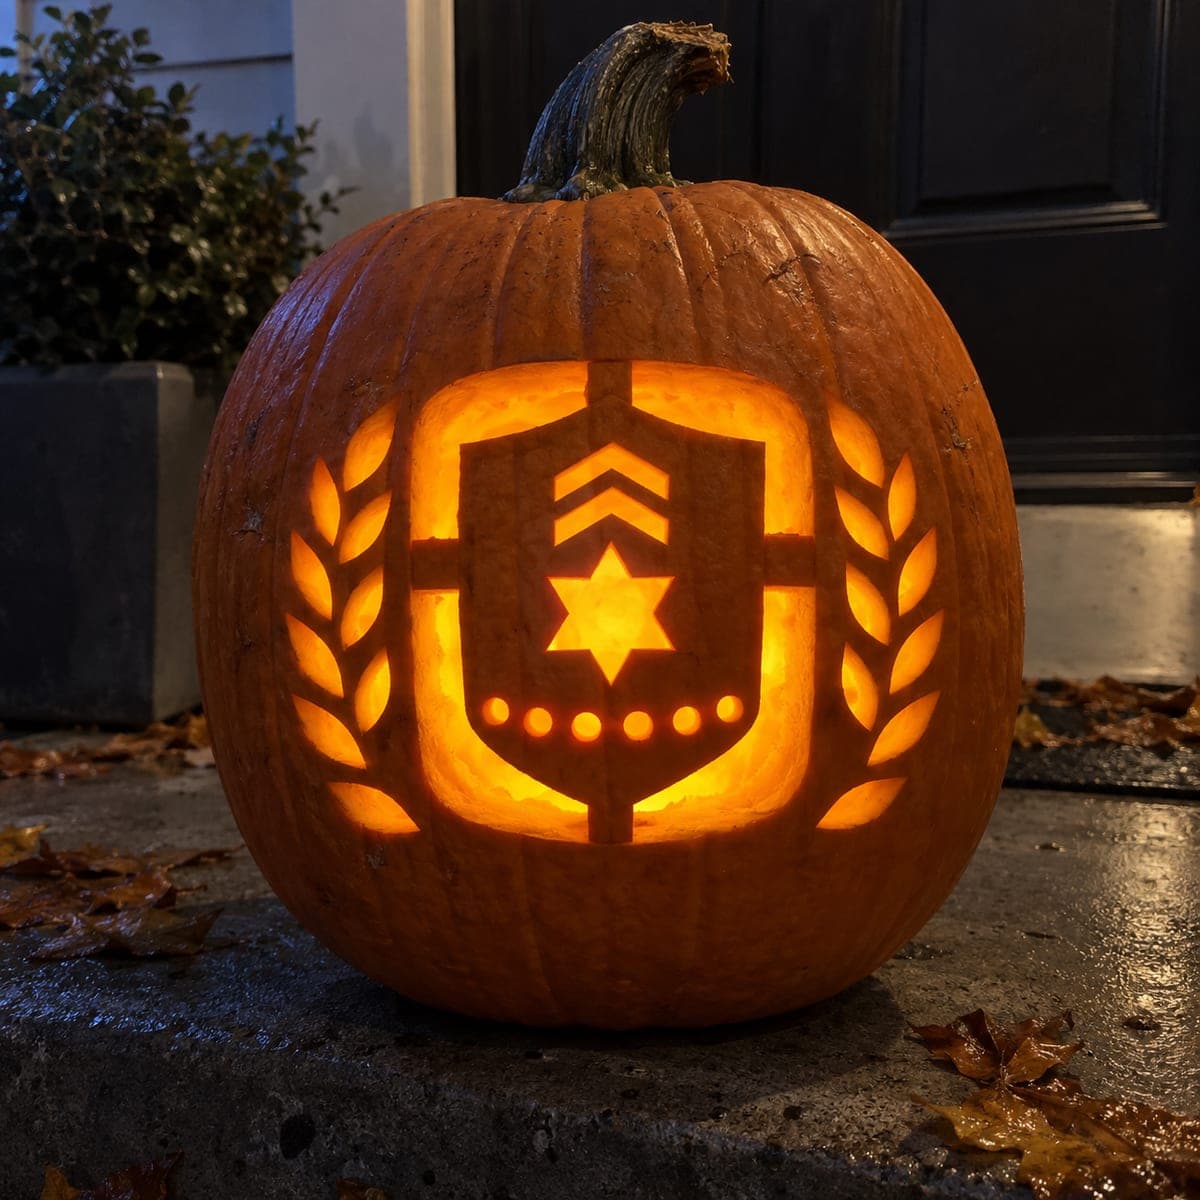
Ten separate curved openings form the sky and leaf spaces in this symmetrical tree of life pumpkin carving, while six branching limbs and four root bridges keep every piece attached to the outer frame. The wide trunk and broad structural connections mean no piece is ever isolated, which is the key to keeping this hard-difficulty design intact. Work on a wide pumpkin with a flat face for the best results, and use a fine-toothed jab saw for the curved leaf openings. Blue-hour lighting makes the amber glow especially vivid.

No ratings yet · Sign in to rate

Comments (0)

  • No comments yet — be the first.

Save without an account. Sign in to like or comment.

Our tips for carving a similar design

Ten curved openings are distributed between six branching limbs that all connect to the outer frame, and four broad root bridges anchor the base so no piece is ever isolated. The wide trunk and generous structural connections are what make this hard design achievable: there are no thin, freestanding ribs to fracture. Working on a wide pumpkin with a flat face maximizes the usable design area and keeps the frame proportional.

From pumpkin to porch

  1. Select and hollow carefully

    Choose a wide, flat-faced pumpkin with even wall thickness. Cut the lid opening from the back, then scoop pulp until the walls are a consistent inch thick, using a scraper tool to even out any thick spots. Even wall depth makes cutting the curved openings much easier to control.

  2. Transfer and mark all structural lines

    Tape the symmetrical template flat against the pumpkin face. Use a stylus to impress the outer frame, all six branch outlines, four root bridges, and all ten curved opening positions. Remove the paper and trace every impressed line with a thin marker so structural and cut lines are fully visible before you begin.

  3. Cut the outer frame circle

    Use a fine-toothed jab saw for the circular outer frame, working in short controlled strokes and rotating the pumpkin as needed. Keep the saw perpendicular to the surface to produce a clean vertical edge. Check that the frame circle is complete and even before moving to internal cuts.

  4. Cut sky and upper leaf openings

    Begin with the largest curved sky openings between the upper branches. Each opening is surrounded by solid branch rind so the structure stays rigid. Use the fine-toothed saw for smooth curves, and push each piece inward to release it without stressing the neighboring rind.

  5. Work down through lower openings

    Move to the mid and lower curved leaf openings, always cutting the larger holes before the smaller ones. Keep confirming that the four root bridges feel solid as you approach the base. Pause if any area develops micro-cracks and allow the pumpkin surface to equalize before continuing.

  6. Light and display at blue hour

    Insert a battery LED positioned at the center of the pumpkin floor so light radiates evenly through all ten openings. Position on a worn brick wall or raised surface and check the display at blue hour when the amber glow and cool sky create the strongest visual contrast.

Written with AI to match this design

Gather your supplies

Check things off as you get ready.

Work on a stable surface, keep your free hand out of the cutting path, and have an adult handle sharp tools.

Three levels of light

  • Leave intact

    Wide trunk, six branching limbs, four root bridges, and outer frame ring remain solid and unlit

  • Peel & shade

    None on this design

  • Cut through

    All ten curved leaf and sky openings cut fully through for full amber glow

Learn the carving basics

Before you start cutting

How do I keep the six branches perfectly symmetrical when transferring?

Fold the printed template in half vertically before taping it down to confirm the left and right halves mirror each other exactly. Use the fold crease as a center axis guide when positioning on the pumpkin. A vertical line drawn lightly down the center of the pumpkin face with a marker also helps you align the template precisely.

Is a fine-toothed saw really necessary or can I use a standard pumpkin saw?

A fine-toothed saw matters here because the curved openings are tighter than basic jack-o-lantern shapes. A coarser blade tends to jump and tear on tight curves, which can chip the rind at thin bridge points. A detail saw from a craft store gives you the control the curved cuts require.

One of my branches cracked slightly during cutting. Should I stop?

Small surface cracks that do not run all the way through can be stabilized by rubbing a thin coat of petroleum jelly over the crack to slow moisture loss. Avoid cutting adjacent to the crack for at least a few minutes. If the crack runs fully through a branch, use a toothpick and a drop of craft glue to pin it before continuing.

Your take belongs here, too.

Changed a detail? Made it simpler? Share a photo of your version and tell the community what worked.

Share your pumpkin

More pumpkins like this

You've reached the end · 8 pumpkins
The Patch Report

Fresh pumpkins, in your inbox.

The best new carvings, ideas worth stealing, and how-tos for carving season. Short, seasonal, and gone by November.

A short email during carving season. Unsubscribe anytime. See our privacy policy.