@boo_radley
Sep 5, 2026
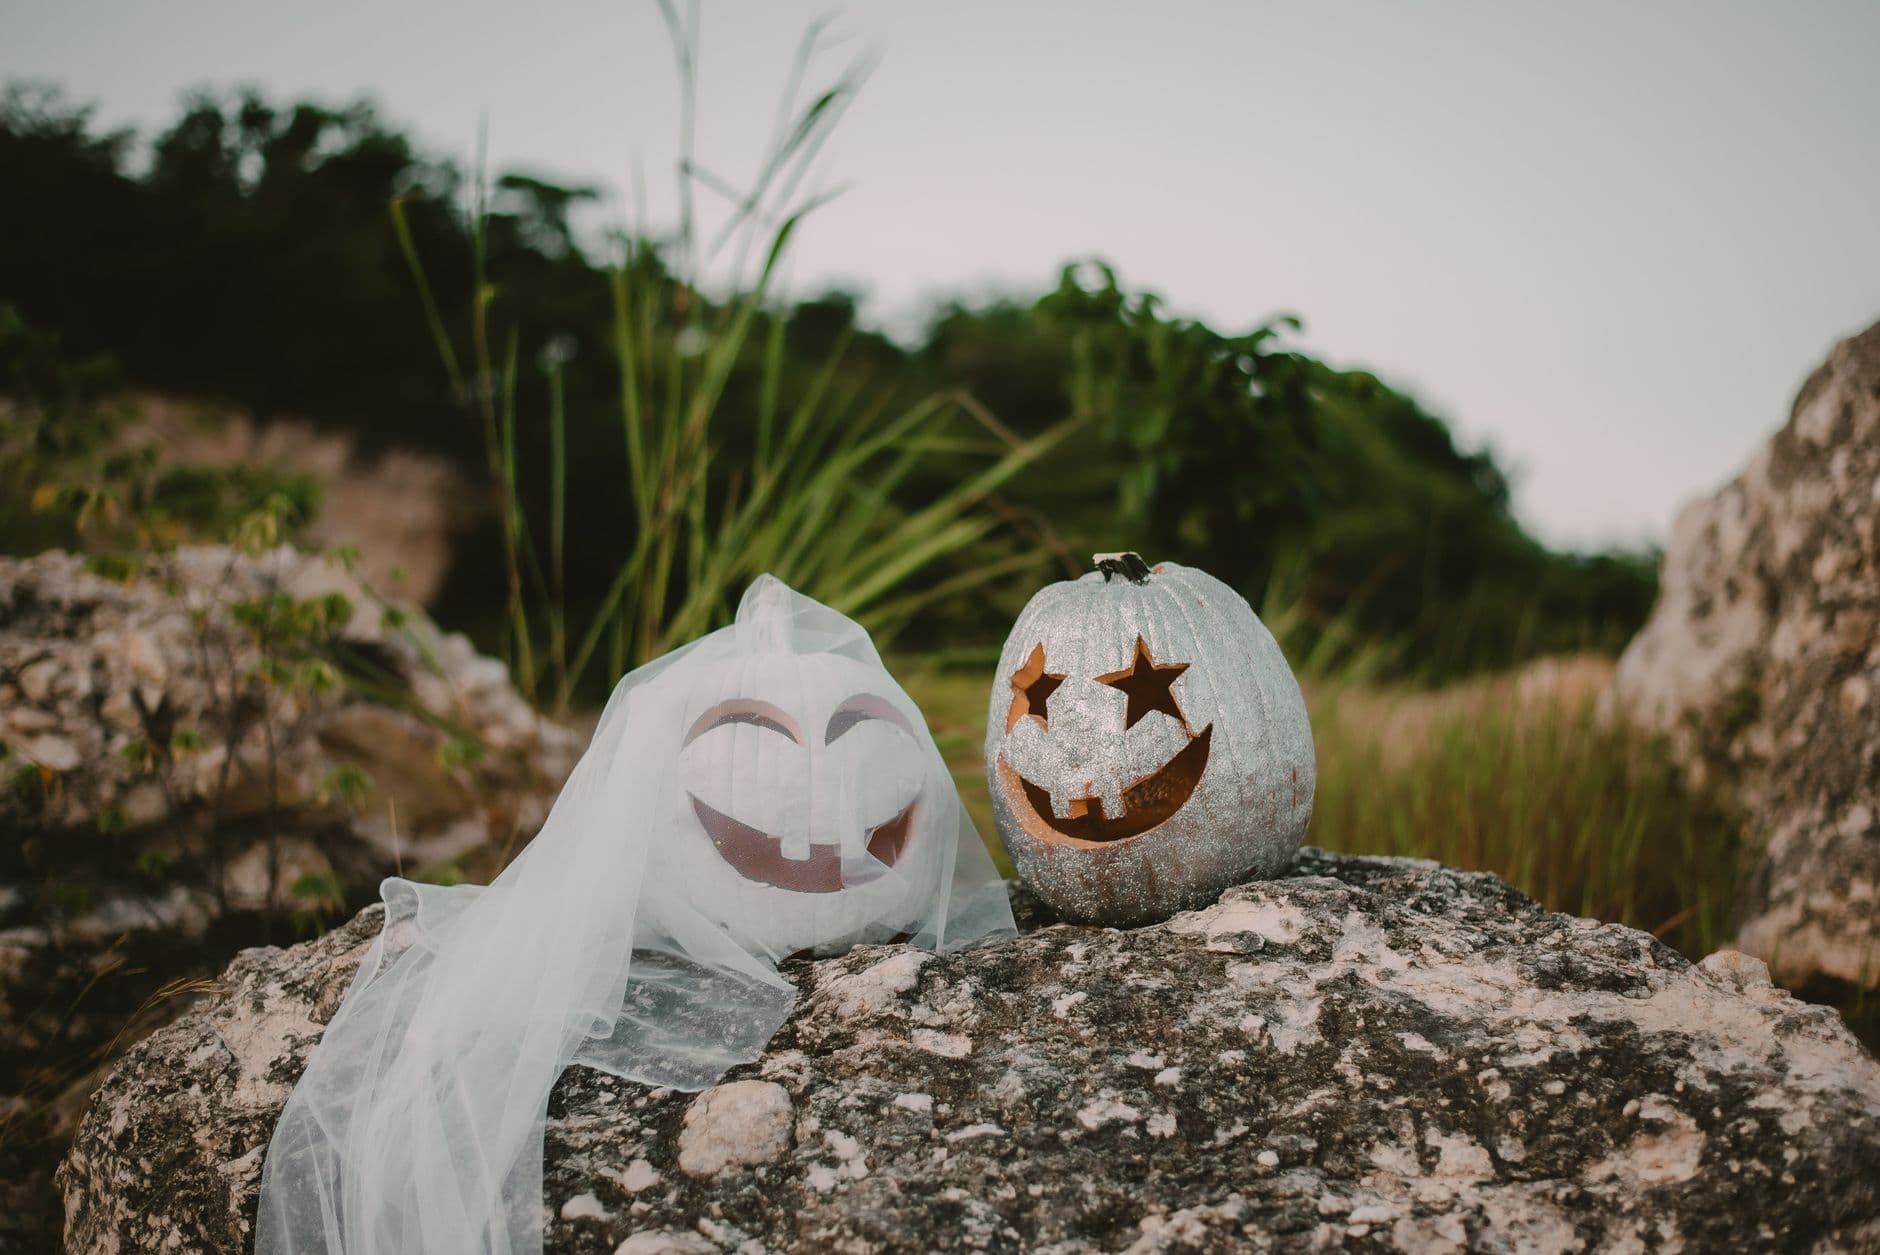
The happy couple
A veiled white bride with a painted grin and her glitter-silver groom with carved star eyes, posing on the rocks.
No ratings yet · Sign in to rate
A veiled white bride with a painted grin and her glitter-silver groom with carved star eyes, posing on the rocks.
The whole trick here is contrast between two partners: one pumpkin stays painted and closed for a soft glowing face, while the other gets real star cutouts that throw light. Paint both a pale color first, then decide which one carries the carved detail and which one is decorated with paint and fabric alone. Keep the openings clean and the shapes simple so the pair reads as cute rather than spooky.
Written by PumpkinCarvingIdeas.com, inspired by @boo_radley's photo above. These are our suggestions, not instructions from the uploader, and this approach hasn't been tested on their exact carve.
Wipe both pumpkins clean and let them dry fully so paint grips well. Give one a flat white base coat and the other a metallic silver or glitter coat, using two thin layers instead of one heavy one. Let each layer dry before adding the next. Painting first means you carve through a finished surface later and avoid smudging.
On the pumpkin that will get star cutouts, cut a lid at an angle around the stem so it rests without falling in. Scoop out the seeds and pulp, then scrape the front wall down to about one inch thick. A thinner wall makes the star points much easier to cut. Have an adult handle all knife work.
Tape a simple face pattern onto the front, two matching stars for eyes and a wide smiling mouth. Poke along the outlines with a pin or an awl to mark the shapes. Remove the paper and connect the dots lightly with a marker so your cut lines are clear. Keep the two stars the same size so the face stays balanced.
Carve the star eyes first while the pumpkin is still strong, using short controlled strokes and cutting toward each point. Save the wide mouth for last since it is the biggest opening and weakens the front. Push each cut piece out gently from the inside. If a star point tears, trim it slightly rather than forcing it.
On the white pumpkin, use paint alone for the face: fill in curved eyes and a grin with a soft brush, and keep the lines smooth. Once dry, drape a piece of white tulle or netting over the top to make the veil. Let it fall loose over one side for that bride look. This partner stays sealed, so no carving is needed.
Set a small LED tealight or puck light inside the carved groom so the stars and grin glow. Place both pumpkins together on a flat, stable surface with the bride leaning slightly toward her partner. Shoot at dusk so the cutouts read against a darker background. Skip real candles, especially near the fabric veil.
Check things off as you get ready.
Work on a stable surface, keep your free hand out of the cutting path, and have an adult handle sharp tools.
The painted bride pumpkin stays whole and dark, glowing only by reflected light off her white surface.
Lightly scrape the inner edges of the groom's star points and mouth so a soft orange rim frames each opening.
The two star eyes and the wide smile on the silver pumpkin are cut all the way through for the brightest glow.
Paint first, then carve. A finished, dry coat lets you cut clean lines without dragging wet paint into the openings. If you carve first, paint tends to pool along the cut edges and smudge the face.
Thin the front wall to about one inch and carve toward each point with short strokes rather than long sawing cuts. Cut the small stars before the big mouth so the pumpkin stays firm. If a tip does crack, trim it into a slightly smaller, cleaner star.
Paint and glitter seal the skin a little, which slows drying out, but a carved pumpkin still softens within several days. Carve close to the day you want to display it and keep both pumpkins cool and out of direct sun. For a photo shoot, they will look their best in the first day or two.
Changed a detail? Made it simpler? Share a photo of your version and tell the community what worked.
The best new carvings, ideas worth stealing, and how-tos for carving season. Short, seasonal, and gone by November.
Comments (0)