Halloween Pumpkin Carving Contest · Starts October 1st · $500 in prizes
← Back to ideas
@ai_concepts
Sep 25, 2026
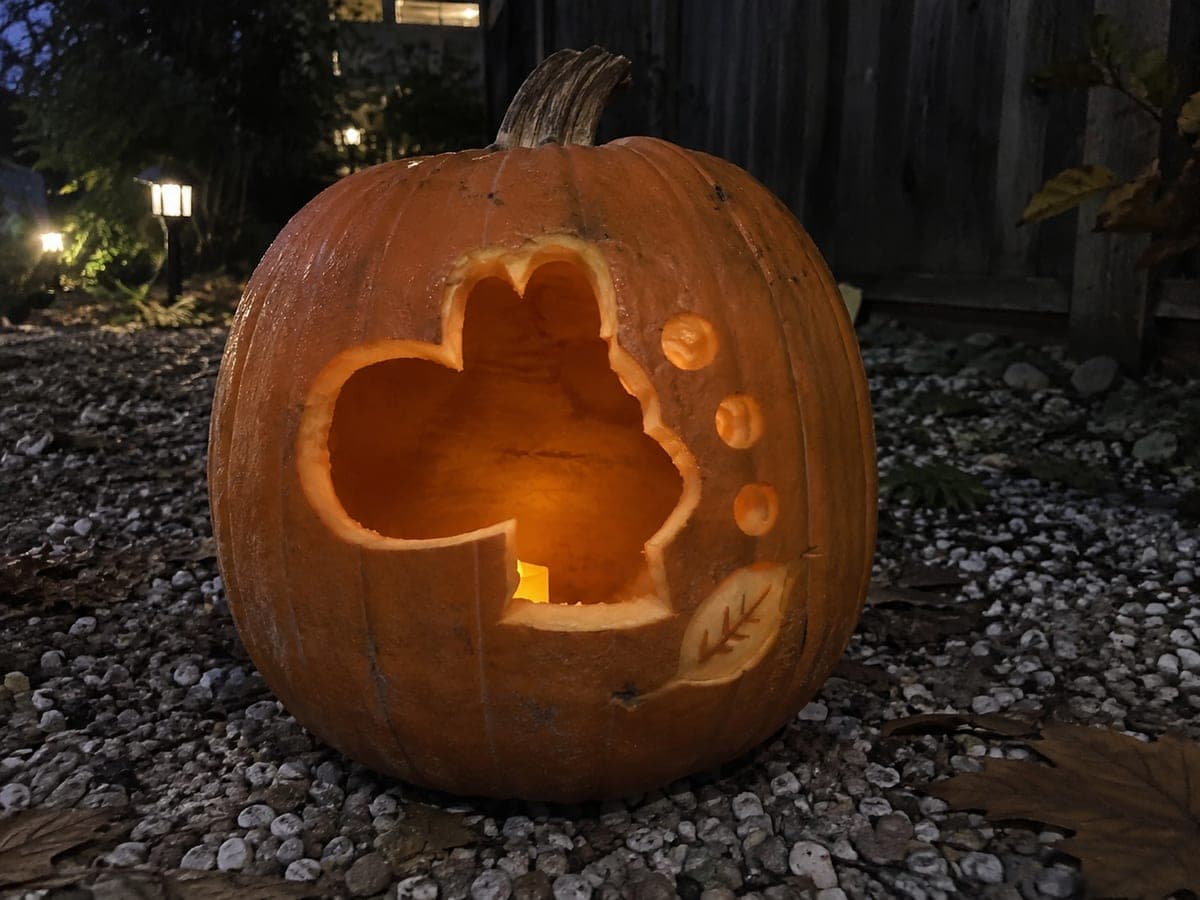
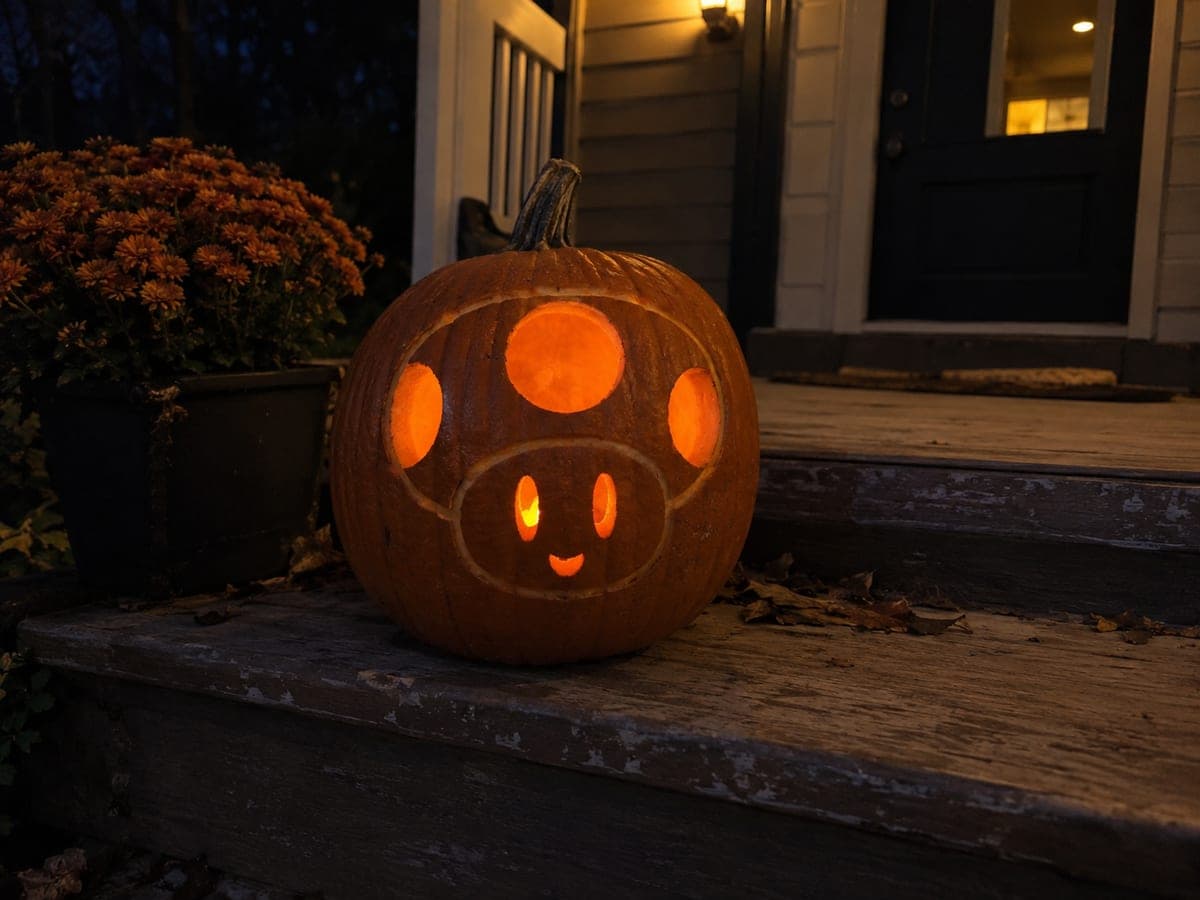
Toad Jack-O-Lantern with Cap Spots and Vest OutlineAI
0

Report this carving

Tell us what is wrong. Reports are private.

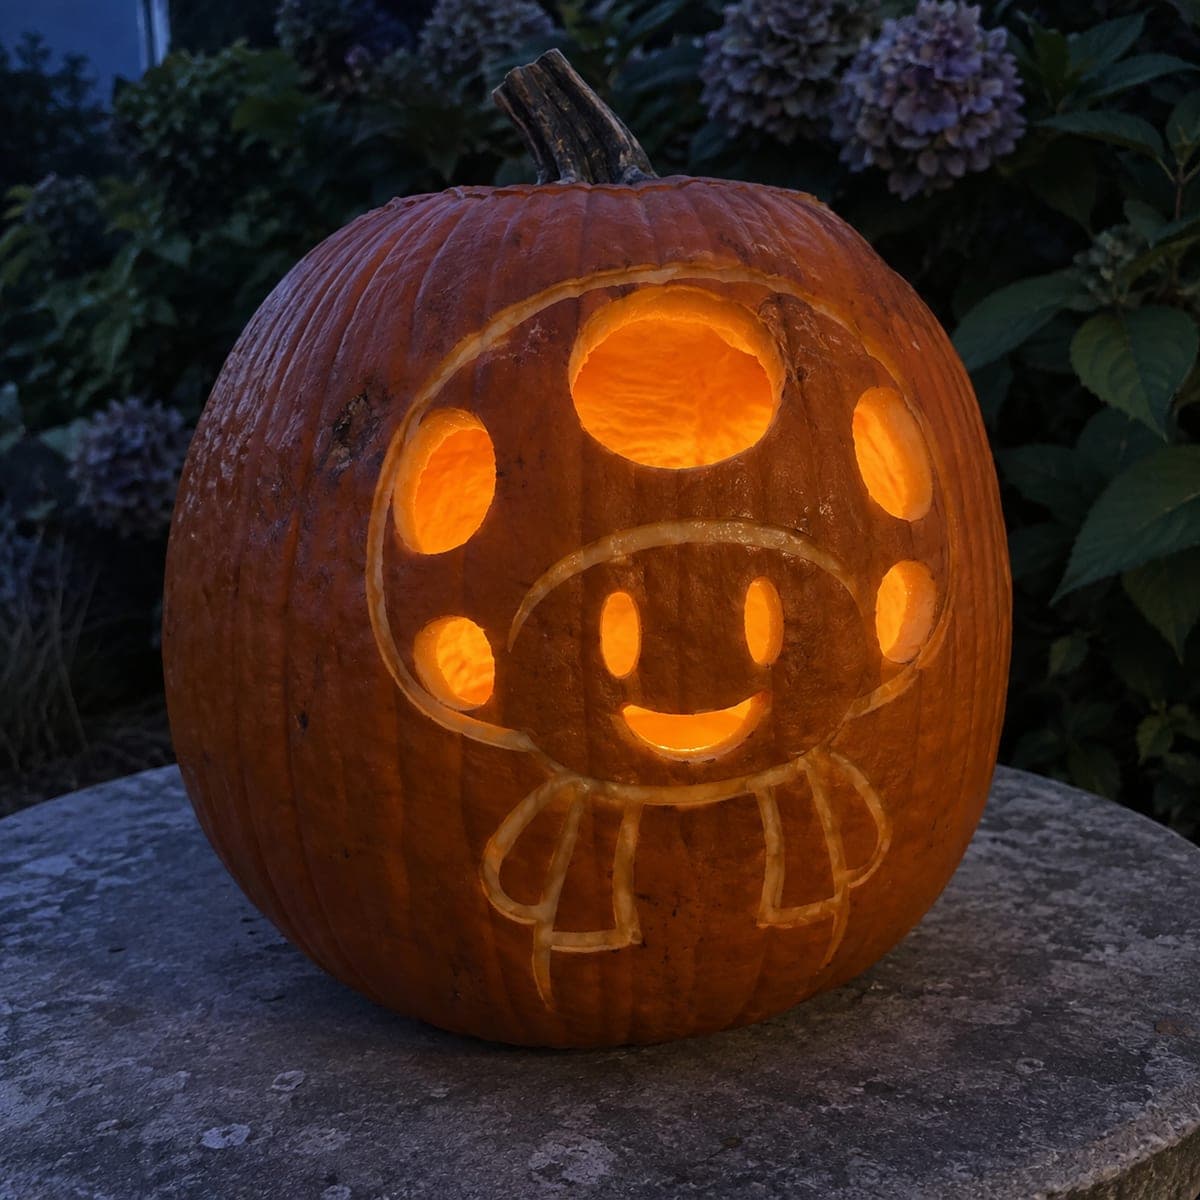
Toad Jack-O-Lantern with Cap Spots and Vest Outline

Eyes, mouth, and large cap spots are cut through to show raw rims and hollow interior on this medium Toad pumpkin carving idea, while the vest outline is shallow-scored on intact rind for a layered surface effect. The contrast between the glowing through-cuts and the matte scored lines gives the finished design a storybook illustration quality. Cut the cap spots before the eyes so the top of the rind stays stiff while you work the face details below.

No ratings yet · Sign in to rate
Comments (0)

  • No comments yet — be the first.

Save without an account. Sign in to like or comment.

Our tips for carving a similar design

At medium difficulty Toad's design shifts the large cap spots to full through-cuts so they glow brightly alongside the eyes and mouth, while the vest outline stays as a scored surface mark for contrast. Cutting the cap spots before the eyes and mouth keeps the upper rind stiff while you work the lower face features, which is the clearest structural advantage this order provides.

From pumpkin to porch

  1. Prep and transfer

    Scoop from the back and thin interior walls to an inch. Transfer the stencil with a pounce wheel, marking all through-cut areas with an X and all scored areas with a single dashed line. Having a clear visual key on the pumpkin surface prevents cutting into a scored zone by mistake.

  2. Score the vest outline

    Score the vest and collar outlines with a scoring tool or linoleum cutter tip before making any through-cuts. Getting the scored outlines established first confirms the composition is correct and gives you a reference line for where the cap and face end.

  3. Cut the cap spots

    Use a fine detail saw to cut the large cap spots from the top of the design downward. Work from the largest spot to the smallest. Keep each spot cut well within the cap outline scored above the face so the scored line still reads as a clear boundary after the spots are open.

  4. Cut the eyes

    Move to the eye openings and cut them with the fine detail saw. At medium difficulty the eyes may be more expressive or detailed than the easy version, so follow the stencil outline precisely. Remove each slug carefully.

  5. Cut the mouth

    Cut the mouth opening last among the through-cuts. The lower face rind has stayed rigid throughout the cap spot and eye work, giving you good support for the saw when cutting the smile. Keep the corners of the mouth within the face zone.

  6. Light and display

    Place a warm LED tea light inside and view in a darkened room. The cap spots, eyes, and mouth should all glow together while the vest outline reads as a scored surface detail below. Apply petroleum jelly to all cut and scored surfaces.

Written with AI to match this design

Gather your supplies

Check things off as you get ready.

Work on a stable surface, keep your free hand out of the cutting path, and have an adult handle sharp tools.

Three levels of light

  • Leave intact

    The rind between cap spots, the face surface below the cap line, and the scored vest zone remain dark

  • Peel & shade

    None at this level; scored vest outline is a surface mark without significant flesh removal

  • Cut through

    Large cap spots, eye openings, and mouth opening are all fully cut through for bright simultaneous light

Learn the carving basics

Before you start cutting

The scored vest outline looks faint compared to the glowing through-cuts. Is that a problem?

It is by design. The vest outline is intentionally subtle, providing a drawn-illustration quality that contrasts with the bright cut openings. If you want the vest to be more prominent, deepen the scored line to a quarter-inch and it will glow noticeably more. This is a matter of personal preference and does not affect the design structurally.

How do I keep the cut edges of the cap spots from showing raw white rind at display time?

The raw cut edges are unavoidable with a cutout technique, but they are only visible up close. From a normal viewing distance of four or more feet, the glowing interior light makes the edge color irrelevant. If you prefer, a thin coat of orange food-safe paint on the cut edge interior can blend it with the outer rind.

The cap spots and eye openings are all glowing at the same brightness. How do I make them read as distinct layers?

Vary the size: cap spots should be larger than the eye openings at this scale so they read as belonging to a different part of the design. If they are the same size, the eye openings can be deepened slightly on the interior side with a gouge to create a slightly different light quality from the cap spots.

Your take belongs here, too.

Changed a detail? Made it simpler? Share a photo of your version and tell the community what worked.

Share your pumpkin

More pumpkins like this

You've reached the end · 8 pumpkins
The Patch Report

Fresh pumpkins, in your inbox.

The best new carvings, ideas worth stealing, and how-tos for carving season. Short, seasonal, and gone by November.

A short email during carving season. Unsubscribe anytime. See our privacy policy.