Halloween Pumpkin Carving Contest · Starts October 1st · $500 in prizes
← Back to ideas
@ai_concepts
Jul 26, 2026
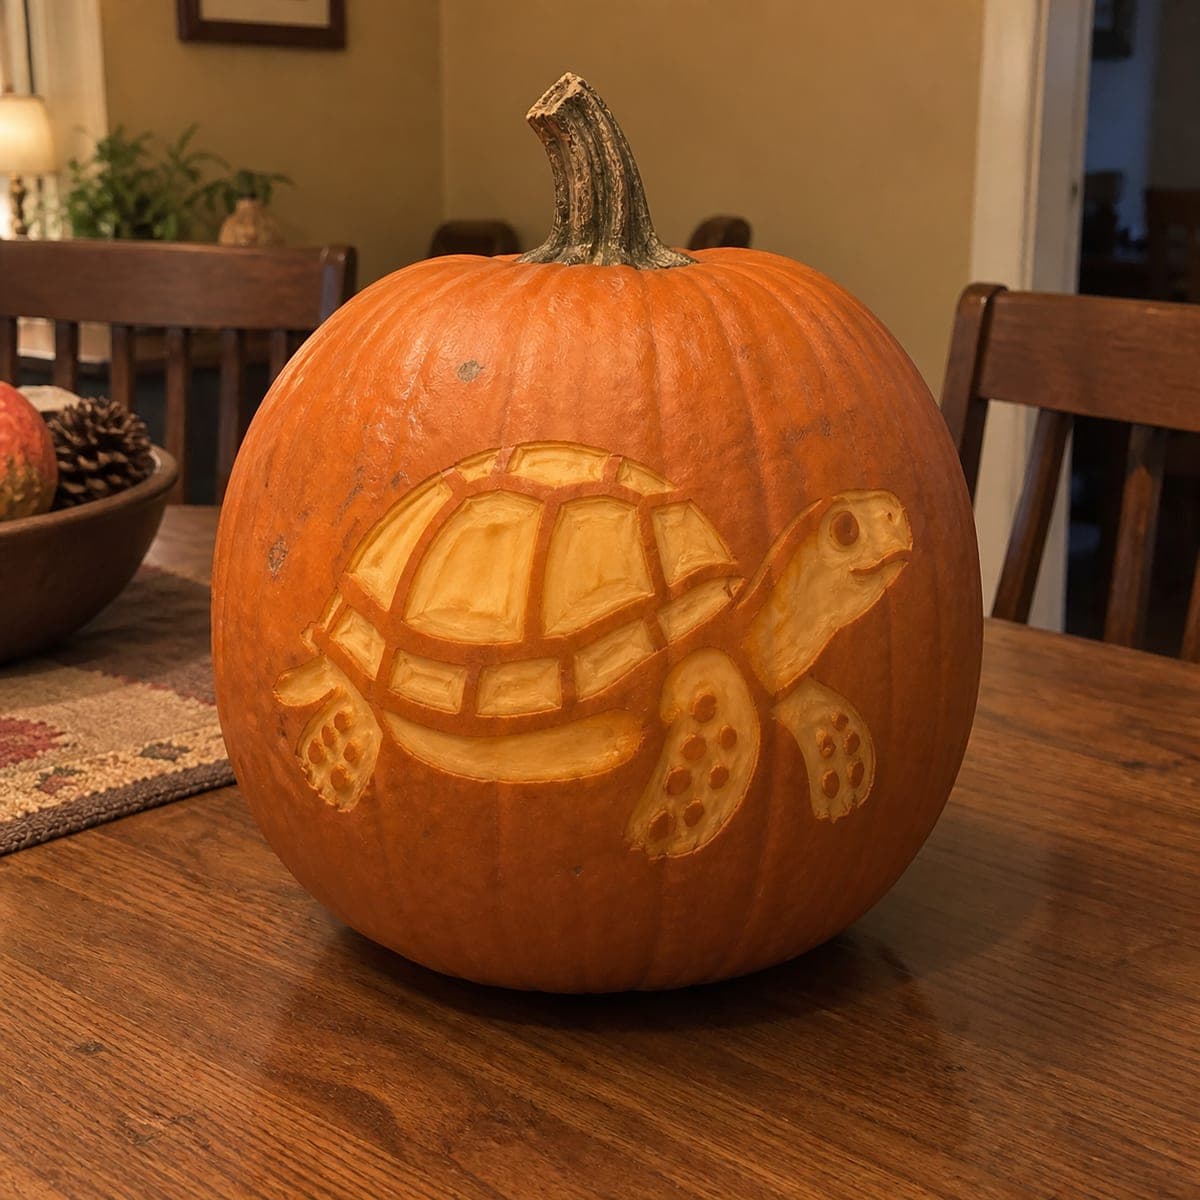
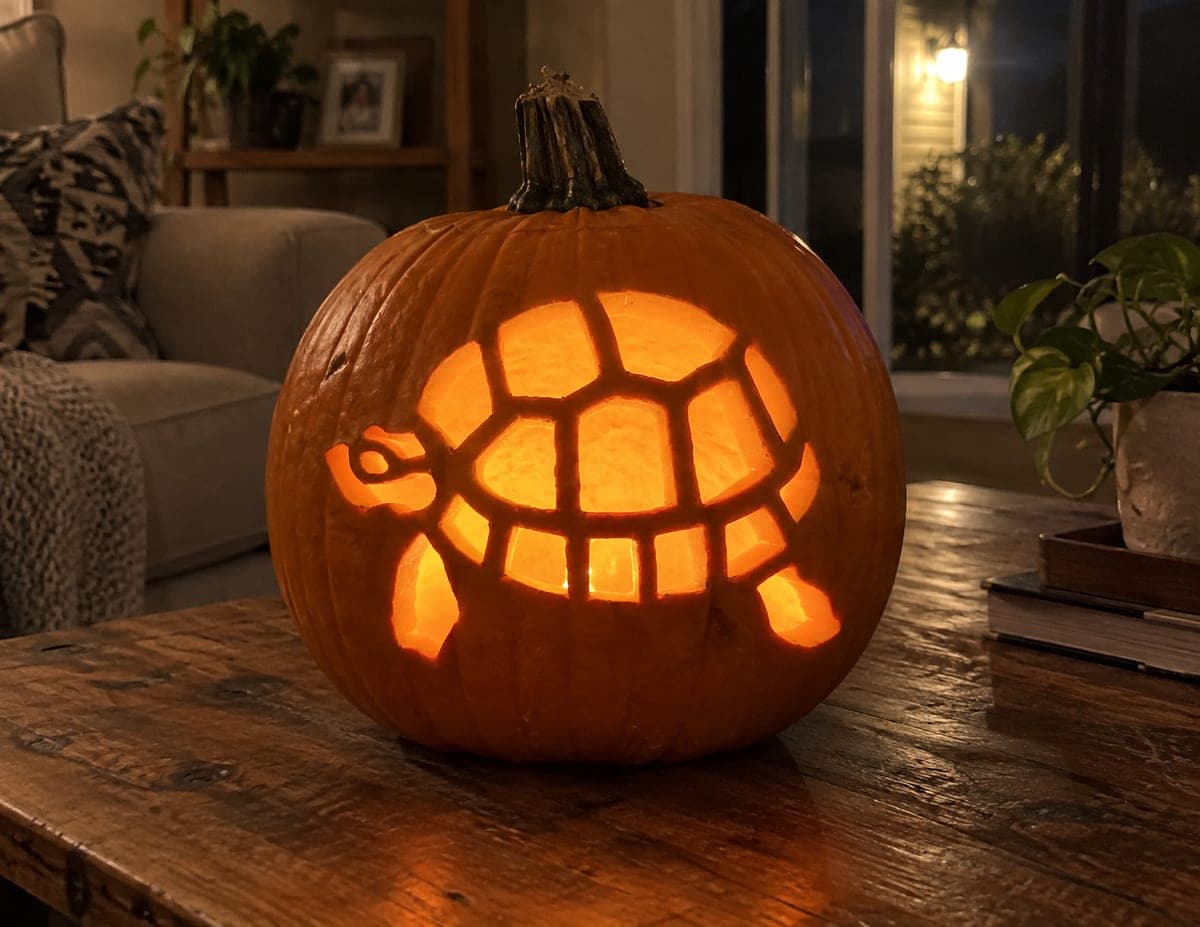
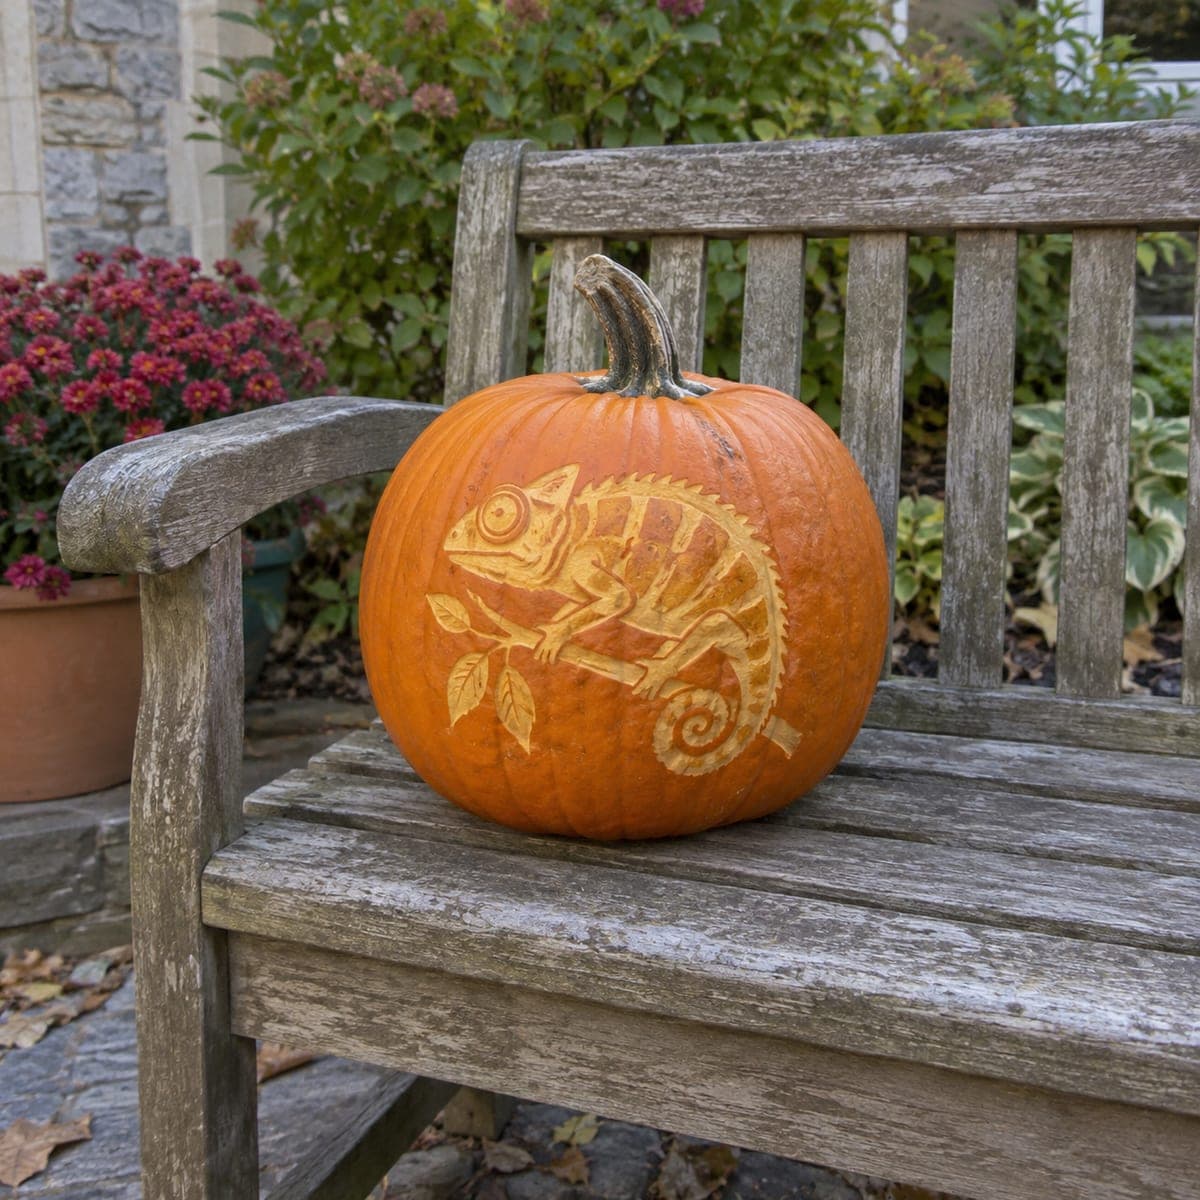
Turtle Shell Silhouette Shaded Pumpkin CarvingAI
0

Turtle Shell Silhouette Shaded Pumpkin Carving

A full-body tortoise is carved across the face of this pumpkin, its geometric shell pattern and stubby legs cleanly etched into the surface so the design reads as a warm silhouette in natural light. The shading technique preserves the pumpkin wall while selectively thinning it to reveal the shell's hexagonal segments and the outline of the animal. Trace the pattern onto the pumpkin with carbon paper and a ballpoint pen before beginning, then work from the outer edges inward. This is a charming pumpkin idea for animal lovers who want something unusual beyond the standard holiday motifs.

This is an AI-generated concept image: a realistic, carvable design idea rather than a photo of a finished carve. AI concepts are always labeled and sit out the leaderboard and the contest.
No ratings yet · Sign in to rate

Comments (0)

  • No comments yet — be the first.

Save without an account. Sign in to like or comment.

Our tips for carving a similar design

The core trick here is shaving, not cutting. Instead of removing chunks, you thin the pumpkin wall so the turtle glows warm while the skin around it stays dark. Keep the shell segments and leg outlines as slightly deeper channels so the pattern reads clearly in daylight and softly when lit.

Written by PumpkinCarvingIdeas.com, inspired by the image above. These are our suggestions, not instructions from the uploader. This approach to the AI concept has not been tested on a real pumpkin.

From pumpkin to porch

  1. Pick and prep the canvas

    Choose a smooth, wide pumpkin with a flat area on one side for the turtle to sit. Cut a lid or a back access hole and scoop the inside clean, thinning the carving wall to about one inch so shading is easier. Pat the front dry so your pattern will stick. A smooth, blemish-free face gives the shell segments room to show off.

  2. Trace the pattern

    Tape your turtle stencil to the front, keeping the shell centered and the head facing to the side. Slide carbon paper underneath and go over every line with a ballpoint pen. Press firmly on the shell segment borders and the leg outlines so you have clear guides. Peel the paper back and check that the full body transferred before you start.

  3. Outline the whole turtle first

    Use a small detail knife or a lino-style gouge to lightly score the full outer edge of the turtle, the shell hexagons, and each leg. These shallow score lines act as stop cuts so your shading does not bleed past the shape. Keep the blade shallow and let the lines stay as narrow dark channels. Work from the outer edges inward so you always have solid pumpkin to brace against.

  4. Shave the shell segments

    With a ribbon tool or the loop end of a clay tool, peel away only the orange skin inside each hexagon so the flesh underneath shows pale. Leave the thin borders between segments untouched so they read as dark lines. Aim for an even depth across all the segments for a consistent glow. Take it slow, since you can always remove more but cannot put skin back.

  5. Shade the head, legs, and body

    Peel the skin off the head, the four stubby legs, and the belly line the same way, keeping the toe details as small dark notches. Vary your pressure slightly so the shell looks a touch brighter than the legs, which adds depth. Wipe away pulp as you go to check the contrast in good light. The eye can stay as a tiny untouched dark dot for personality.

  6. Light it and photograph

    Drop a battery LED puck inside and set it on a shelf or bench in the evening. Because this is a shaded design, a soft warm bulb makes the pale turtle glow without washing out the segment lines. Coat the shaved areas with petroleum jelly to slow drying and keep the glow crisp for a few days. Snap your photo at dusk when the ambient light still shows the shell texture.

Gather your supplies

Check things off as you get ready.

Work on a stable surface, keep your free hand out of the cutting path, and have an adult handle sharp tools.

Three levels of light

  • Leave intact

    The pumpkin skin around the turtle and the thin borders between each shell segment stay untouched and dark.

  • Peel & shade

    The shell hexagons, head, legs, and belly are skin-peeled for a warm mid glow.

  • Cut through

    No full cutouts are needed, though you could pierce the eye dot for a small bright point if you want extra pop.

Learn the carving basics

Before you start cutting

Do I need to cut all the way through anywhere?

No, this design is built almost entirely on shading, so most of the effect comes from peeling skin rather than making openings. That keeps the pumpkin wall intact and the whole turtle glows evenly. If you want a little sparkle, you can poke through just the tiny eye.

How do I keep the shell segments from blurring together?

Score the segment borders as stop cuts before you shade, then leave those thin lines as untouched skin. Shave only inside each hexagon and stay clear of the borders. The dark lines against the pale flesh are what make the shell pattern read clearly.

How deep should I shave for the best glow?

Aim to remove just the orange skin and a shallow layer of flesh, so the wall thins but does not open. Test one segment first, hold it to light, and match the rest to that depth. Consistent shaving gives an even warm glow instead of blotchy bright spots.

Your take belongs here, too.

Changed a detail? Made it simpler? Share a photo of your version and tell the community what worked.

Share your pumpkin

More pumpkins like this

You've reached the end · 8 pumpkins
The Patch Report

Fresh pumpkins, in your inbox.

The best new carvings, ideas worth stealing, and how-tos for carving season. Short, seasonal, and gone by November.

A short email during carving season. Unsubscribe anytime. See our privacy policy.