Halloween Pumpkin Carving Contest · Starts October 1st · $500 in prizes
← Back to ideas
@ai_concepts
Sep 3, 2026
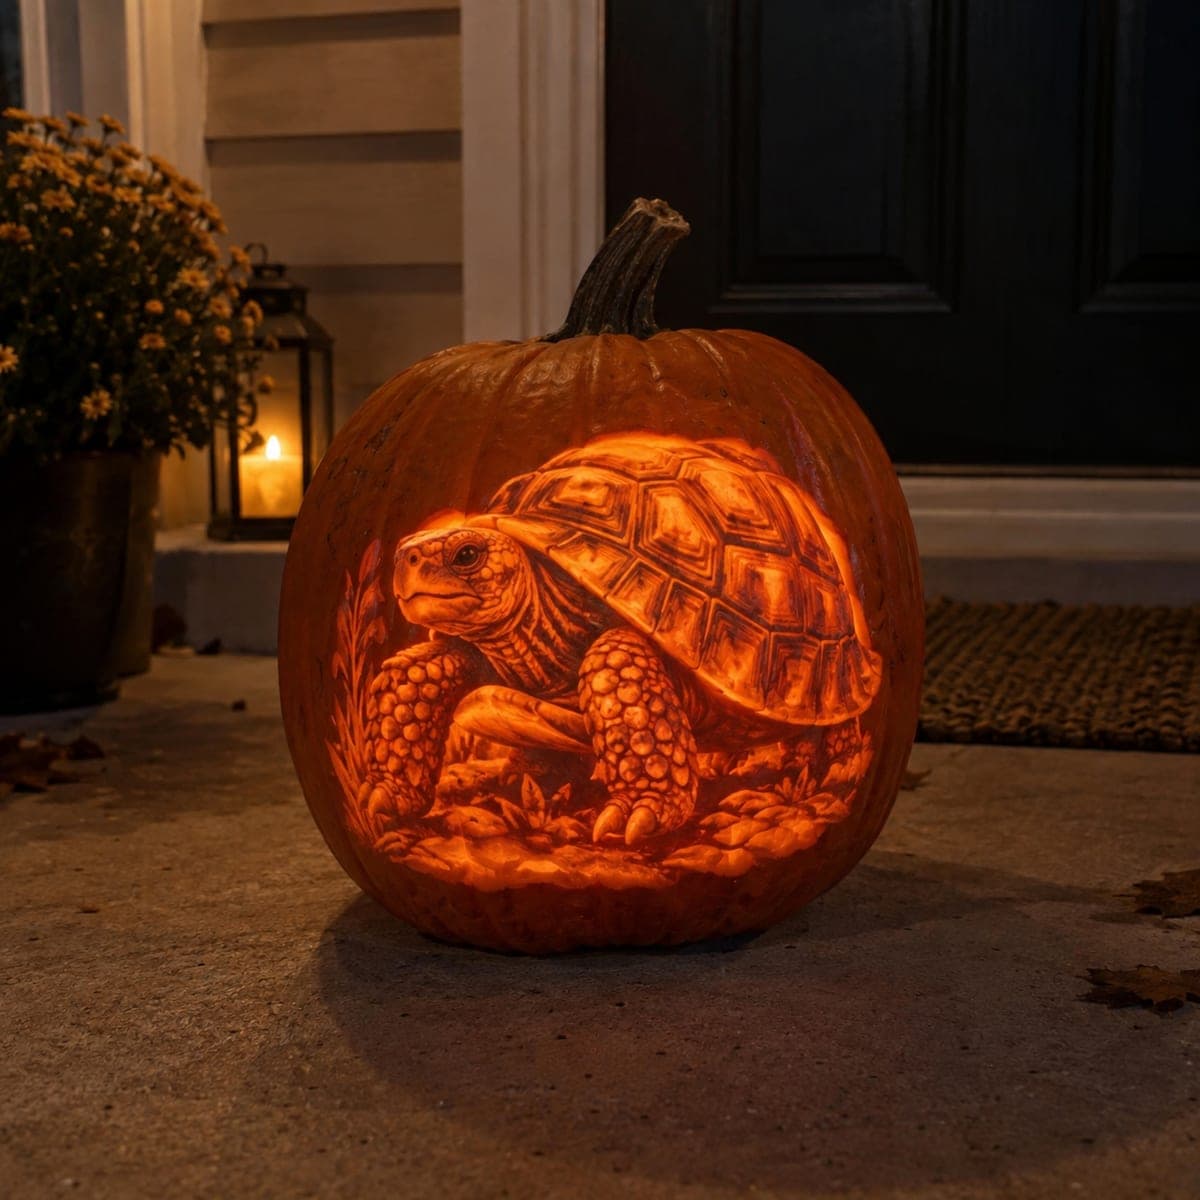
Chipmunk Holding an Acorn Shaded PumpkinAI
0

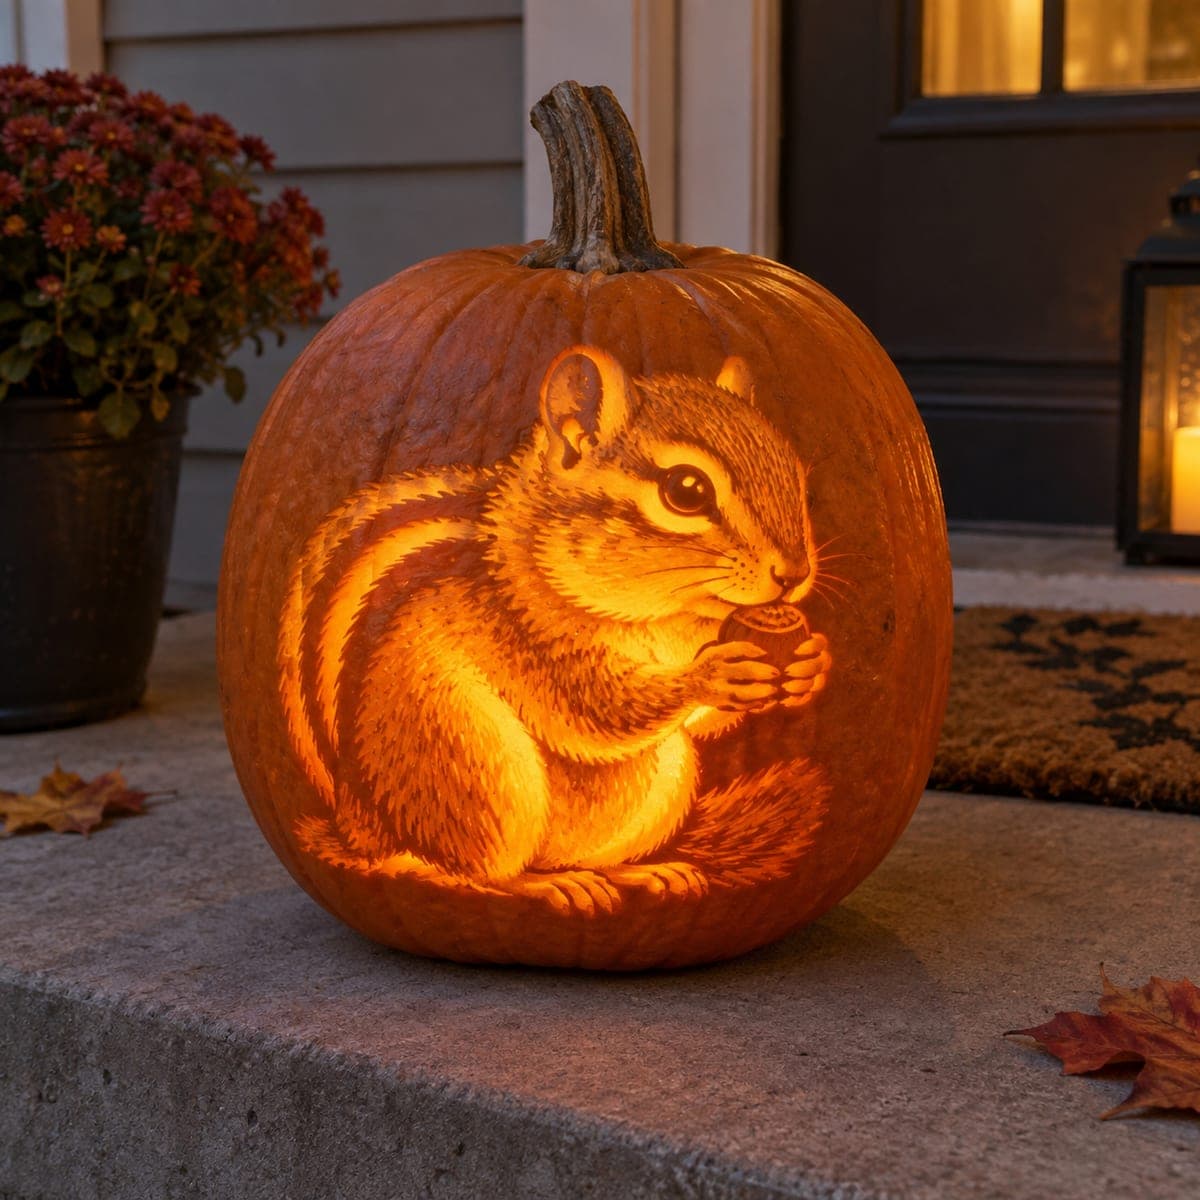
Chipmunk Holding an Acorn Shaded Pumpkin

A chipmunk clutching a tiny acorn is etched in fine detail across the front of an orange pumpkin, the candlelight glowing warmly through the thinned skin. The design relies entirely on surface shading rather than cutouts, with varying depths creating soft fur texture, striped markings, and expressive eyes. Transfer the design with graphite paper, then work from the background inward using linoleum gouges and a loop tool. Display near a porch lantern so the warm light plays up the subtle tonal range.

This is an AI-generated concept image: a realistic, carvable design idea rather than a photo of a finished carve. AI concepts are always labeled and sit out the leaderboard and the contest.

No ratings yet · Sign in to rate

Comments (0)

  • No comments yet — be the first.

Save without an account. Sign in to like or comment.

Our tips for carving a similar design

This design is built almost entirely from surface shading, with no big cutouts to give it away. The trick is varying how deeply you thin the skin so light comes through in three tones: dark untouched shell for shadows, dim peeled areas for the body, and the brightest thinned patches for the belly, cheek, and the glow around the acorn. Plan your depths before you touch a tool so the fur reads as soft rather than muddy.

Written by PumpkinCarvingIdeas.com, inspired by the image above. These are our suggestions, not instructions from the uploader. This approach to the AI concept has not been tested on a real pumpkin.

From pumpkin to porch

  1. Pick a smooth-faced pumpkin and clean it out

    Choose a pumpkin with a broad, even front and few ribs so the portrait sits flat and undistorted. Cut a lid from the bottom rather than the top so the stem stays intact for looks, then hollow the inside and scrape the carving wall down to about one inch thick. An even wall is what lets your shading glow consistently. Wipe the surface dry before transferring.

  2. Transfer the stencil with graphite paper

    Tape the chipmunk pattern firmly to the front, slide graphite paper underneath, and trace every line, including the stripe edges, the eye, and the acorn. Go slowly so you capture the fur direction, since those lines guide every cut later. Lift a corner to check the transfer before removing the stencil. Mark which zones are darkest, mid, and brightest with a light pencil code.

  3. Peel the mid-tone body first

    Use a wide loop tool to skin off just the outer skin across the chipmunk's body and tail, leaving a thin translucent layer. This creates the dim orange glow that forms the main shape. Keep pressure even and stop before you break through. Leave the darkest background and shadow areas completely untouched so they stay dark by contrast.

  4. Build fur texture with a small gouge

    Switch to a narrow linoleum gouge and carve short strokes that follow the direction of the fur, going a little deeper where you want brighter highlights. Work from the outer edges inward so you always cut toward areas you have already shaped. Thin the belly, cheek, and the ring around the acorn the most so those spots read as the brightest. Vary depth gradually to keep transitions soft.

  5. Sharpen the eye, stripes, and acorn

    Leave a tiny dot of full-thickness skin as the dark pupil highlight so the eye looks alive, and thin the area just around it for a gleam. Keep the dark stripes as untouched skin between brightly thinned bands so they pop. Shade the acorn a touch dimmer than the belly so it stays a distinct object in the paws. Take your time here, since these small contrasts carry the whole portrait.

  6. Light it and photograph

    Drop in a warm-white LED puck or a battery lantern, never a candle, since the thin wall can scorch. Test the glow in a dark room and go back to thin any spots that stay too dark. Set the pumpkin near a porch lantern so the ambient light plays up the subtle tones. Shoot at dusk for the warmest color.

Gather your supplies

Check things off as you get ready.

Work on a stable surface, keep your free hand out of the cutting path, and have an adult handle sharp tools.

Three levels of light

  • Leave intact

    The dark background, deep shadows under the body, the eye pupil, and the dark fur stripes stay as untouched skin.

  • Peel & shade

    The chipmunk's body, tail, and legs get lightly skinned for a soft mid glow.

  • Cut through

    Nothing is fully cut through on this design; the belly, cheek, and area around the acorn are thinned deepest for the brightest glow.

Learn the carving basics

Before you start cutting

There are no cutouts, so how does it light up?

All the glow comes from thinning the skin to different depths, a technique called shading. Untouched shell blocks light and reads dark, while peeled and deeply thinned areas let progressively more light through. Keeping your inner wall even is the key to a consistent glow.

How do I keep the fur from looking muddy?

Carve short strokes that follow the natural direction of the fur rather than random scratches, and change depth gradually. Save your deepest thinning for a few highlight zones like the belly and cheek so the eye has a focal point. Step back and check the glow in dim light as you go.

This is an AI concept image, so can a real pumpkin look like this?

Yes, a shaded portrait like this is achievable, though it takes patience and a steady hand. Because it relies on thinning rather than fragile cutouts, there are no delicate bridges to snap, which actually makes it structurally forgiving. Expect the real colors to shift a bit warmer and softer than a rendered image.

Your take belongs here, too.

Changed a detail? Made it simpler? Share a photo of your version and tell the community what worked.

Share your pumpkin

More pumpkins like this

You've reached the end · 8 pumpkins
The Patch Report

Fresh pumpkins, in your inbox.

The best new carvings, ideas worth stealing, and how-tos for carving season. Short, seasonal, and gone by November.

A short email during carving season. Unsubscribe anytime. See our privacy policy.