Halloween Pumpkin Carving Contest · Starts October 1st · $500 in prizes
← Back to ideas
@ai_concepts
Sep 14, 2026
Walking Bigfoot PumpkinAI
0

Walking Bigfoot Pumpkin

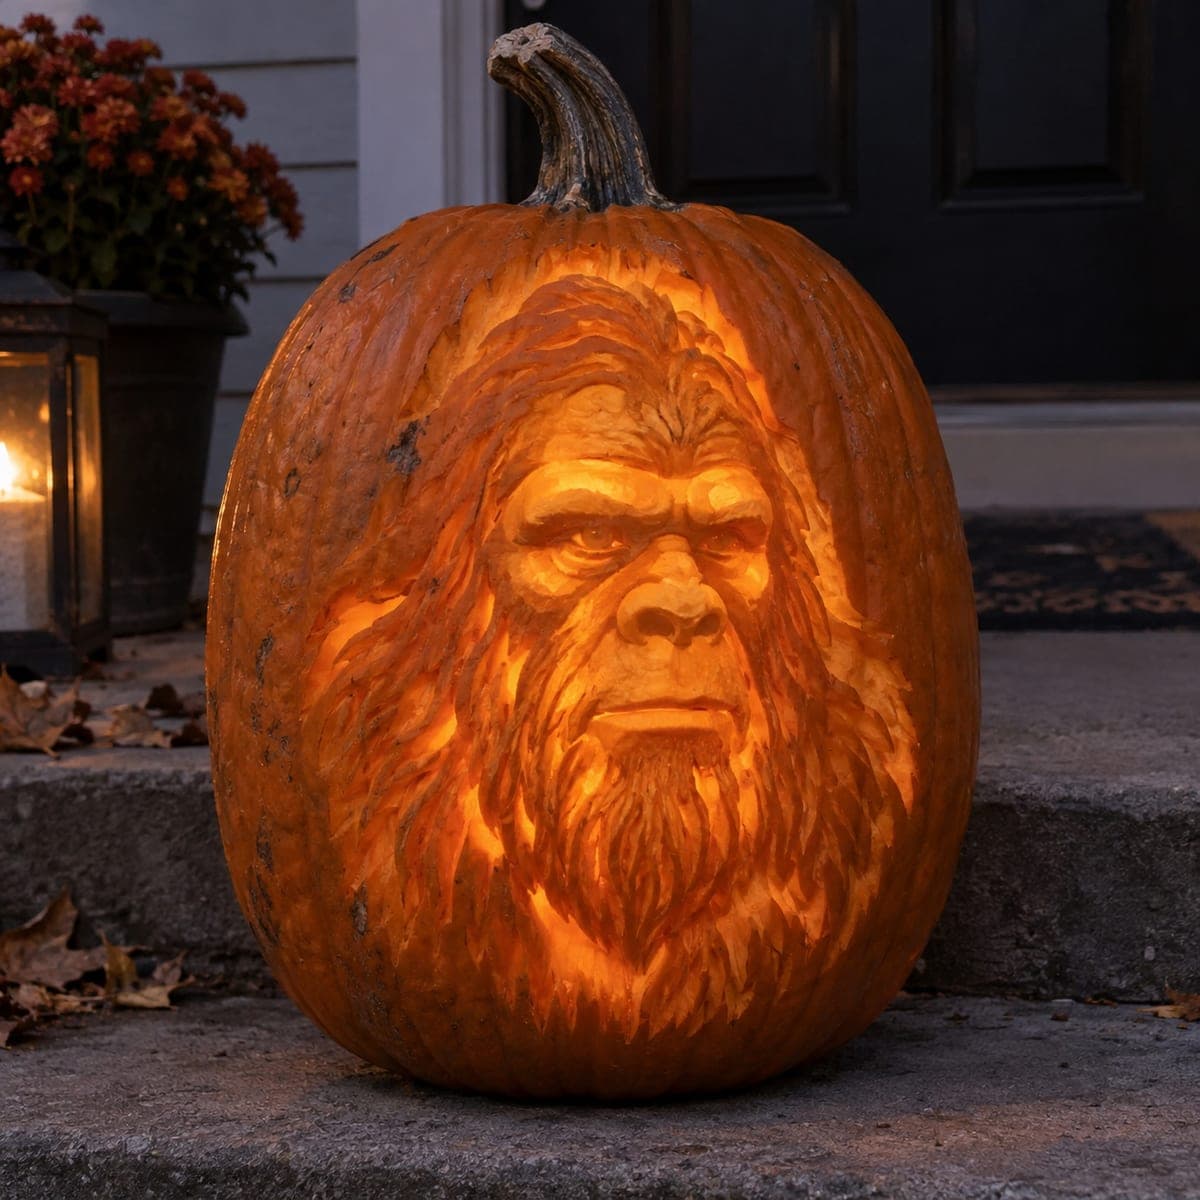
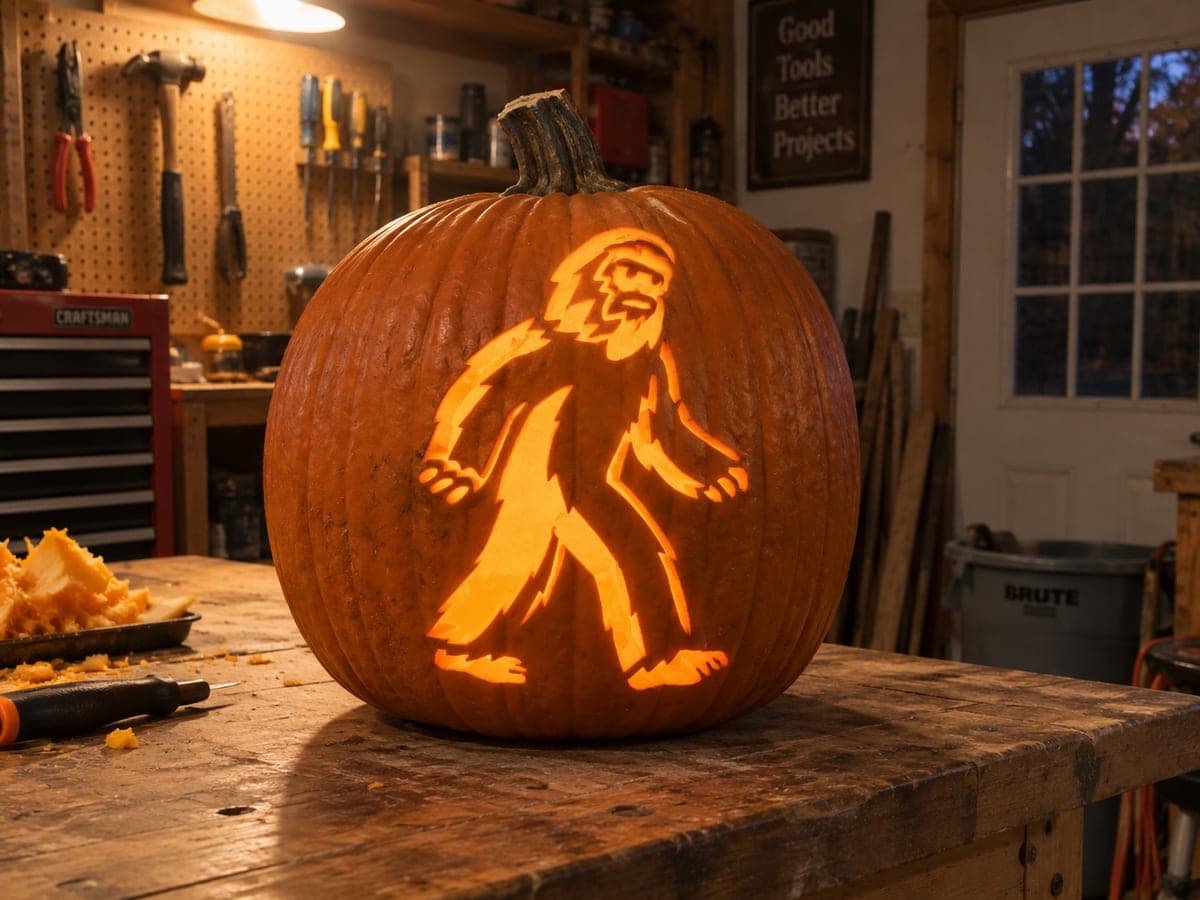
A shaggy upright Bigfoot strides to the right with both arms swinging, a fur-fringed body outline, and a recognizable round-browed face peeking through the fur at the top in this fun pumpkin carving idea. The entire figure is cut out and glowing, with the ragged fur edges giving it a choppy, spiky silhouette that is instantly recognizable as Sasquatch. Carve each fur spike individually from tip to base rather than trying to cut the whole outline in one pass, which gives you cleaner control over the jagged edges.

This is an AI-generated concept image: a realistic, carvable design idea rather than a photo of a finished carve. AI concepts are always labeled and sit out the leaderboard and the contest.

No ratings yet · Sign in to rate
Comments (0)

  • No comments yet — be the first.

Save without an account. Sign in to like or comment.

Our tips for carving a similar design

This design is one big backlit cutout of a walking Bigfoot, so the whole figure glows while the pumpkin skin around it stays dark. The core trick is patience with the fur: carve each spike one at a time, cutting from the tip inward to the body rather than trying to trace the whole ragged outline in a single pass. Save the largest openings in the torso and legs for last so the shell stays strong while you work the fine edges.

Written by PumpkinCarvingIdeas.com, inspired by the image above. These are our suggestions, not instructions from the uploader. This approach to the AI concept has not been tested on a real pumpkin.

From pumpkin to porch

  1. Prep the pumpkin and pick a flat face

    Choose a tall, round pumpkin with one broad, smooth panel facing you, since the standing figure needs vertical room from stem to base. Cut a lid from the bottom instead of the top so the pumpkin sits steady and you can set it right over an LED. Scoop the inside until the front wall is about one inch thick, scraping the carving side a little thinner so your blade moves easily. A thin, even wall makes the fine fur cuts far more predictable.

  2. Transfer the Bigfoot pattern

    Print or draw the upright figure at a size that leaves a margin of skin on all sides. Tape the pattern flat against the smooth panel, darting the paper edges so it hugs the curve without wrinkling. Poke closely spaced dots along every line with a pin or awl, following each fur spike, the arms, the legs, and the round-browed face at the top. Peel the paper and connect the dots with a washable marker so you have a clear map before any blade touches the pumpkin.

  3. Carve the face details first

    Start with the smallest openings up top where the face peeks through the fur. Cut the brow line, the eye hollows, and the shadow shapes while the surrounding shell is still solid and supported. Use a fine detail saw or a craft knife and take slow, short strokes. Getting these delicate cuts done early means you are not stressing thin sections later when the big body is already open.

  4. Cut the fur spikes one at a time

    Work the ragged outline spike by spike, entering at each pointed tip and cutting inward toward the body. This gives you clean control over the jagged silhouette instead of a torn, mushy edge. Keep the tip of the blade at a steady angle and let each spike meet its neighbor at the base. Rotate the pumpkin as you go so your cutting hand always stays comfortable and away from your holding hand.

  5. Open the large body sections last

    Once the fur border is defined, remove the big interior pieces of the torso, arms, and legs. Cutting these last keeps the shell rigid while you handle the fine work. Push each freed piece gently inward and out rather than yanking, so you do not crack a thin fur point. If a spike feels fragile, leave a tiny uncut bridge to hold it, then trim it cleanly at the end.

  6. Light it and take the photo

    Drop a bright LED puck or a string of LED lights inside and set the pumpkin over it through the bottom opening. Skip real candles, since the wide cutout and thin walls dry out fast and can scorch. Shoot your photo in a dim room so the glowing Sasquatch pops against the dark skin. A little clean-up pass with the knife on any fuzzy edges sharpens the silhouette right before the picture.

Gather your supplies

Check things off as you get ready.

Work on a stable surface, keep your free hand out of the cutting path, and have an adult handle sharp tools.

Three levels of light

  • Leave intact

    The pumpkin skin surrounding the figure stays untouched and dark, framing the glowing shape.

  • Peel & shade

    Shallow skin-peeling inside the face area can give a dimmer glow for the brow and cheeks if you want depth instead of full openings.

  • Cut through

    The entire Bigfoot body, arms, legs, and fur spikes are cut clean through for the brightest light.

Learn the carving basics

Before you start cutting

How do I keep the fur spikes from breaking off?

Carve each spike from its tip toward the base and leave the big body cutouts for last so the shell stays firm. If a point feels wobbly, keep a tiny uncut bridge holding it in place and trim that bridge only at the very end. A thin, even wall also helps, since you are not forcing the blade through thick flesh near delicate tips.

This is a full cutout figure. Will the pumpkin hold its shape?

Yes, if you keep a generous margin of solid skin around the whole figure and cut the largest torso and leg openings last. That border acts like a frame and carries the structure. Working from a bottom lid rather than a top hole also leaves the strong stem end intact.

Why carve the face before the body?

The face has the smallest, most detailed openings, and they are easiest to control while the surrounding shell is still solid. If you open the big body sections first, the panel flexes and those fine cuts get harder and riskier. Detail first, bulk last is the safe order here.

Your take belongs here, too.

Changed a detail? Made it simpler? Share a photo of your version and tell the community what worked.

Share your pumpkin

More pumpkins like this

You've reached the end · 8 pumpkins
The Patch Report

Fresh pumpkins, in your inbox.

The best new carvings, ideas worth stealing, and how-tos for carving season. Short, seasonal, and gone by November.

A short email during carving season. Unsubscribe anytime. See our privacy policy.