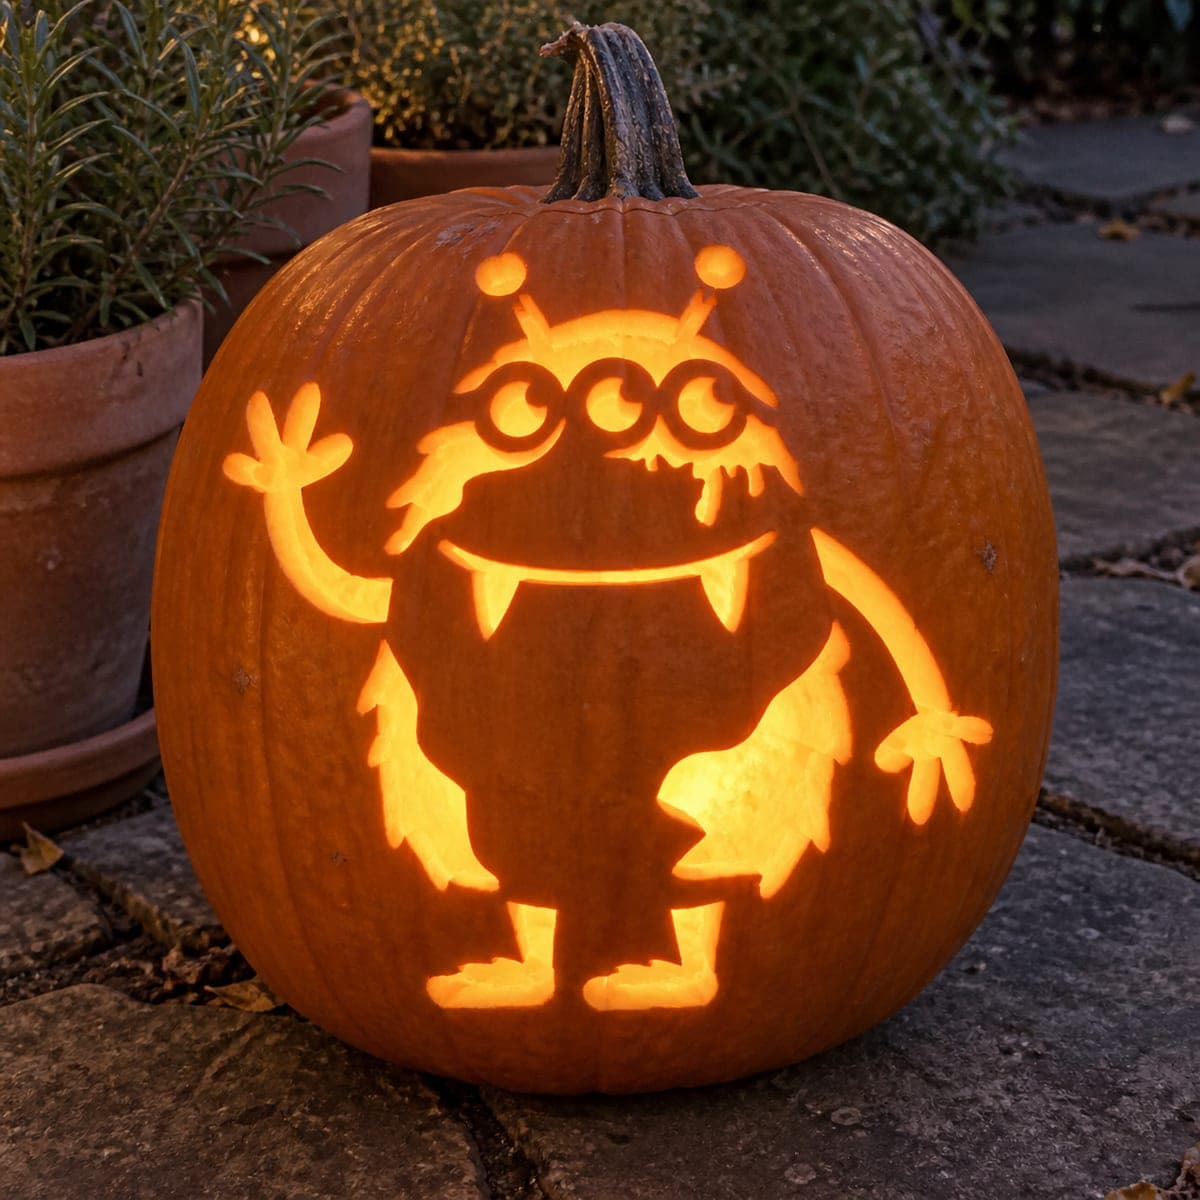
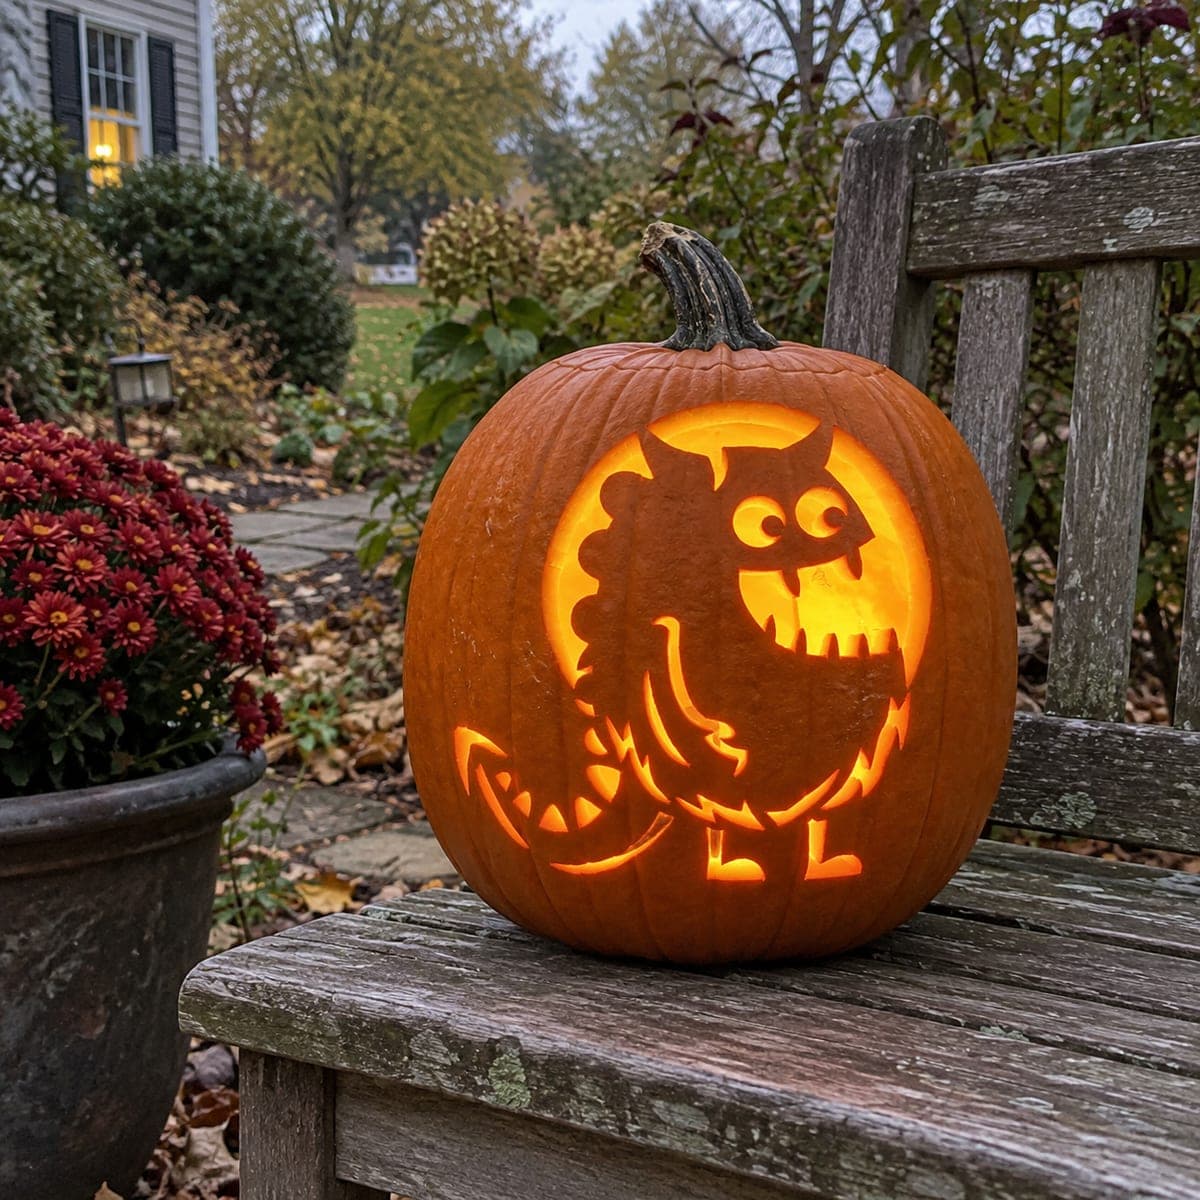
A round-bodied cartoon monster with three circular eyes, two ball-tipped antennae, and wide-spread three-fingered hands waves cheerfully from the pumpkin face in this funny jack-o-lantern pumpkin carving idea. The cutout technique pierces the body, hands, and eye rings entirely through so warm candlelight outlines every gap. Cut the three eye circles first, since they sit inside the dark uncut body and define its center, then work outward to the hands and feet. A flat-bottomed LED puck keeps the monster centered and avoids the shadow wobble a tall taper candle would cause.
This is an AI-generated concept image: a realistic, carvable design idea rather than a photo of a finished carve. AI concepts are always labeled and sit out the leaderboard and the contest.
The trick here is contrast: the monster's round body stays as dark, uncut skin while the eyes, mouth, hands, and outline gaps get pierced all the way through so light traces the whole shape. Plan your cuts from the center outward, starting with the three eye rings that anchor the face, then the mouth and fangs, and save the long limb and body gaps for last. Keeping the body itself uncut is what makes the glowing outline read as a solid little creature.
Written by PumpkinCarvingIdeas.com, inspired by the image above. These are our suggestions, not instructions from the uploader. This approach to the AI concept has not been tested on a real pumpkin.
From pumpkin to porch
1
Pick a big round pumpkin and prep it
Choose a tall, round pumpkin with a smooth front panel wide enough for a full body figure. Cut a lid from the back rather than the top so the front face stays clean, then scoop the inside until the front wall is about one inch thick. A thinner wall makes piercing the small eye rings and fang edges much easier. Wipe the front dry before you transfer the pattern.
2
Transfer and study the stencil
Tape your printed stencil flat against the front, snipping the edges so it hugs the curve without wrinkling. Poke the outlines with a pin or trace them with a washable marker, paying extra attention to the two antenna balls, the three eye circles, and the three-fingered hands. Mark clearly which areas are cutouts and which stay as solid skin. Take a photo of the plan so you remember where the dark body should remain.
3
Cut the three eye rings first
With a fine detail saw, cut the three small circles that form the eyes since they sit inside the dark body and set the whole face. Work slowly and let the saw do the turning rather than forcing it. Leave a thin ring of skin around each eye so the pupils read as dark centers if your stencil calls for it. Adults should handle all the sharp tools here.
4
Open the mouth and fangs
Cut the wide smiling mouth next, then carefully shape the pointed fangs. Leave the fangs as uncut skin so they stay dark against the glowing mouth, and keep each fang tip broad at the base so it does not snap. Small triangular teeth are stronger than long thin spikes, so round any fragile points. Clear the waste from the mouth before moving on.
5
Carve the antennae, arms, and body gaps
Cut the two thin antenna stalks and their ball tips, keeping a short bridge of skin where each stalk meets the head so the balls stay attached. Then pierce the outline gaps around the waving arms, the three-fingered hands, the legs, and the feet, saving these larger openings for last so the pumpkin stays rigid while you work. Leave the main body panel completely uncut so the monster reads as a solid dark shape ringed in light. Go slowly around the fingers and support the pumpkin with your free hand.
6
Light it and take the photo
Drop in a flat-bottomed LED puck light and center it so the glow spreads evenly into the arms and legs. Skip tall taper candles, which flicker and cast a wobbling shadow that muddies the fine antenna and finger cutouts. Set the pumpkin at dusk on a flat step, dim the surrounding lights, and shoot slightly above eye level to catch the full waving pose. A light dab of petroleum jelly on cut edges slows drying if you want it to last a few extra days.
Gather your supplies
Check things off as you get ready.
Work on a stable surface, keep your free hand out of the cutting path, and have an adult handle sharp tools.
Three levels of light
Leave intact
The round body, the fang teeth, and the dark eye pupils stay as untouched skin so the monster reads as a solid shape.
Peel & shade
Shade the antenna stalks or a soft body shadow by skin-peeling for a dim orange glow if you want subtle depth.
Cut through
The three eye rings, the smiling mouth, the hands, feet, and the gaps around the arms and legs get cut through for the brightest outline.
How do I keep the ball-tipped antennae from breaking off?
Leave a short bridge of uncut skin where each antenna stalk meets the top of the head so the piece stays anchored. Cut the thin stalks last, after the sturdier eyes and mouth are done, so the pumpkin wall is still firm while you work. Keep the stalks a bit wider than they look on paper, since a slightly thick line survives handling far better than a hair-thin one.
The three eyes sit inside the dark body. Won't they be hard to line up?
Cut them first, before anything else, because they define the center of the face and everything else works outward from them. Use a fine detail saw and let it turn slowly through each circle rather than pushing hard. Thinning the front wall to about an inch beforehand makes these small curved cuts much cleaner.
Can I make the fangs look sharp without snapping them?
Yes, but keep them as uncut skin rather than cutouts so they stay dark and supported by the surrounding wall. Give each fang a broad base and a slightly rounded tip instead of a long needle point. Broad, short teeth hold up to handling and still read clearly as fangs against the glowing mouth.
Your take belongs here, too.
Changed a detail? Made it simpler? Share a photo of your version and tell the community what worked.
 AI
AI

Comments (0)