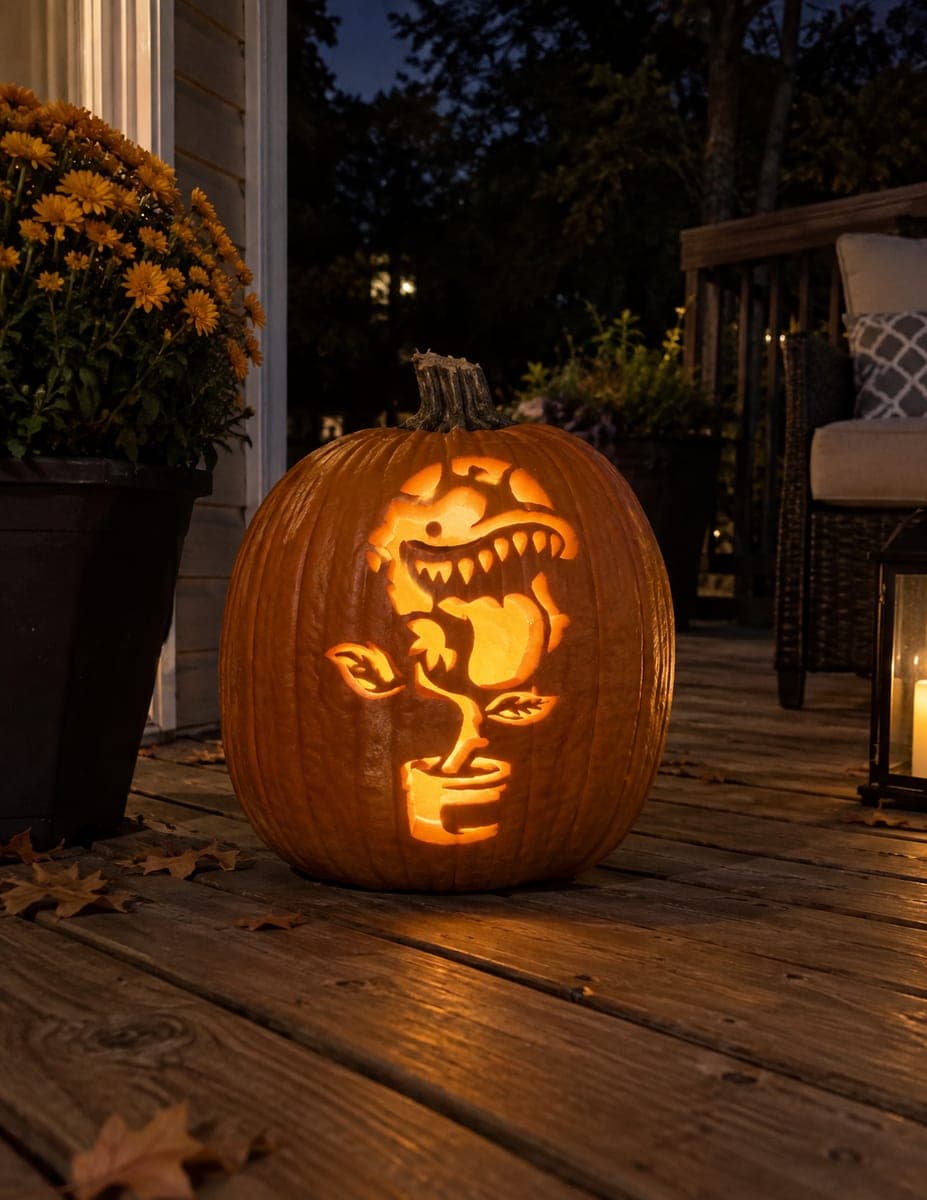
A fanged monster plant with a wide open mouth full of jagged teeth, a single round eye, and two small leaf arms rises from a small round flowerpot on a curved stem in this funny pumpkin carving idea. The entire design is cut through the pumpkin wall, with the pot and stem forming a narrow vertical anchor between the leafy arms. Carve the teeth first by cutting each one individually from the interior of the mouth so you can exit each cut cleanly; then open the mouth cavity itself before moving to the stem, which should be the final cut to keep the whole design stable.
This is an AI-generated concept image: a realistic, carvable design idea rather than a photo of a finished carve. AI concepts are always labeled and sit out the leaderboard and the contest.
The whole gag lives in that grinning mouth, so the core trick is carving each jagged tooth as its own clean cut before you open the mouth cavity behind them. Everything else, the round eye, the two leaf arms, the pot, and the curved stem, is cut fully through the pumpkin wall for maximum glow. Plan your cuts from the smallest, most fragile details outward so the design stays strong until the very end.
Written by PumpkinCarvingIdeas.com, inspired by the image above. These are our suggestions, not instructions from the uploader. This approach to the AI concept has not been tested on a real pumpkin.
From pumpkin to porch
1
Pick and prep a smooth pumpkin
Choose a pumpkin with a large, flat, relatively smooth front panel so the mouth and pot read clearly. Cut a lid from the bottom or the back rather than the top, since a bottom opening lets you set the pumpkin right over an LED. Scoop the inside until the front wall is about one inch thick, scraping the carving area extra thin and even. A thinner wall makes the many teeth much easier to cut cleanly.
2
Transfer the stencil
Tape your monster plant pattern flat against the front, snipping the edges of the paper so it hugs the curve without wrinkling. Poke closely spaced dots along every line with a pin or a poker tool, paying special attention to each tooth tip and the outline of the pot. Peel the paper and connect the dots lightly with a marker if it helps you see the shapes. Double check that the stem and pot form one connected vertical strip before you cut.
3
Carve the teeth first
Start with the jagged teeth, cutting each one individually from inside the mouth area so your blade exits into open space with control. Use a fine detail saw and take slow, short strokes, letting the tool do the work instead of forcing it. Leave a little pumpkin between neighboring teeth so none of them snap off. Working tooth by tooth keeps the mouth crisp and prevents one long ragged slit.
4
Open the eye, arms, and pot
Cut out the single round eye, then the two small leaf arms, and finally the flowerpot as full openings through the wall. Keep the narrow strip where the stem meets the pot intact for now, since it holds the top of the plant to the bottom. Cut larger openings in a few passes rather than one deep plunge to avoid cracking the surrounding wall. Clean up each edge with a gentle bevel so light spreads evenly.
5
Save the stem for last
The curved stem is the anchor that connects the leafy top to the pot, so cut it only after everything else is open. Trace it as a slim shape and remove the pumpkin on either side, leaving the stem itself as a standing bridge of skin. Go slowly here, because the design is at its most fragile once this final cut is made. If the stem feels weak, leave it slightly wider than the stencil for extra support.
6
Light it and photograph
Set a battery LED puck inside, warm white for a classic glow or a green light to sell the monster plant idea. Place the pumpkin on a porch or step at dusk and check that light fills the mouth, eye, and pot evenly. Rotate the light or add a second LED if any area looks dim. Snap your photo in low ambient light so the cutouts pop against the dark.
Gather your supplies
Check things off as you get ready.
Work on a stable surface, keep your free hand out of the cutting path, and have an adult handle sharp tools.
Three levels of light
Leave intact
The untouched pumpkin skin around the plant stays dark and frames the whole scene.
Peel & shade
Shave a thin layer just outside the leaf arms or along the pot rim for a soft dim halo if you want extra depth.
Cut through
The mouth, teeth gaps, round eye, leaf arms, pot, and stem edges are cut through for the brightest glow.
Carve each tooth as its own small cut and leave a bit of pumpkin between neighboring teeth instead of hollowing one long channel. Thinning the front wall to about one inch first makes the cuts easier and reduces pressure on each point. Work slowly with a sharp detail saw so you are not forcing the blade.
Why cut the stem last?
The narrow stem is the bridge that connects the leafy top of the plant to the pot at the bottom. If you open it early, the design loses its structural link and the surrounding wall can sag or crack. Saving it for the final cut keeps everything stable while you handle the rest.
This is a concept image, so can a real pumpkin hold all these openings?
Yes, as long as you keep the stem and pot connection as a solid strip and leave small gaps between the teeth. Do not thin the wall so much that the bridges flop. If a section feels weak as you go, carve it slightly wider than the stencil for support.
Your take belongs here, too.
Changed a detail? Made it simpler? Share a photo of your version and tell the community what worked.
 AI
AI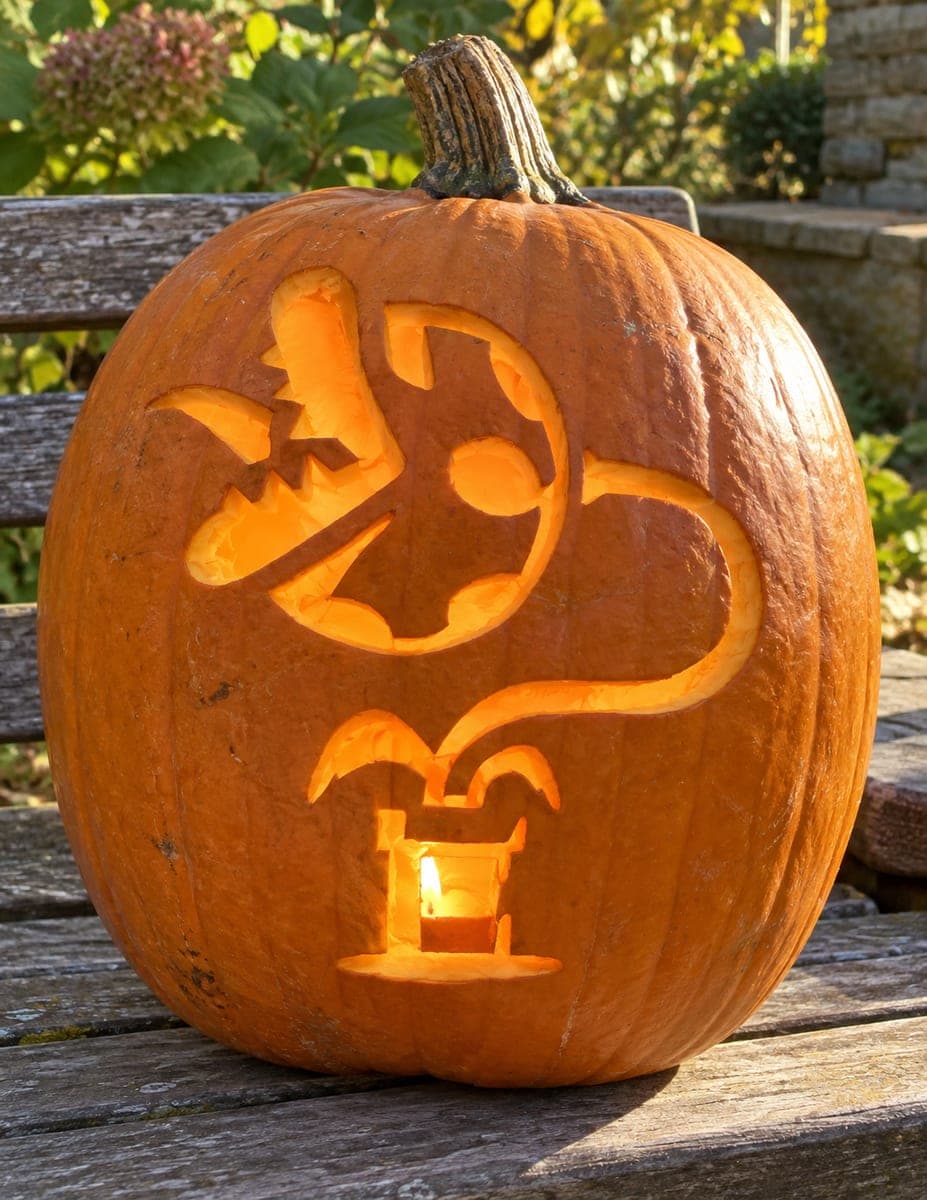



Comments (0)