Similar to This
View all stencils →About this stencil
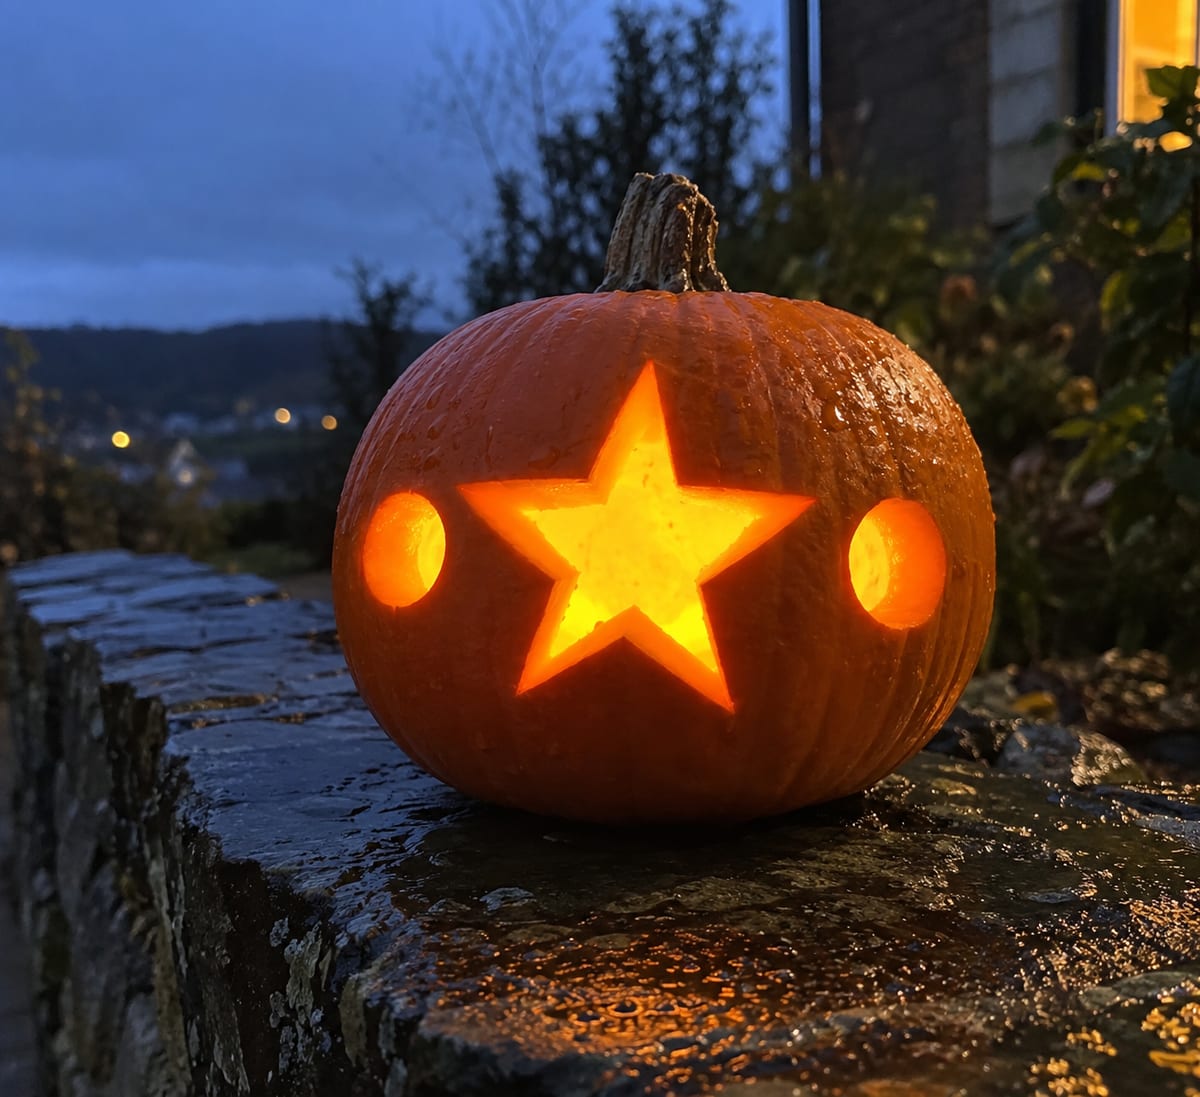
One broad five-point star dominates the center of the pumpkin, flanked by a single round opening on each side. All three shapes are cut fully through, so the star throws bright, even light while the two dots add a playful balance. It is a quick, satisfying carve for beginners; saw each point of the star from the outer tip inward toward the center so the corners meet cleanly without overcuts. This design is rated Beginner-friendly and takes most carvers around 30 minutes from trace to glow. Great for kids and first-timers. Big shapes, short cuts.
Pumpkin size guide
- 🎃 Small (5–7") — print at 80%
- 🎃 Medium (7–10") — print at 100% (recommended)
- 🎃 Large (11–13") — print at 130%
- 🎃 Giant (14"+) — print at 150% on tabloid paper
Frequently asked questions
Can I resize this stencil?▾
Yes. The PDF is vector so it scales cleanly. Print at 100% for a 7–10 inch pumpkin, 130% for 11–13 inch, or 150% for a giant. Use your printer's "Fit to page" or "Custom scale" setting.
What kind of paper works best?▾
Standard 20 lb letter or A4 printer paper is fine. Heavier paper is harder to bend around the pumpkin curve. If your printer supports it, set the quality to 'best' so the lines are crisp.
How long will the carved pumpkin last?▾
Usually 5–10 days. Coat all cut surfaces with petroleum jelly and store the pumpkin somewhere cool overnight. Avoid direct sun. Battery LED pumpkin lights produce no heat and double the lifespan.
Can I sell pumpkins carved with this stencil?▾
Yes, the carved pumpkin you make is yours. The license covers personal and small-scale commercial carving (selling carved pumpkins, photographing them, posting on social). You may not resell the PDF file itself.
What if my printer doesn't print the whole stencil?▾
Set 'Page scaling' to 'Fit' in the print dialog and uncheck 'Auto-rotate'. If it still cuts off, the design includes 0.25" of safe-area margin so a small crop won't ruin it.
How to carve this stencil
- 1Print it
Download the PDF and print at 100% scale on letter or A4 paper.
- 2Prep the pumpkin
Cut the lid at an angle, scoop the guts, thin the wall to ~1 inch.
- 3Tape it on
Snip darts in the paper so it lies flat against the curve.
- 4Transfer the design
Poke along every line — about one dot every 1/8 inch.
- 5Carve it
Connect the dots with short straight cuts. Center first, work outward.
- 6Light it up
Drop in a battery LED pumpkin light and you're done.
Tools you'll need
For a beginner-friendly carve like this you'll want a paring knife, spoon / scoop, marker, and led pumpkin light. Here's the kit we reach for — start with whatever you already own.

Elmchee Pumpkin Carving Kit
13-piece kit with carrying case
Saws for the larger cutouts, plus a scoop for hollowing. Covers both jobs in one kit.
View on Amazon ↗
HOME MOST LED Pumpkin Lights
4-pack, battery operated, with remote + timer
Orange glow made for jack-o'-lanterns. The remote and timer light the pumpkin every evening without reaching inside.
View on Amazon ↗
Speedball 4131 Lino Cutter Set
Handle + 5 interchangeable cutters
Interchangeable cutters for peeling and shading the face. Useful for the finer details.
View on Amazon ↗
Community Pumpkin Carving Ideas
Carving ideas that use stencils like this one.


Related stencils
Carvers who liked this one also downloaded these.
 Intermediate
Three Stars and Six Dots
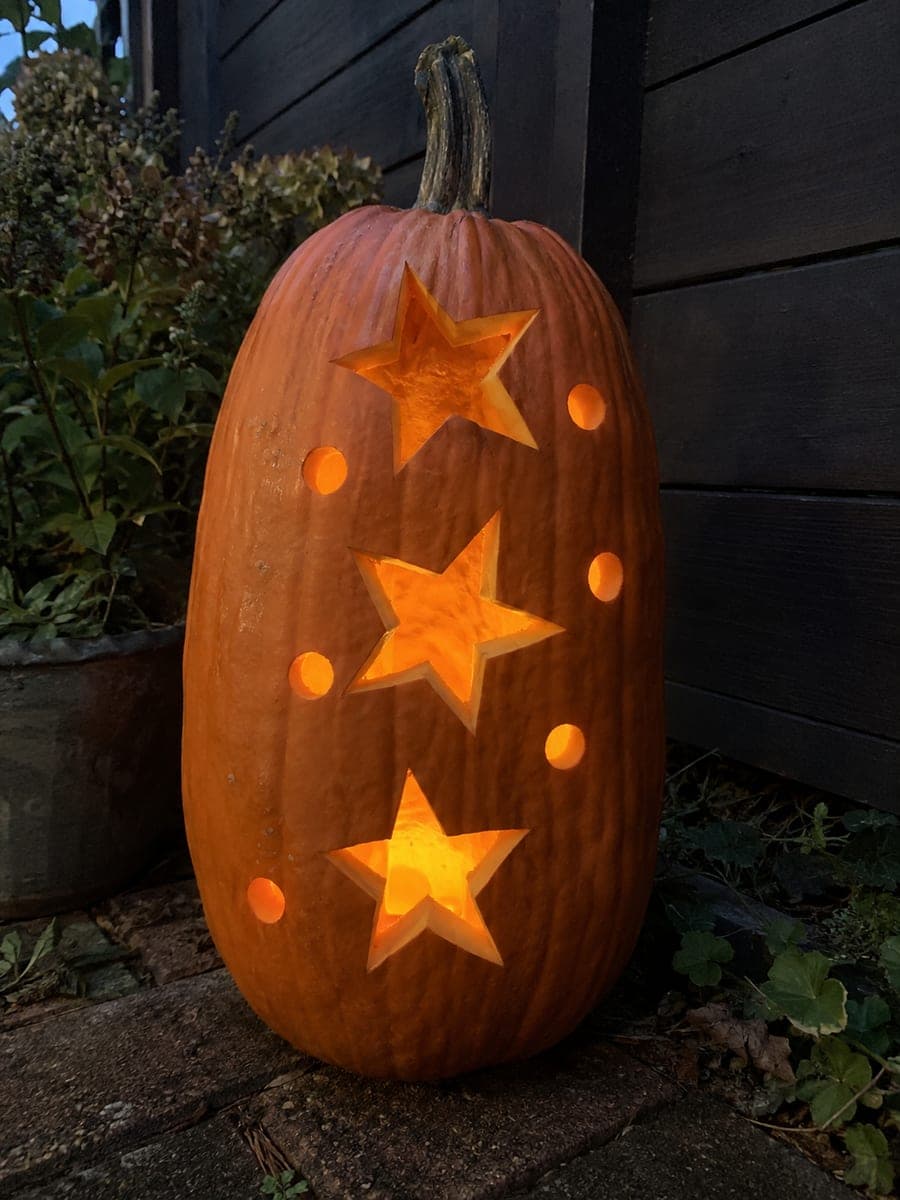
Three five-pointed stars descend in a vertical column, each one paired with small round dots scattered alongside like sparkling companions. Designed for tall, narrow pumpkins, every star and dot is a clean cut-through opening that fills the height of the fruit with light. Poke the dots first, then cut each star from its center outward toward the points so the tips stay sharp and intact.
 Beginner-friendly
Mortar and Tilted Pestle
A footed mortar bowl with a tilted pestle resting across its rim, the timeless symbol of pharmacists and potion mixers alike. The bowl, base, and pestle are carved as one connected cutout so the whole emblem glows in a single bright shape. An easy pattern with mostly smooth curves; keep the narrow bridge where the pestle meets the bowl rim intact, and this one is done in a single relaxed sitting.
 Beginner-friendly
Triangle Face and Lower Teeth
The most traditional face in the patch: two triangle eyes, a triangle nose, and a wide smile interrupted by two square teeth rising from the lower lip. All five shapes cut straight through with no curves to fight, making this an ideal first carve. Push the saw in straight vertical strokes and finish each triangle corner cleanly from both sides before popping the piece out.
 Beginner-friendly
Tall Eyes and Deep Crescent
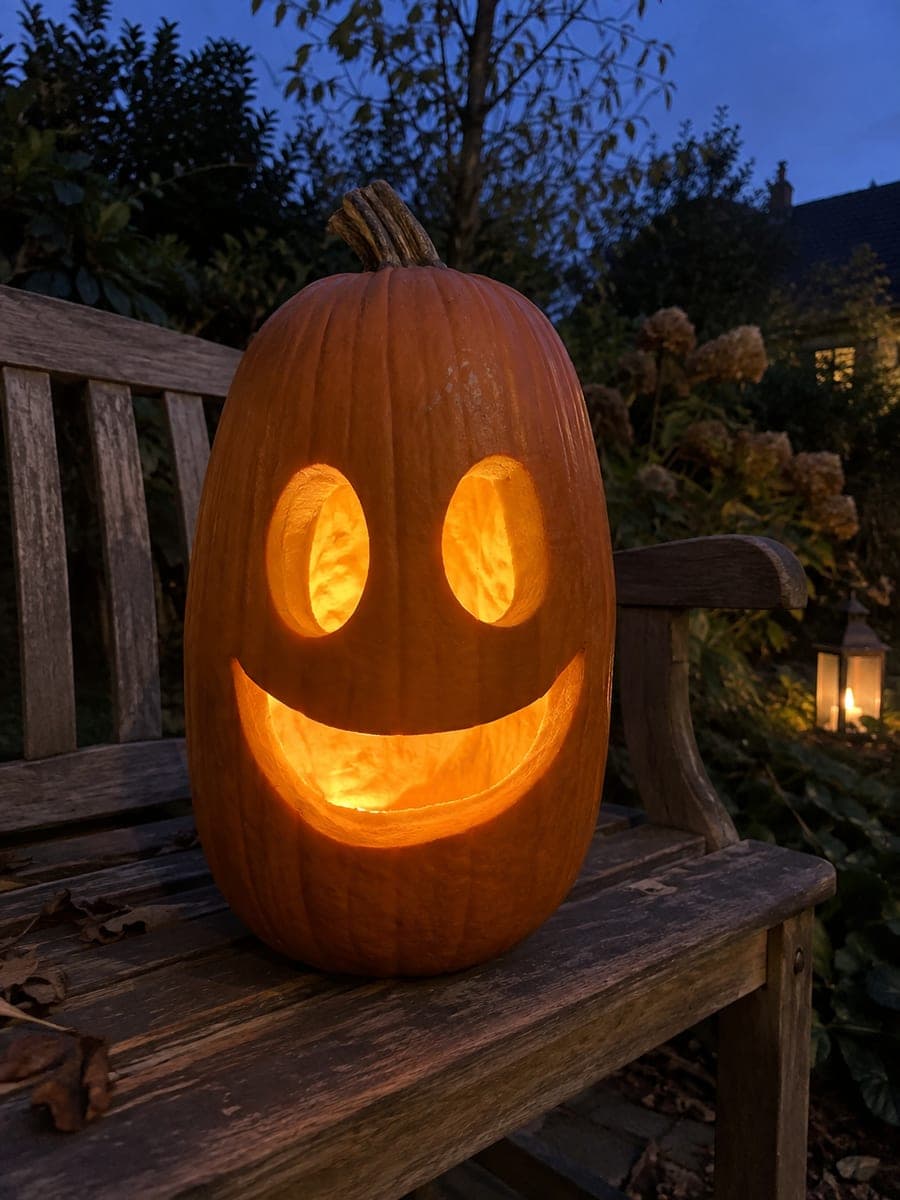
A tall, friendly face made of just three shapes: two upright oval eyes and one deep crescent smile sweeping nearly the full width of the pumpkin. All three openings are pierced through, and the design especially suits oblong or elongated pumpkins. It is an easy carve with big forgiving shapes; cut the wide smile in two halves that meet at the center bottom so the long curve stays smooth and the flap comes out in manageable pieces.
 Beginner-friendly
Four Diamonds and Eight Dots
Four diamonds run in a straight column down the front of the pumpkin, flanked by a staggered row of round dots on each side, turning a tall pumpkin into a modern lantern. All twelve openings are cut through, and their regular spacing is what sells the design. Mark the vertical centerline first and measure each diamond's position before cutting, since even spacing matters more here than fancy knife work.
 Intermediate
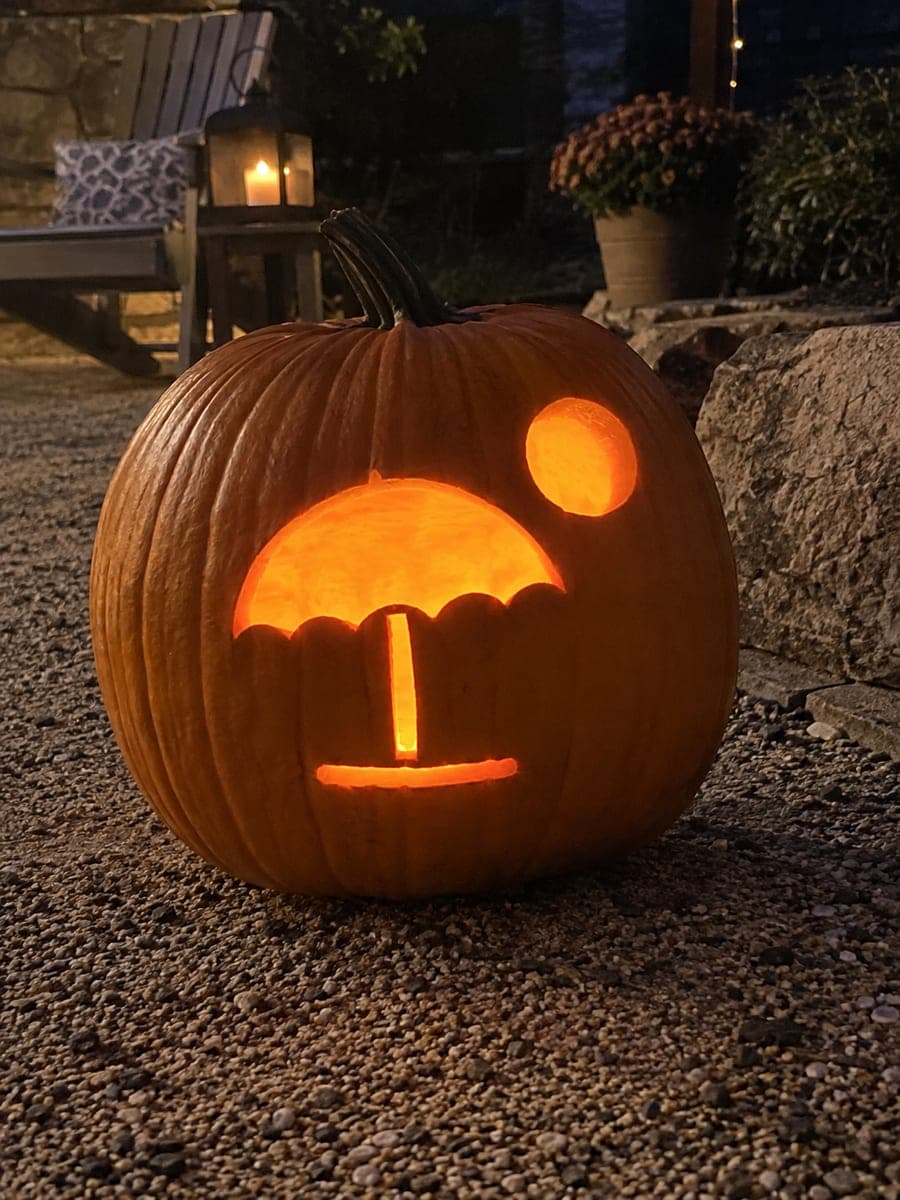
Beach Umbrella and Sun
A scalloped beach umbrella on a straight pole stands above a short shoreline bar, with a round sun cut high to one side. The umbrella canopy, pole, ground line, and sun are each fully cut out, and the scalloped edge leaves a playful fringe of skin between canopy sections. A medium carver's best move is to cut the small scallop notches before removing the big canopy piece, while the wall still has plenty of support.