Pumpkin carving templates
572 free printable stencils. Download, print, trace, carve.
176 results · Page 3 of 5
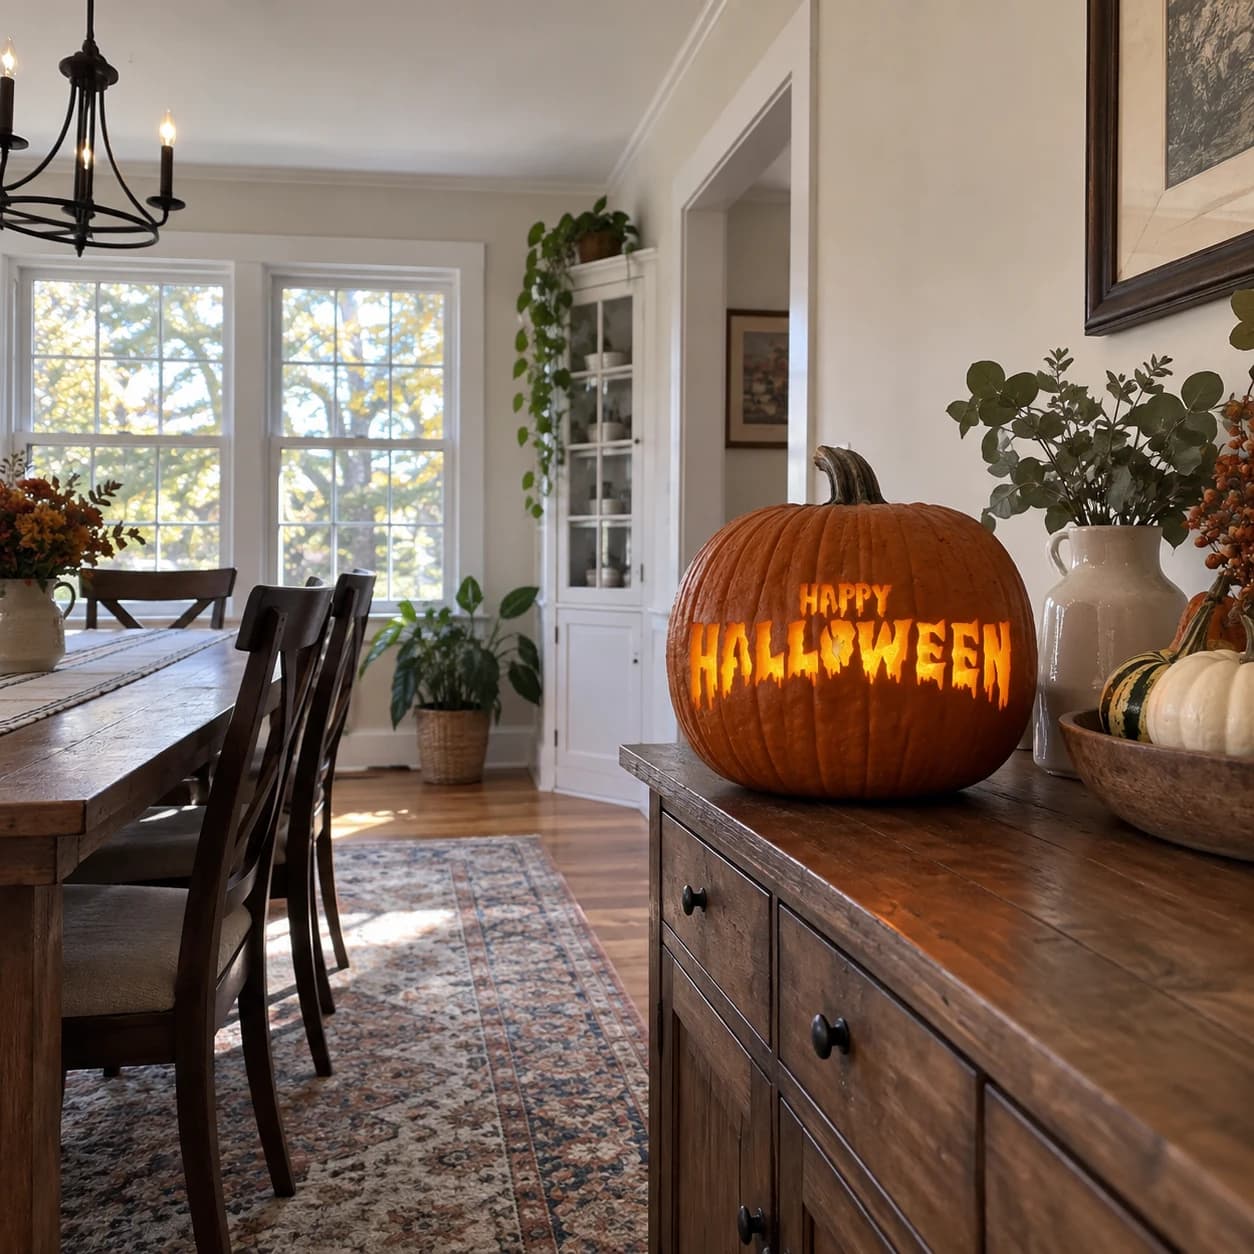
Happy Halloween Drip Text Pumpkin Stencil
The words HAPPY HALLOWEEN wrap across this pumpkin stencil in a wide dripping horror typeface, the tall letters of HALLOWEEN spanning the full width of the pumpkin in a single solid banner with icicle-like drips hanging from each base. The smaller word HAPPY sits above in a lighter display face. All letters are carved as open cut-outs connected edge to edge, forming a wide horizontal band of glowing text. Thin the pumpkin wall to about half an inch across the whole text zone before carving, because the long horizontal band removes a large section of structural support and a thinner wall is easier to keep from cracking under the blade.
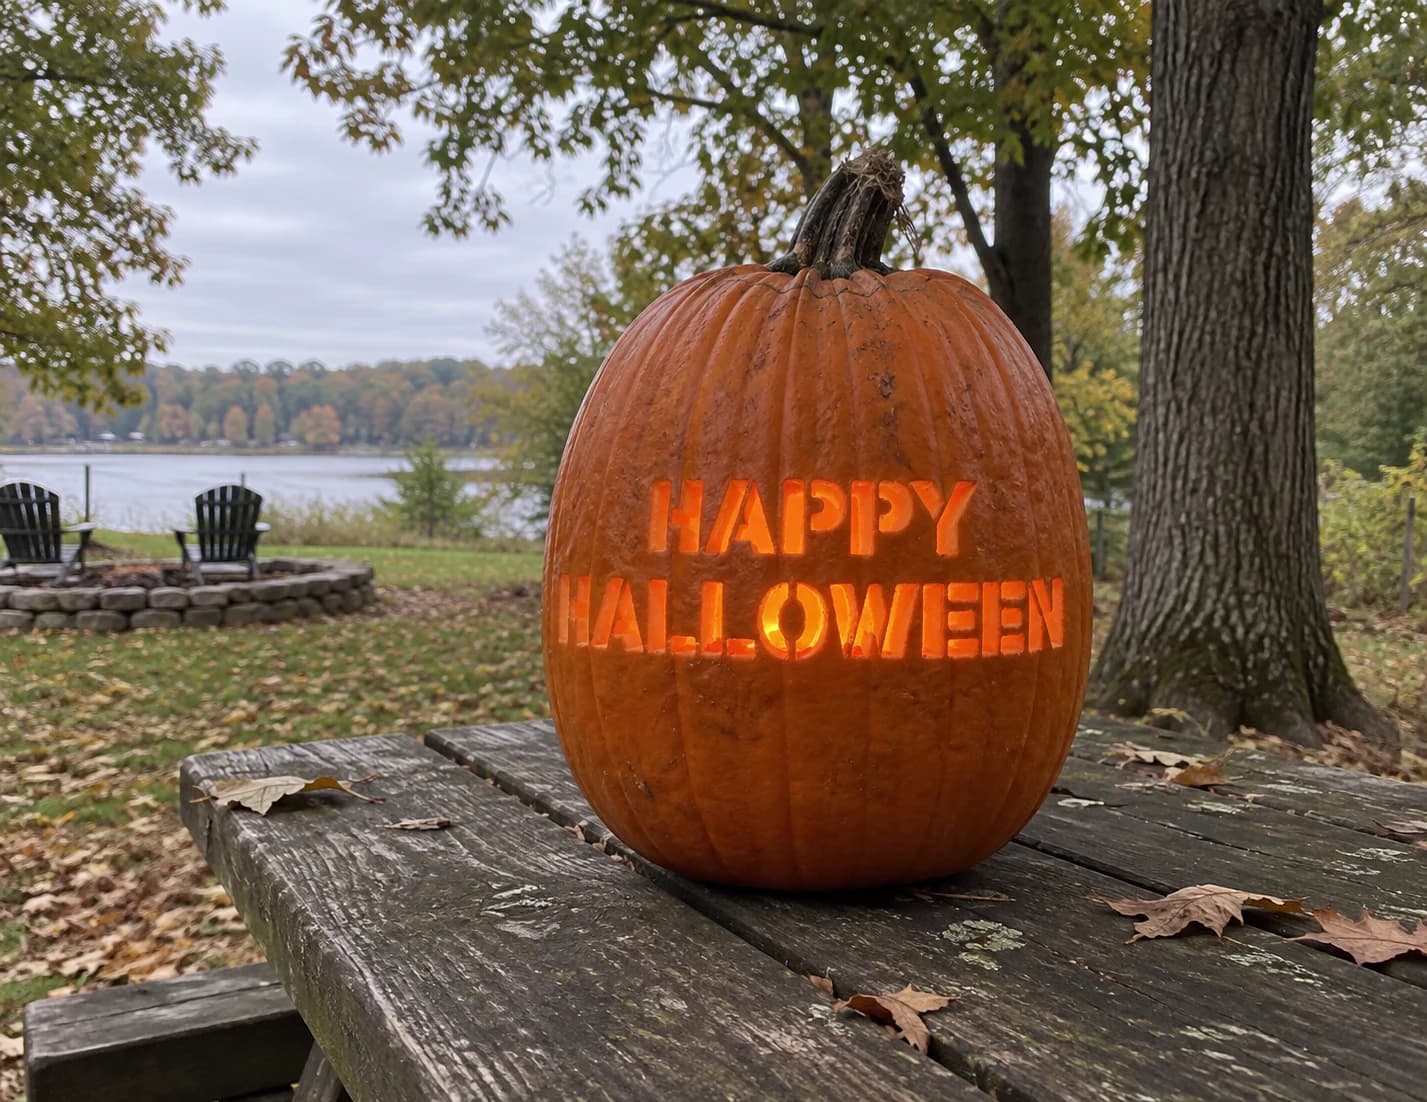
Happy Halloween Text Pumpkin Stencil
The words HAPPY HALLOWEEN appear in two stacked lines of wide block capital letters in this pumpkin stencil, the typeface clean and bold with squared serifs and open counters inside letters like A, P, O, and E. Every letter is a cut-through opening, so the lit jack-o-lantern displays a glowing two-line greeting. Before carving, identify the enclosed counter islands inside closed letters such as the inner triangles of A and the inner ovals of O and P, and cut those small interior pieces out first so each island stays anchored until its surrounding letter walls are removed.
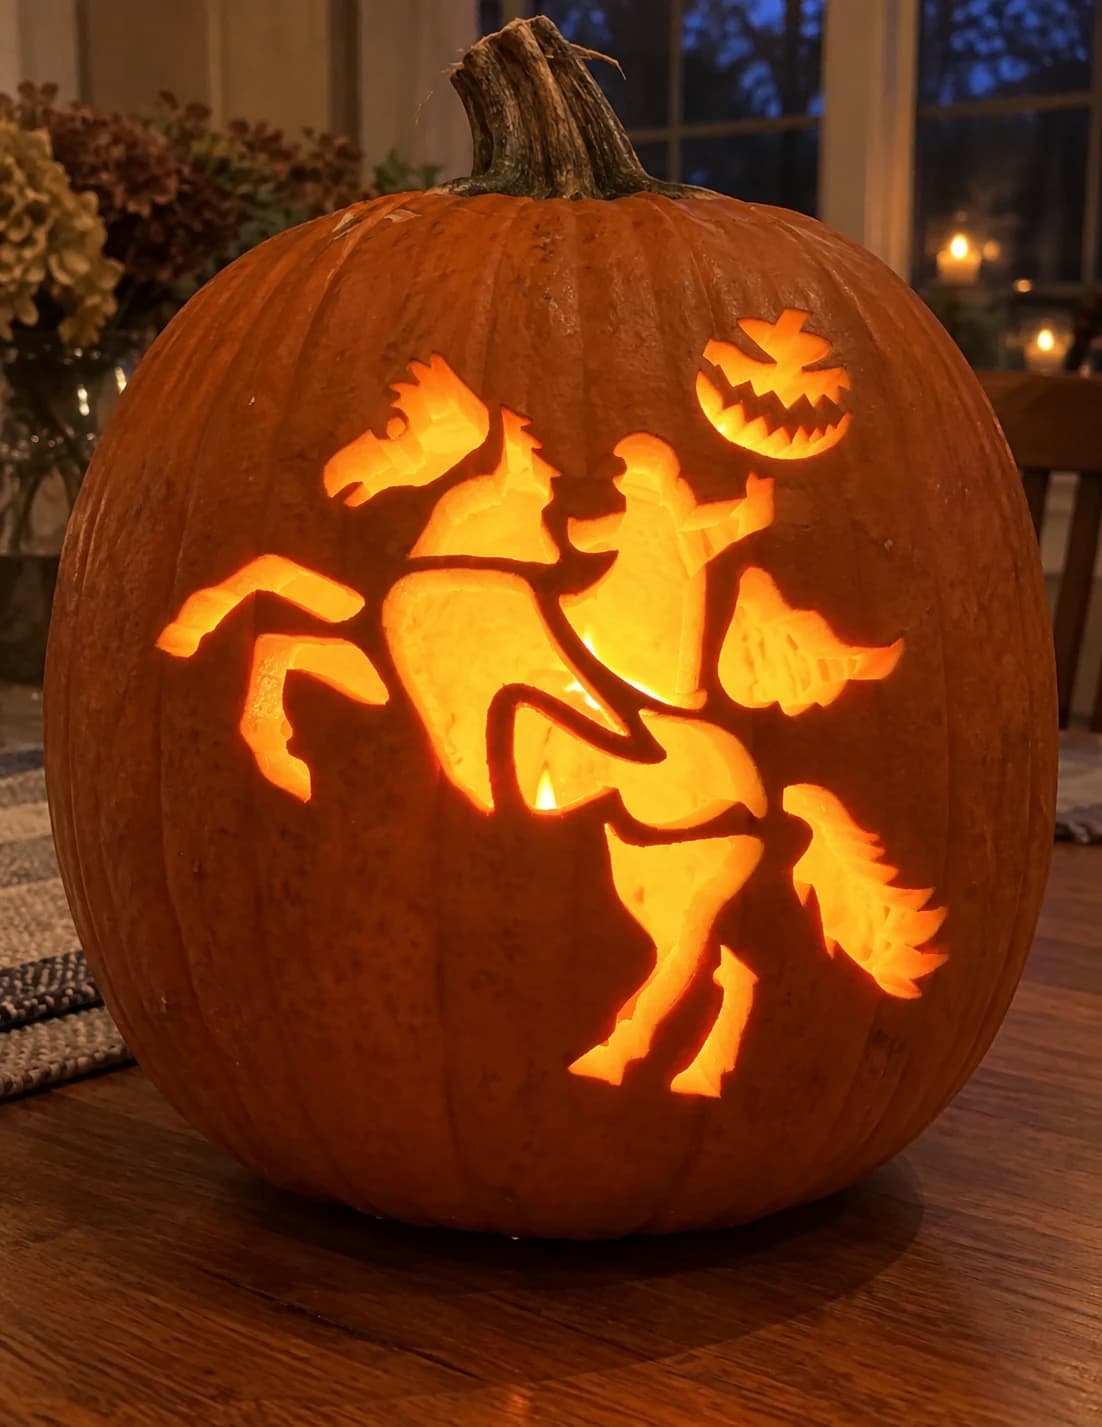
Headless Horseman Pumpkin Stencil
A headless horseman gallops across this pumpkin stencil: a rearing horse with flowing tail and mane, a cloaked rider holding a jack-o-lantern aloft in one outstretched hand, all cut as a silhouette composition with open negative space between the horse's legs and between the rider's cape and the horse's back. The carved jack-o-lantern in the rider's hand is its own small cutout with jagged eye and mouth slits. Carve the jack-o-lantern's tiny face cuts first, since that elevated detail is the easiest to lose if the surrounding wall shifts.
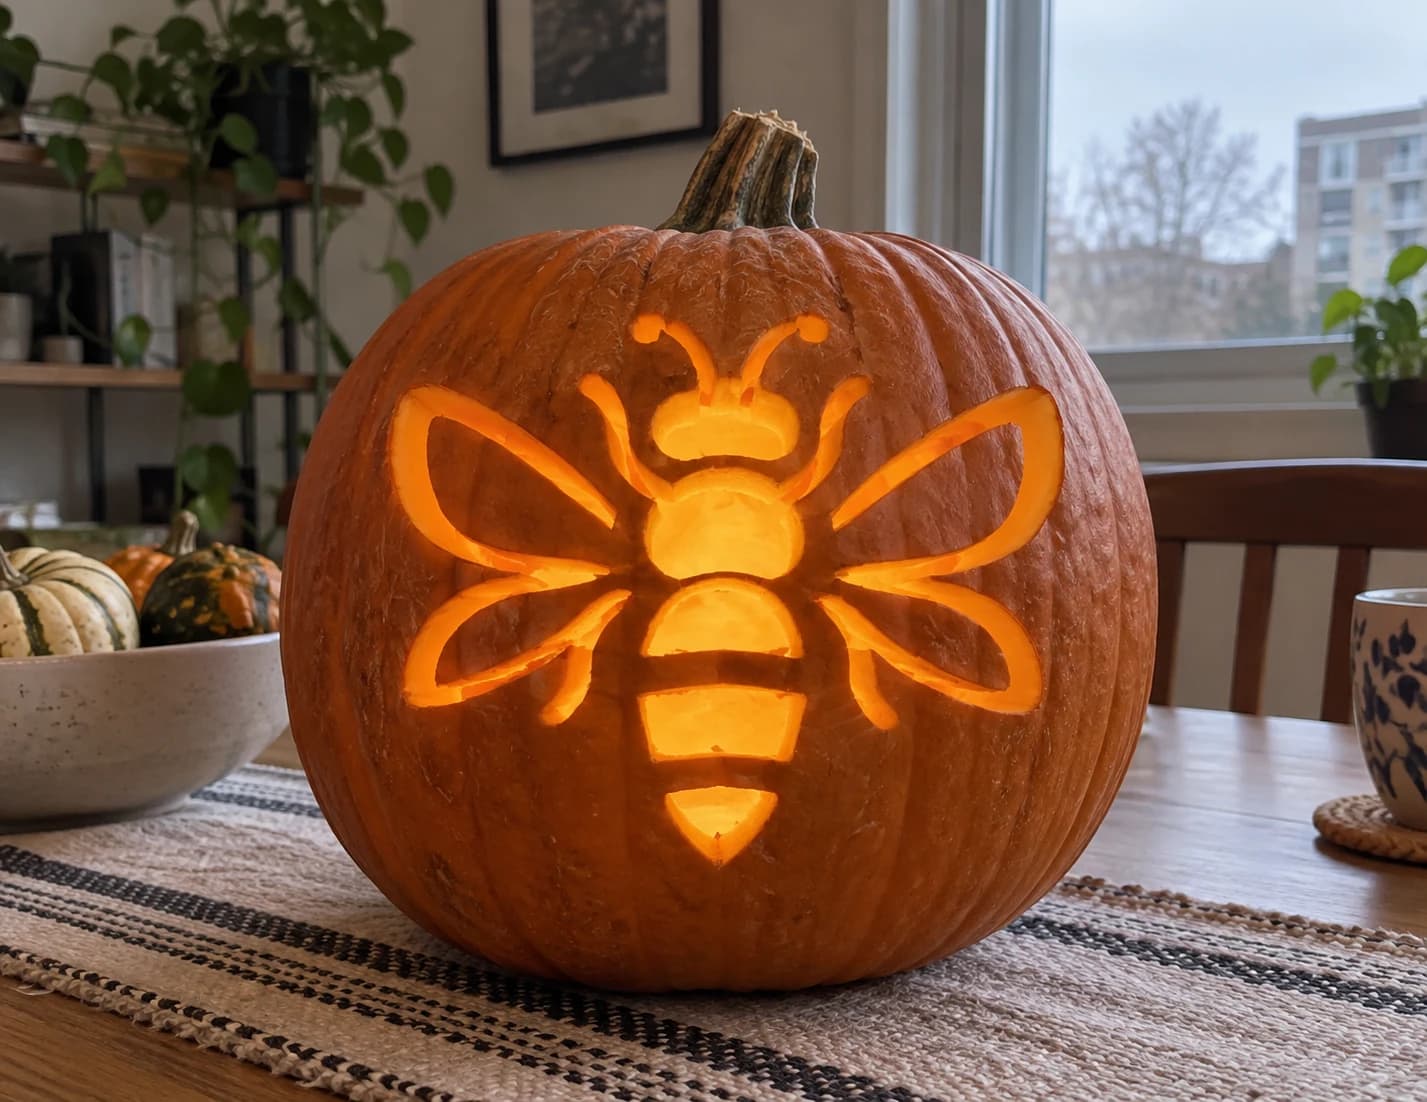
Honeybee Pumpkin Stencil
A honeybee shown from above spreads four large wing panels around a segmented body in this bee pumpkin stencil, each wing outlined by a curved channel and left as a solid pumpkin-skin shape, while the spaces inside and between the wings are cut open. The head, thorax, and three abdominal segments are kept solid with open gaps between them, and two curling antennae rise from the head. Cut the antenna curls first since they are the narrowest, most isolated elements, and finishing them before weakening the surrounding wall prevents breakage.
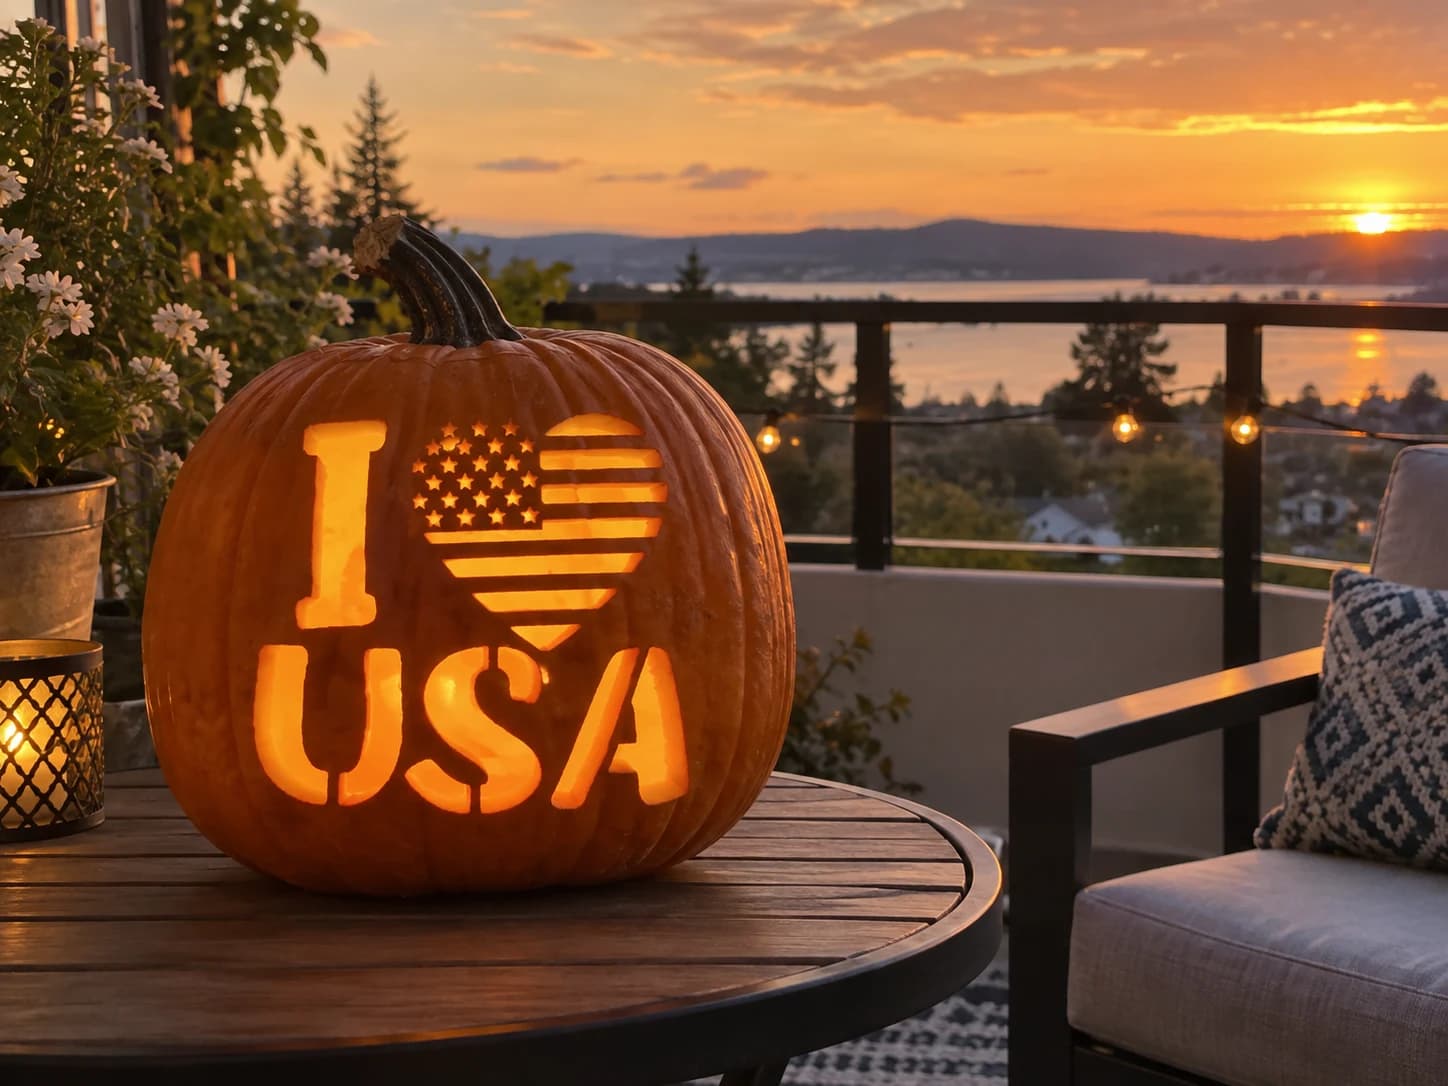
I Love USA Pumpkin Stencil
The text "I" stacked above a heart filled with an American flag pattern, then "USA" below it, makes up this patriotic pumpkin stencil: the flag-heart shows a grid of small stars on the left and horizontal stripe bars on the right, while the bold block letters are cut as open shapes. The letters and star shapes pierce through so the pumpkin glows with text and a star-field simultaneously. Cut the individual stars inside the flag-heart before removing the surrounding letter openings so the fine star shapes stay supported by the neighboring skin as long as possible.
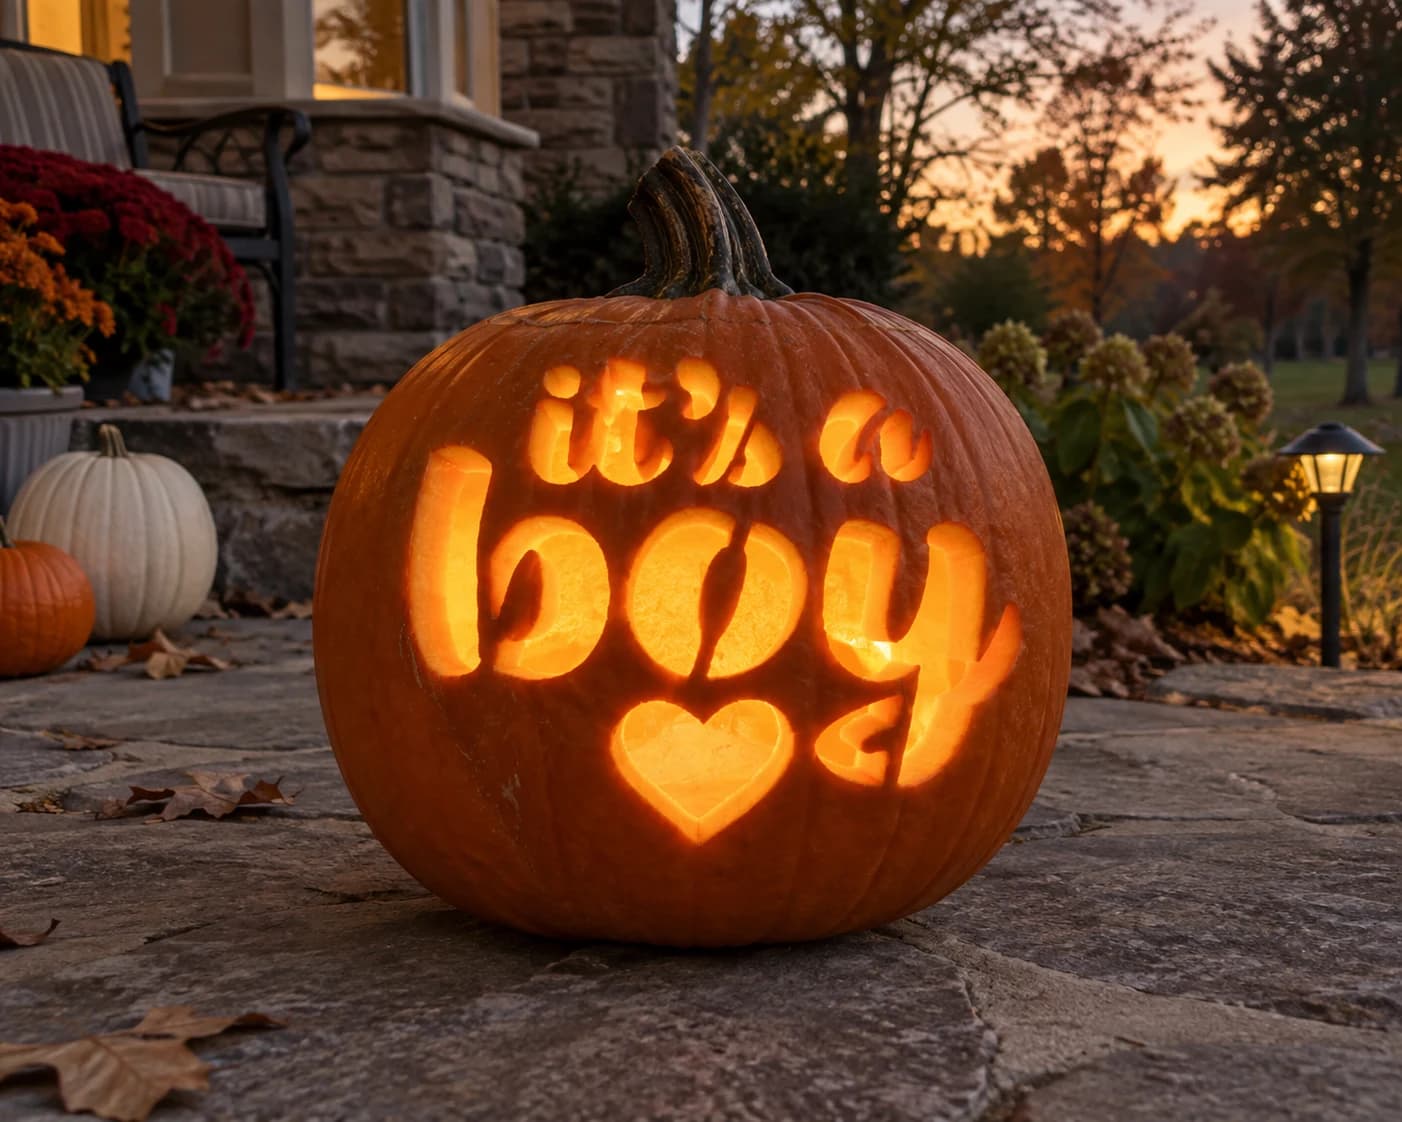
It's a Boy Pumpkin Stencil
The phrase "it's a boy" is set in a bold, bubbly hand-lettered script across two lines, with a heart shape centered below the text. Every letter is cut as a solid shape: the rounded strokes of the lowercase letters, including the counter inside the "o" of "boy" and the enclosed loop of the "b," are all part of the carved-away design. Lit from within, the chunky letterforms glow against the pumpkin wall. Cut the enclosed counters of "b" and "o" before removing the main letter bodies so those small interior pieces don't become loose mid-carve.
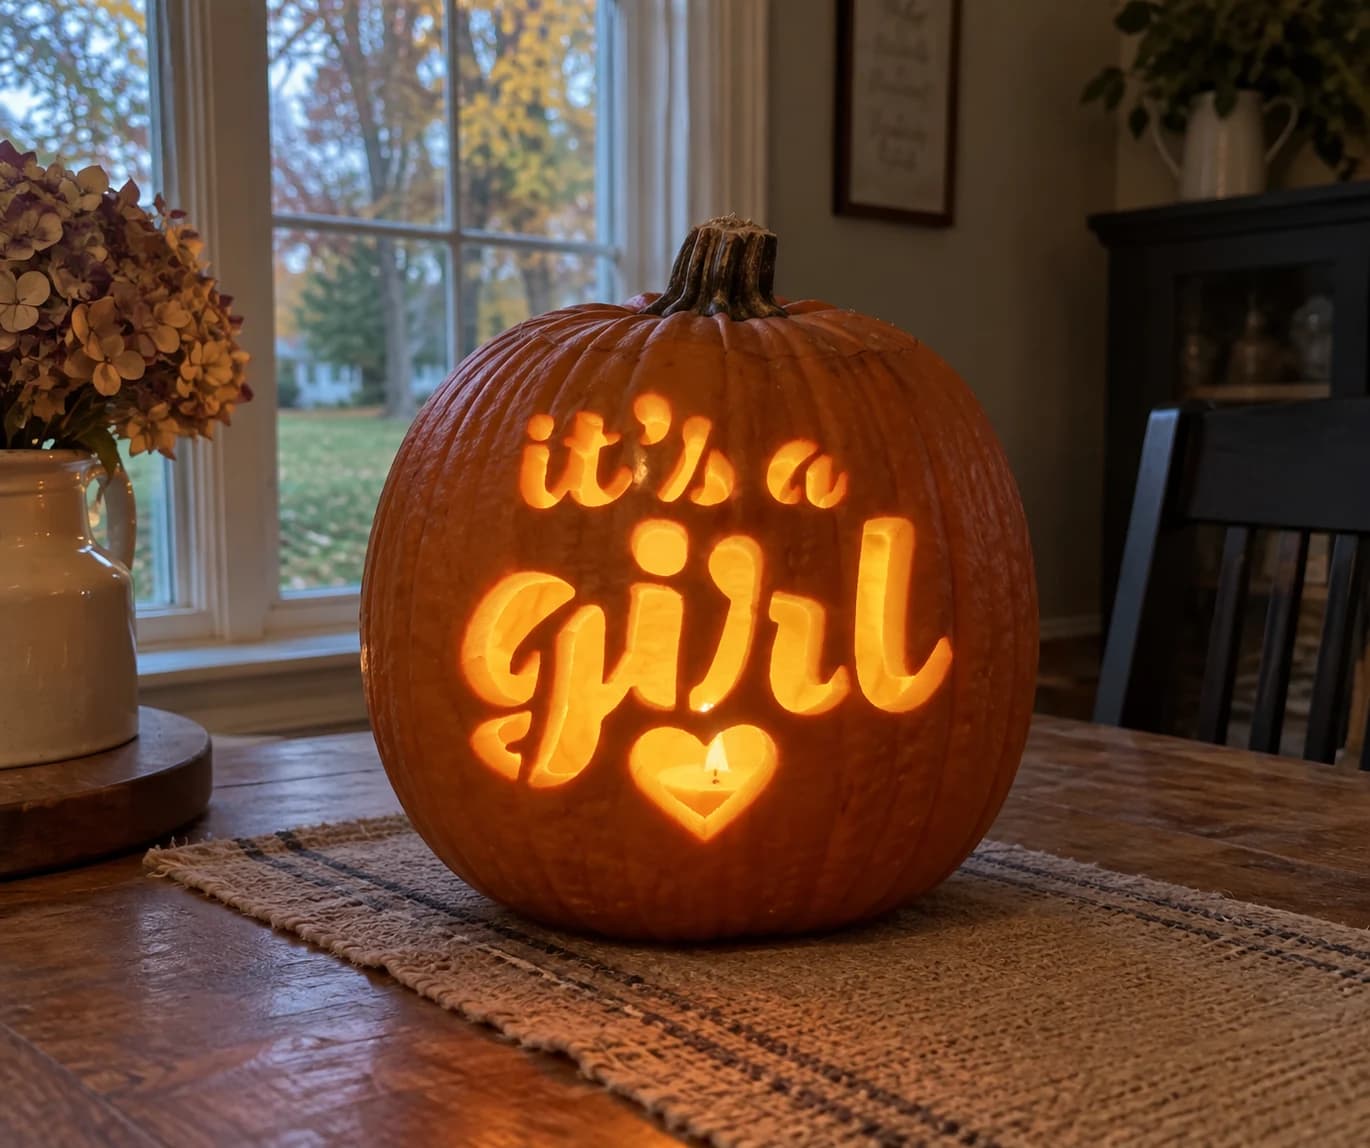
Its a Girl Pumpkin Stencil
The phrase "it's a girl" in chunky lowercase lettering fills this pumpkin stencil, with a small heart shape tucked below the word "girl" to complete the baby announcement message. Each letter and the heart are cut-out shapes, many with enclosed counters that require careful handling. The interior dot of the letter i in "girl" is the trickiest floating island: cut around it last and keep the skin disc in place using a toothpick or small skewer pressed through the back of the pumpkin wall to hold it.
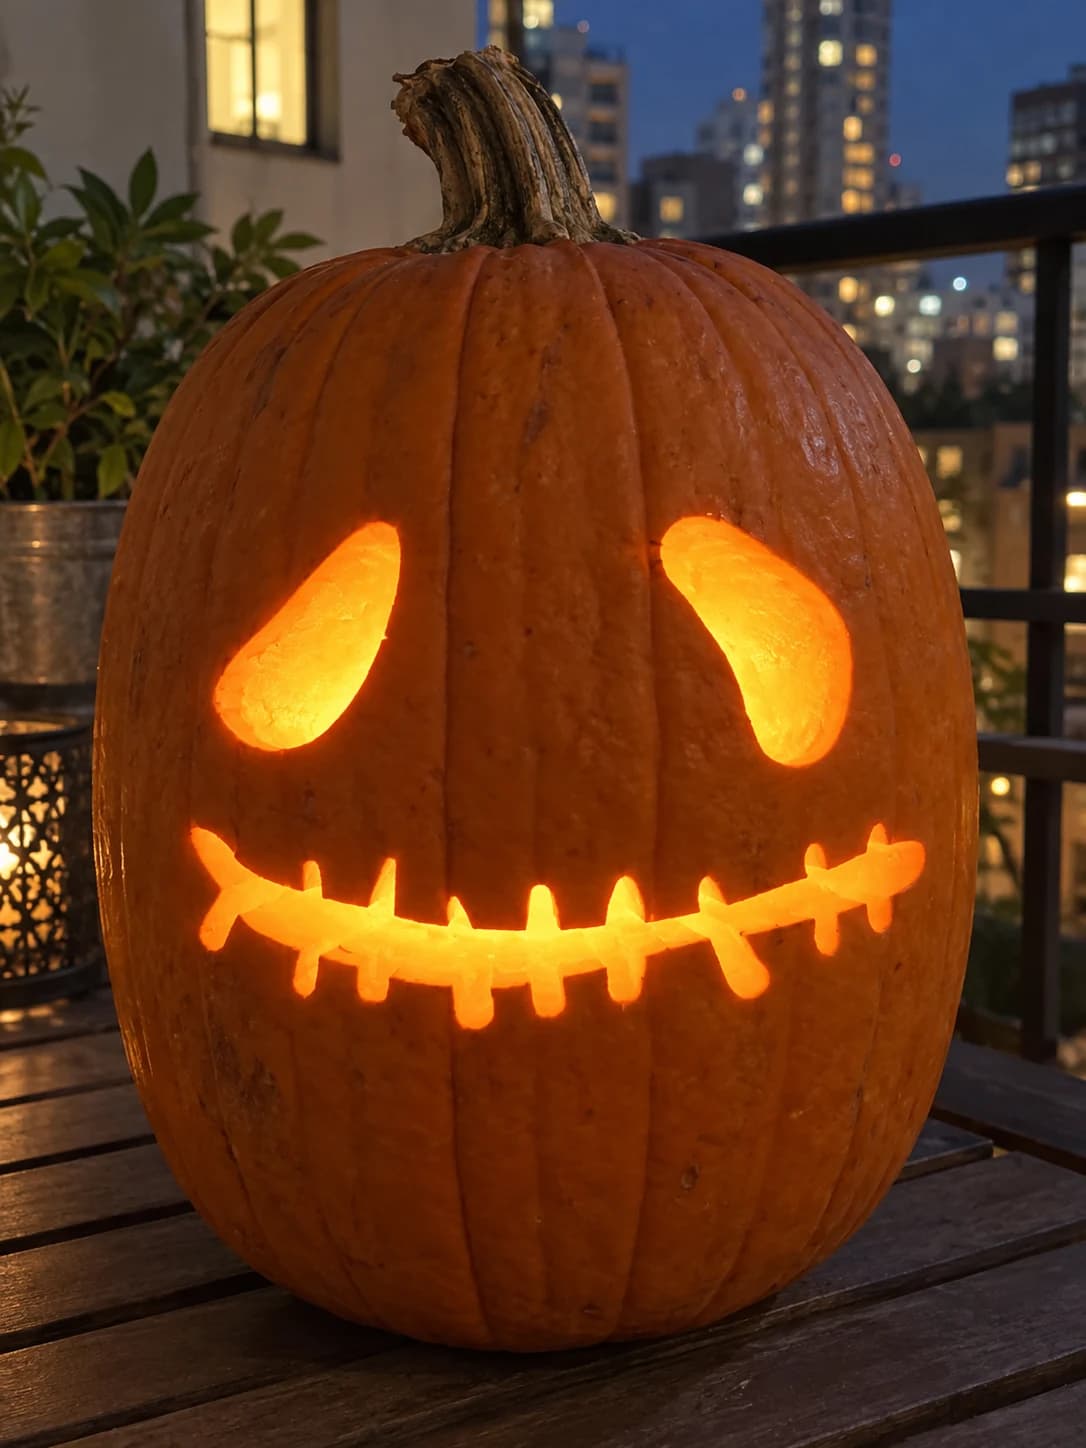
Jack Skellington Pumpkin Stencil
Two tall oval eye holes and a long horizontal stitched mouth with cross-bar teeth form the three pieces of this minimalist Skellington-style pumpkin stencil, recognizable for its sparse, elongated proportions. The eyes are simple solid ovals and the mouth is a single wide slot with evenly spaced vertical tines. Because all three cutouts are surrounded by smooth uncut pumpkin, placement matters: center the stencil higher on the pumpkin face than you think you need to, so the long mouth lands in the rounder mid-section where the wall is thickest and the tine cuts are less likely to blow out.
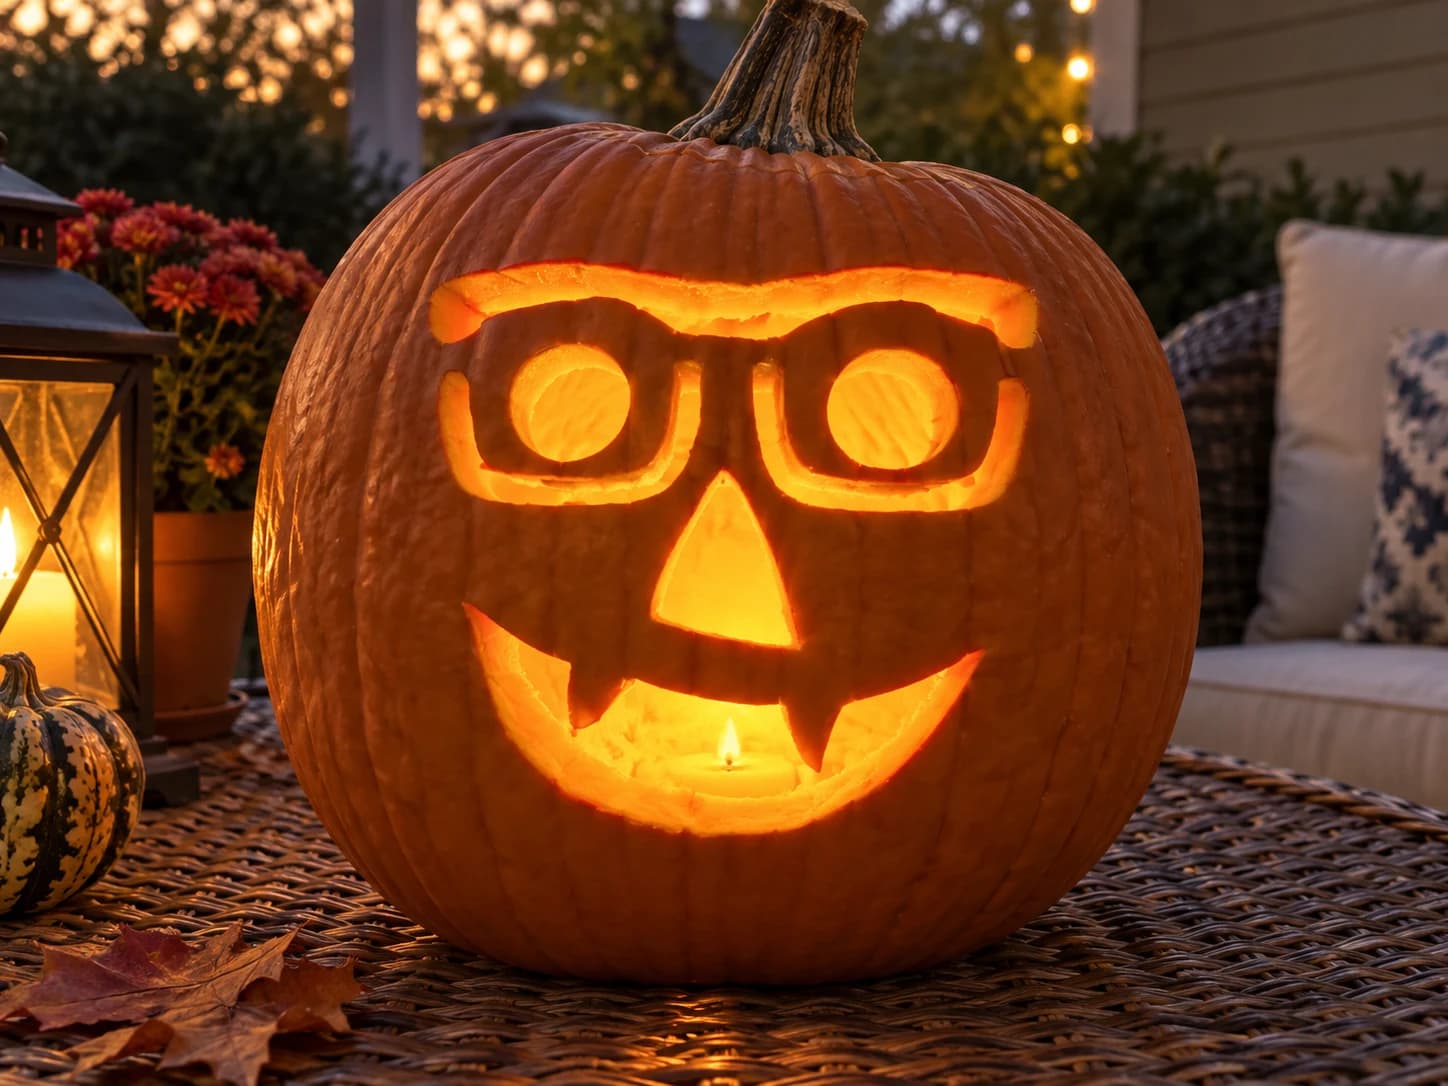
Jack-o-Lantern with Glasses Pumpkin Stencil
A classic jack-o-lantern face wearing oversized rectangular glasses makes up this beginner pumpkin stencil. The eyebrow is a wide arched strip across the top, the glasses frame is a connected pair of rectangular loops each containing a circular lens opening, a triangular nose sits below, and a broad grinning mouth with one dripping fang dominates the lower half. The thick glasses frame and face outlines remain solid while the lens circles, nose triangle, and mouth are cut through. Cut the two circular lens openings inside the glasses before the wide mouth, so the frame bridge between the lenses stays firm.
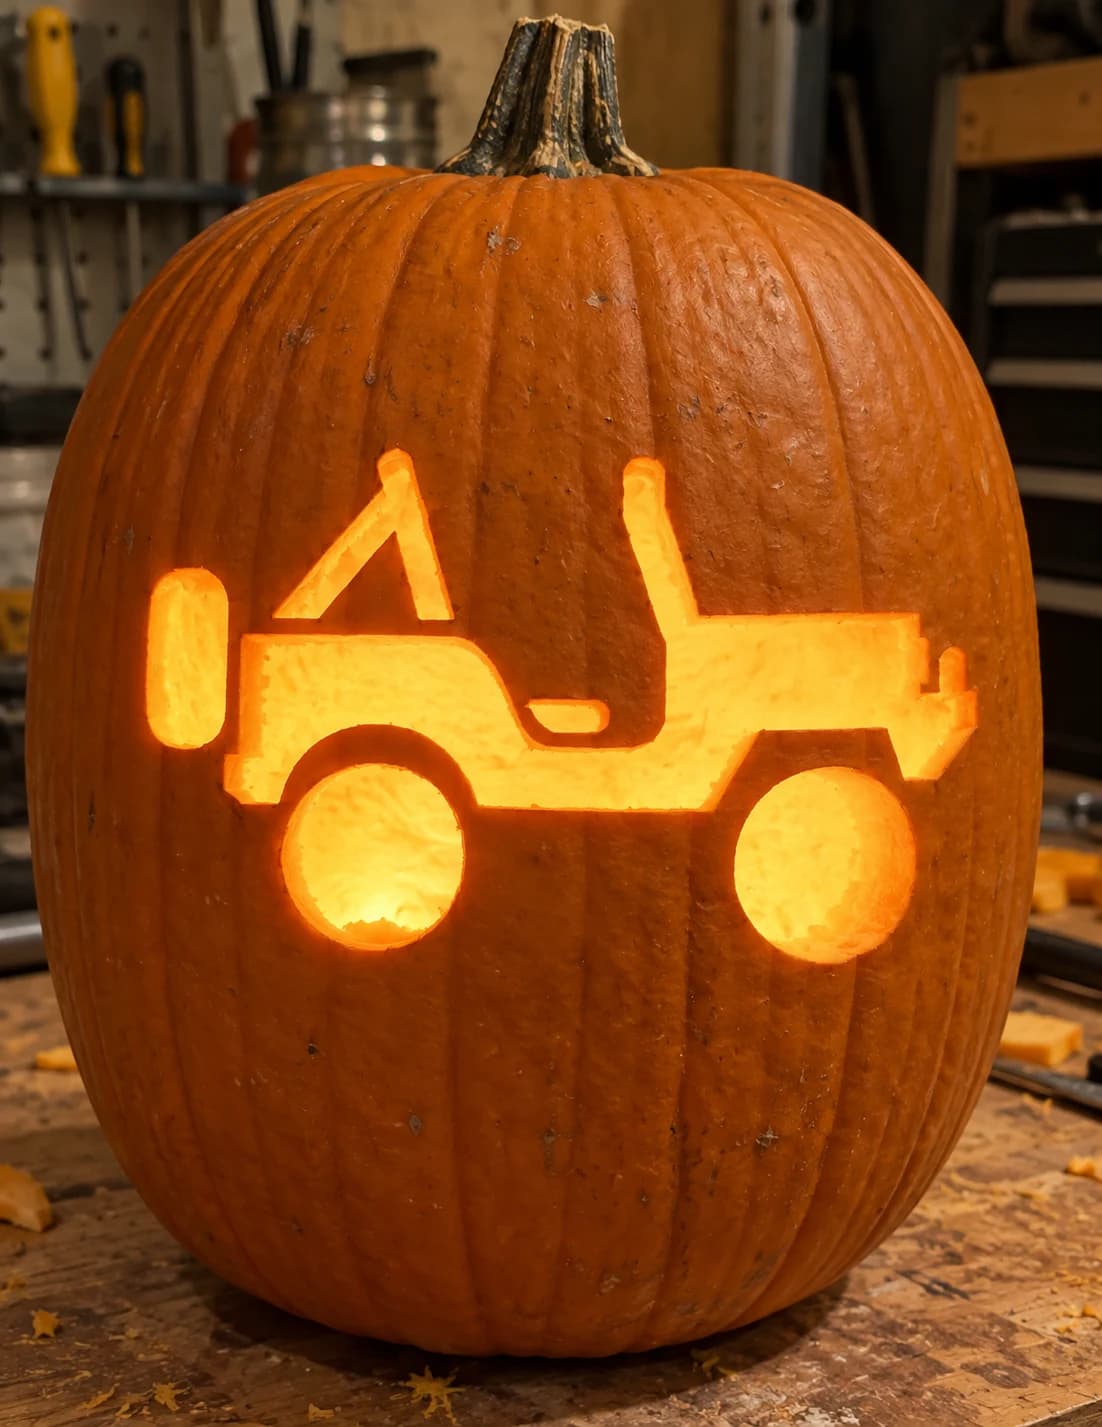
Jeep Pumpkin Stencil
An open-top jeep faces left in a clean side-profile pumpkin stencil, showing the boxy body, roll bar, two large round tires, a spare tire mounted on the hood, and a small hitch at the rear. The body cavity and the two wheel holes are pierced through while the roll bar and body outline remain as solid pumpkin flesh. To keep the narrow roll bar from snapping, cut the large body opening first and work inward toward that bar, not the other way around.
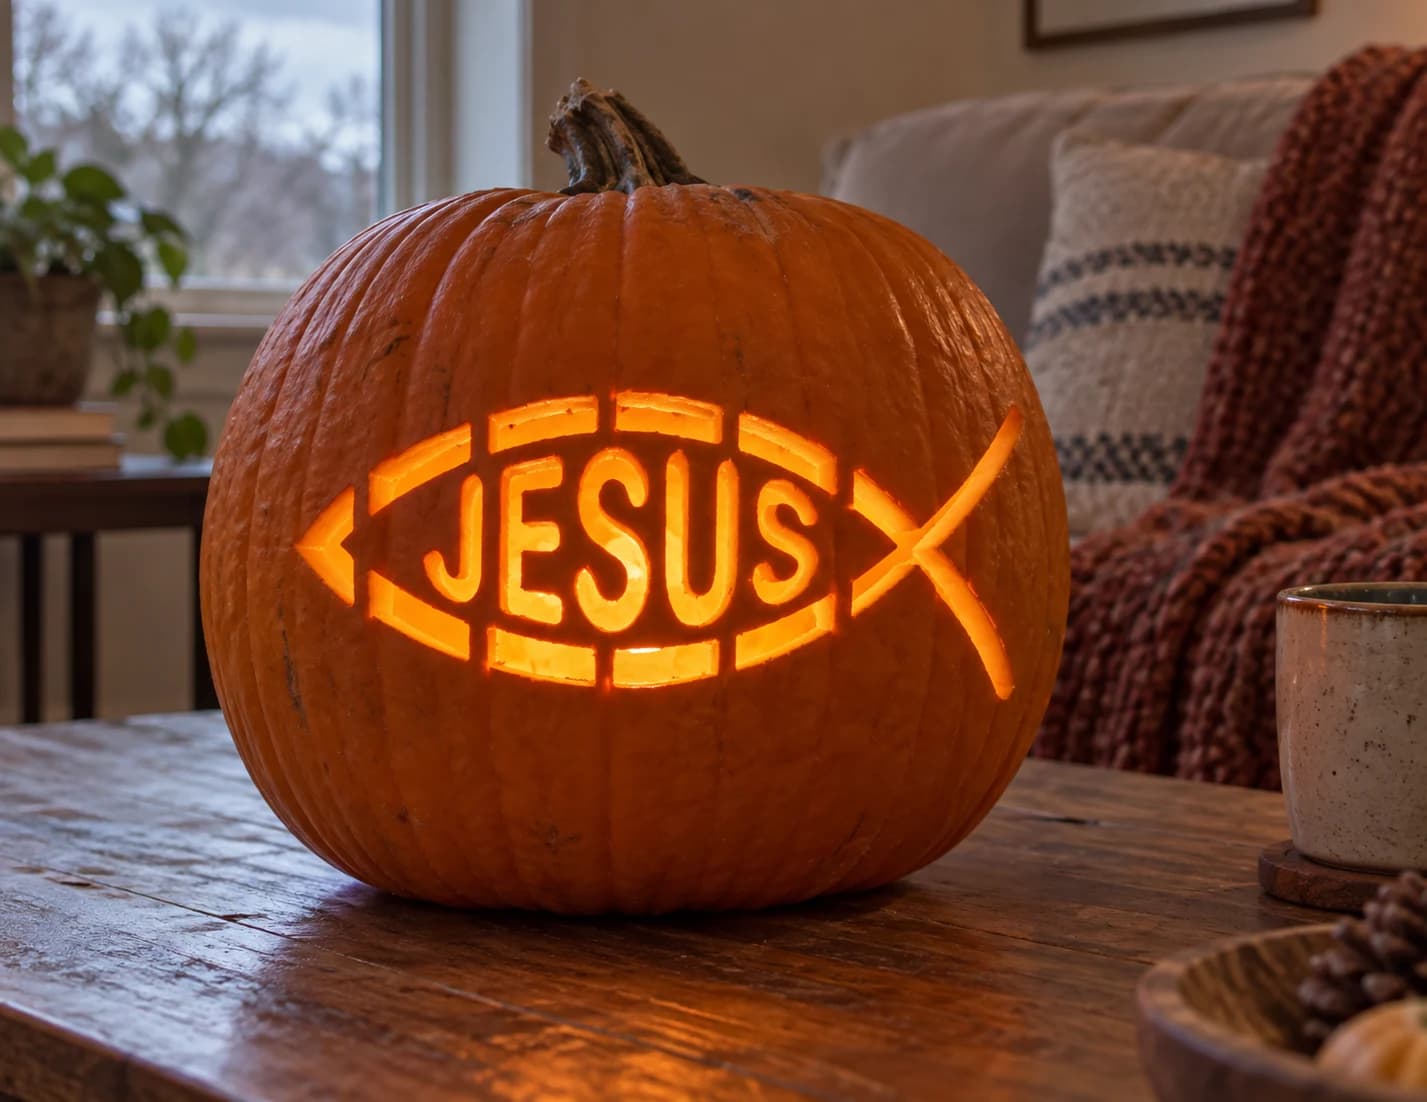
Jesus Fish Pumpkin Stencil
This pumpkin stencil renders the Christian ichthys fish symbol horizontally across the pumpkin face: the fish body outline is formed by pierced dashes along the top and bottom edges, the word JESUS is cut in open block capitals inside the body, and a small cross sits at the tail junction on the right. The letters and outline dashes are all negative space, so the finished jack-o-lantern glows with JESUS framed inside the fish. Carve the outer dash segments first to establish the fish outline, then work each letter from E inward to avoid flexing the narrow skin strips between characters.
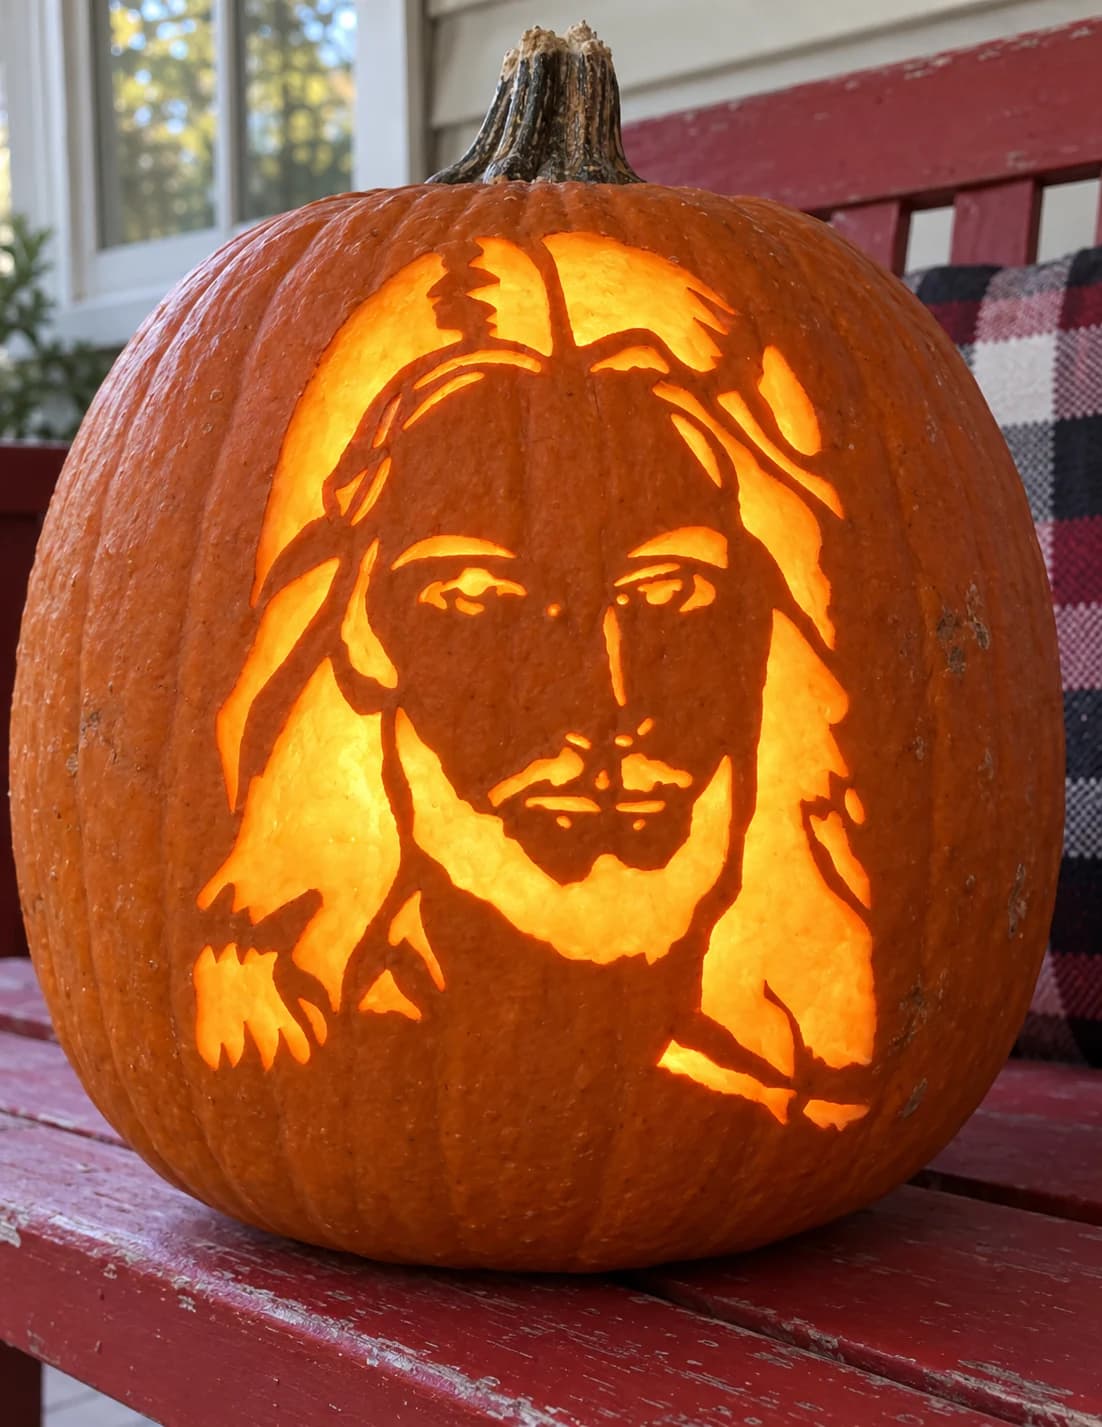
Jesus Portrait Pumpkin Stencil
A front-facing portrait of Jesus with long flowing hair, a short beard, and softly rendered facial features fills this expert-level pumpkin stencil. The background and hair are pierced through as large open sections, while thin bridges of solid pumpkin skin form the eyes, nose, and beard details. Lit from inside, the face glows with warmth against the dark cut-out surround. Cut the large hair sections first to ease tension in the skin before tackling the delicate facial feature bridges.
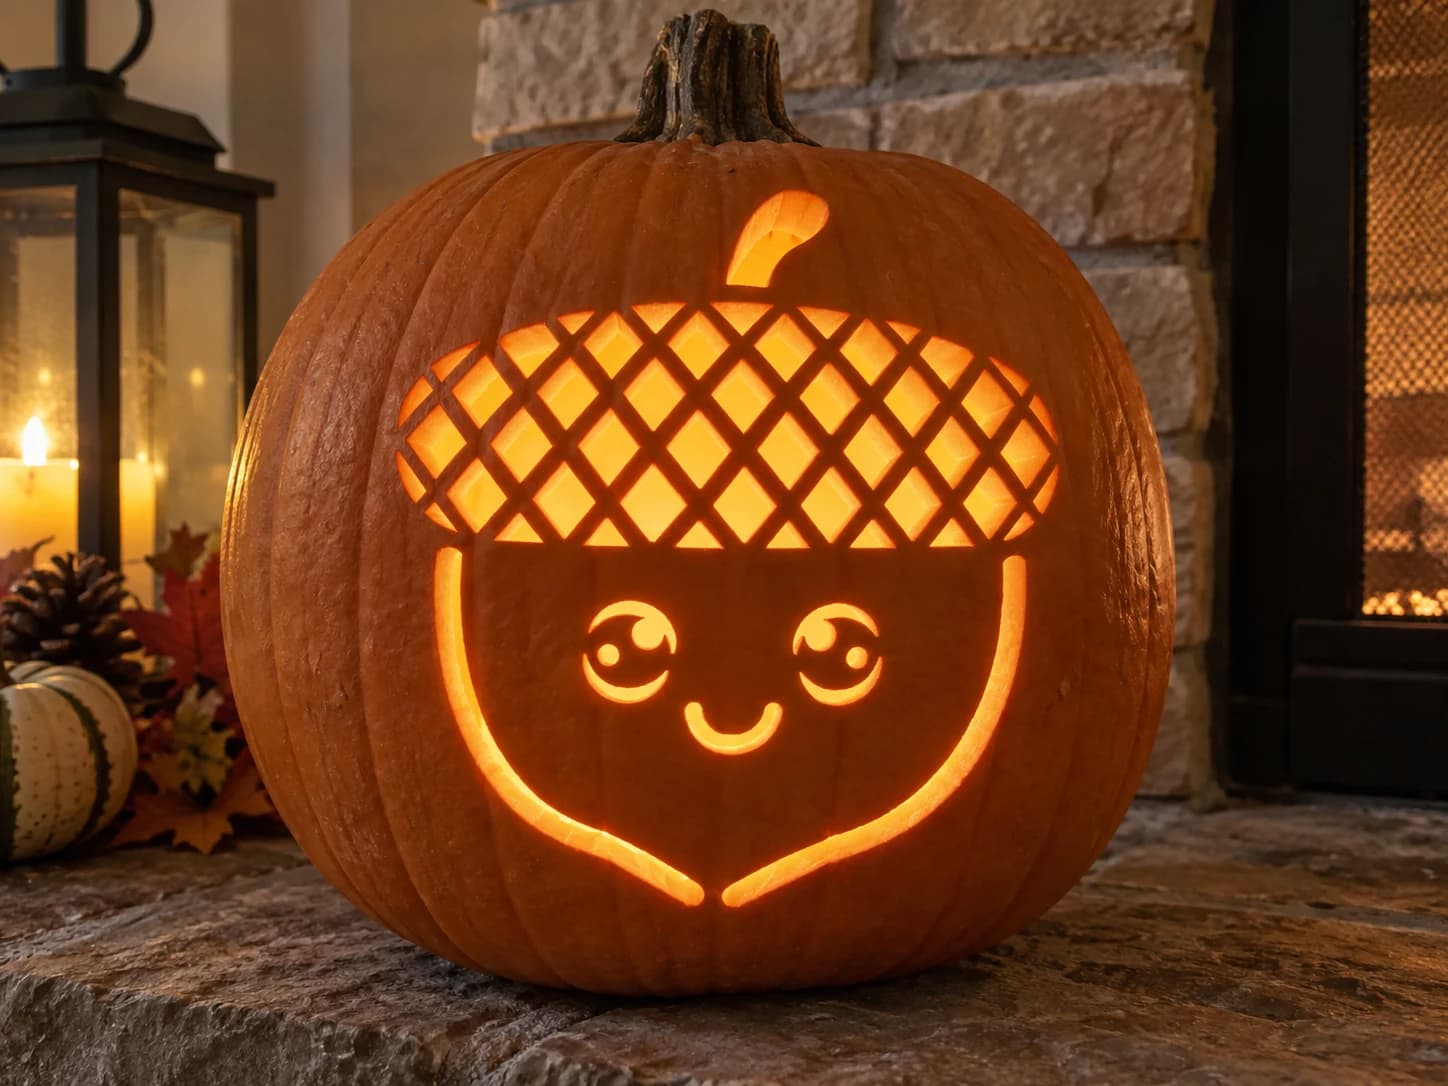
Kawaii Acorn Pumpkin Stencil
A kawaii-style acorn character fills the stencil: the domed cap is covered in a dense diamond lattice of cut-out shapes, while the rounded body below carries two crescent-shaped eyes, a small curved smile, and delicate arm curves along each side. Lit from within, the hatched cap glows like a lantern screen and the face reads warmly against the solid body. Carve the lattice diamonds from the center of the cap outward, and avoid cutting the thin grid lines between them until all surrounding diamonds are removed.
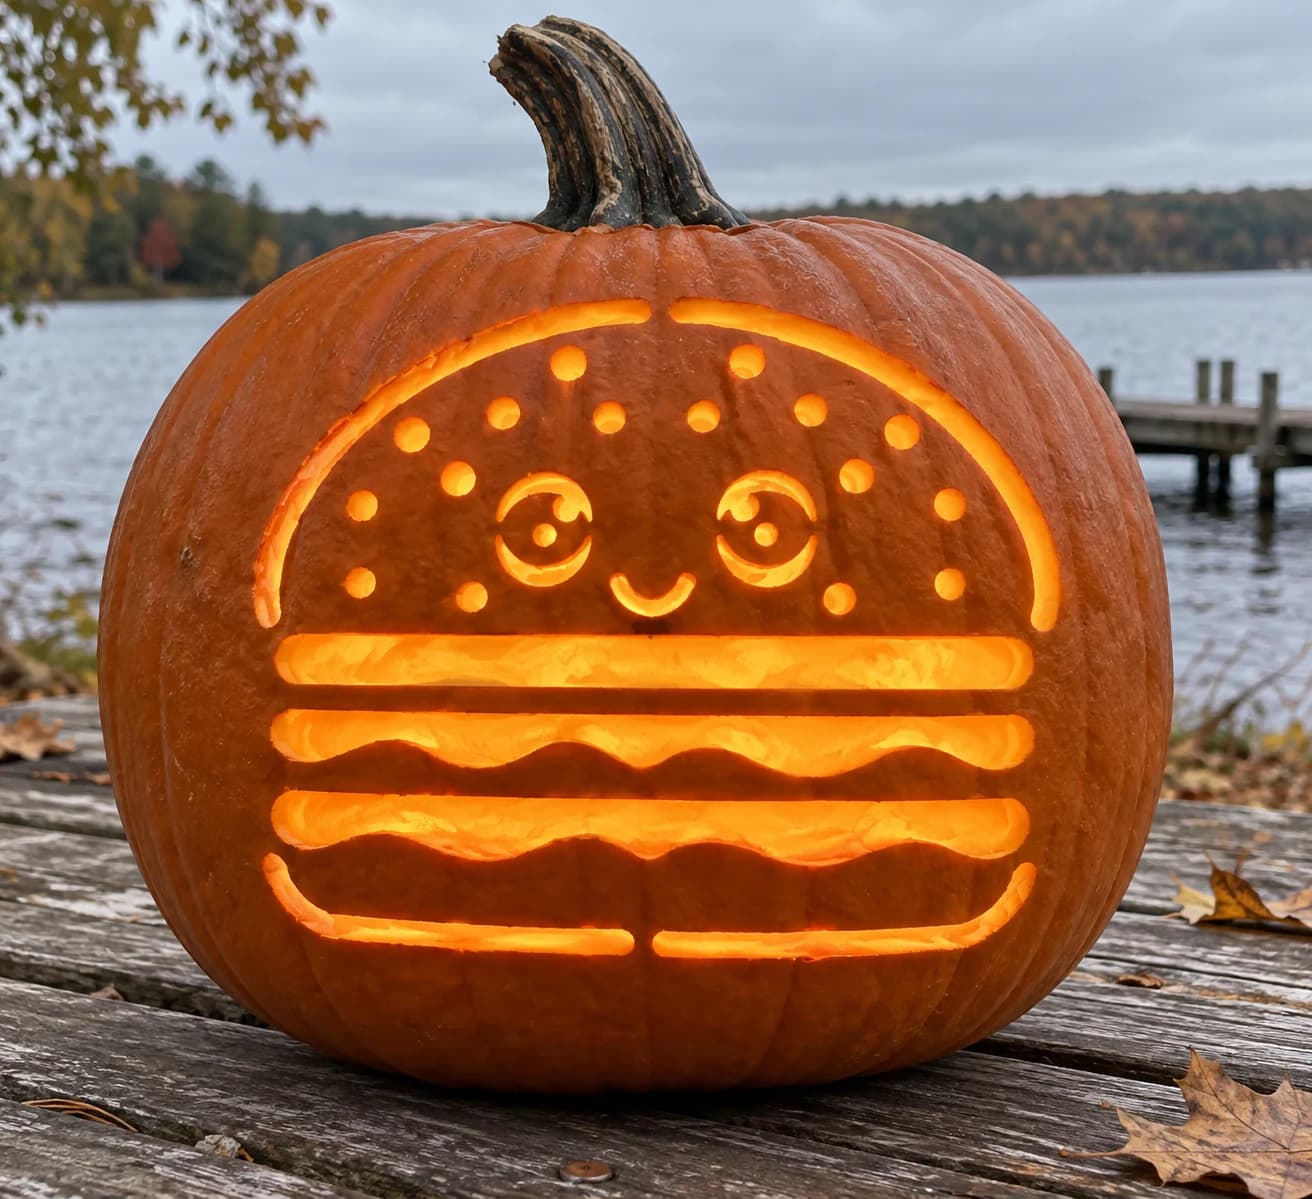
Kawaii Burger Pumpkin Stencil
A kawaii-style cheeseburger with a sesame-seed bun, two wavy patty layers, and a smiling face with spiral eyes fills this easy food pumpkin stencil, its stacked layers translated into a series of bold horizontal cuts separated by solid pumpkin-skin ridges. The round sesame seeds on the bun are punched as individual small circles, and the curly eyes and smile arc are cut as open shapes inside the bun half. Punch all the seed holes first with a small drill bit or apple-corer tip before cutting the long horizontal bun and patty slots, so the surrounding wall stays firm while you place those precise dots.
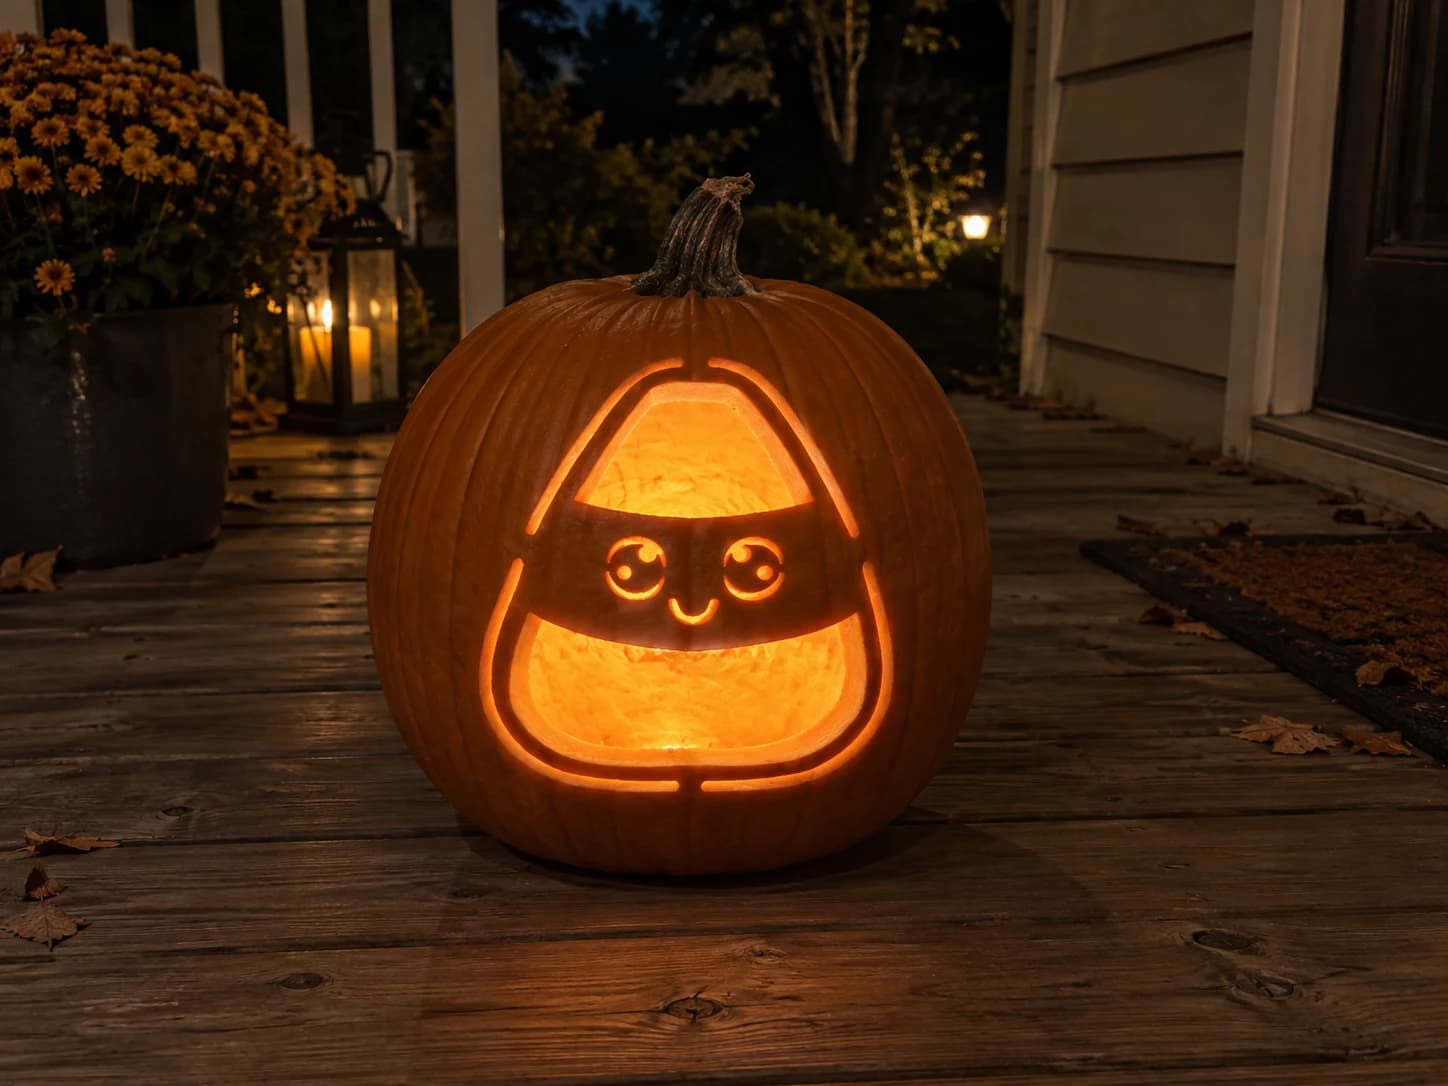
Kawaii Candy Corn Pumpkin Stencil
A kawaii candy corn character fills this pumpkin stencil, with a wide triangular body divided into two large cut-out sections and a solid mid-stripe band that holds a pair of circular eyes and a curved smile. The two open panels at top and bottom glow brightly when lit, while the pumpkin-colored face strip stays solid, making the cute expression pop in candlelight. Cut the smaller eye circles last to avoid weakening the surrounding pumpkin skin before the big panels come out.
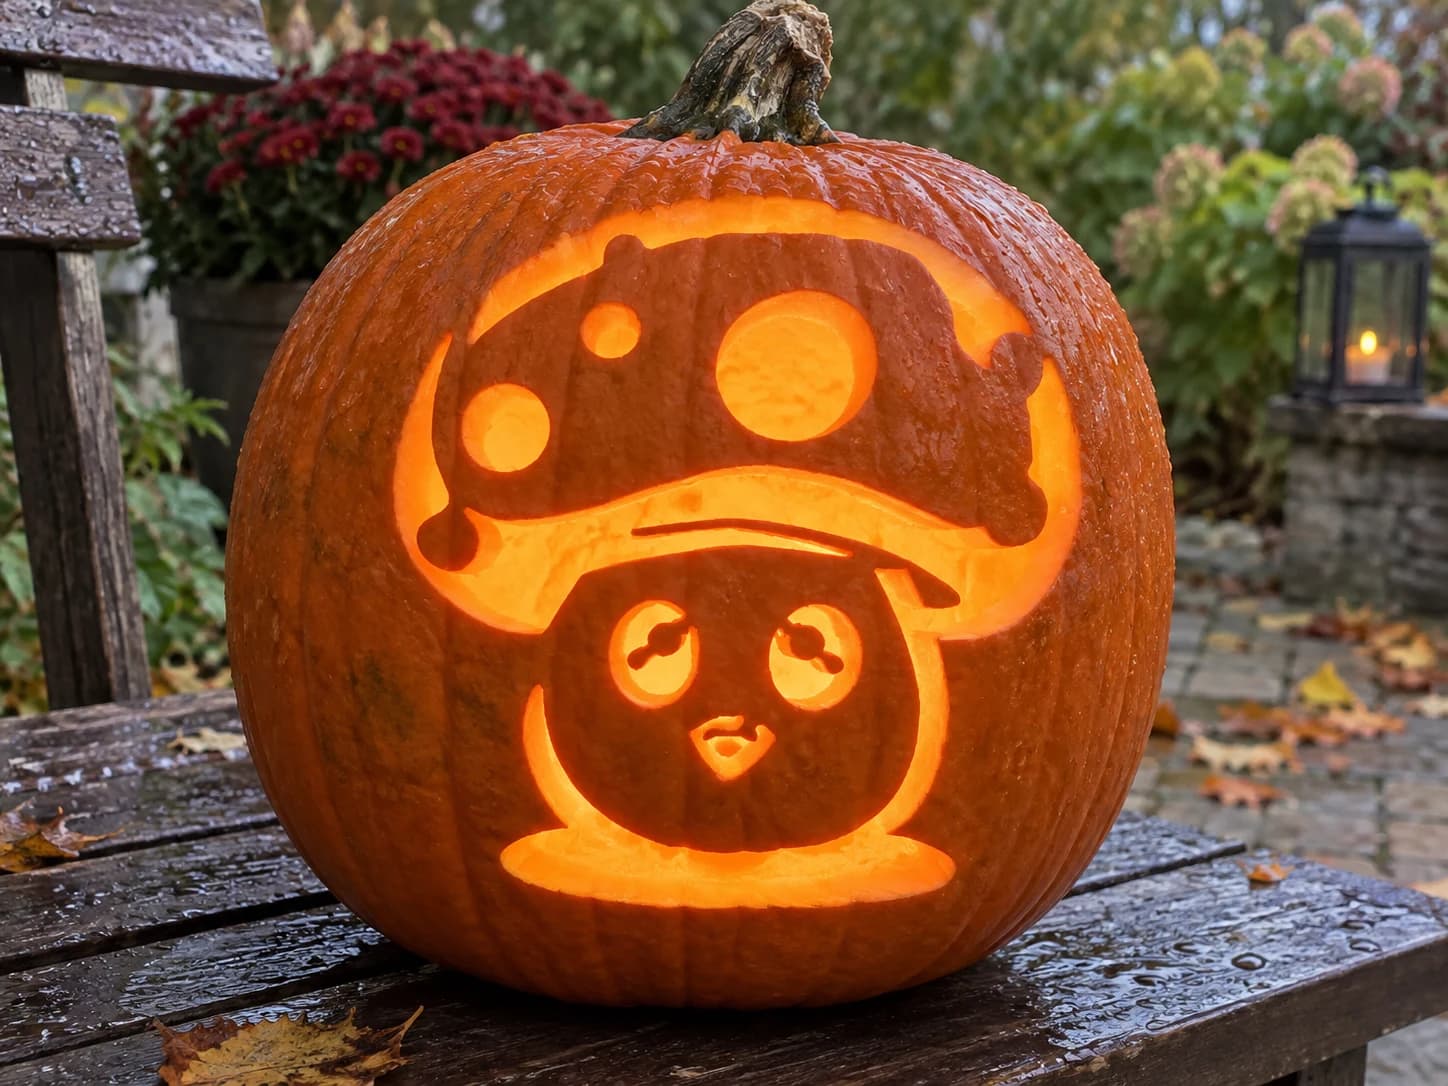
Kawaii Mushroom Pumpkin Stencil
A kawaii-style mushroom character fills this hard pumpkin stencil, with a broad spotted cap, small horns or fins at the sides, and a round face below it showing large anime eyes and a tiny curved mouth. The cap spots are solid orange circles against a pierced cap background, and the face details are fine interior cuts within the solid round head. Carve the small circular spots on the cap before removing the large open cap area, so those circles have firm pumpkin wall behind them while you make the precise cuts.
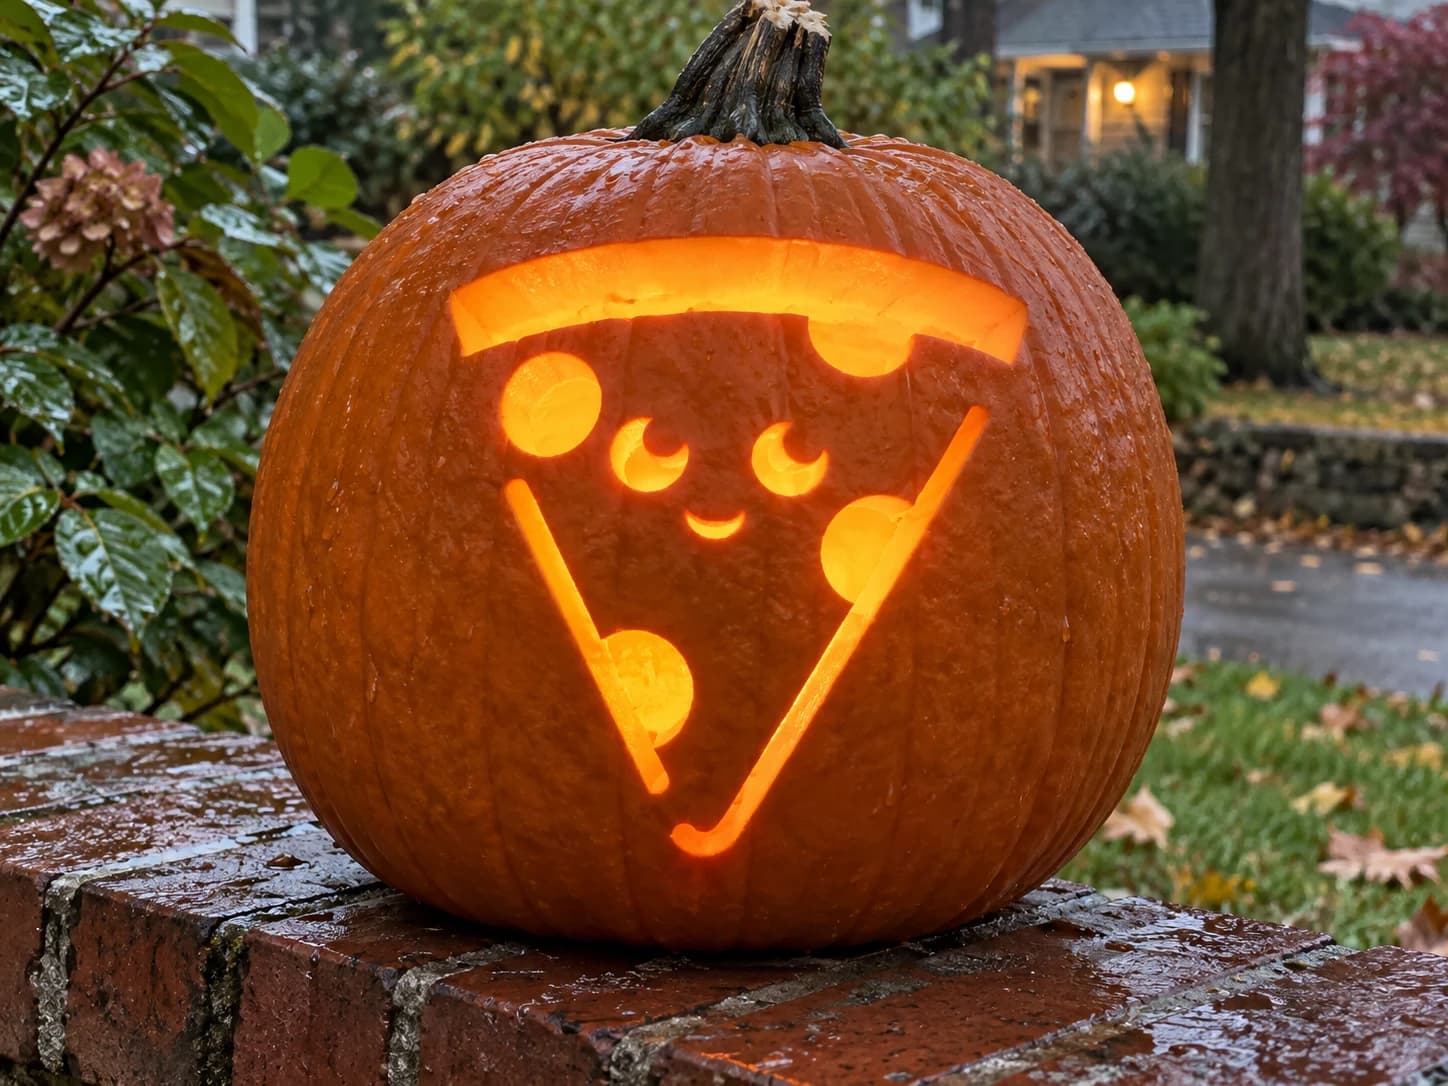
Kawaii Pizza Slice Pumpkin Stencil
A kawaii pizza slice takes center stage in this pumpkin stencil: the triangular slice has a curved crust bar across the top, a cute face with crescent-shaped eyes and a small smile, circular pepperoni cutouts, and two thin diagonal lines suggesting arms. All the face features, pepperoni circles, and the space surrounding the slice are pierced through, while the slice outline and crust shape remain solid. Cut the tiny crescent eyes and smile first before the circular pepperoni holes, which are easier to control while the surrounding skin is still intact.
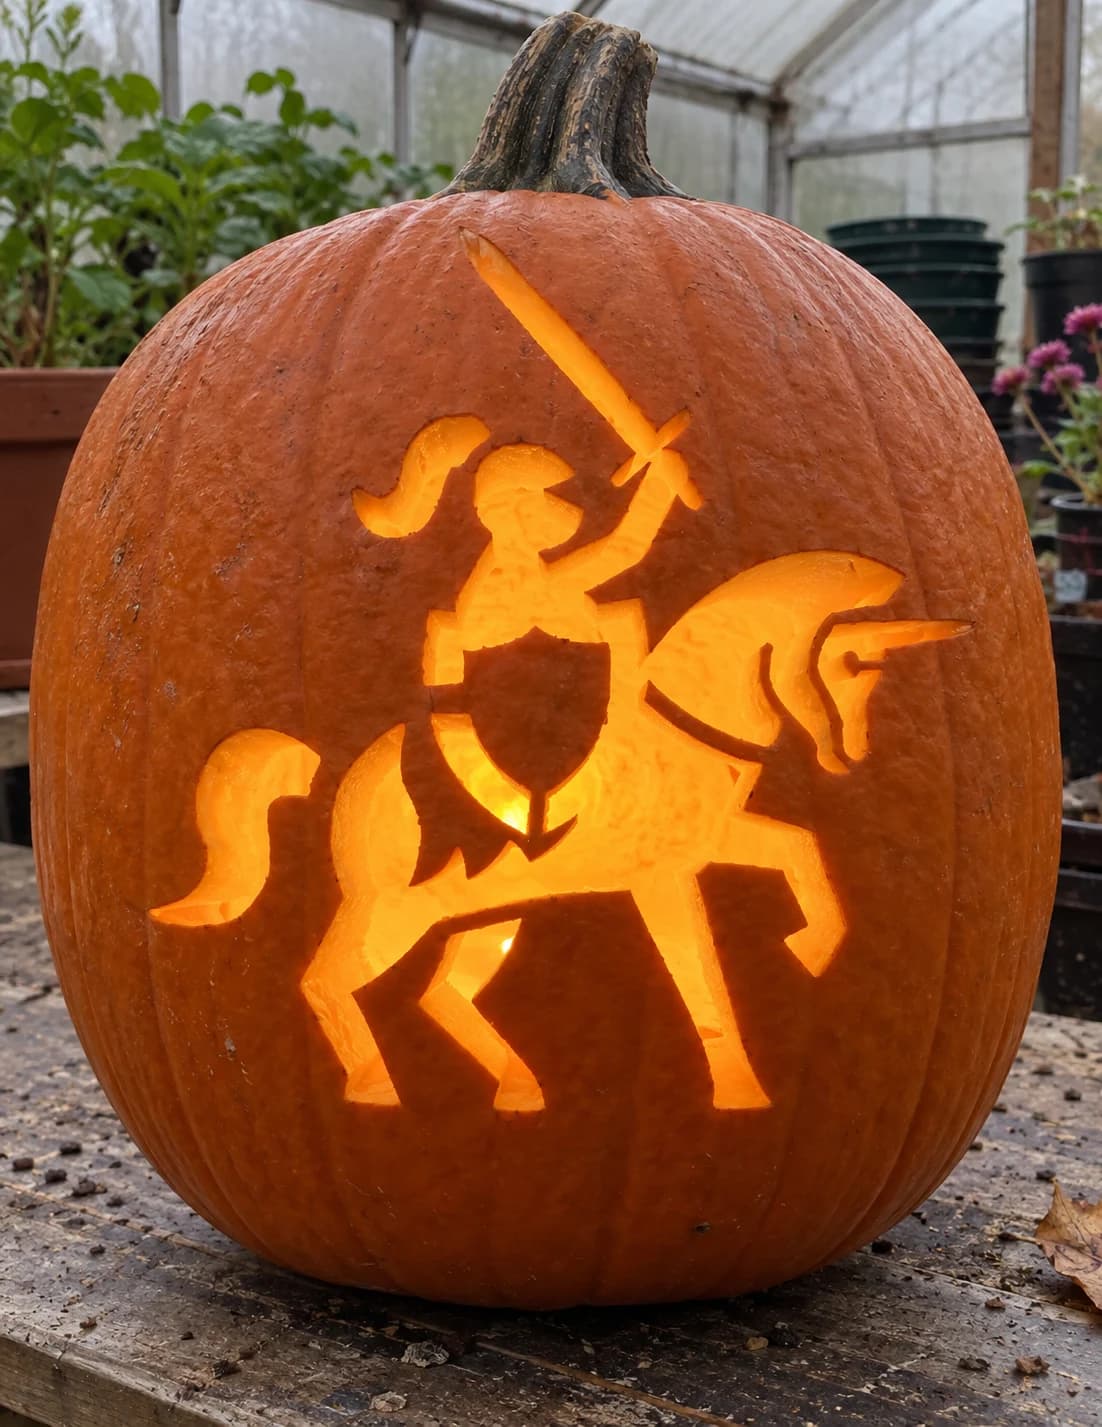
Knight on Horseback Pumpkin Stencil
A mounted knight in full armor charges across this hard pumpkin stencil: a plumed helmet, a raised sword pointing upward, a shield on the left arm, and a rearing horse with flowing mane and tail all read as a single bold silhouette. The composition is cut as one large negative space with only the sword blade, the shield, and the horse's legs as internal solid elements connected by thin skin bridges. Carve the outer silhouette edge first to release the large background, then carefully free the sword blade from top to tip while keeping the shield bridge intact.
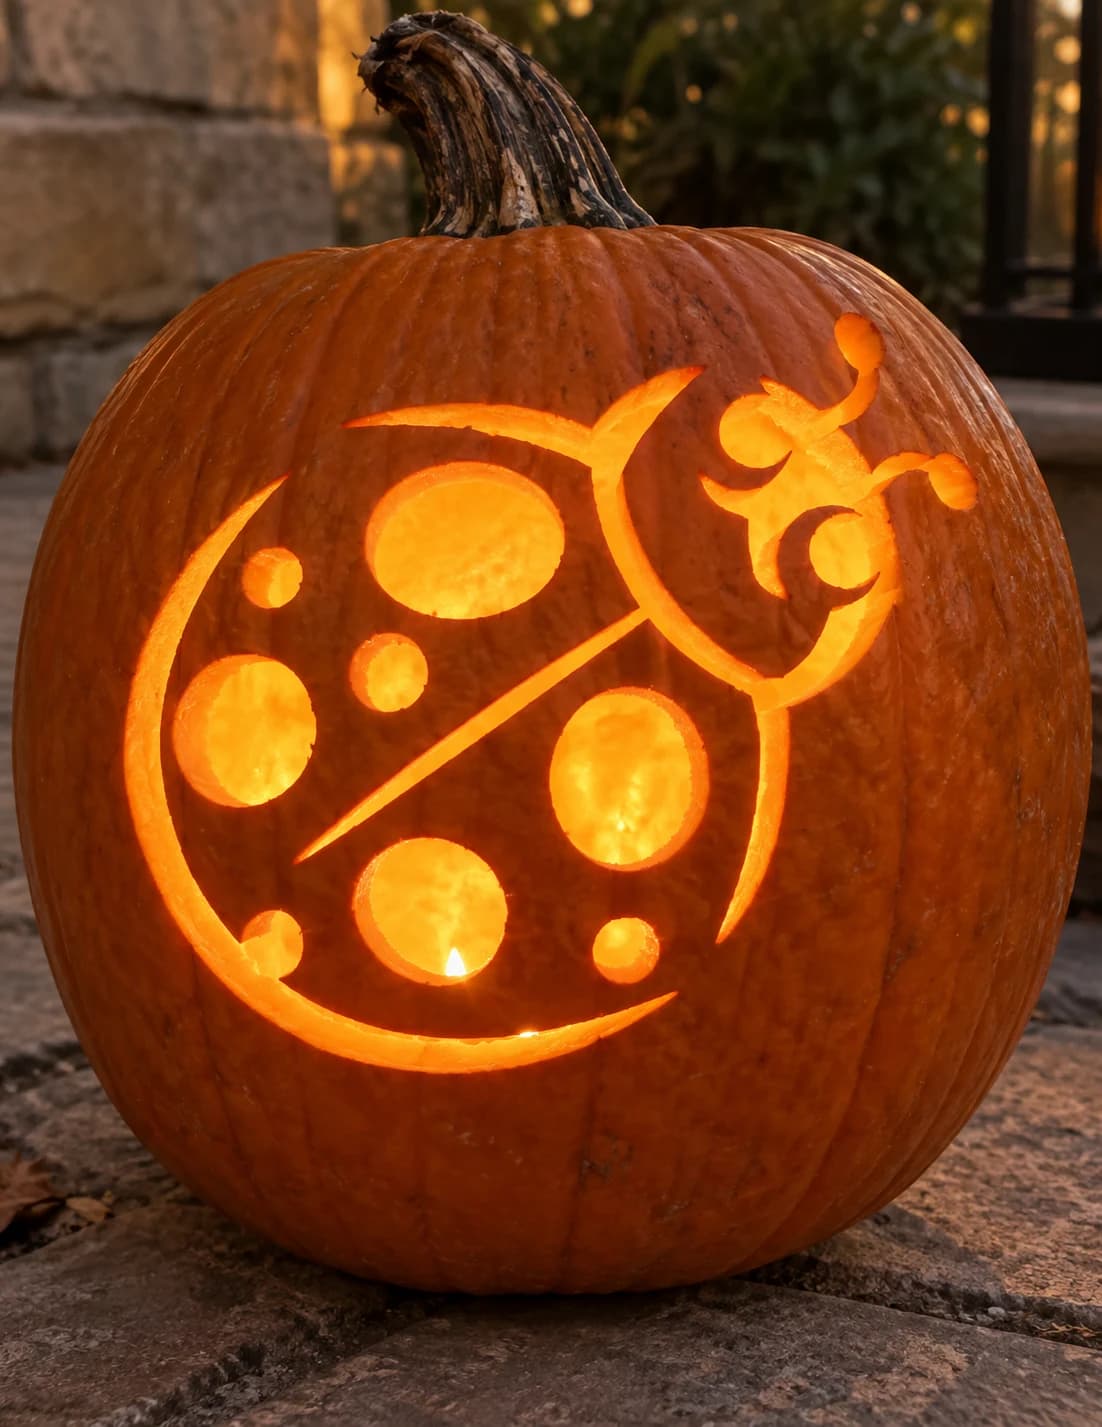
Ladybug Pumpkin Stencil
A plump ladybug viewed from above fills this cheerful pumpkin stencil, its round spotted body divided by a center-line ridge and ringed by a curved outline, while a decorative curling head with antennae sits at upper right. The circular spots are the cut-through elements that blaze as glowing dots; the outer body outline and dividing ridge stay solid. To keep the smaller spots from cracking inward, cut the largest center spot first, then work outward to the progressively smaller ones.
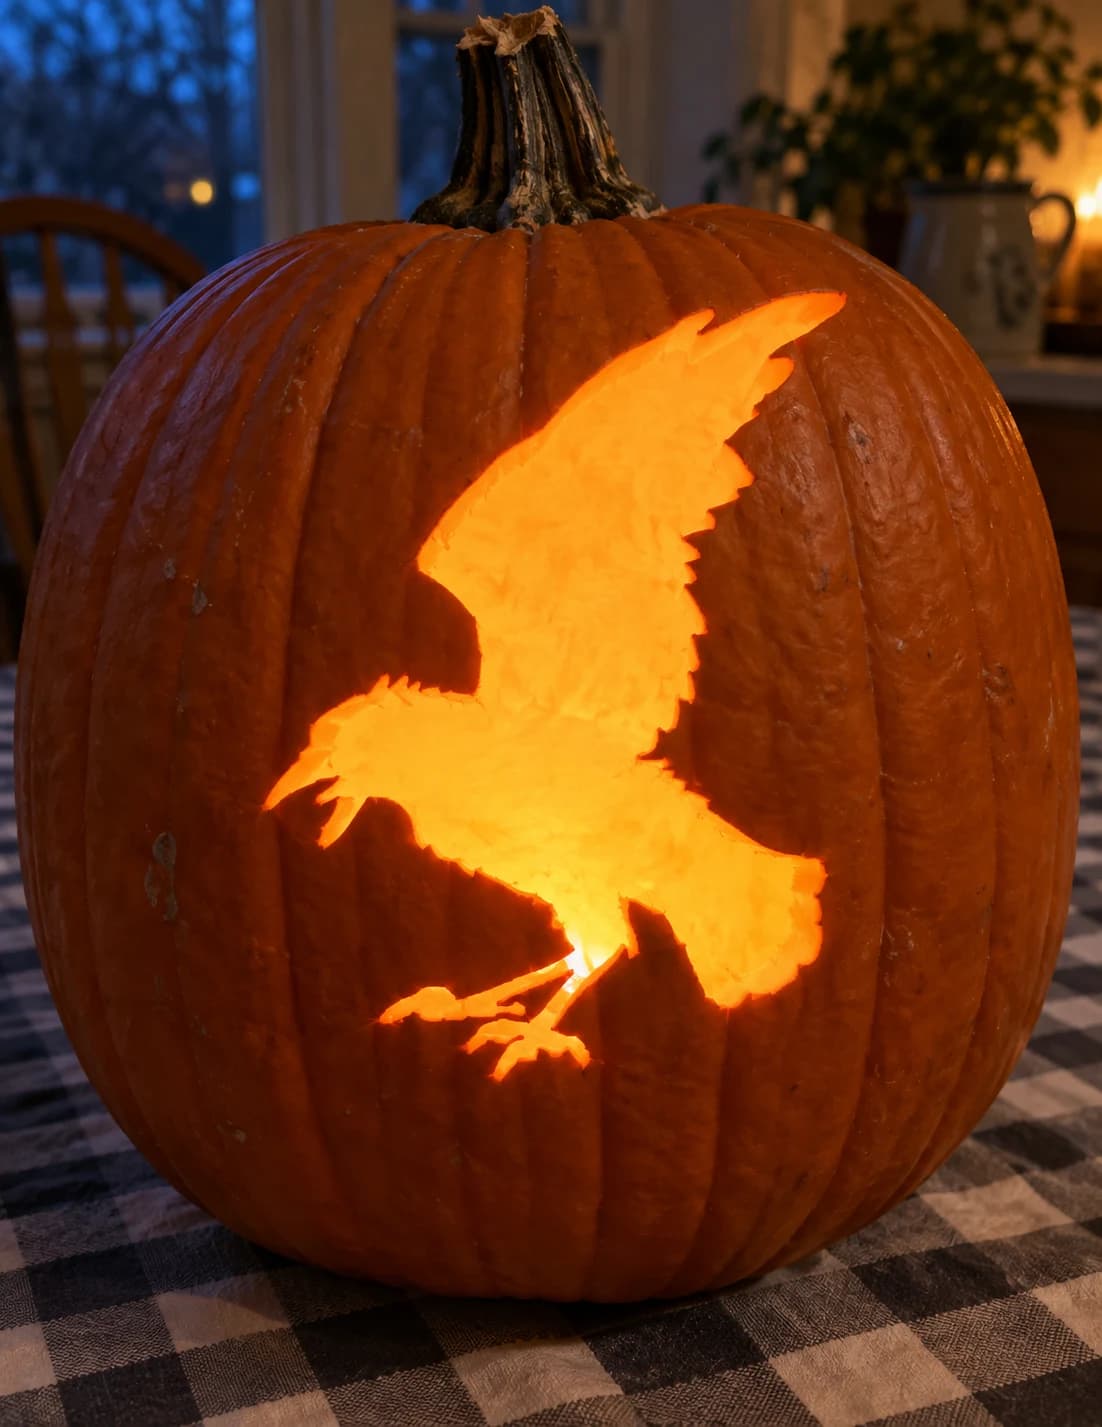
Landing Crow Pumpkin Stencil
A crow lands with wings spread wide in this pumpkin stencil, its whole body carved as a single flowing silhouette: broad fanned primary feathers stretch across the top, the compact body curves in the center, and sharp talons reach downward at the bottom. The entire bird shape is one large open cutout, so the glow forms a clean winged-bird shadow on the pumpkin's orange skin at the edges. The outermost wing-tip feathers taper to fine points, so trace and cut those tips before sawing into the larger body to prevent cracking the thin ends.
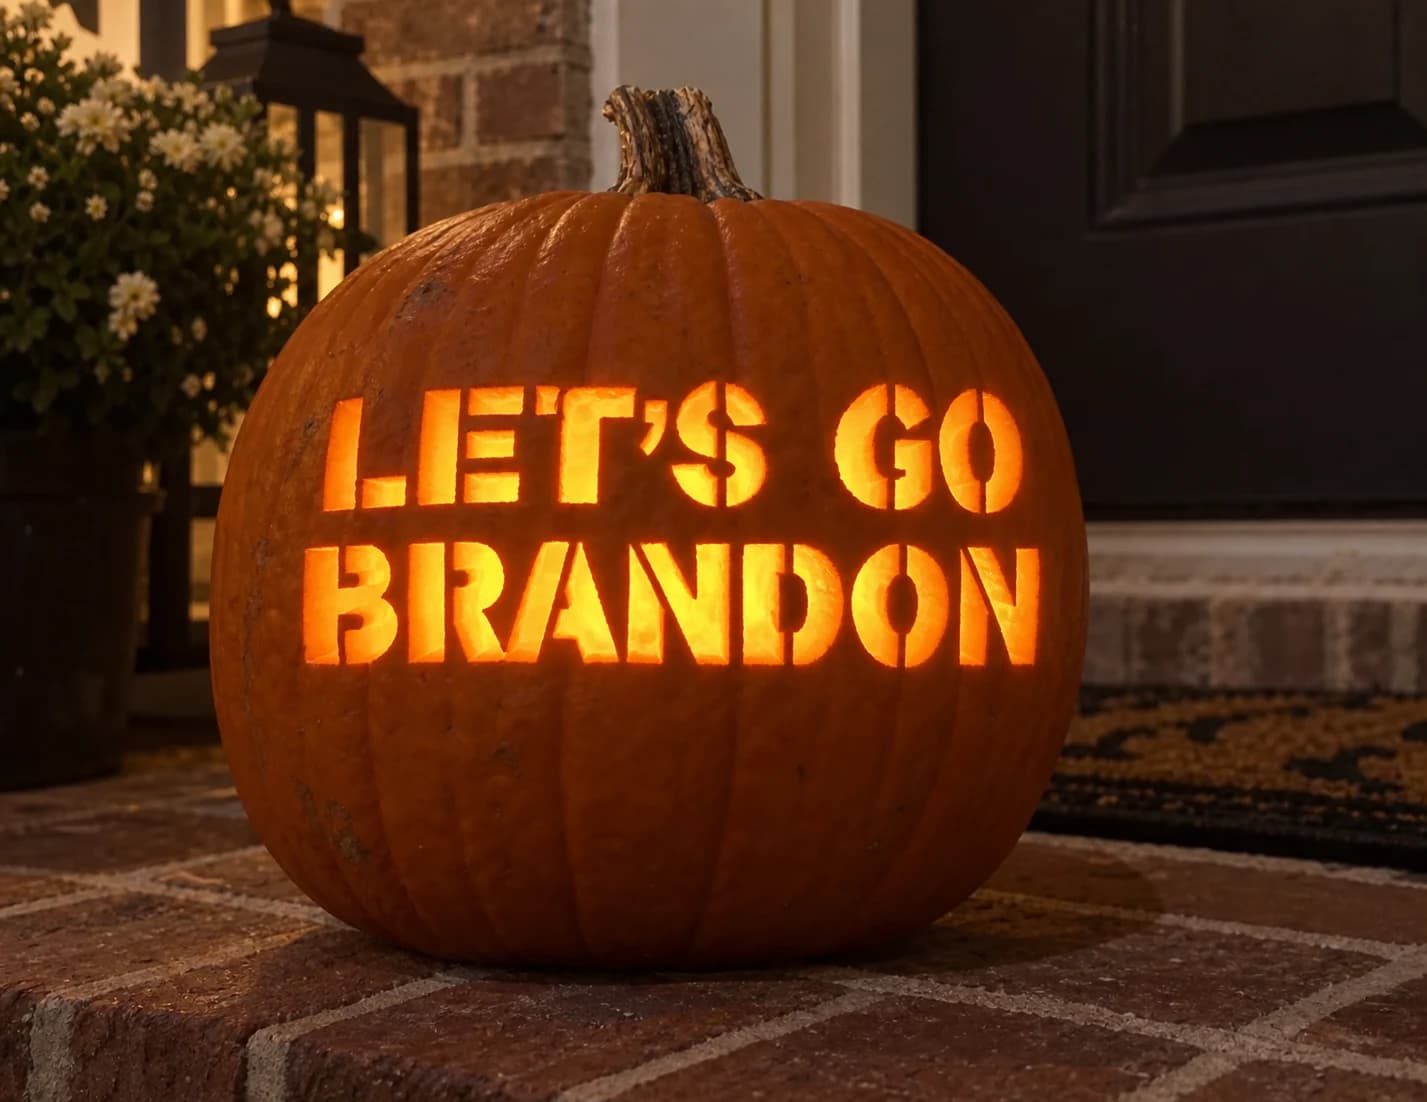
Let's Go Brandon Pumpkin Stencil
The phrase "LET'S GO BRANDON" is set in chunky all-caps stencil lettering across two lines, with each letter built from thick strokes and bridged counters so the whole design holds together as a single carved piece. The letters are fully pierced, glowing bright when lit. Because the letter A and the two O's have floating internal islands, cut those counter shapes first before clearing the surrounding letter bodies to keep the islands from shifting.
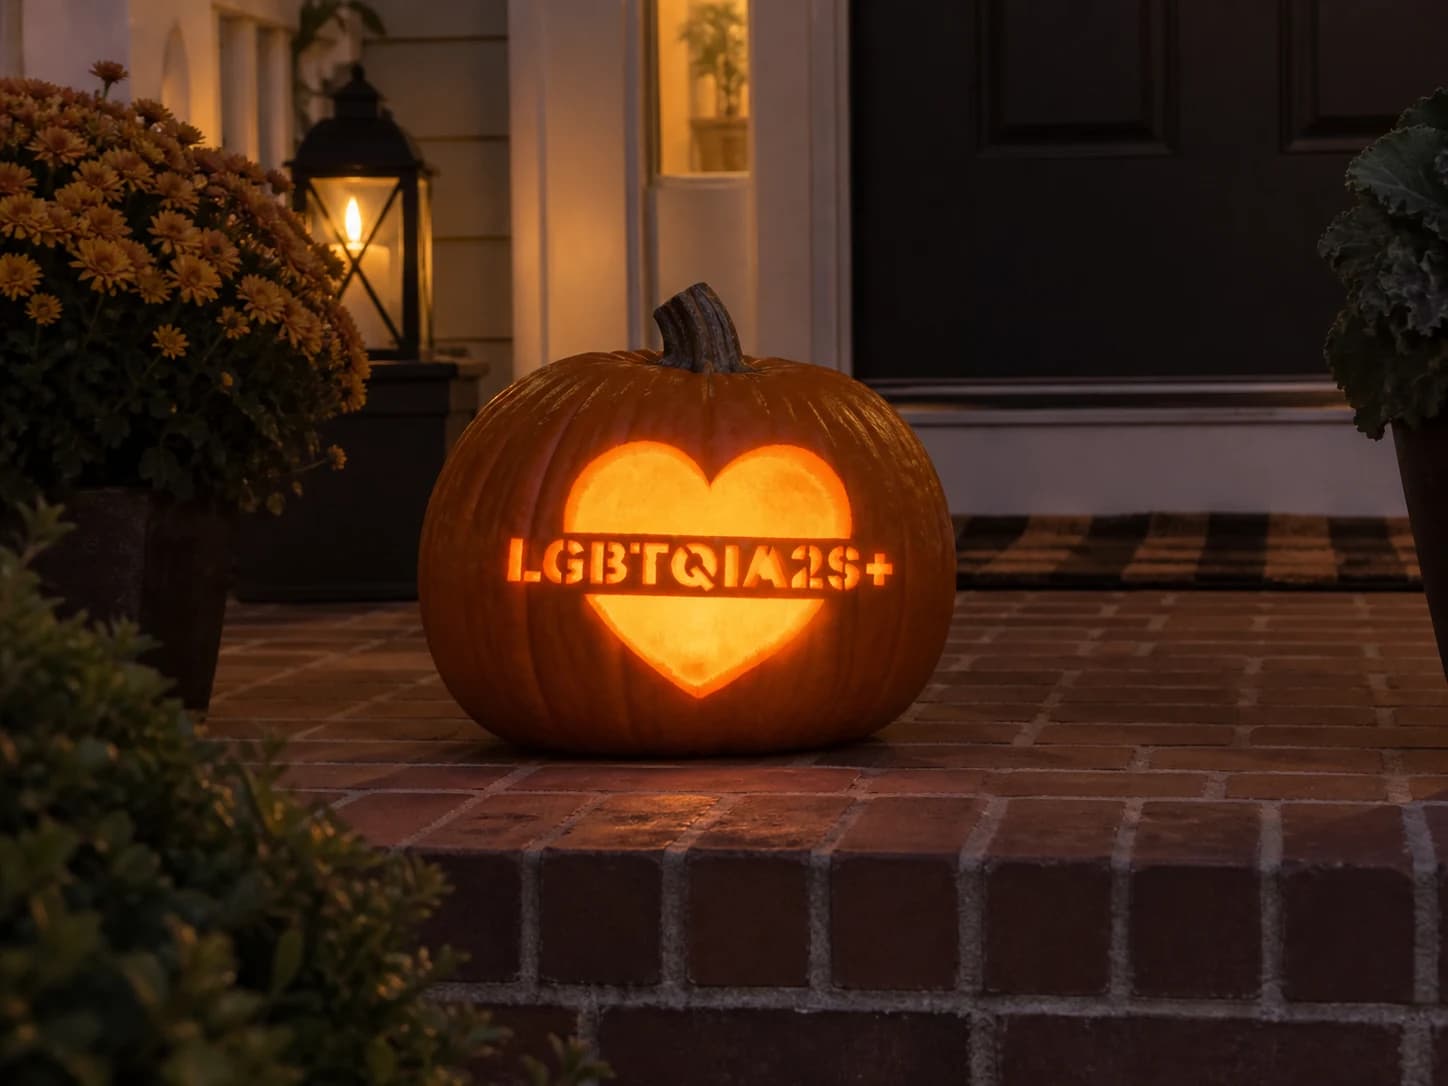
LGBTQIA2S+ Heart Pumpkin Stencil
A large bold heart silhouette is the main shape, with the text "LGBTQIA2S+" set in thick stencil letters running horizontally across the heart's center. The heart is cut in two halves separated by the text band, which itself is cut through except for the letter bridges. Lit from inside, the whole heart glows with the text reading as solid orange stripes across the opening. Carve the upper and lower heart halves before the text strip to keep the letter bridges from tearing while the wall is still reinforced.
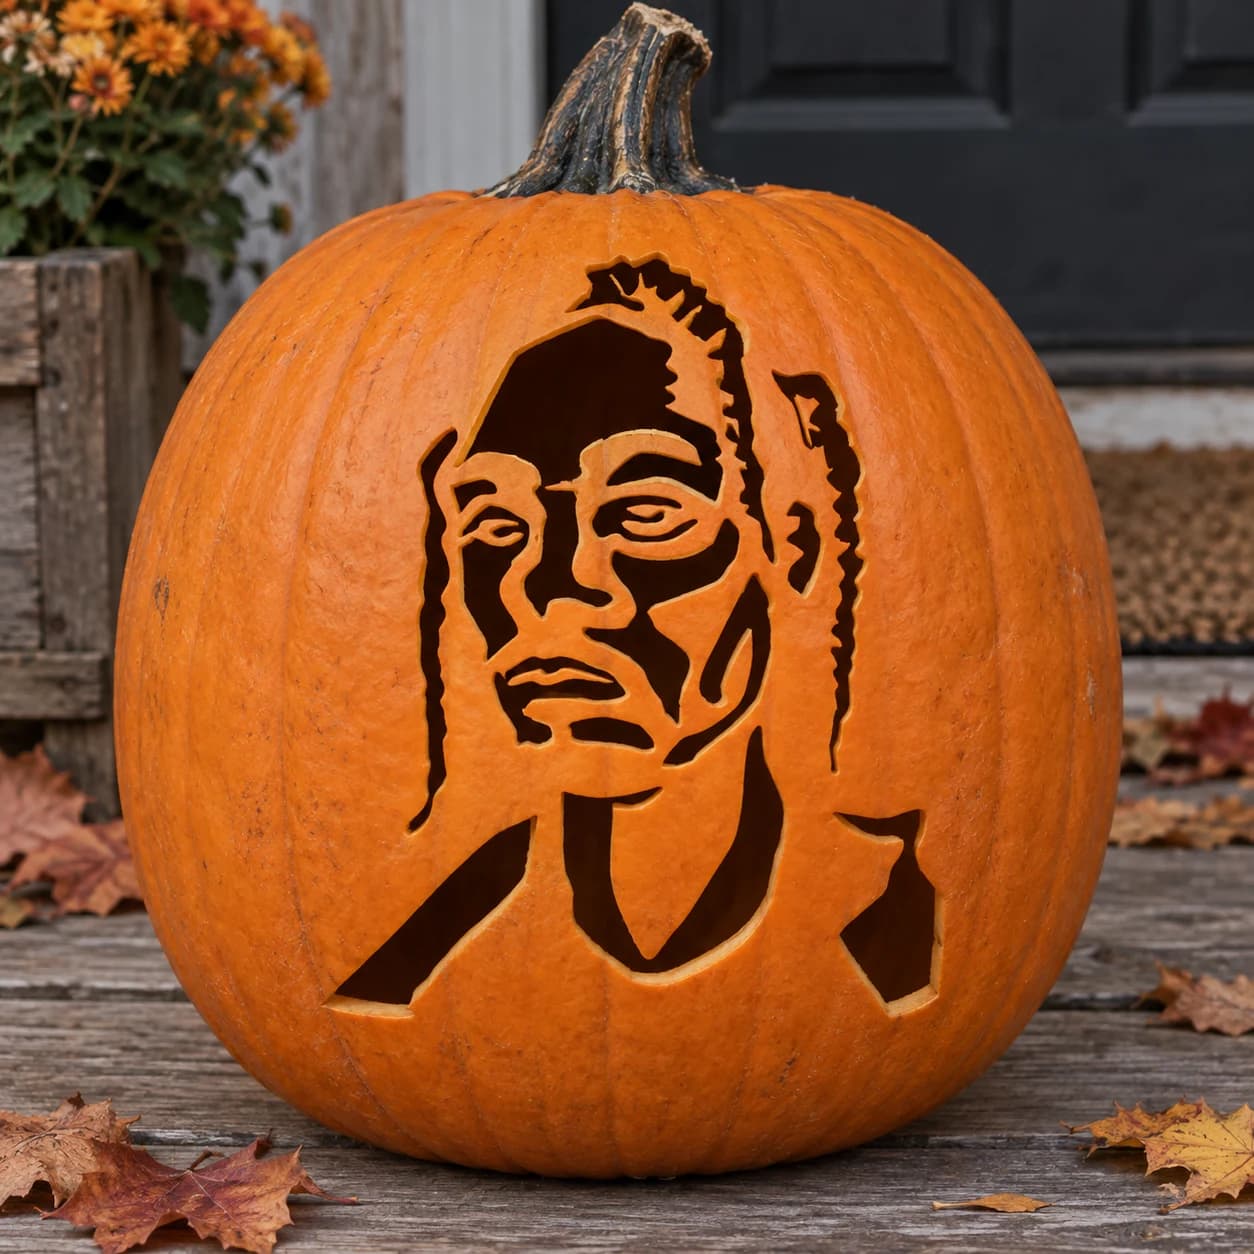
Locs Portrait Pumpkin Stencil
A close-up portrait of a man with long twisted locs, rendered in bold cut-through shapes that frame his eyes, cheekbones, and jaw in dramatic silhouette. The face is built from large negative spaces separated by solid orange bridges, so candlelight floods the features when lit. Start by cutting the forehead and cheek openings first; leave the thin vertical bridge between the nose and mouth intact until last to prevent the whole face from sagging during carving.
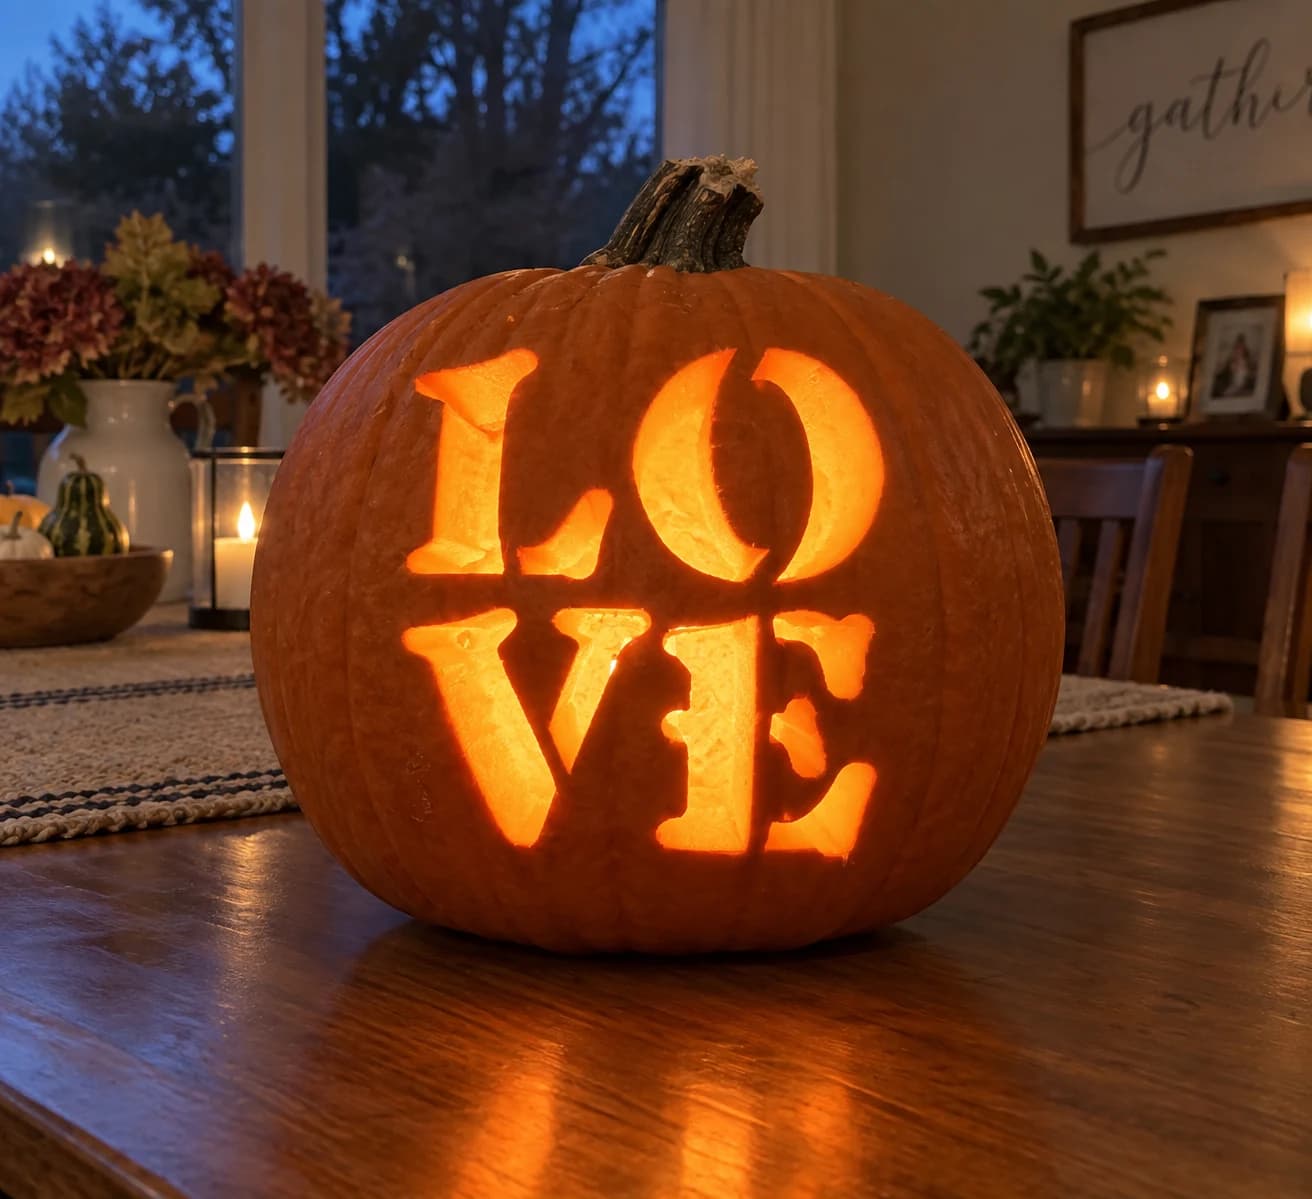
LOVE Block Pumpkin Stencil
"LOVE" is arranged in a two-by-two block format, with "LO" on the top row and "VE" below, echoing the famous Robert Indiana sculpture. Each letter is cut through in rounded, chunky sans-serif type and the four characters together form a near-square composition. The internal counters of the "O" and the enclosed angle of the "V" need to be freed as islands; carve those interior pieces before removing the surrounding letter bodies so they stay fixed in place by the adjacent wall material.
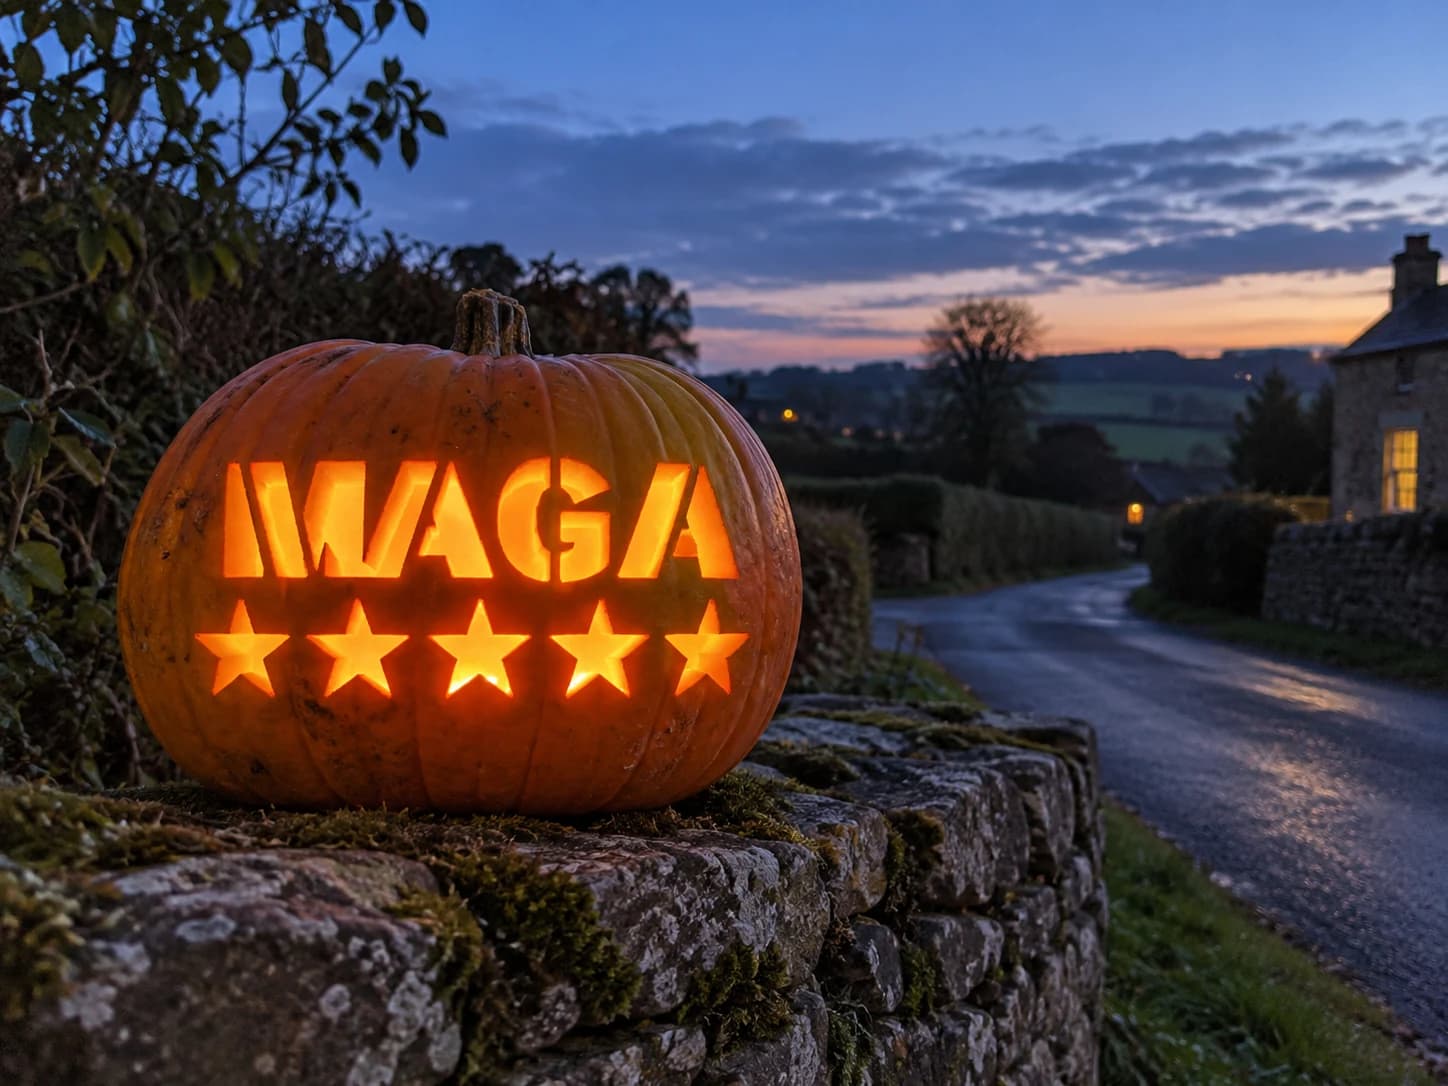
MAGA Pumpkin Stencil
The acronym "MAGA" is set in wide, bold stencil letters on the upper portion, with a row of five evenly spaced five-pointed stars running beneath it. All letters and stars are fully pierced through, so the finished jack-o-lantern glows the text and stars against the night. The star points are the sharpest cuts in this design; carve each star from its center outward to each tip rather than tracing the outer perimeter, which helps keep the thin points from tearing.
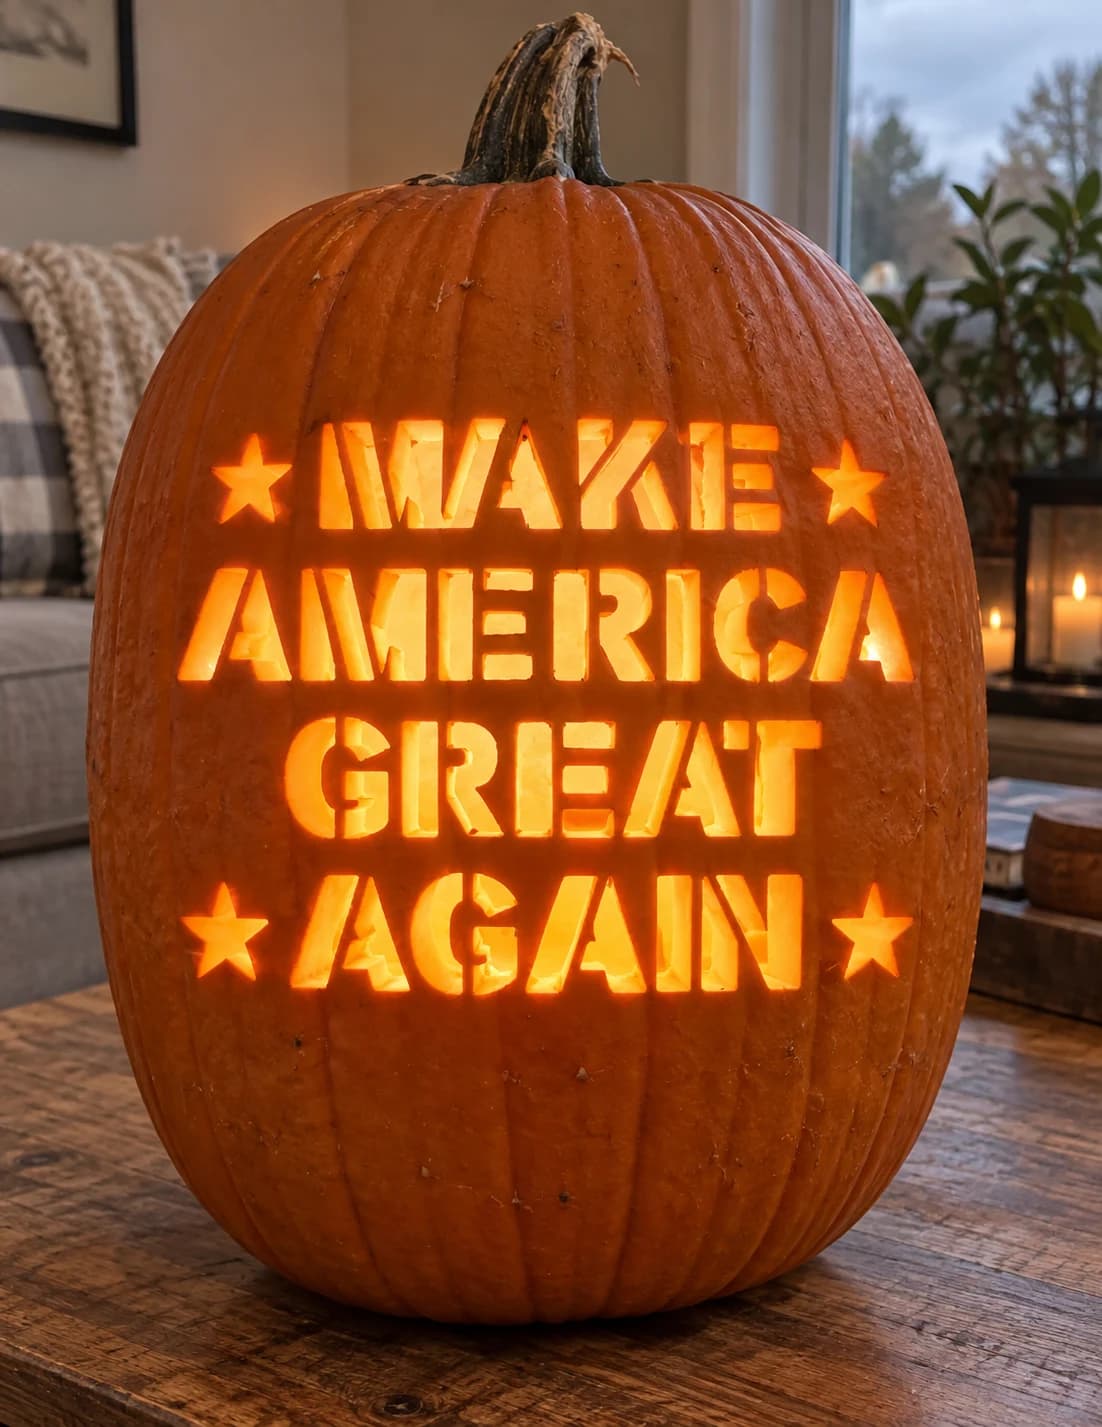
Make America Great Again Pumpkin Stencil
Four lines of bold stencil-style block text spell out MAKE AMERICA GREAT AGAIN across this jack-o-lantern stencil, with a five-pointed star flanking the top line and another pair of stars at the bottom. Every letter and star is carved as a separate pierced shape, so the orange pumpkin wall forms bridges inside closed letterforms like A, G, and R. Before cutting, secure those interior letter islands with a small pin through the pumpkin flesh so they don't drop out mid-carve and leave shapeless holes.
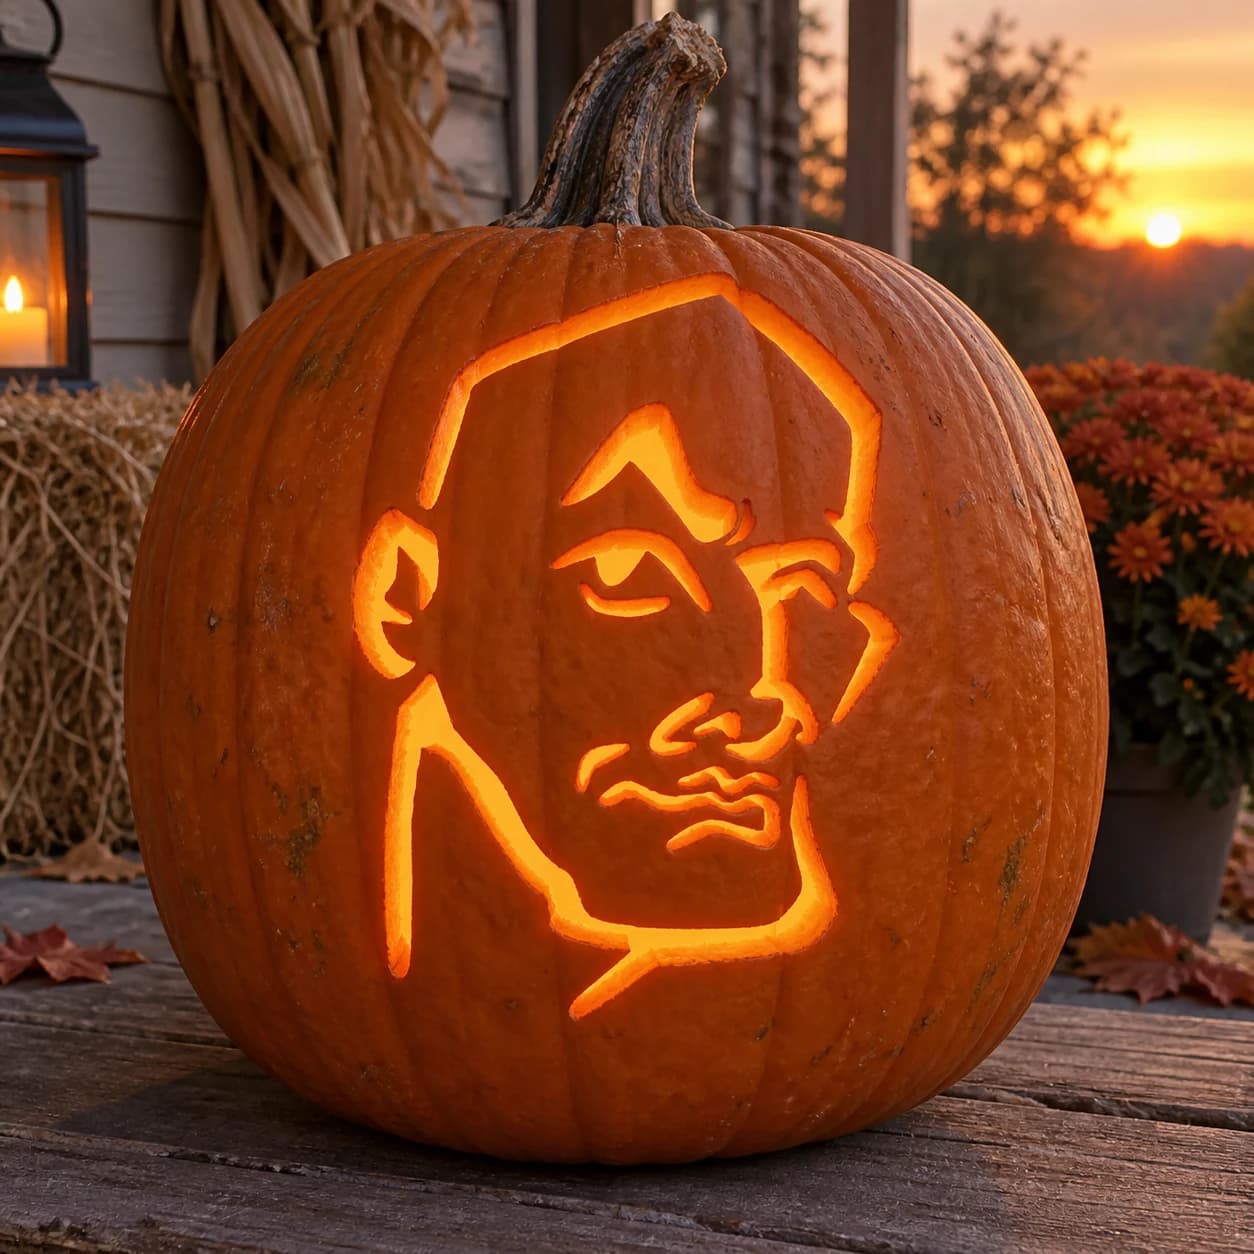
Male Portrait Pumpkin Stencil
A male portrait rendered in spare, angular linework fills this hard pumpkin stencil: a large angular head shape, a distinctive widow's peak hairline, deep-set eye sockets with small cutout irises, a long straight nose, and a square jaw with a chin dimple. The design uses wide open negative shapes separated by just a few thin structural bridges, so the lit portrait reads as a bold, high-contrast face. The narrow bridge between the nose and the upper lip is the most vulnerable point, so score it lightly before making any cuts on either side of it.
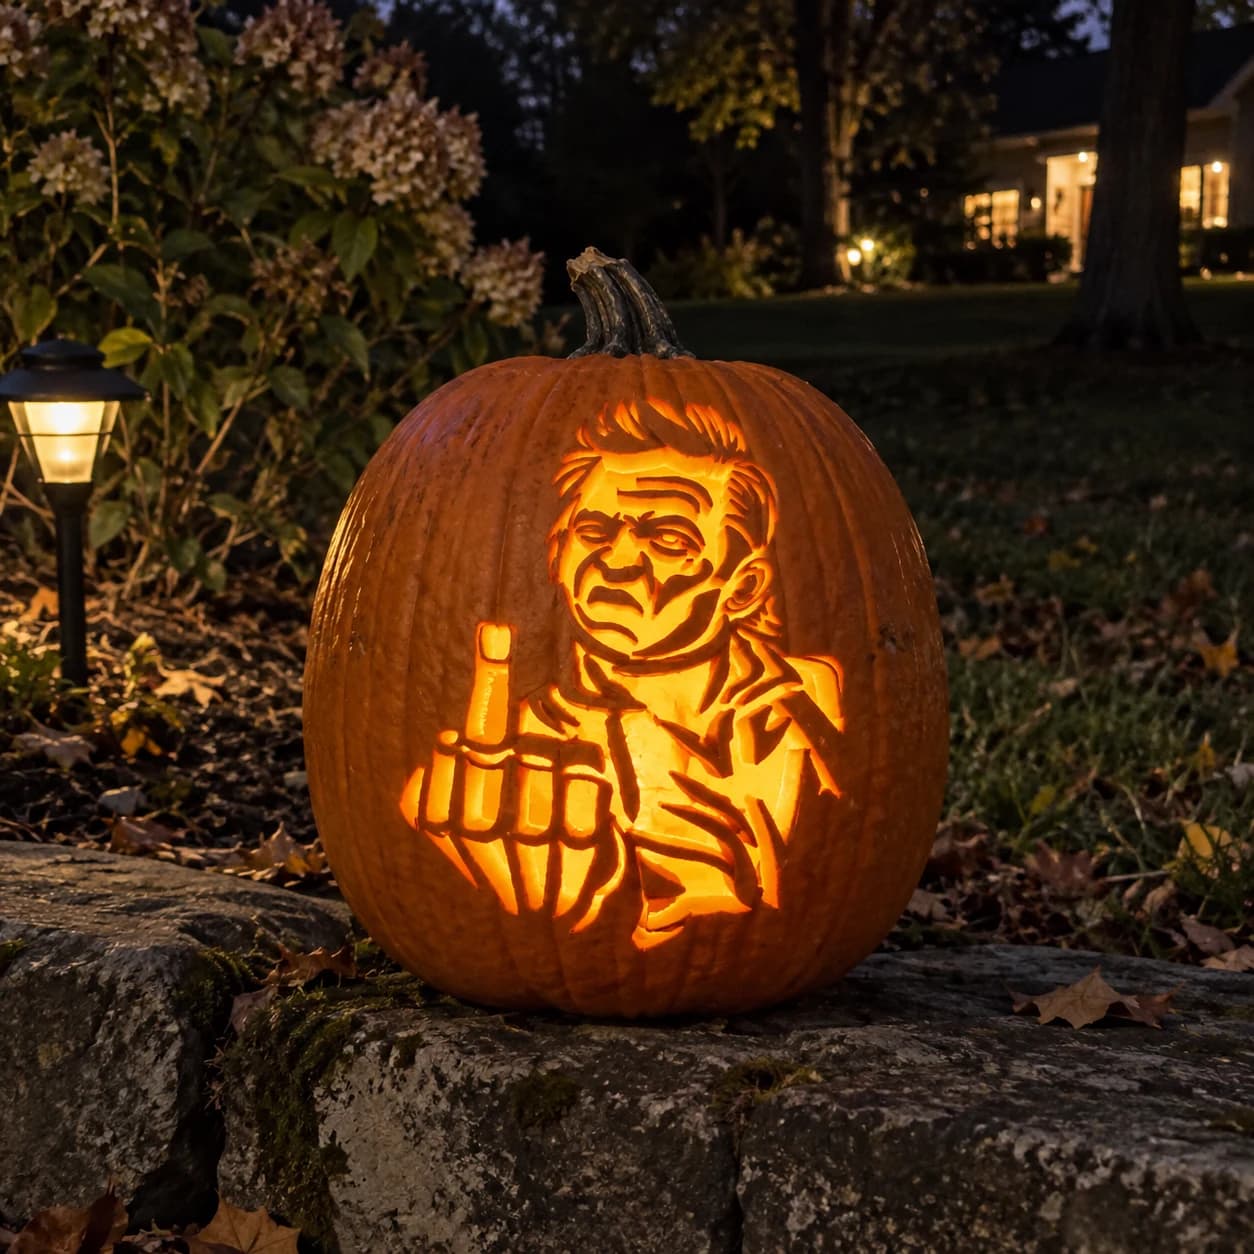
Man Portrait Pumpkin Stencil
A scowling man's portrait rendered in tight linework stares out from this expert pumpkin stencil, one hand raised in a defiant gesture with a skeleton hand overlaid on it, the figure's jacket and muscular build conveyed through angled slash cuts below the face. The design relies on many small interior cuts to build the facial features, making it a demanding carve. Tackle the densely detailed face first, cutting the brow wrinkles, nostril, and lip cuts before opening any of the larger torso voids.
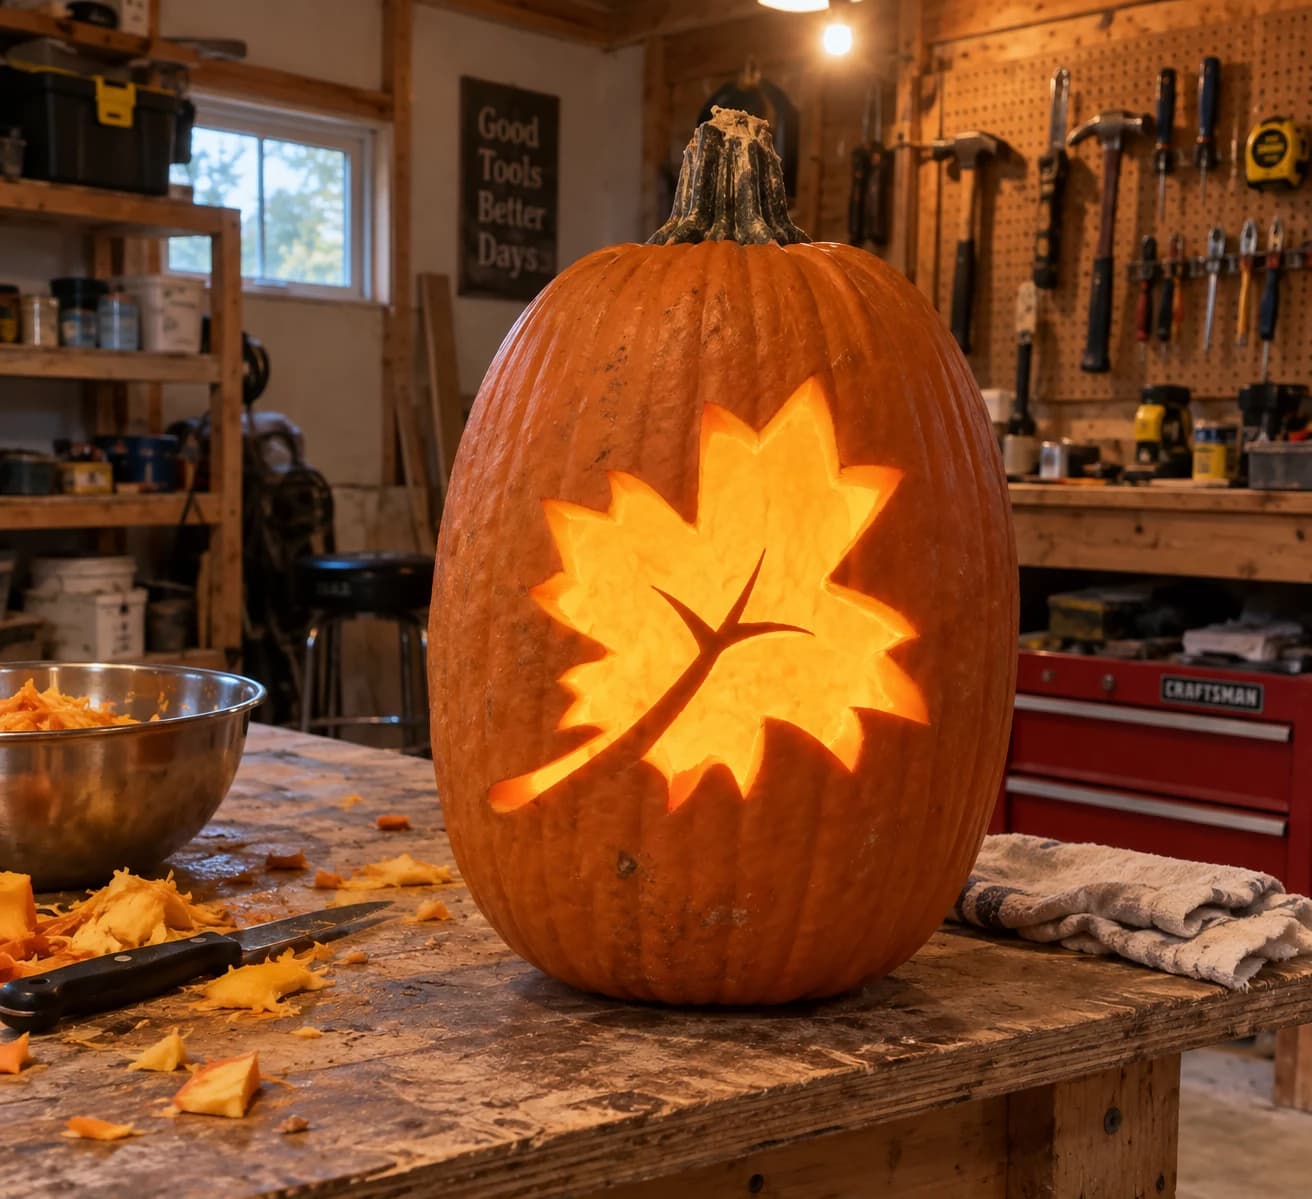
Maple Leaf Pumpkin Stencil
A single large maple leaf fills most of the stencil, tilted slightly to the right with its stem curving down and left. The leaf has seven pointed lobes with gently serrated edges and a central vein ridge left solid, creating a two-section open cut on each side of the midrib. Lit from inside, the two halves of the leaf glow symmetrically while the narrow central vein remains as an unlit orange line. Keeping that vein bridge intact is the key structural challenge: cut the left lobe section completely before moving to the right so you're never cutting beside an already-open neighbor.
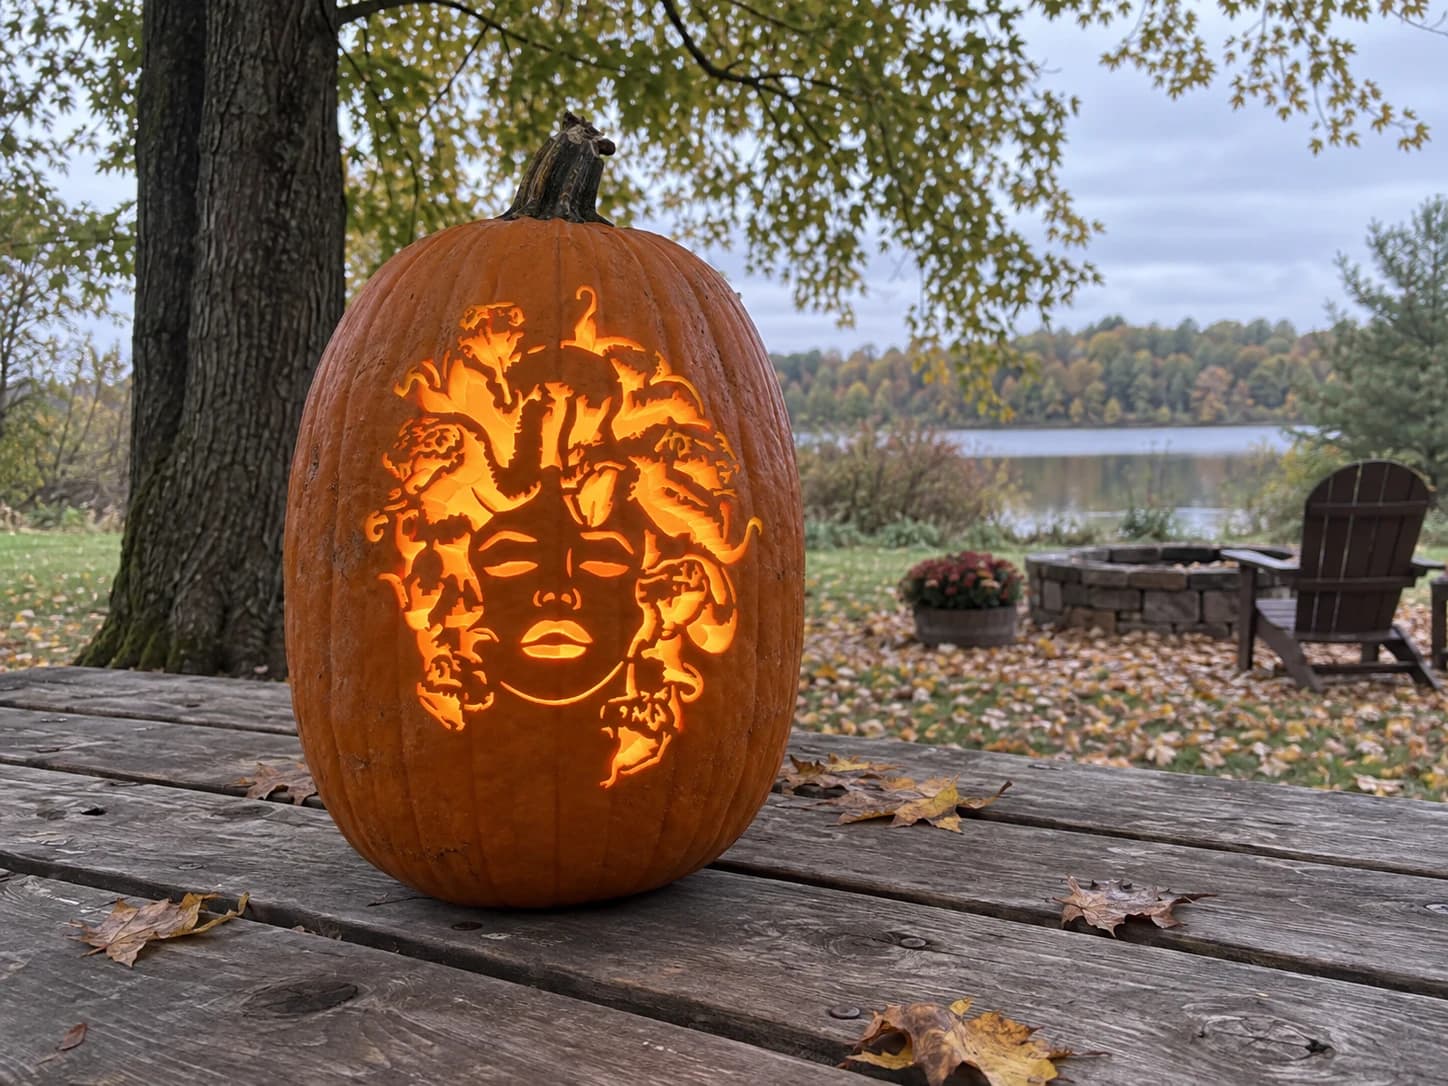
Medusa Pumpkin Stencil
Medusa's face stares out from this expert pumpkin stencil, her features rendered as thin-cut channels forming almond-shaped eyes, a small nose, and full lips against a solid oval face. The hair is replaced by dozens of writhing snake bodies, each carved as an interlocking mass of curved shapes with heads visible at the perimeter, open mouths and coiling bodies creating a dense web of negative space around the face. When lit, the snake-hair region glows with a complex, shifting pattern while the face remains a composed solid island. Work the snake-hair sections in quadrants, finishing each area before moving to the next, so no large unsupported skin islands shift mid-carve.
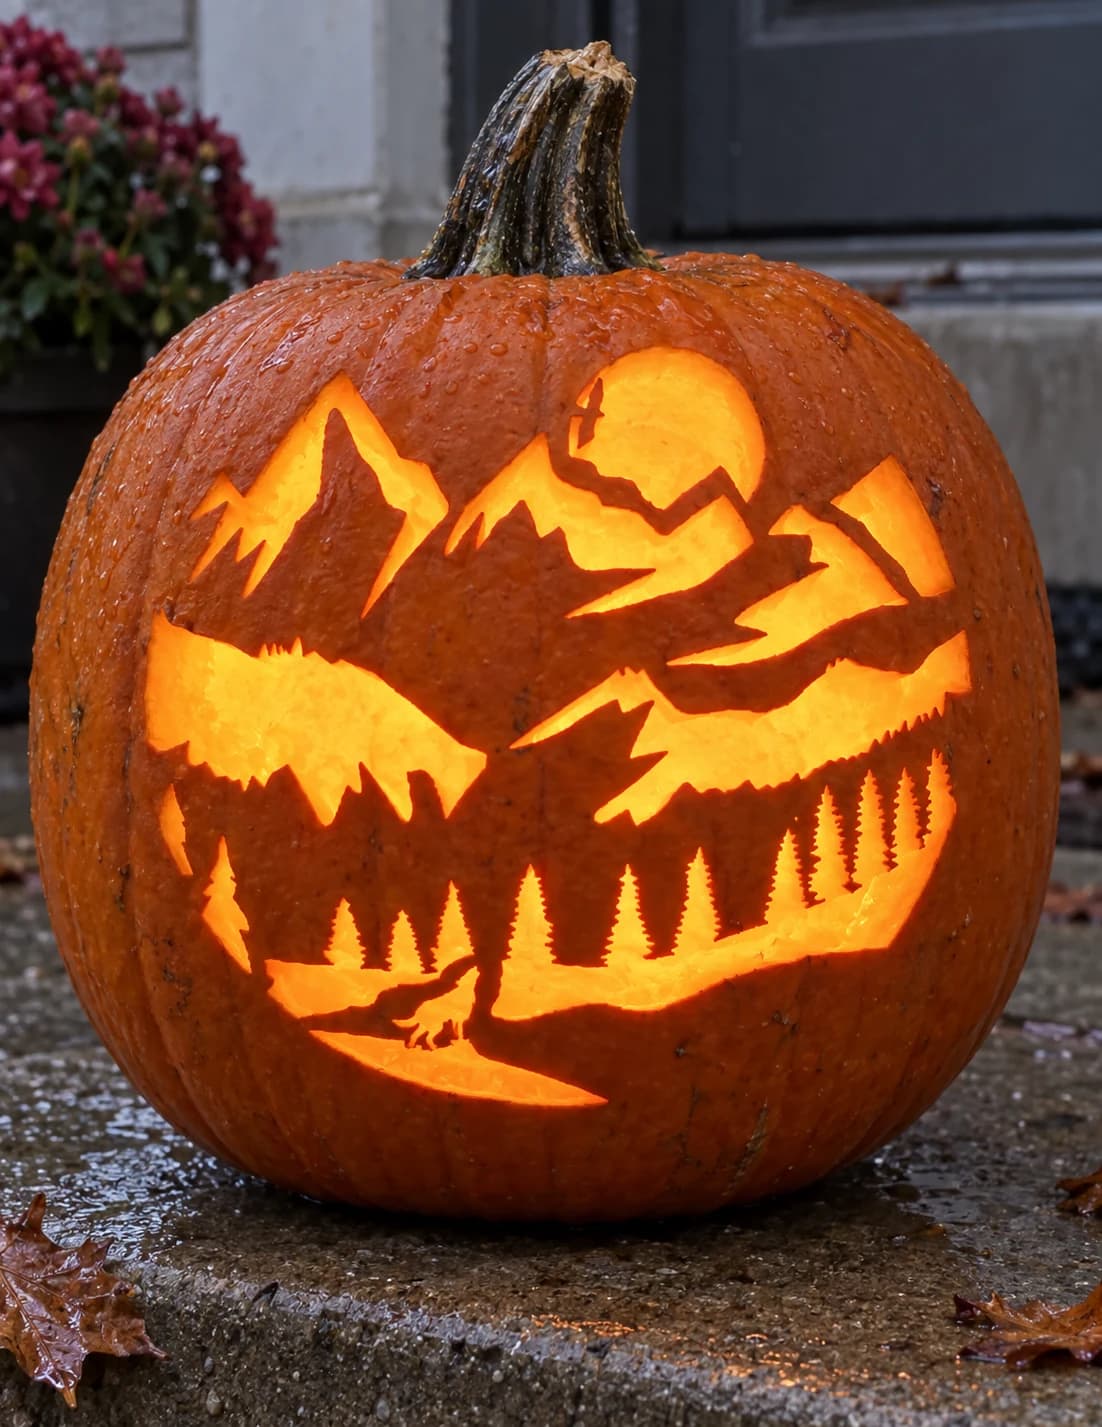
Mountain Wolf Scene Pumpkin Stencil
This expert-level pumpkin stencil presents a layered wilderness panorama: jagged mountain peaks and a partially obscured moon sit above a mid-ground of ridgelines, while the foreground holds a row of spiky pine trees and a tiny howling wolf on a plateau. Dozens of separate cut-through shapes at varying scales build depth across the whole composition. Tackle the tiny wolf and the narrowest tree spires first, as those fragile points are easiest to cut cleanly before surrounding sections are removed and the pumpkin wall softens.
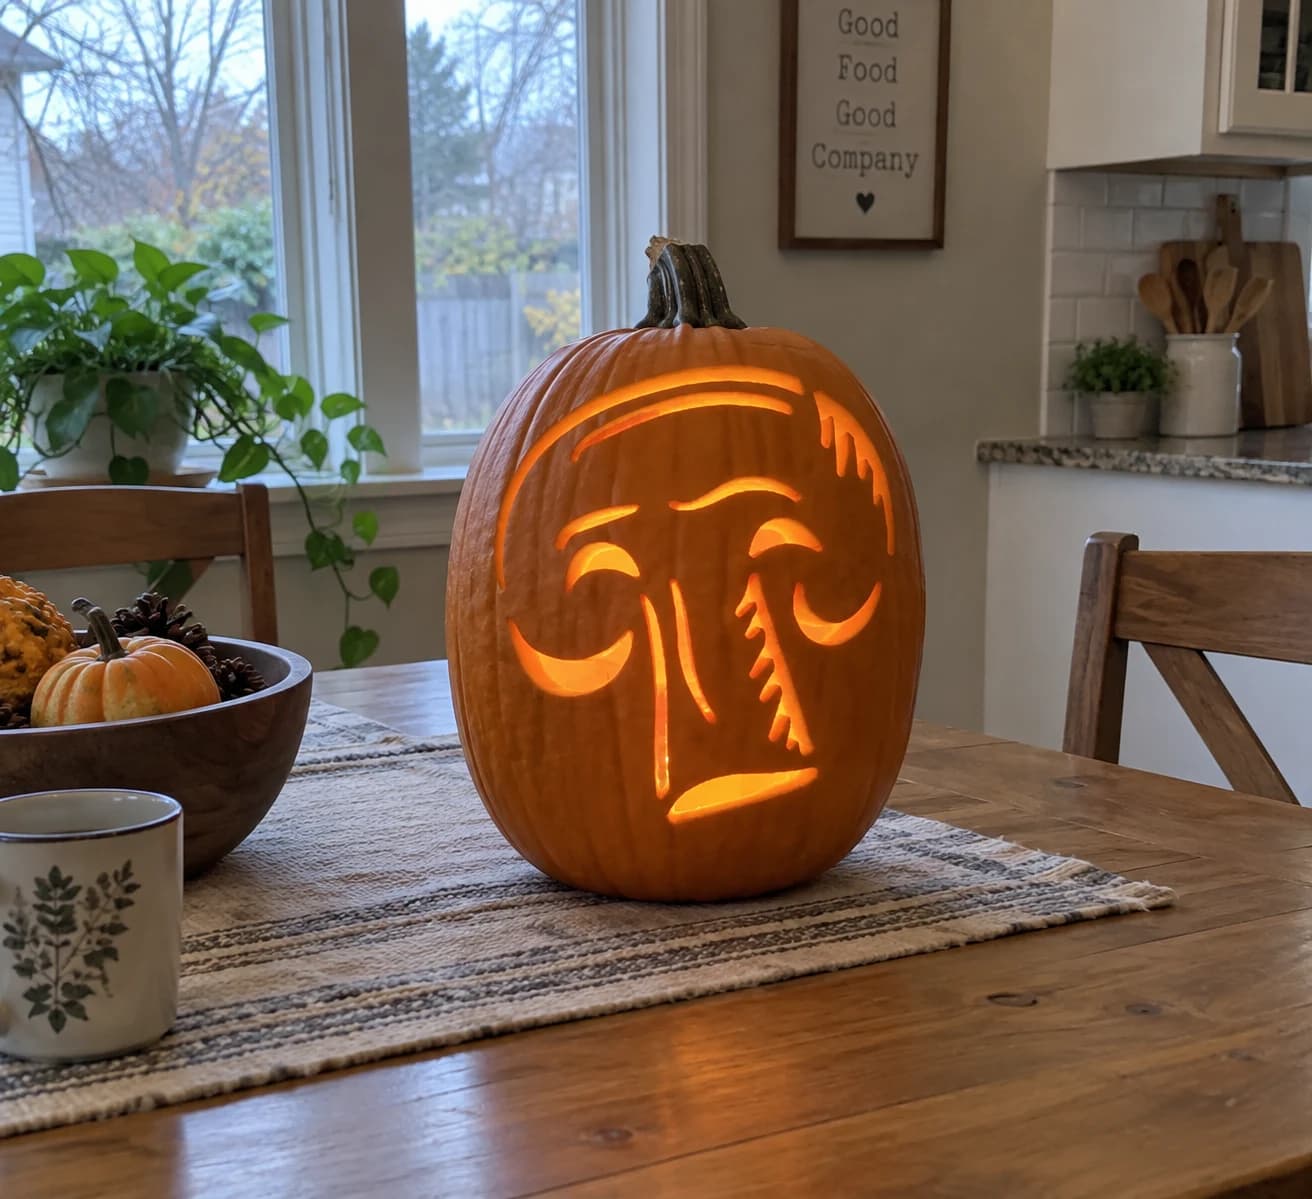
Mushroom Face Pumpkin Stencil
A large mushroom cap viewed head-on occupies the center of this pumpkin stencil, with the rounded cap outlined by a wide curved arc at the top, a pair of angled brow-like ridges beneath giving it a brooding expression, two crescent-shaped gill slits, and a column of vertical stem lines below that narrow at the base into root tendrils. Several short wispy cuts at the upper right suggest spores or texture. The negative spaces between these cut shapes read as a haunting mushroom face when lit. Cut the thin gill crescents before the wider stem column to keep the central face stable.
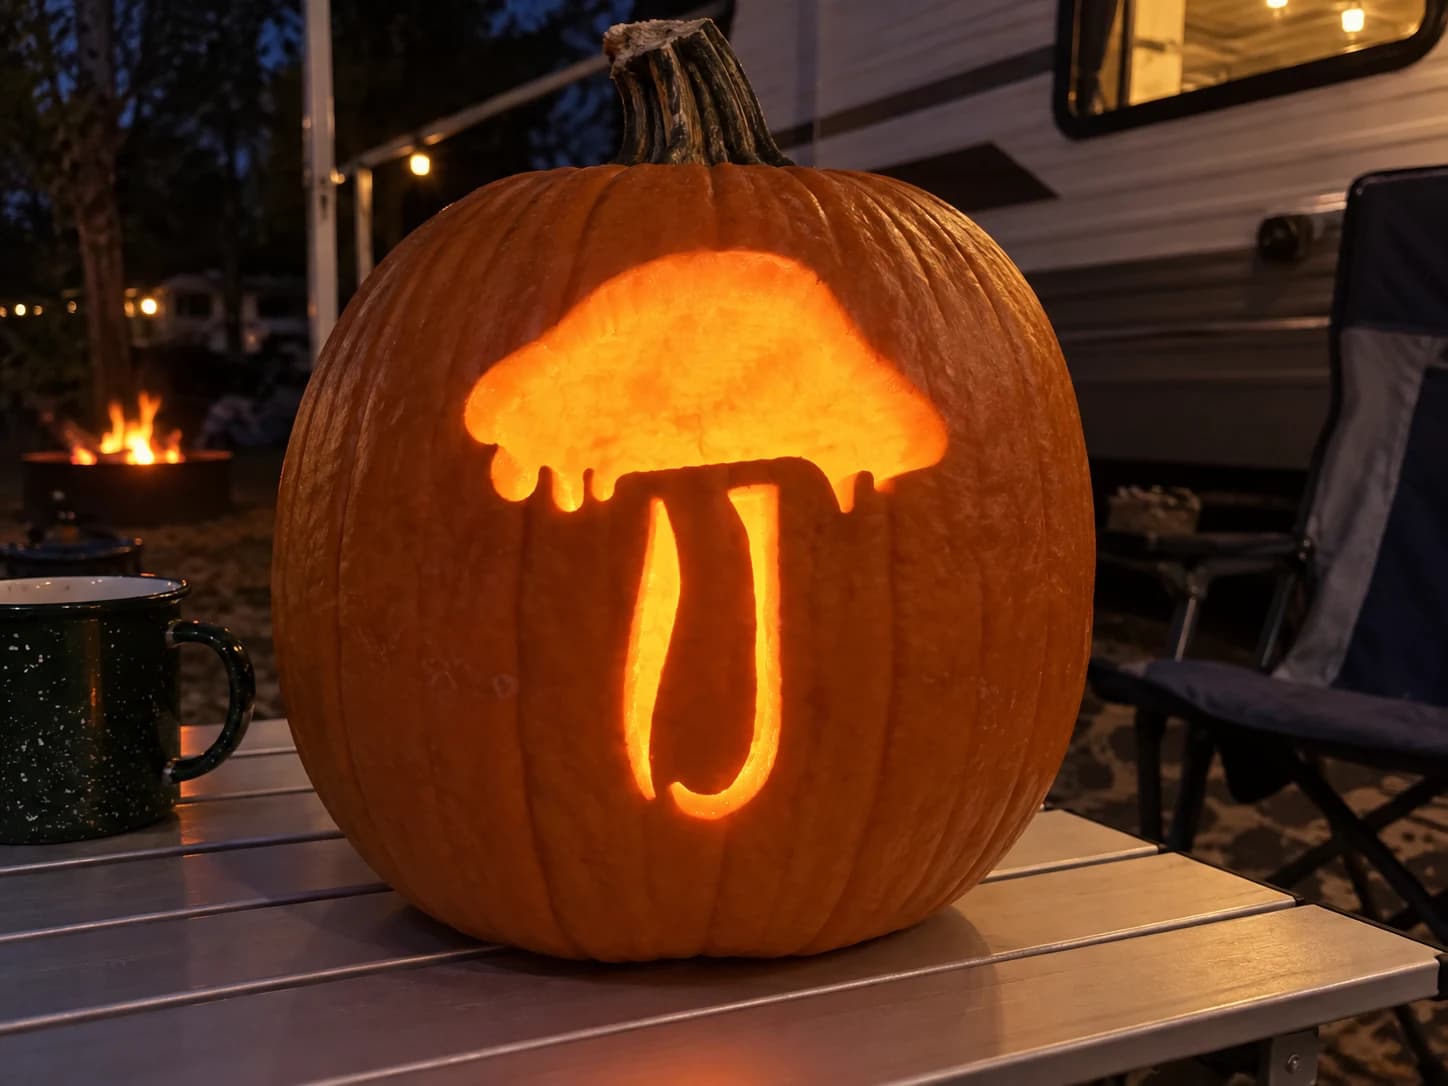
Mushroom Pumpkin Stencil
A single large mushroom silhouette fills this pumpkin stencil, its broad rounded cap dripping with three short gill-like projections and a slender curved stem below. The entire shape is carved out as one open negative space, so candlelight pours through the whole silhouette at once. Because the stem is narrow where it meets the cap, score that junction lightly with a detail knife before cutting through fully to keep the bridge from cracking under pressure.
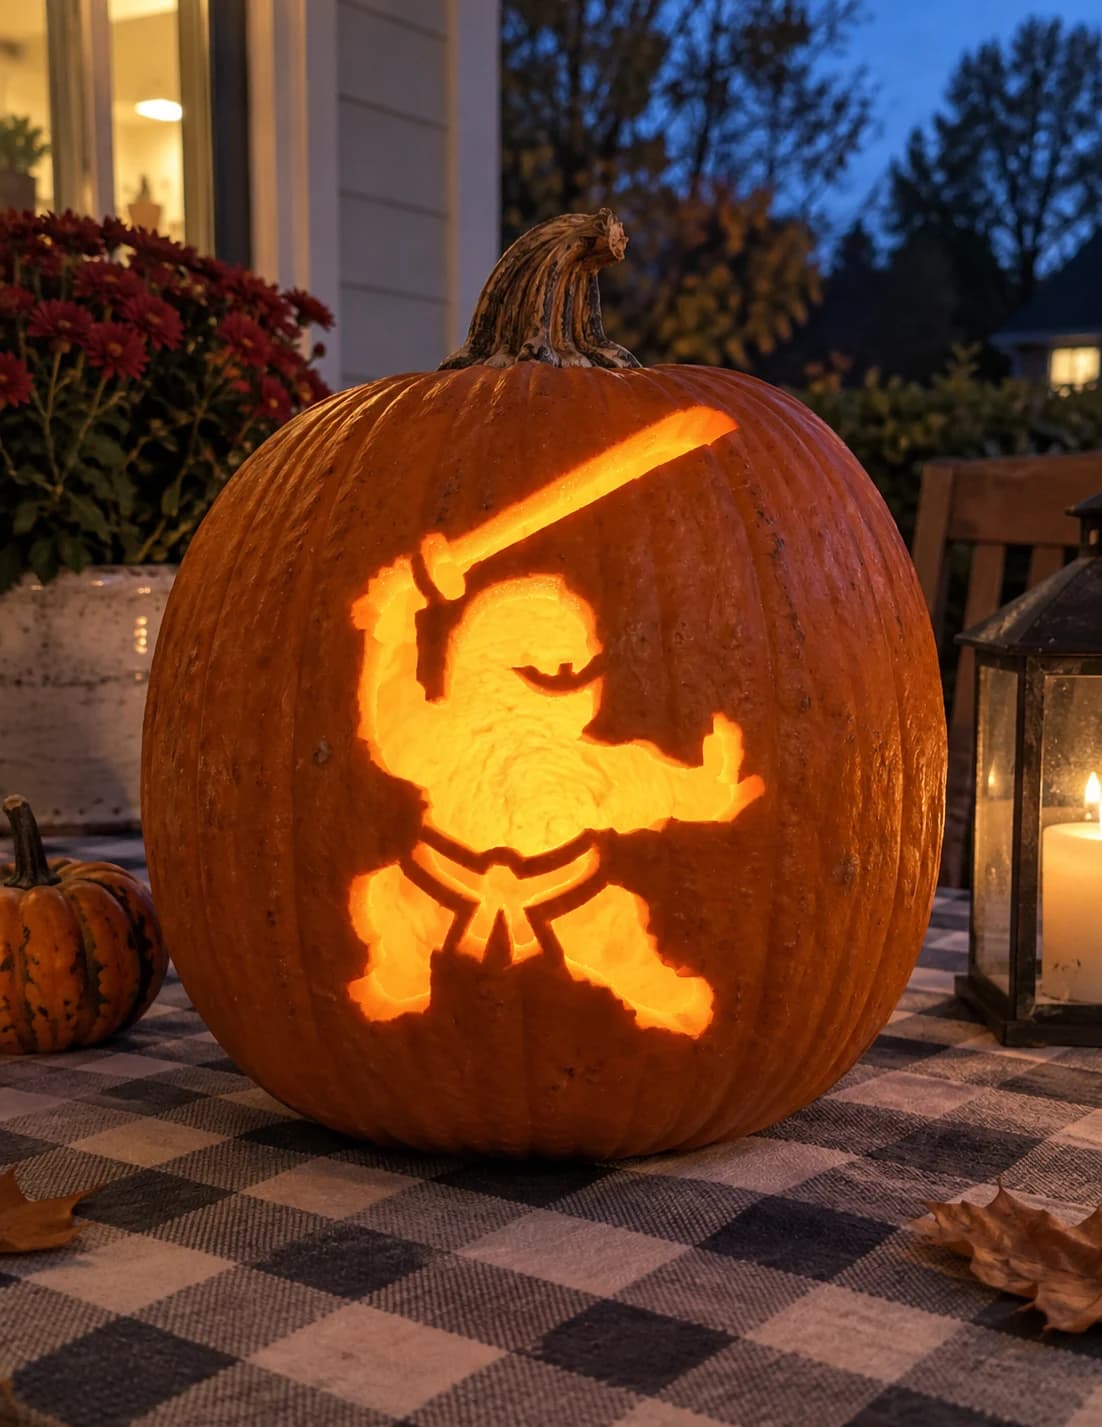
Ninja Warrior Pumpkin Stencil
A stocky ninja warrior in a fighting stance holds a broad katana raised overhead in this easy pumpkin stencil. The figure is nearly a solid silhouette pierce-through, with just a few interior slots carved at the belt sash and the chest opening to add definition. The diagonal sword blade extends well above the head, making it the widest point of the design. Transfer the sword line with care and cut it in a single continuous stroke so the blade stays perfectly straight when lit.
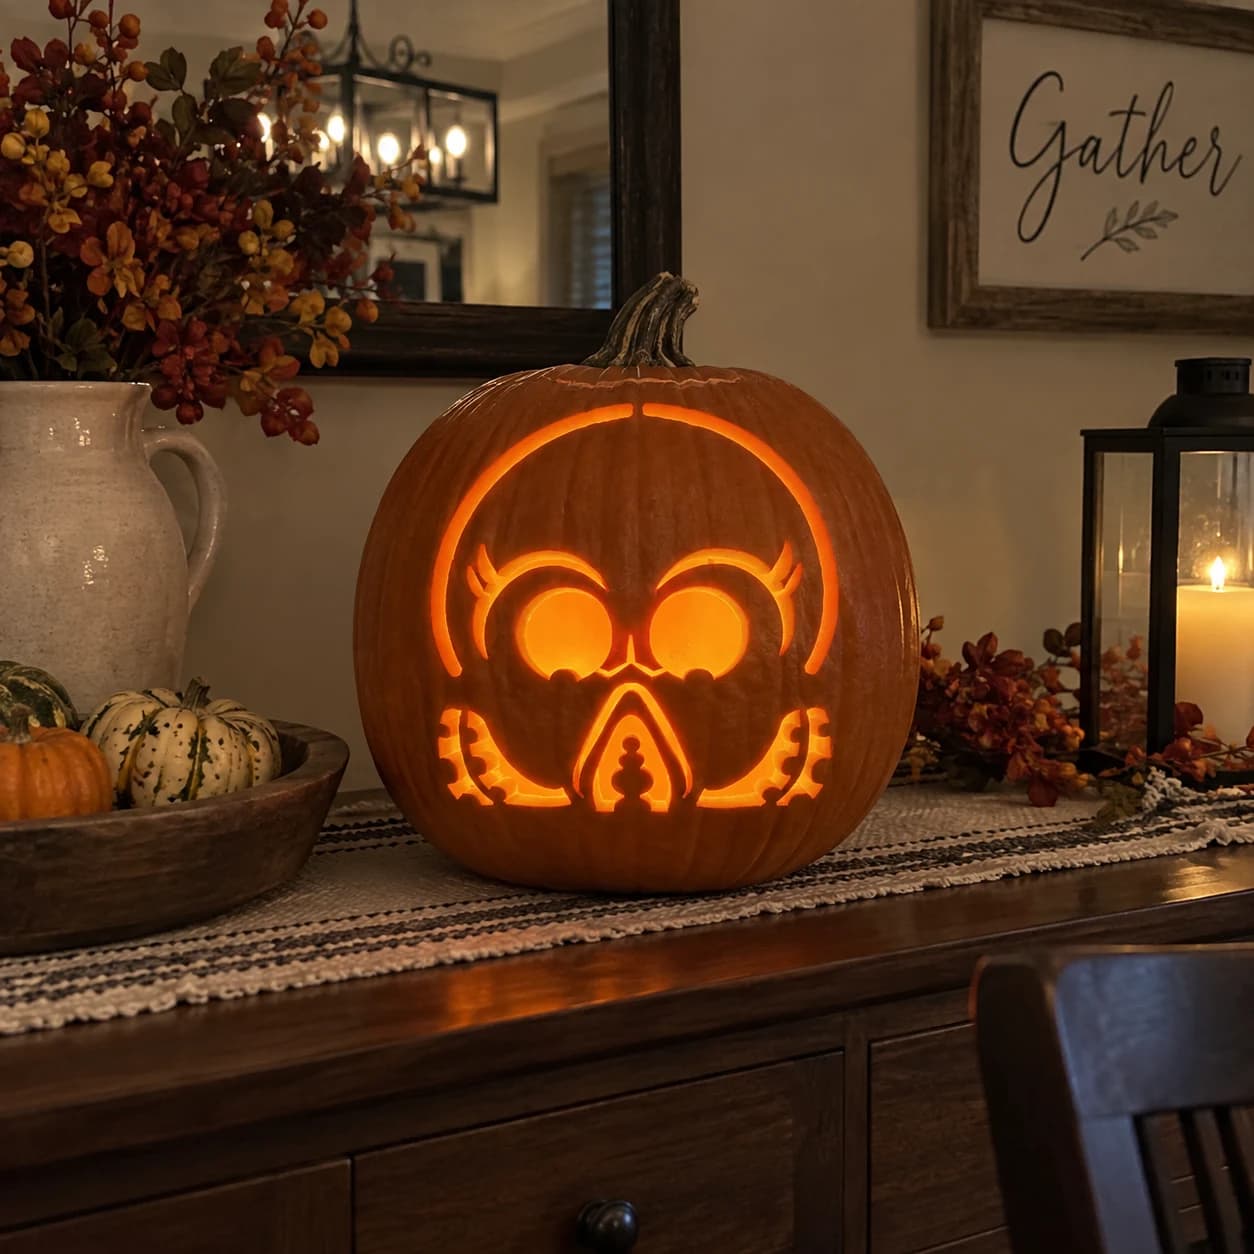
Octopus Face Pumpkin Stencil
A stylized cartoon octopus face fills this hard pumpkin stencil with a nearly circular head outline, two large round eyes with lash-like detail above them, a central beak-like nose bridge, and a decorative lower section featuring a symmetrical arch with layered cutwork and scalloped tentacle bases on each side. The round eyes are solid islands of pumpkin skin that must be preserved while the surrounding face is cut away. Carve the outer circular head arc first, then remove the face background working around the solid eye discs, and finish with the fine scalloped cuts at the bottom.
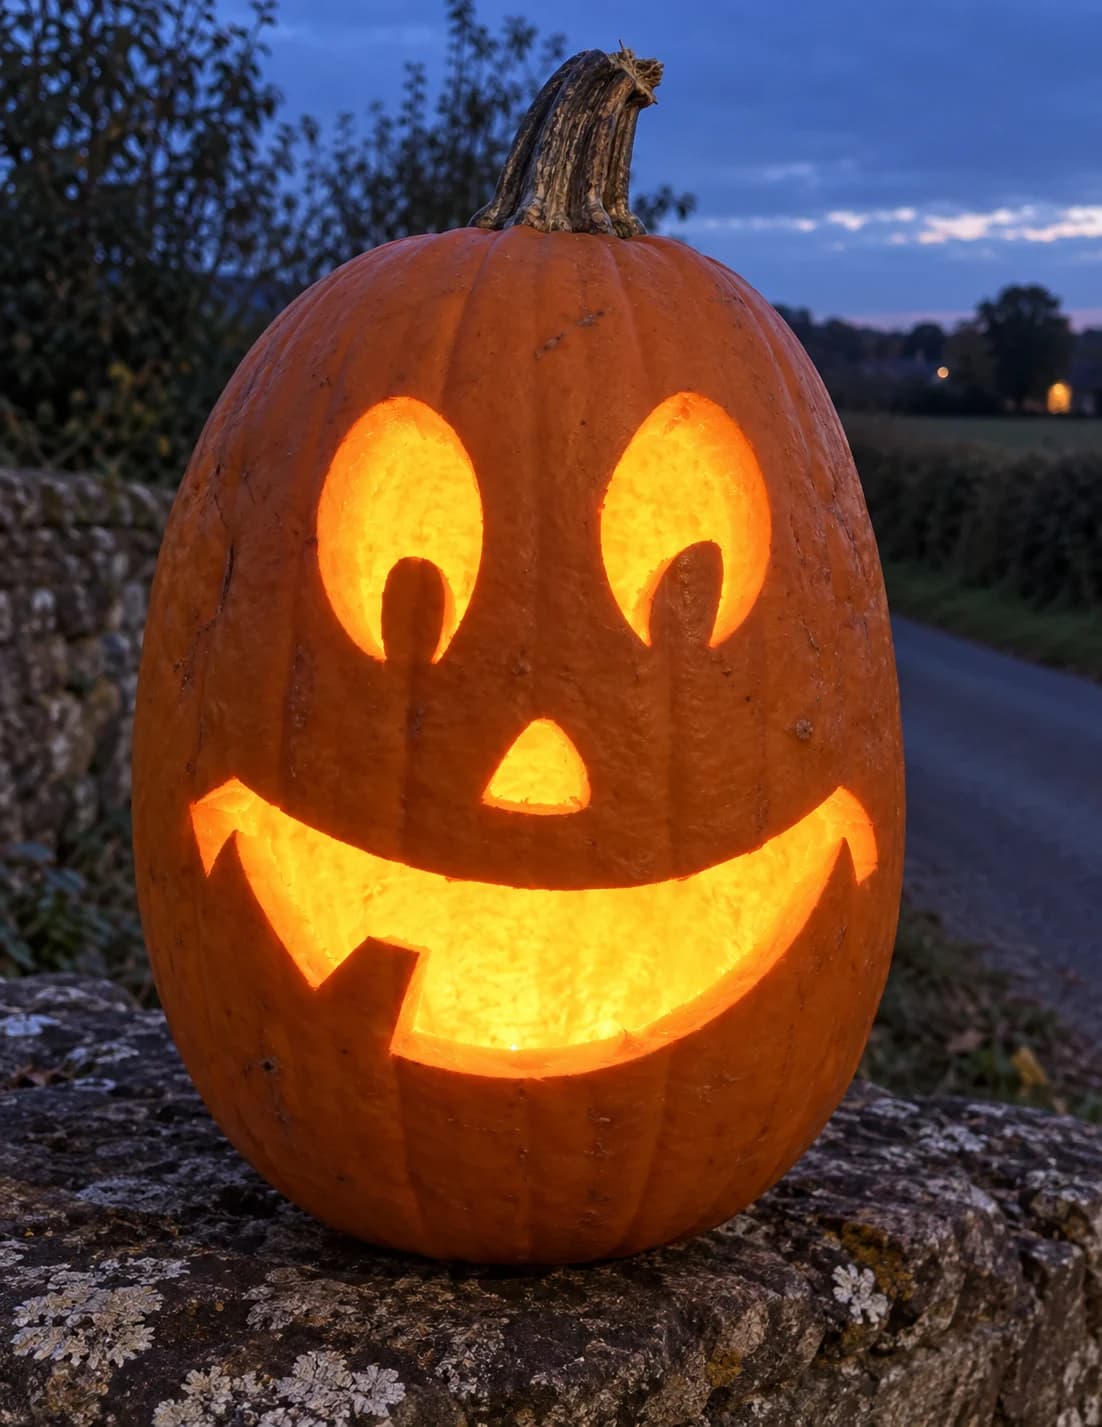
One Tooth Jack-o-Lantern Pumpkin Stencil
This jack-o-lantern face pumpkin stencil keeps it deliberately minimal: two teardrop eye shapes each with a crescent notch cut from the bottom to suggest a raised brow, a small triangular nose, and a wide grinning mouth with one single center tooth left intact at the top lip. All four openings are pierced so they glow together, and the lone tooth bridging the smile is the only delicate detail in the whole design. Cut the single tooth gap on either side of that center tooth in two careful inward strokes, meeting cleanly at the base so it does not detach.