Pumpkin carving templates
572 free printable stencils. Download, print, trace, carve.
176 results · Page 5 of 5
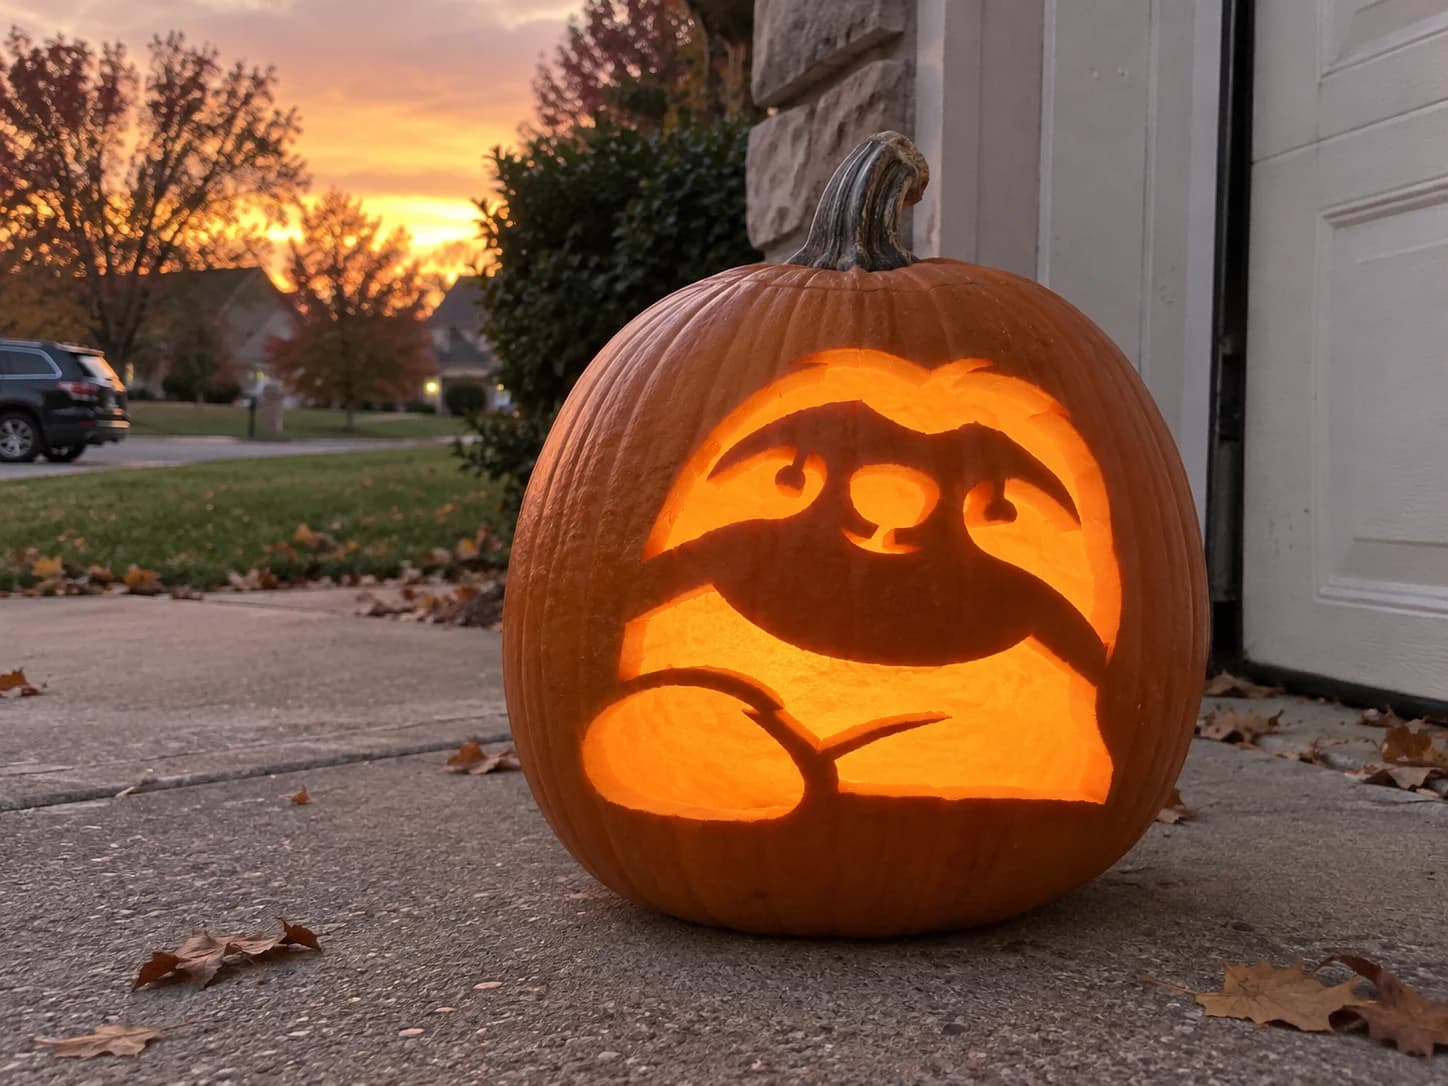
Sloth Pumpkin Stencil
A sloth clings with its long clawed arm across the center of this easy pumpkin stencil, its round face showing closed or half-shut eyes and a compact round nose, with a shaggy fur outline around the head and a rounded body below. The large body and arm openings are cut through while the face detail pieces stay solid, so the lit pumpkin shows the sloth's relaxed expression clearly outlined in orange. Cut the small eye-detail pieces before opening the large arm void so those delicate shapes have full surrounding support.
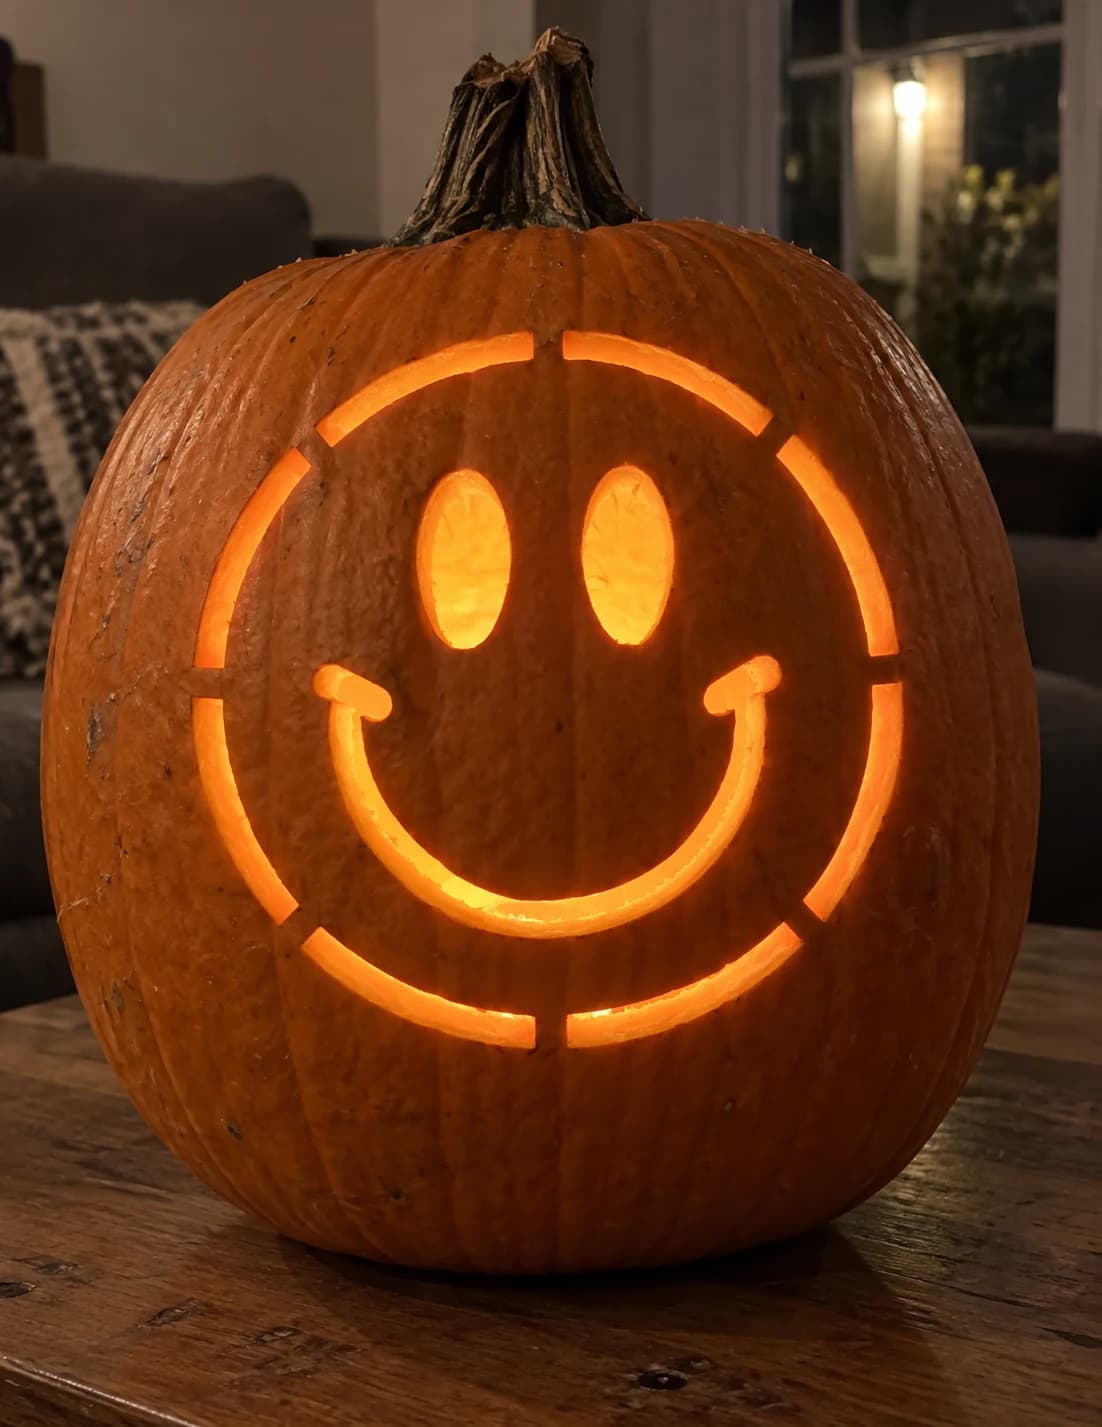
Smiley Face Pumpkin Stencil
A classic smiley face fills this easy pumpkin stencil: a broken circle made of twelve short arc segments forms the head outline, two tall oval eyes sit in the upper face, and a wide curved smile with rounded upturn ends completes the expression, all cut through as open negative space. The twelve dash segments that form the outer circle are separated by small uncut gaps, creating a dotted-ring effect when lit. Carve the outer arc segments first to define the circle, then cut the eyes and smile; the uncut gaps between segments are intentional and should be left untouched.
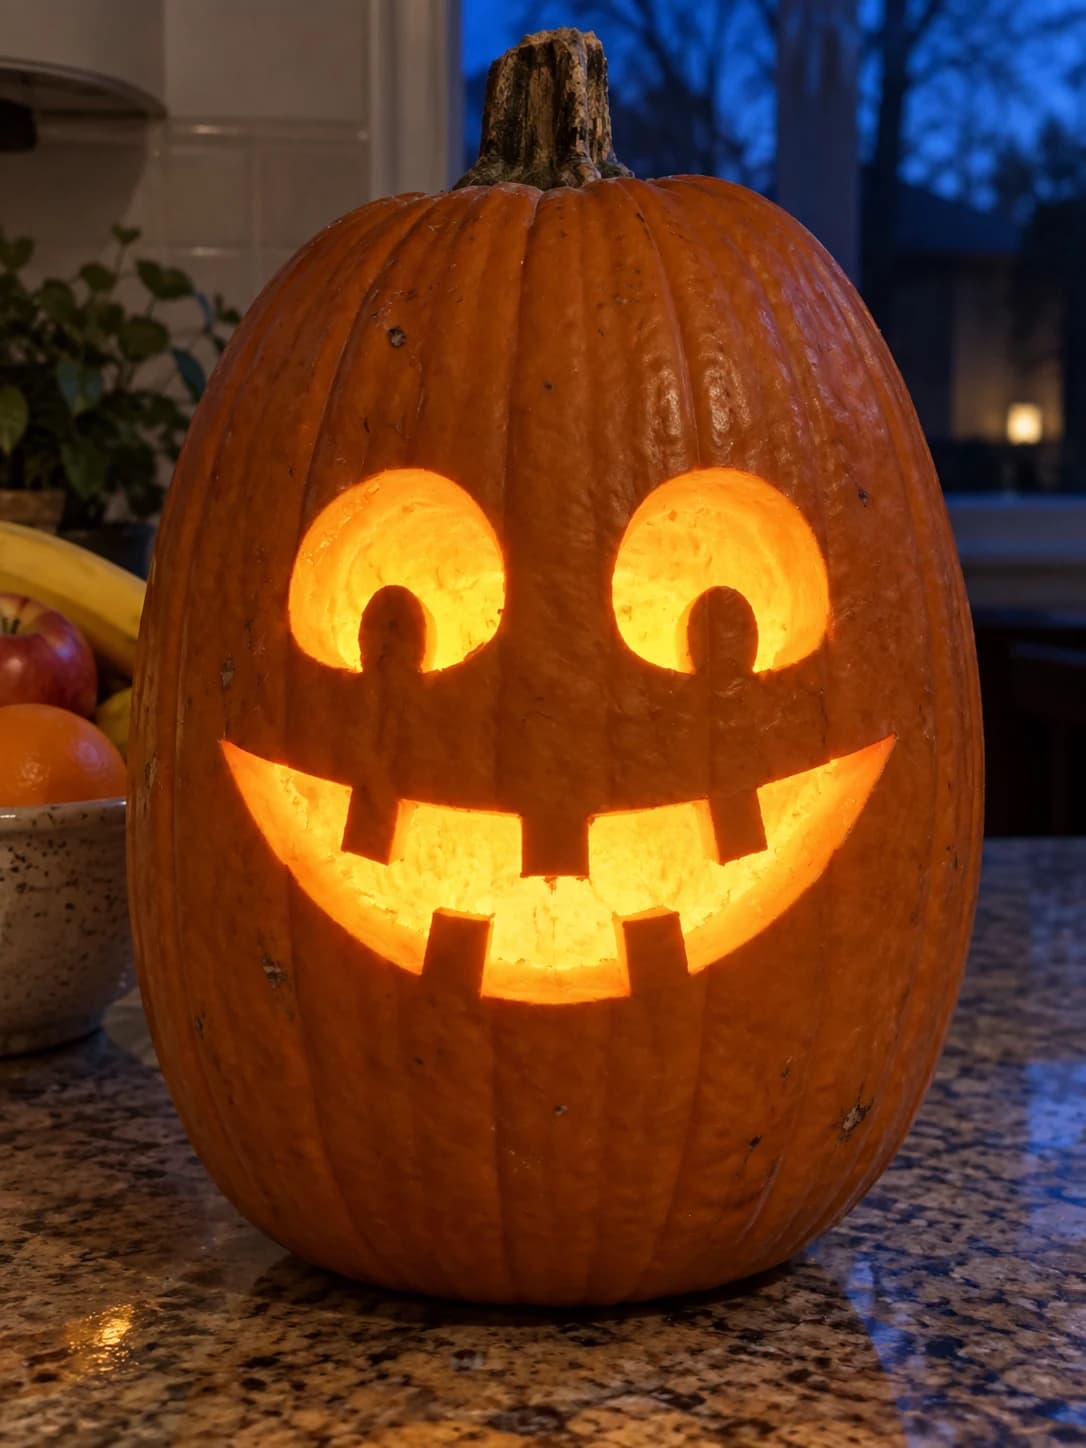
Smiley Jack-o-Lantern Pumpkin Stencil
Two large rounded arch eyes, each with a small notch cut from the bottom edge, sit above a wide U-shaped grin lined with four evenly spaced rectangular teeth in this easy pumpkin stencil. The result is a cheerful, friendly face rather than a sinister one, and when lit the broad open eyes and blocky smile radiate warmth across the porch. The small notches at the base of each eye are the only detail that can break off if carved too aggressively, so score those notch curves gently with the tip of your blade before removing the eye sections.
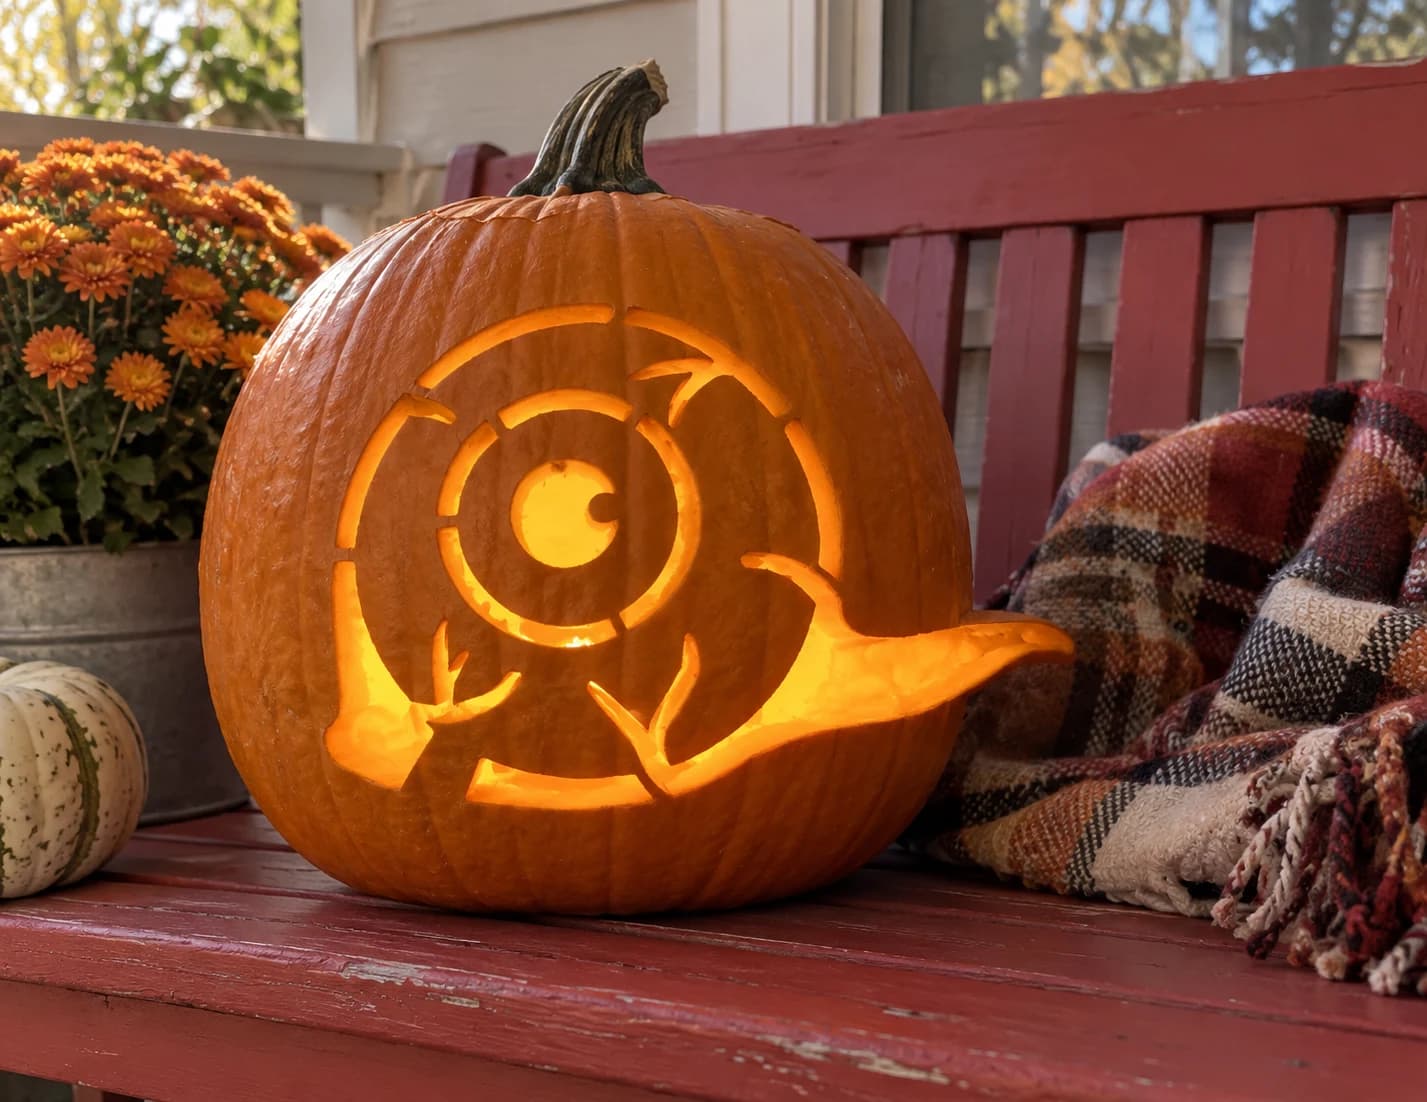
Snail Pumpkin Stencil
A giant snail is the surprising subject here: a segmented spiral shell packed with dashed arc cutouts occupies most of the design, while the snail's body stretches out to the right and two small eyestalks rise from the head. The shell is built from concentric broken rings that leave thin solid bridges between segments, and the effect when lit is an intricate circular lantern orbited by a slow-moving creature. Cut the outermost arc segments of the shell first and work inward toward the central solid disc so the bridges hold until last.
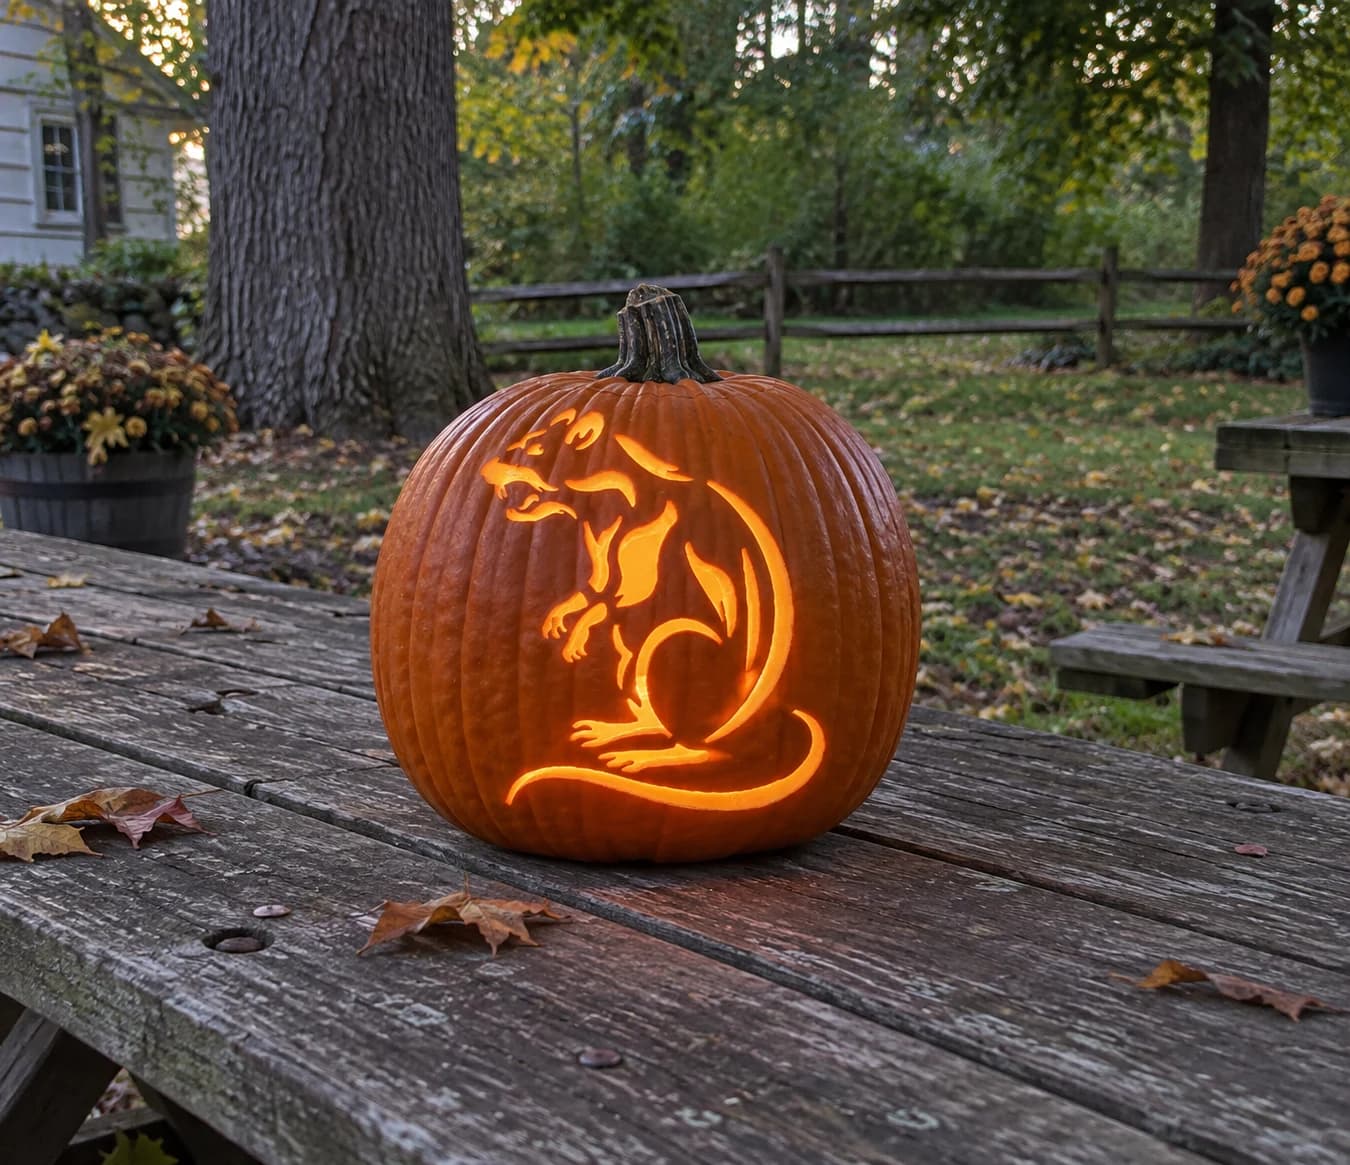
Snarling Rat Pumpkin Stencil
A detailed rat rearing up on its hind legs fills this hard pumpkin stencil, posed with clawed front paws raised, mouth open in a snarl, and a long curling tail sweeping around the lower body. Unlike the simpler silhouette rat in this collection, this design uses internal cut lines to carve fur texture, claw separations, and an open mouth, leaving thin pumpkin ridges that define the anatomy when lit. Cut the individual claw slots in the front paws first so those delicate tips are still surrounded by solid pumpkin.
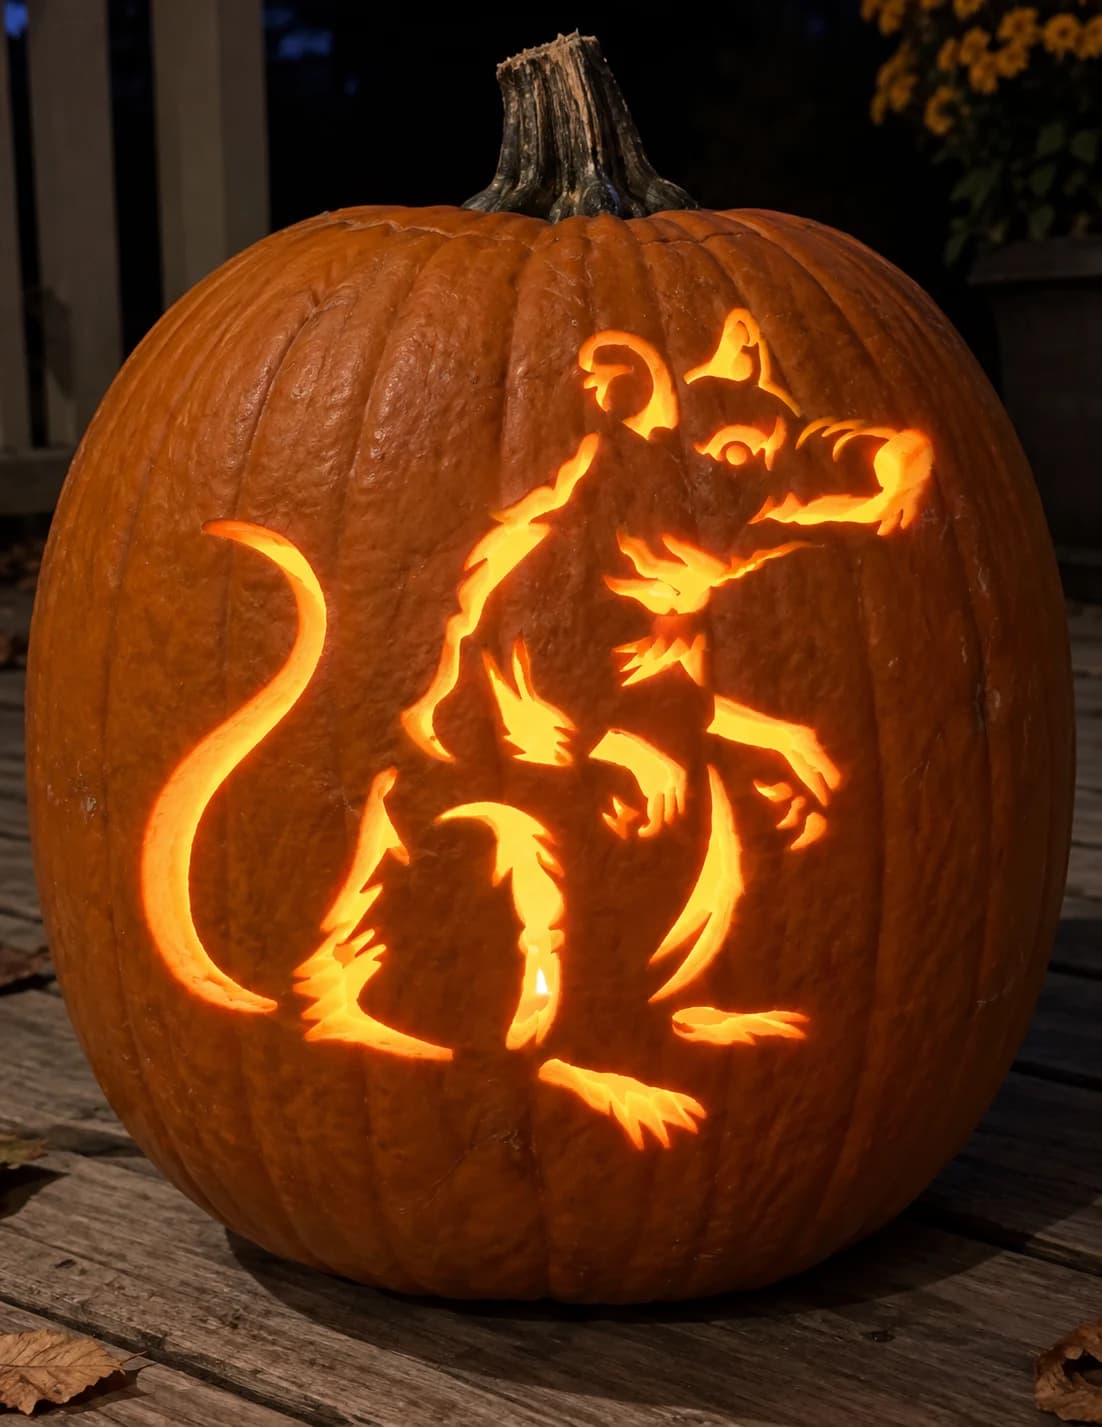
Snarling Rat Pumpkin Stencil
A snarling rat pumpkin stencil rendered in detailed linework shows the animal rearing up on its hind legs, front paws raised, with a long curving tail sweeping to the left, ragged fur along the spine, clawed feet, and an open mouth with visible teeth. Dozens of short cut lines define the fur texture and claws, leaving narrow orange ridges between them, so the finished jack-o-lantern reads as a detailed fur-covered creature rather than a flat silhouette. Work in sections from the tail outward, cutting fur-texture lines in short strokes rather than single long passes to avoid splitting the thin ridges.
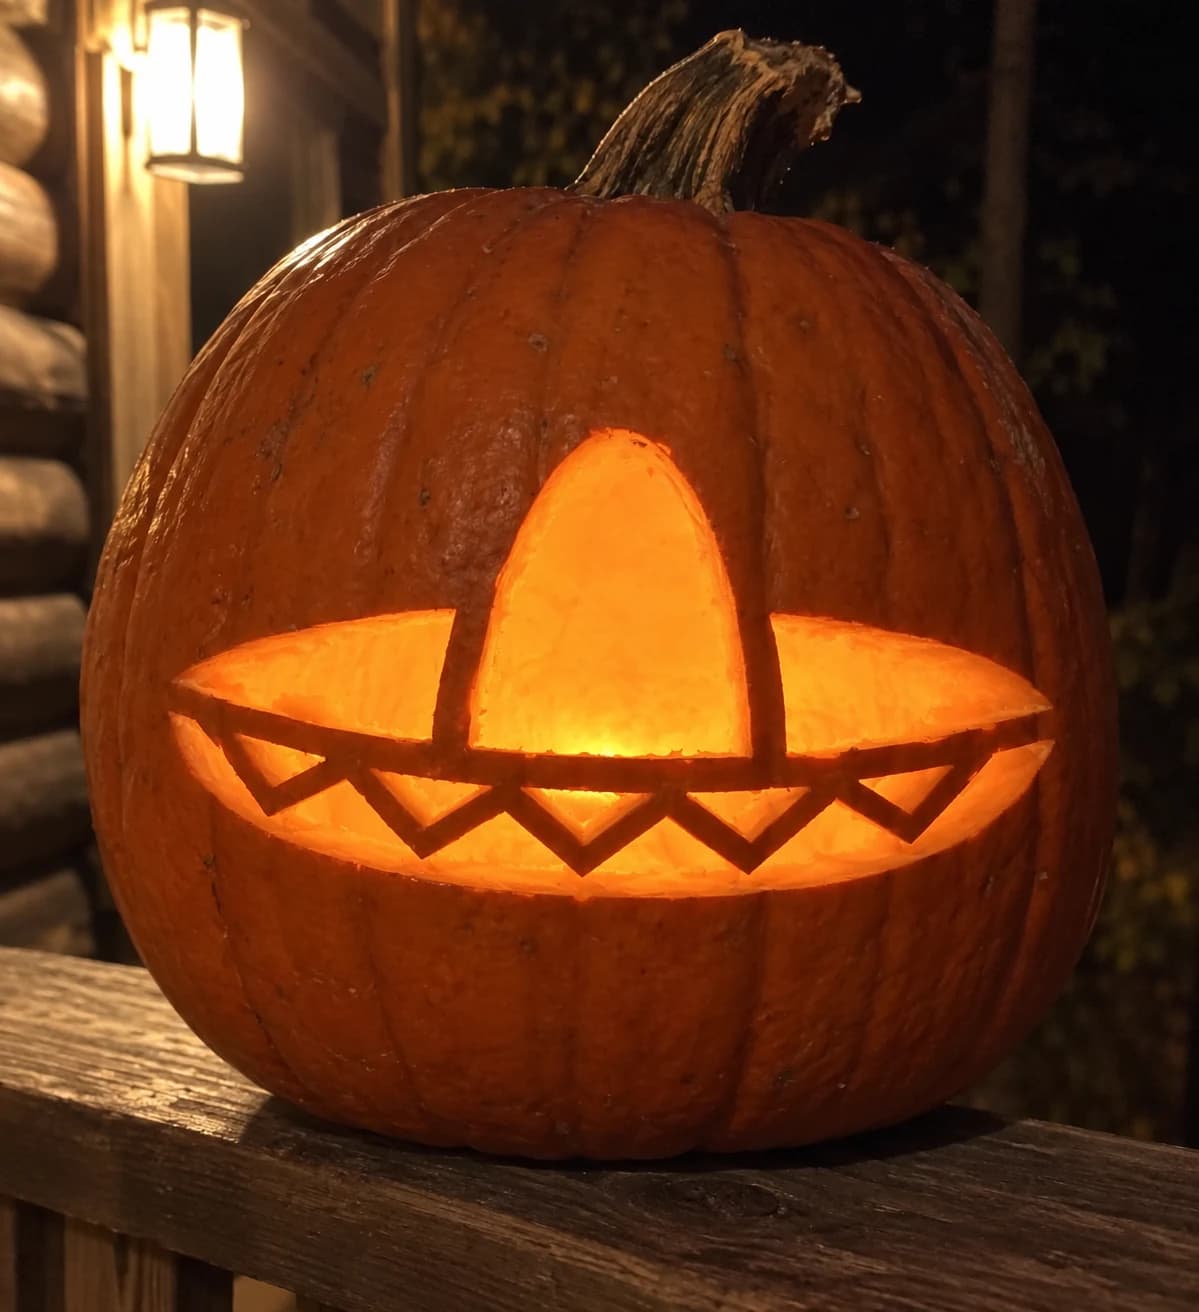
Sombrero Pumpkin Stencil
A wide-brimmed sombrero fills this pumpkin stencil, its high rounded crown pierced as one large cutout and the broad brim divided by a decorative band of repeating V-shaped notches that form a row of open triangles along the lower edge. The hat brim is the negative-space opening, and the triangular notches add festive detail within it. Cut the triangular notches along the band first, from the center outward in each direction, so the thin pumpkin teeth between them remain stable while you remove the larger crown and brim sections.
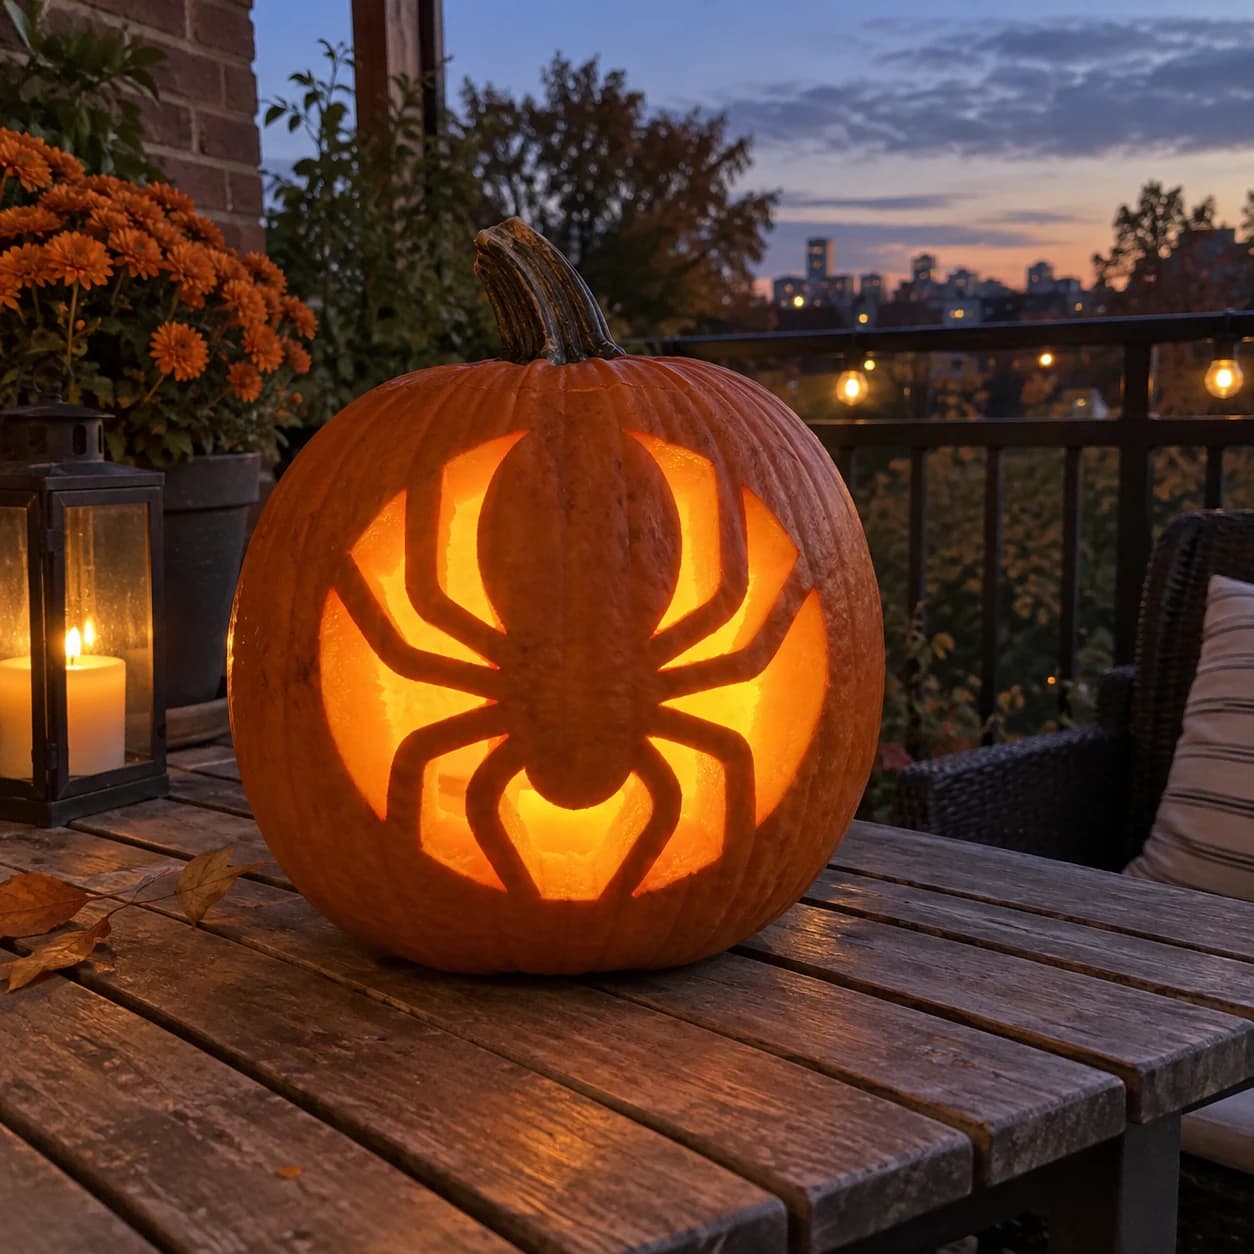
Spider Emblem Pumpkin Stencil
A stylized spider rendered as a graphic emblem fills this easy stencil: the body is split into a large oval abdomen and a smaller rounded head kept solid as orange pumpkin, while the eight legs radiate outward as broad curved blades that taper to sharp points, all backed by cut-out negative space. The overall silhouette has a bold, almost logo-like quality that glows dramatically when lit. Leave the narrow waist bridge connecting the head to the abdomen until last, since removing adjacent leg gaps early can put stress on that small connector.
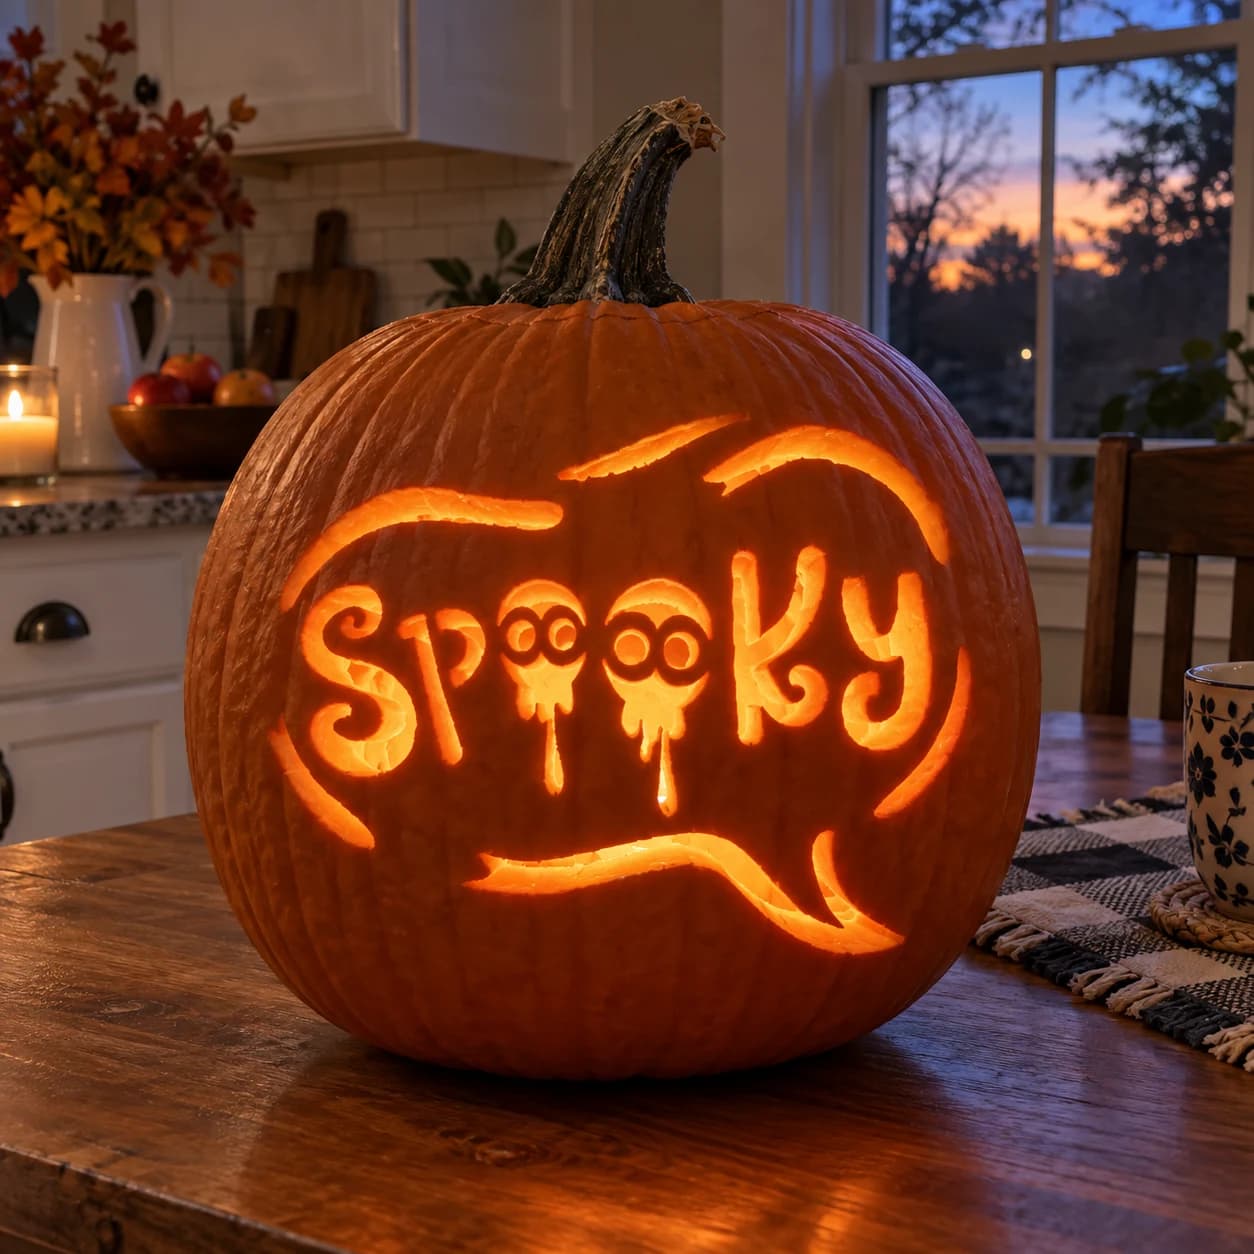
Spooky Text Pumpkin Stencil
The word "Spooky" is carved in bold bubbly lettering with each letter outlined as a cut-through shape on this Halloween pumpkin stencil. The two O's feature skull-like eye holes inside them, and drip lines hang from the letters below. Curling ribbon flourishes arc above and below the text, all pierced through. Lit from inside, the letters glow with dark gaps forming the decorative interior details. Take care to preserve the thin drip connections between letters, as those links keep each letter floating in place on the pumpkin wall.
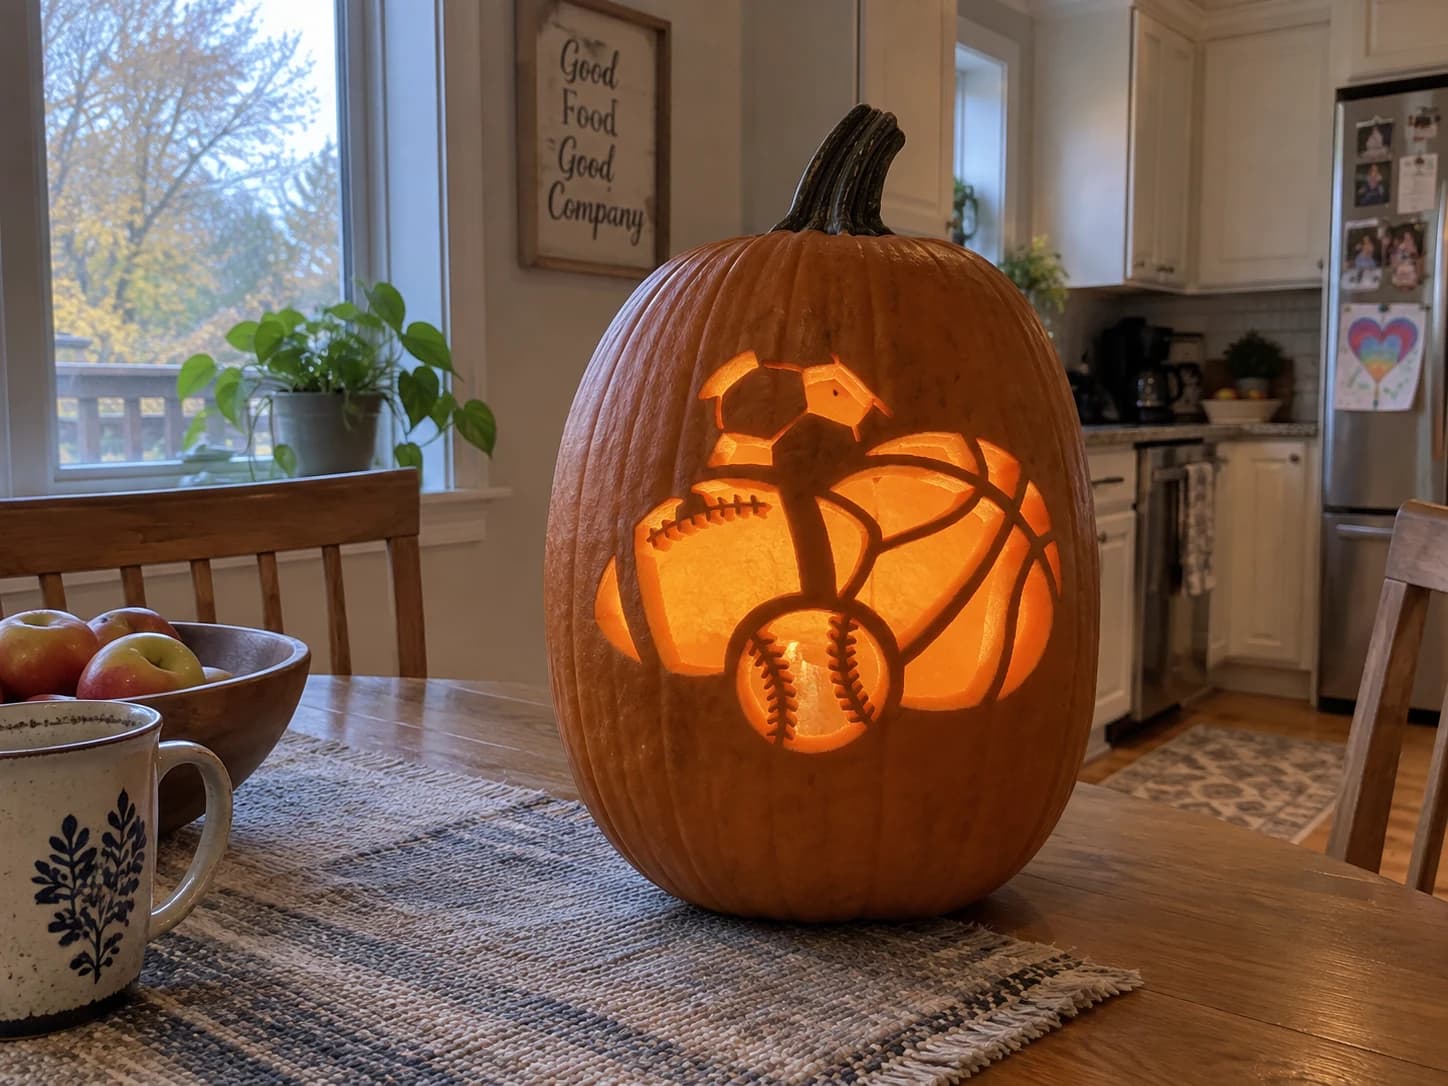
Sports Balls Pumpkin Stencil
Four sports balls are stacked and overlapping in a loose cluster: a soccer ball at the top with its pentagon-patch pattern, a football on the left with stitching lines, a basketball on the right with its curved seam lines, and a baseball at the front center with a double-stitch seam. Each ball's distinctive surface markings are left as uncut pumpkin ridges, so when lit the glowing interior shines through the open areas between stitches and panel gaps. Carve the baseball's curved stitch lines last since they are the finest linework and benefit from the stability of the surrounding cuts already in place.
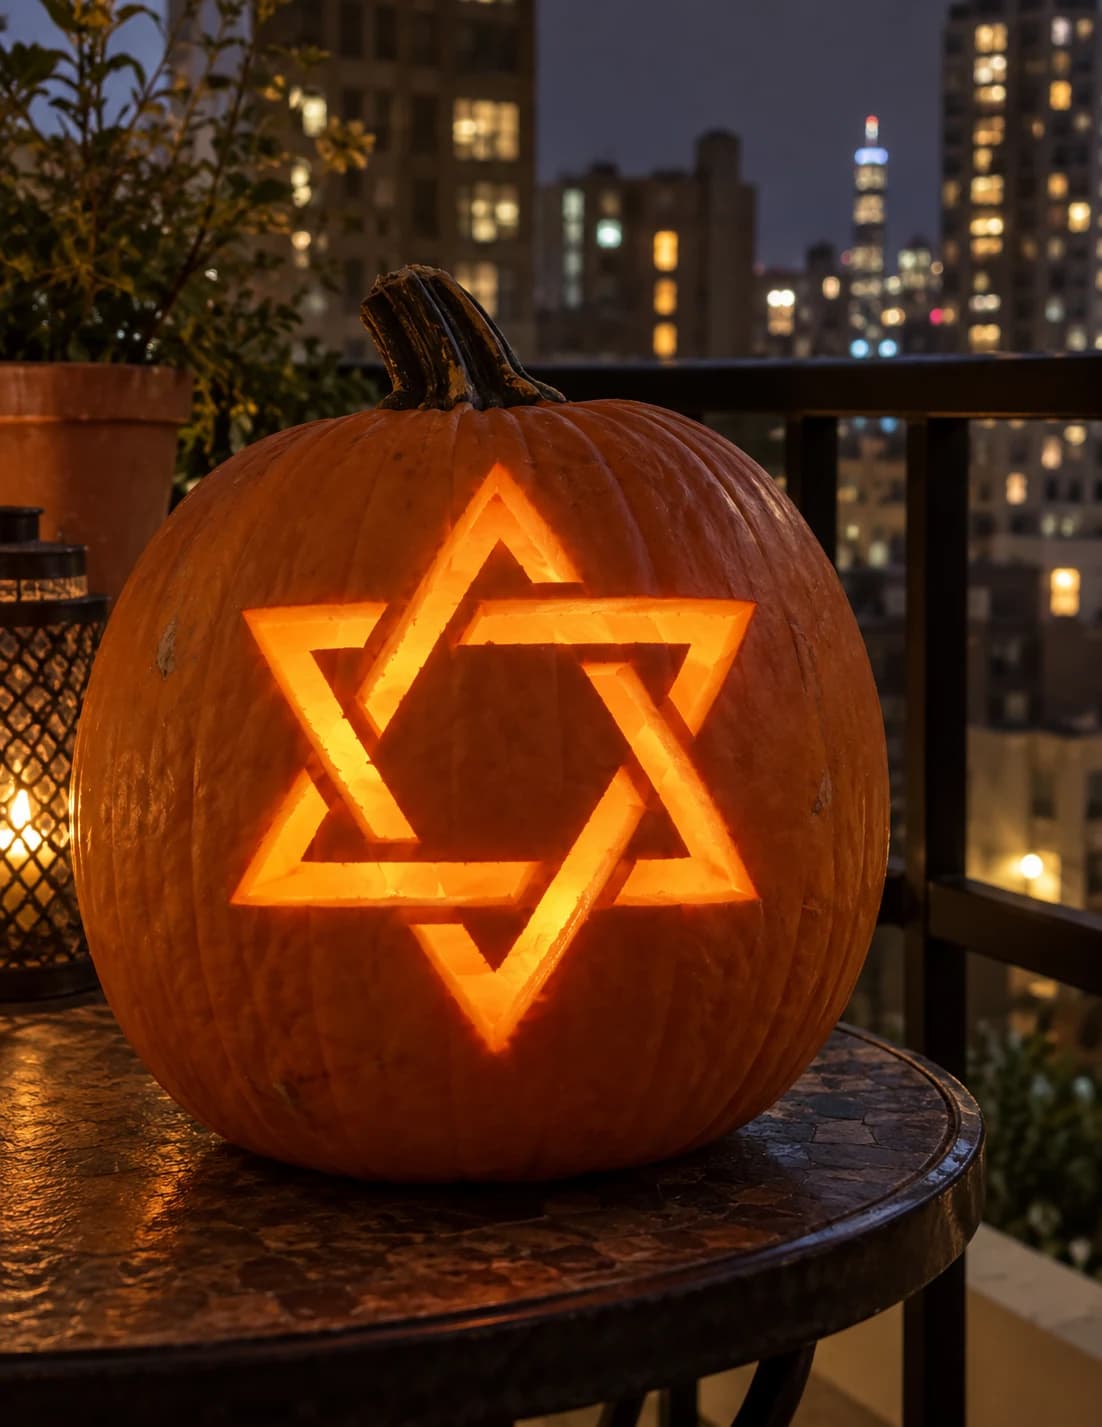
Star of David Pumpkin Stencil
Two overlapping equilateral triangles forming the Star of David fill this pumpkin stencil as a clean geometric shape. The entire six-pointed star outline is carved as a single continuous pierce-through, and the small hexagonal gaps at each interlocking corner are left as solid pumpkin wall, creating the interlaced look of the design. On the lit jack-o-lantern the star glows in bright outline form. Score the six triangle tip points lightly before making full cuts; the acute corners are the most likely to tear, so finish them with a fine blade rather than a heavy saw.
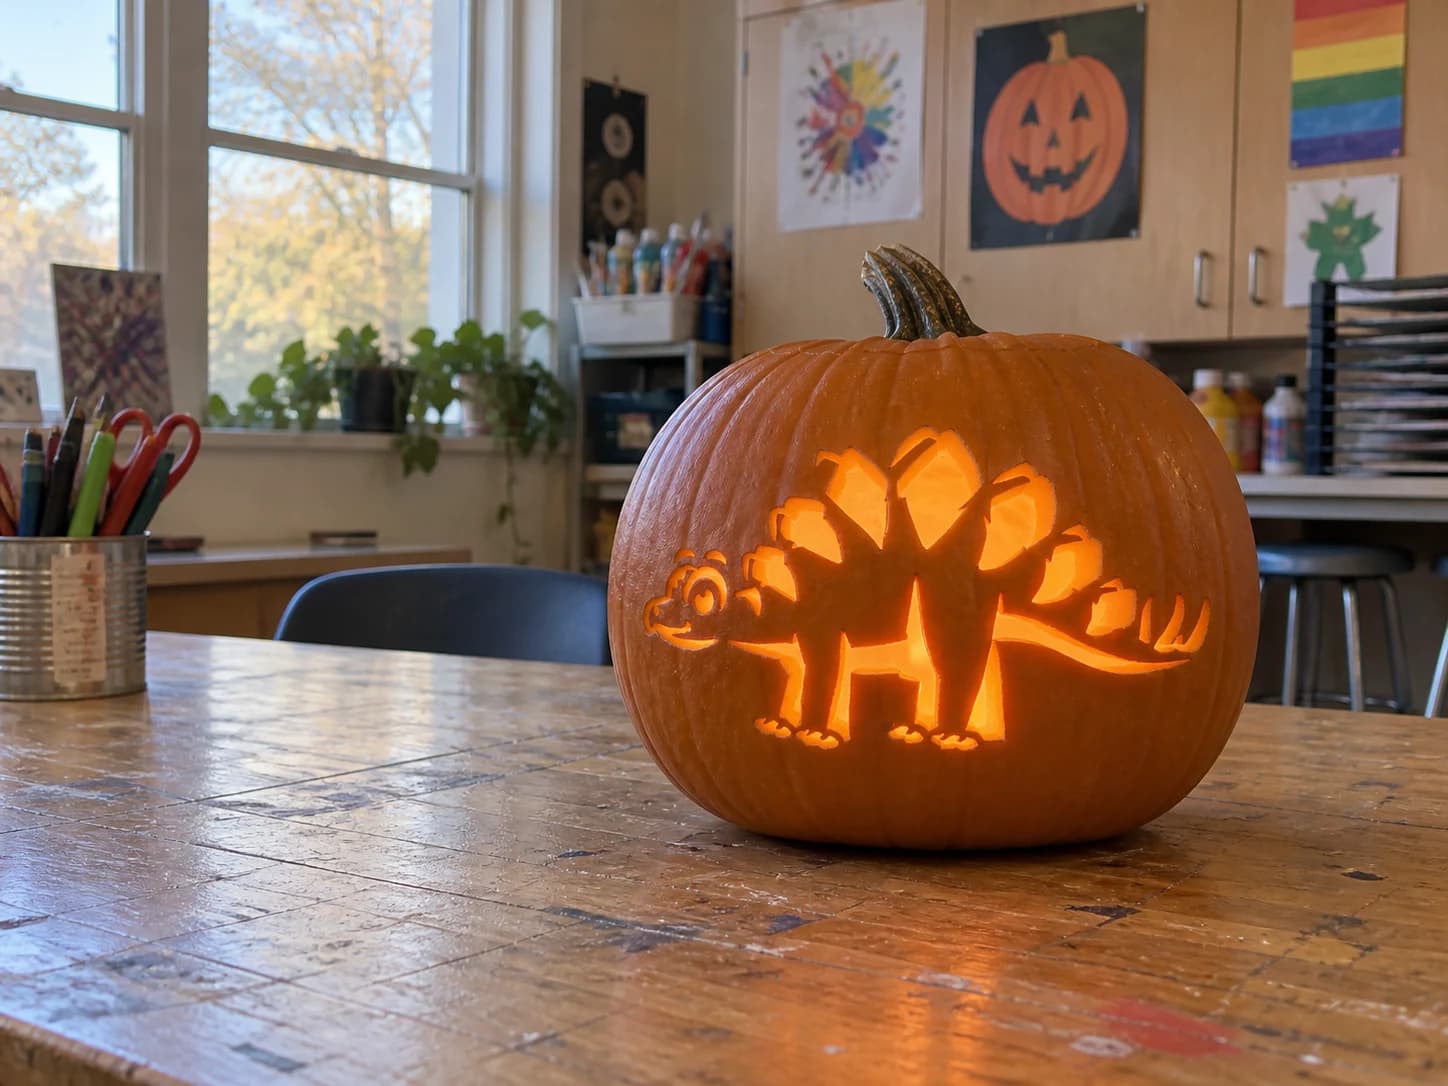
Stegosaurus Pumpkin Stencil
A cartoon stegosaurus with a round friendly face, four chunky legs, and a row of large diamond-shaped back plates fills this hard pumpkin stencil. The body is carved as a wide open pierce, the back plates are pierced individually above it, and the toes and facial details are fine cut-outs. When lit, the dinosaur glows as a bright segmented shape with the plates hovering above the silhouette. Carve the face details and tiny toe lines before removing the large body section, since the body cut-through will flex the pumpkin wall and make those small details harder to control.
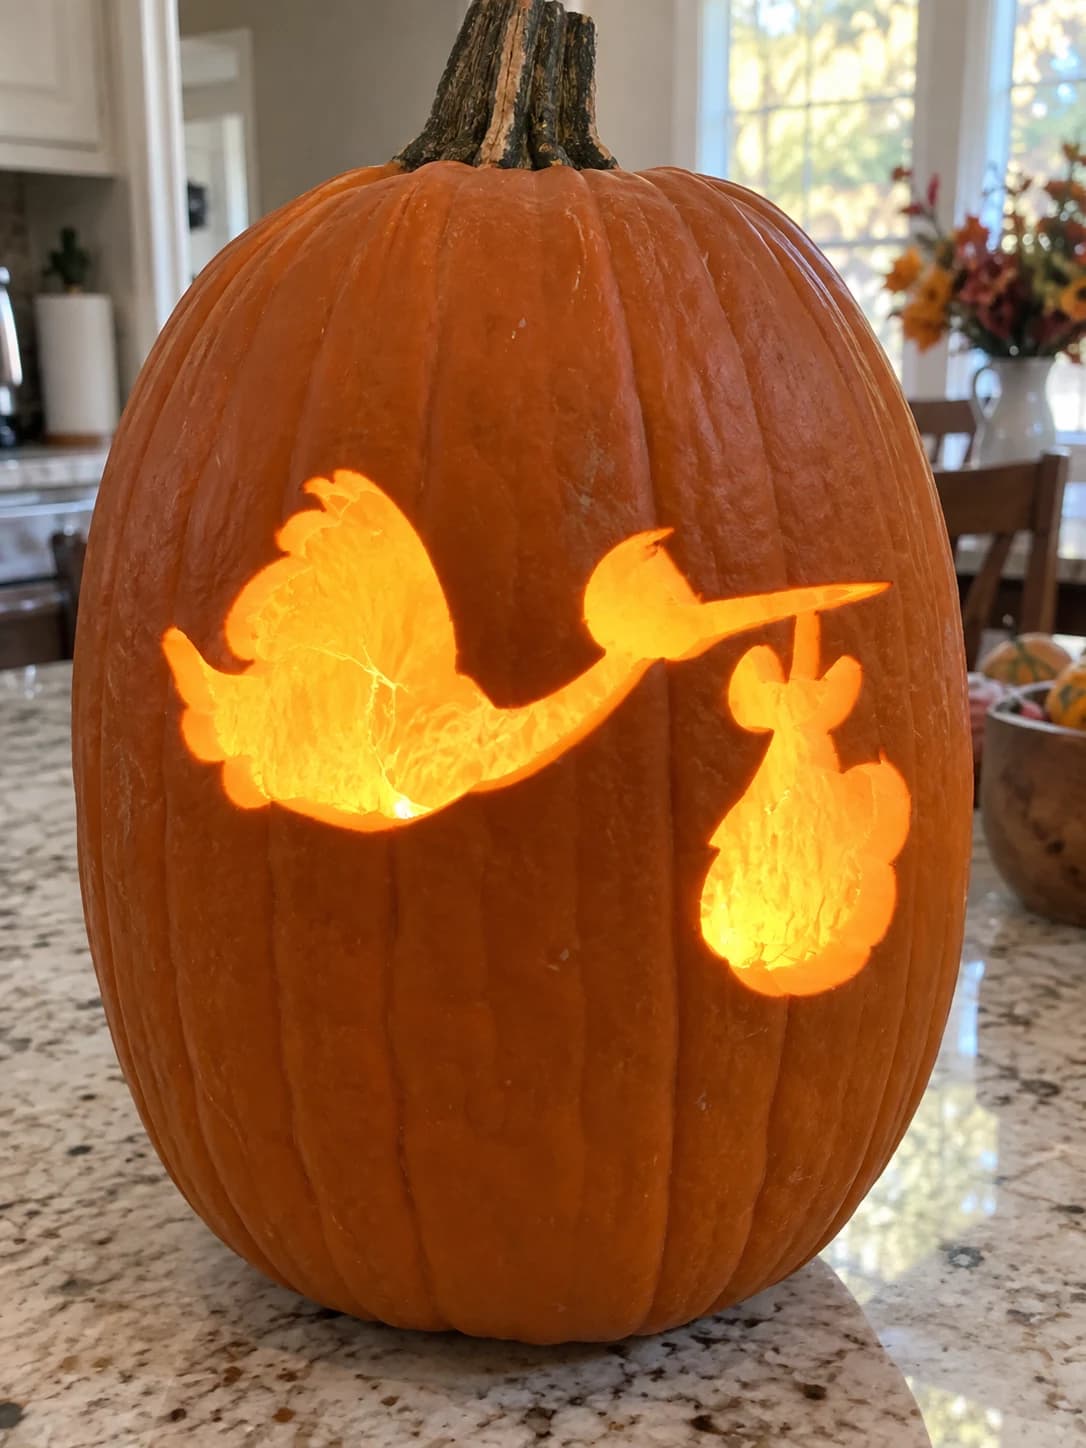
Stork with Baby Pumpkin Stencil
A flying stork carries a bundled newborn in its beak in this cheerful pumpkin stencil, the whole scene rendered as a single horizontal silhouette cut entirely through the pumpkin wall. The stork's body, outstretched wings, long bill, and the round swaddled baby bundle are all connected in one flowing outline. Because the bird's bill is the narrowest point in the silhouette, carve it last and approach the tip from the beak base rather than from the pointed end to avoid snapping.
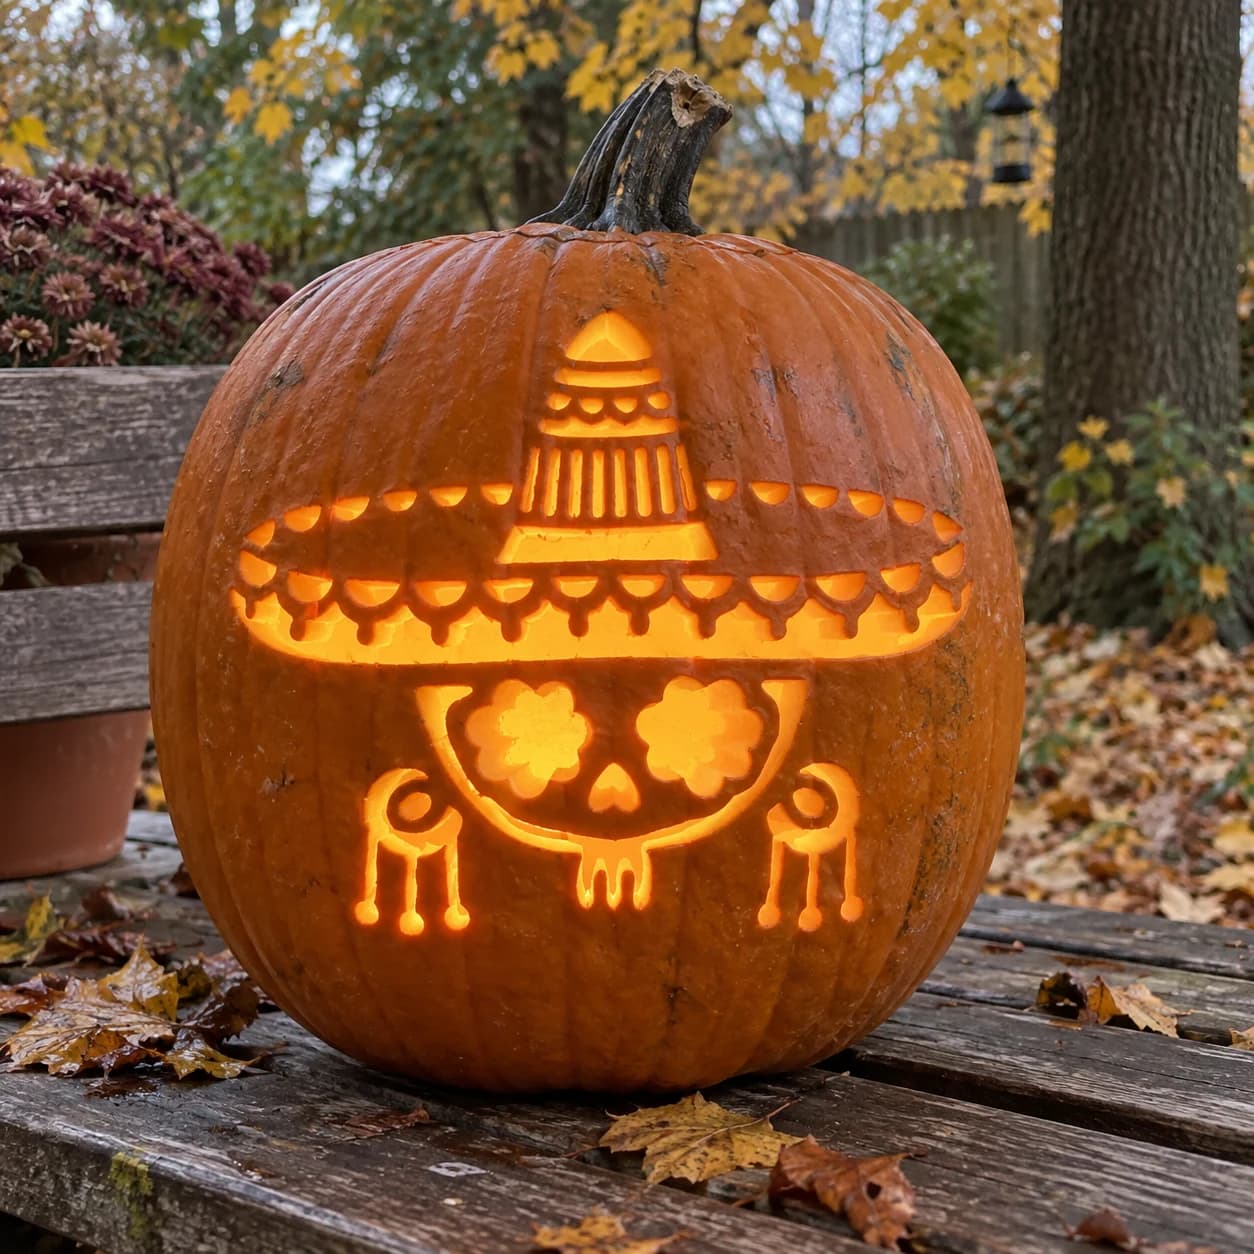
Sugar Skull Sombrero Pumpkin Stencil
A calavera skull wearing a wide sombrero fills this expert pumpkin stencil: the sombrero brim is ringed with rows of small scallop-cut holes and vertical stripe slots, the crown shows banded tiers, and the skull below has large flower-shaped eye sockets, a heart-shaped nose, a grinning mouth, and curling moustache scrolls on each side. Every decorative element is cut away so candlelight floods through the scallops, stripes, and flower eyes simultaneously, creating an elaborate Day of the Dead glow. Start with the tiny scallop holes along the sombrero brim before any other cut, since those are easiest to control while the surrounding skin is still rigid.
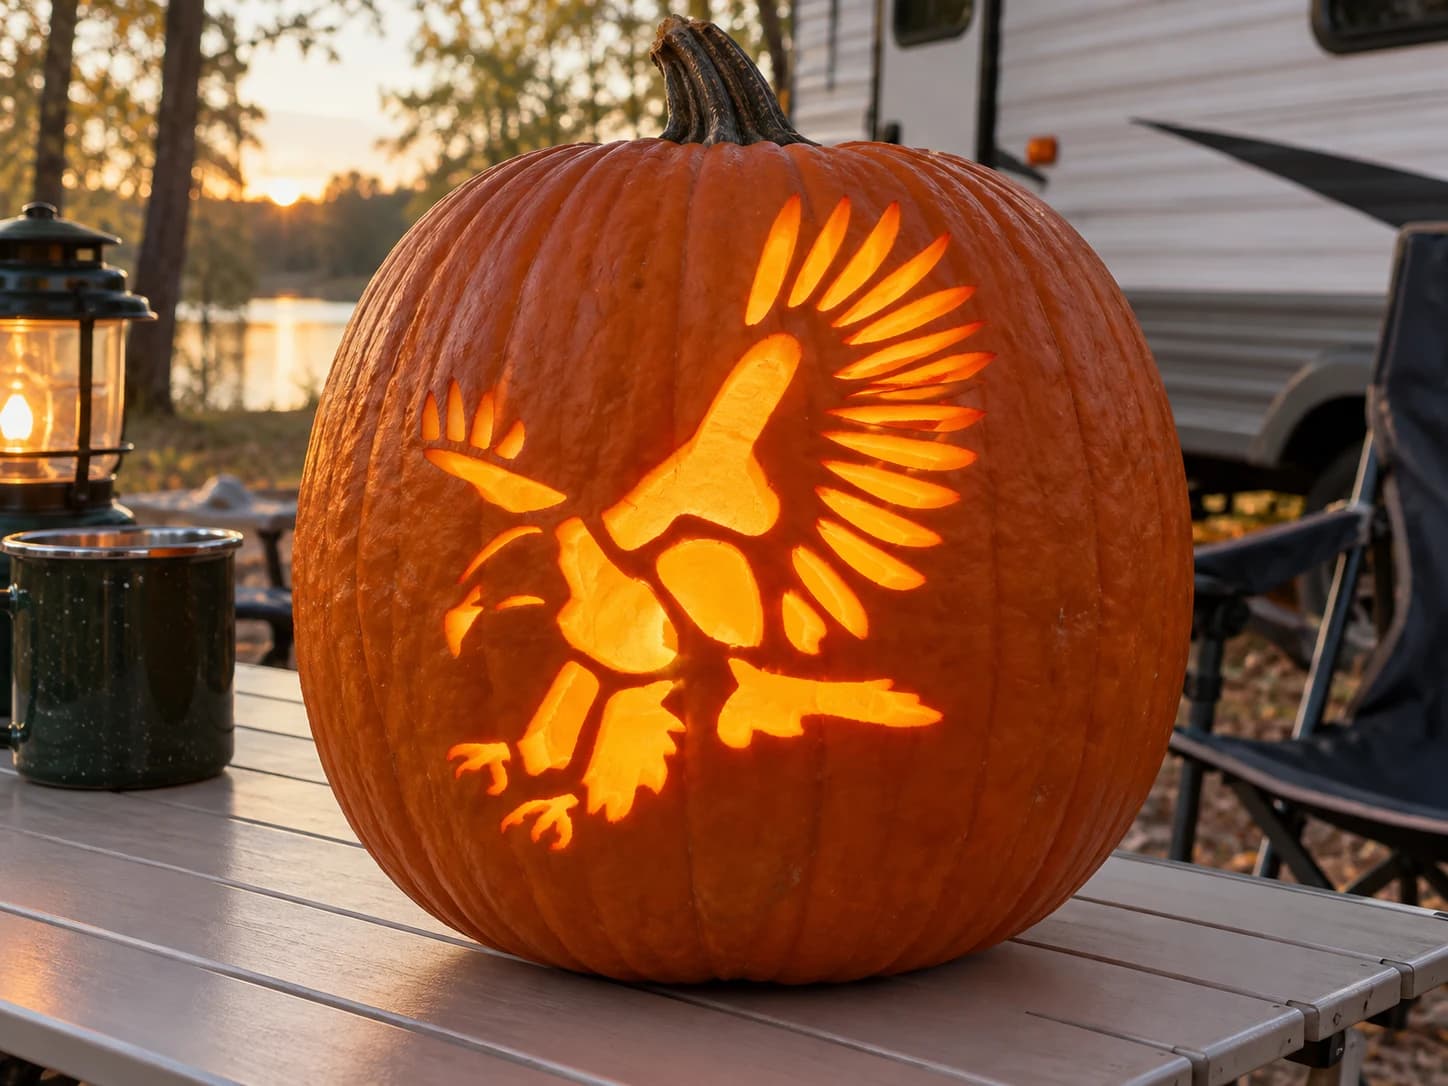
Swooping Bald Eagle Pumpkin Stencil
A bald eagle swoops down with wings fully spread in this striking pumpkin stencil, its feathers rendered as a fan of elongated oval cutouts radiating from the body while the torso, tail, and talons are larger open shapes. The mosaic of separate feather pierces makes the wings blaze with light and gives the design a dramatic stained-glass quality. Cut the smallest outer wing-tip feathers first while the wall is firmest, then work inward toward the body to avoid weakening the center before the delicate tips are done.
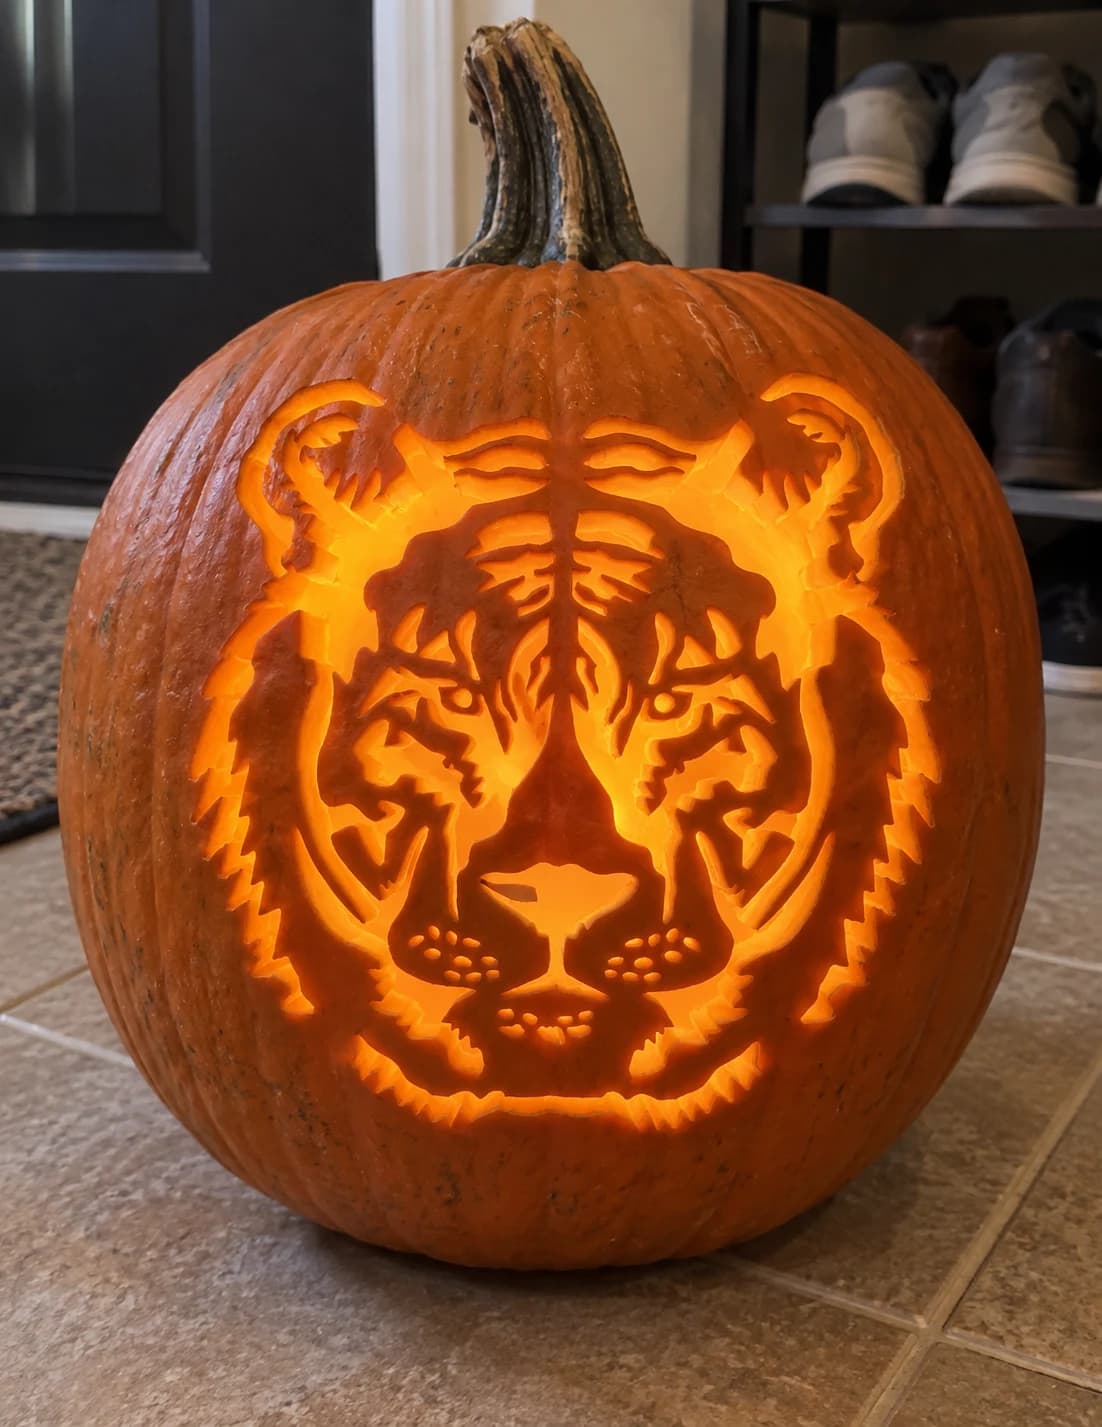
Tiger Face Pumpkin Stencil
A full-face tiger portrait stares forward from this expert-level pumpkin stencil: the broad round head is ringed by a jagged fur ruff, two triangular ears with inner cutouts peek from the top corners, and the face is built from dozens of interlocking stripe-shaped cutouts that form the eyes, nose bridge, muzzle, and whisker spots. The lit result shows a photorealistic tiger rendered entirely in positive pumpkin bridges and negative glowing gaps. Work from the center of the face outward, cutting the small eye-iris pieces first before tackling the radiating stripe cuts that hold the whole design together.
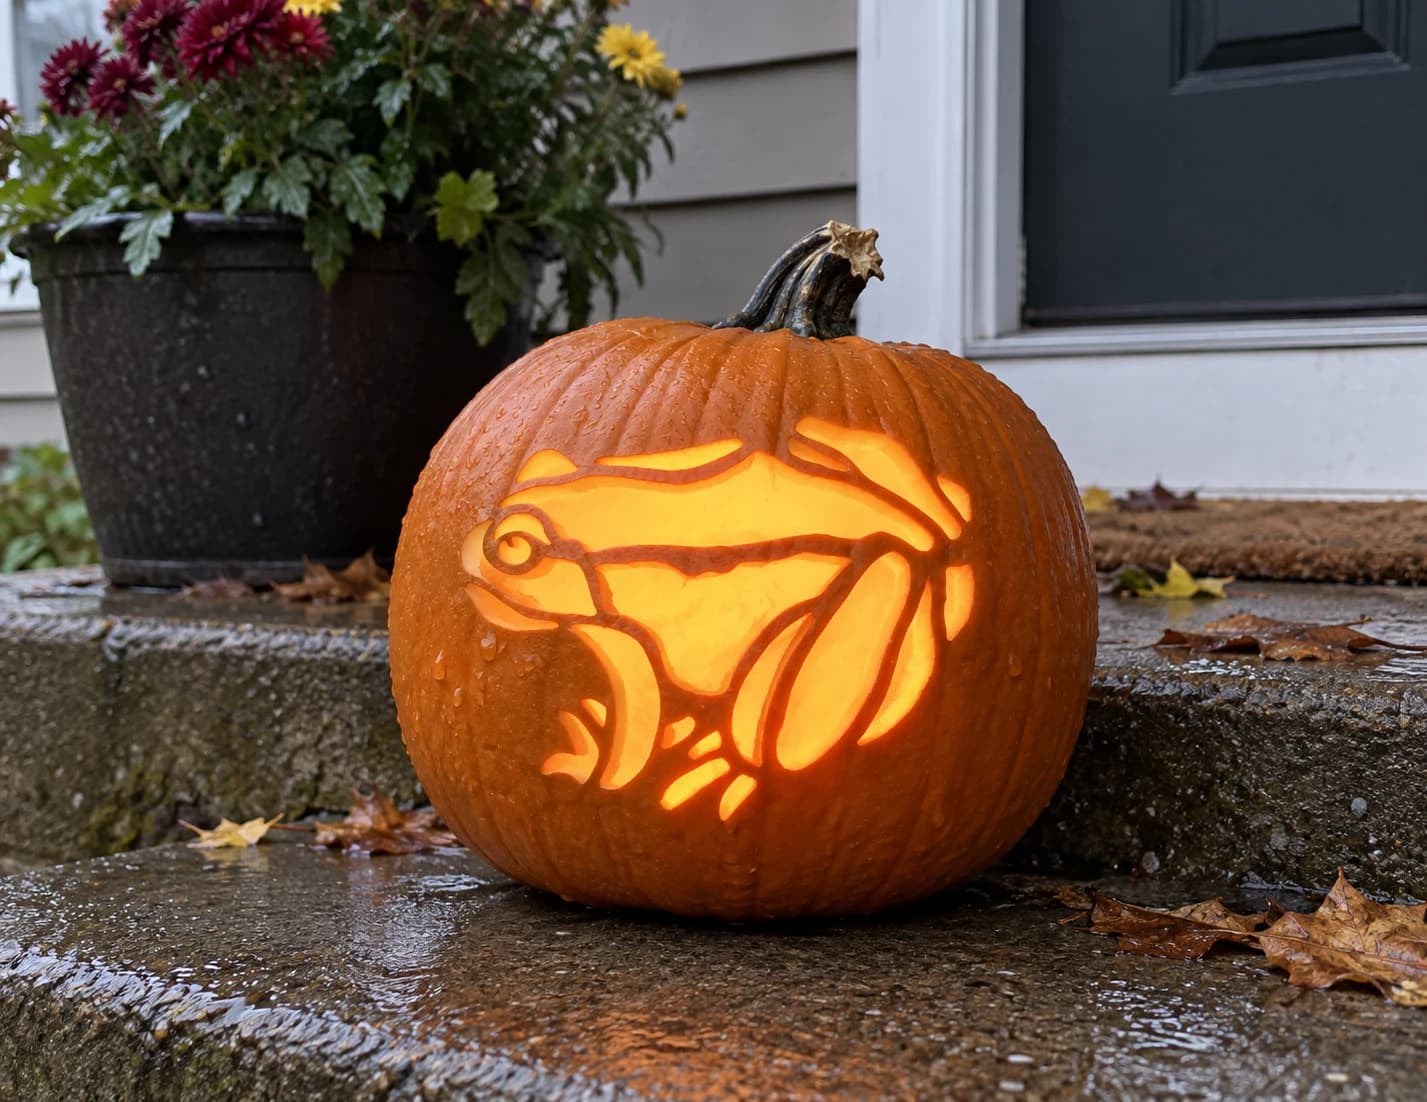
Toad Pumpkin Stencil
A plump toad viewed in profile crouches on this hard Halloween pumpkin stencil, with a large circular eye, a wide body, and four splayed feet rendered as interlocking cut-out sections separated by curving skin bridges. The body reads as a mosaic of light and shadow when lit, with the large back void glowing brightly and the leg bridges casting graphic lines across the opening. Cut the round eye circle first, then work from the head backward through each body section toward the feet.
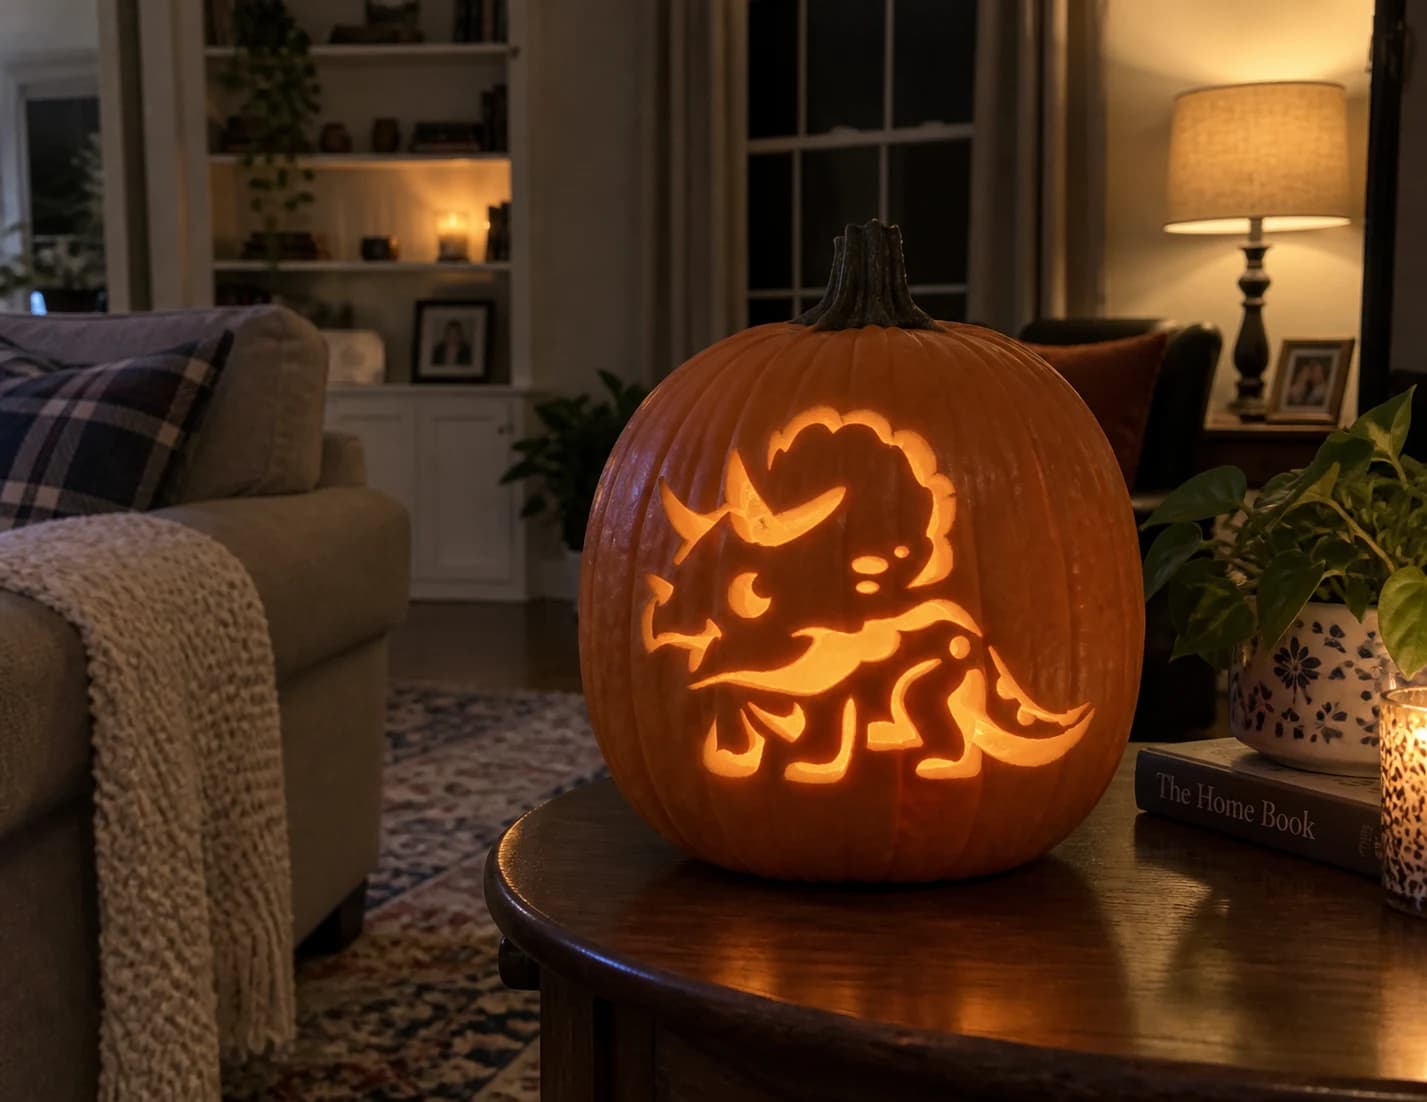
Triceratops Pumpkin Stencil
A chubby cartoon triceratops in a walking pose fills this hard pumpkin stencil: a large frilled head with three prominent horns, two small oval nostril dots and a crescent eye below the frill, a round body, four chunky legs with pointed toe claws, and a short upturned tail. The frill at the back of the head is an open silhouette that glows as a scalloped arc. Cut the three horn outlines and the two small nostril dots first before the broader body and leg cutouts, as the nostril dots are isolated and easiest to control while the pumpkin is still intact.
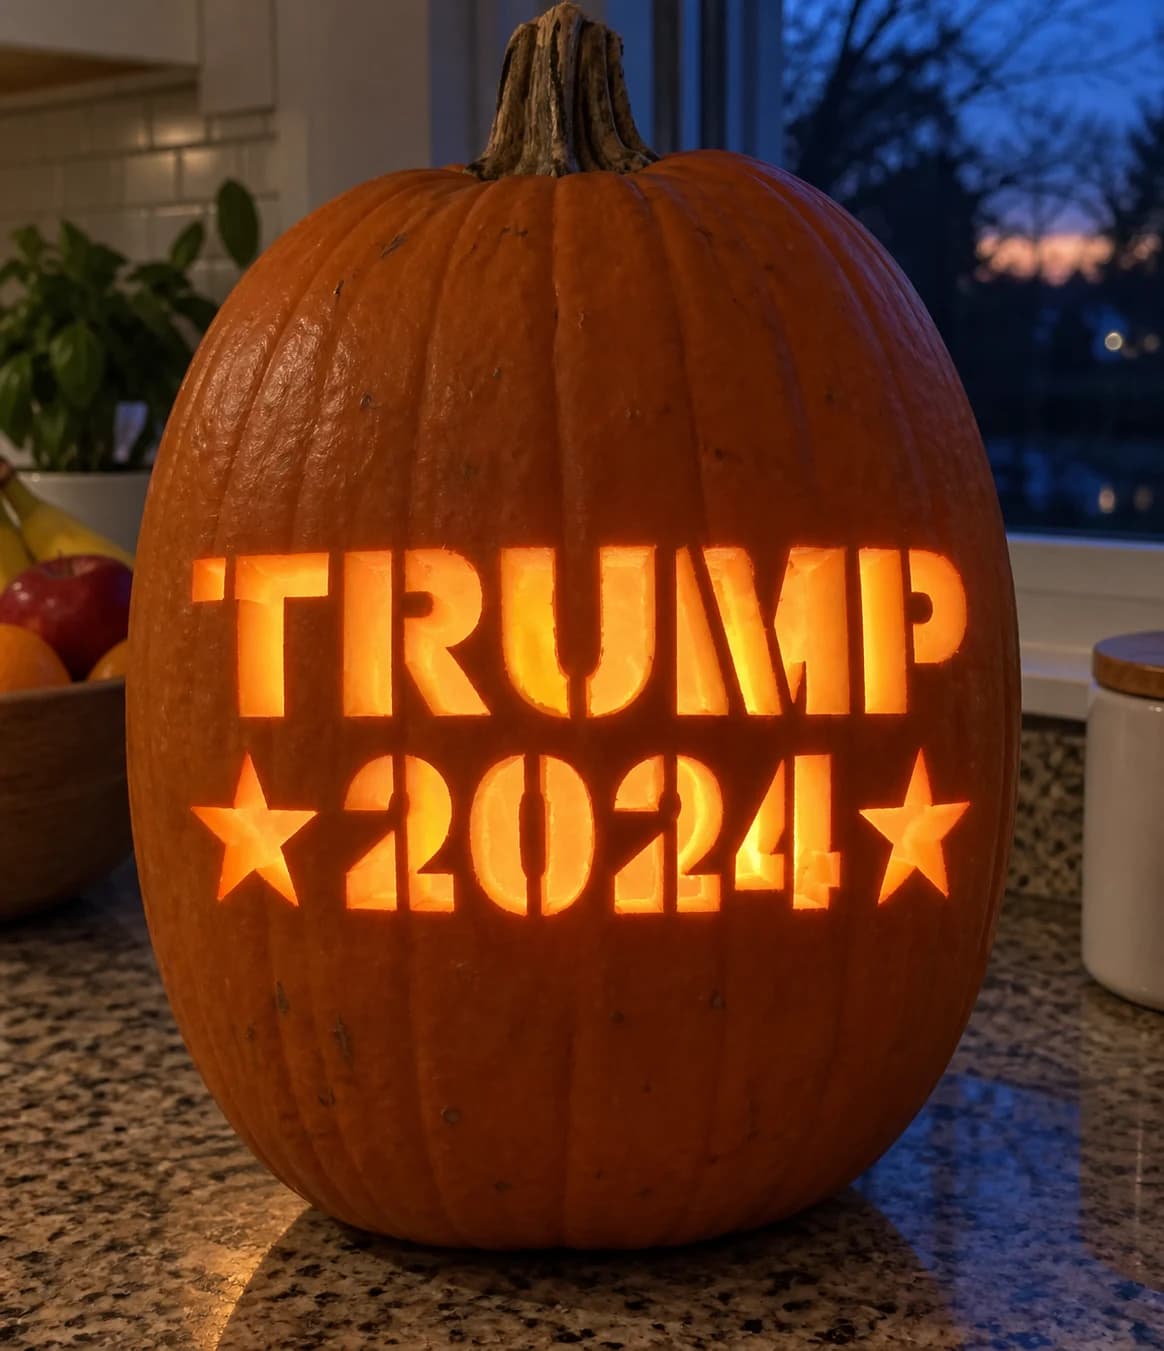
Trump 2024 Pumpkin Stencil
Bold military stencil-style lettering spells "TRUMP" on the top row and "2024" flanked by two five-pointed stars on the bottom row of this hard pumpkin stencil. Each letter and numeral is a thick open outline with interior counters preserved as solid pumpkin islands. The two stars at the sides of "2024" are each pierced through as open silhouettes. Cut the enclosed counters of rounded letters and numerals first (the interior of the P, the U loops, and the 0 counter in 2024), then cut each letter and numeral outline, saving the two star shapes for last.
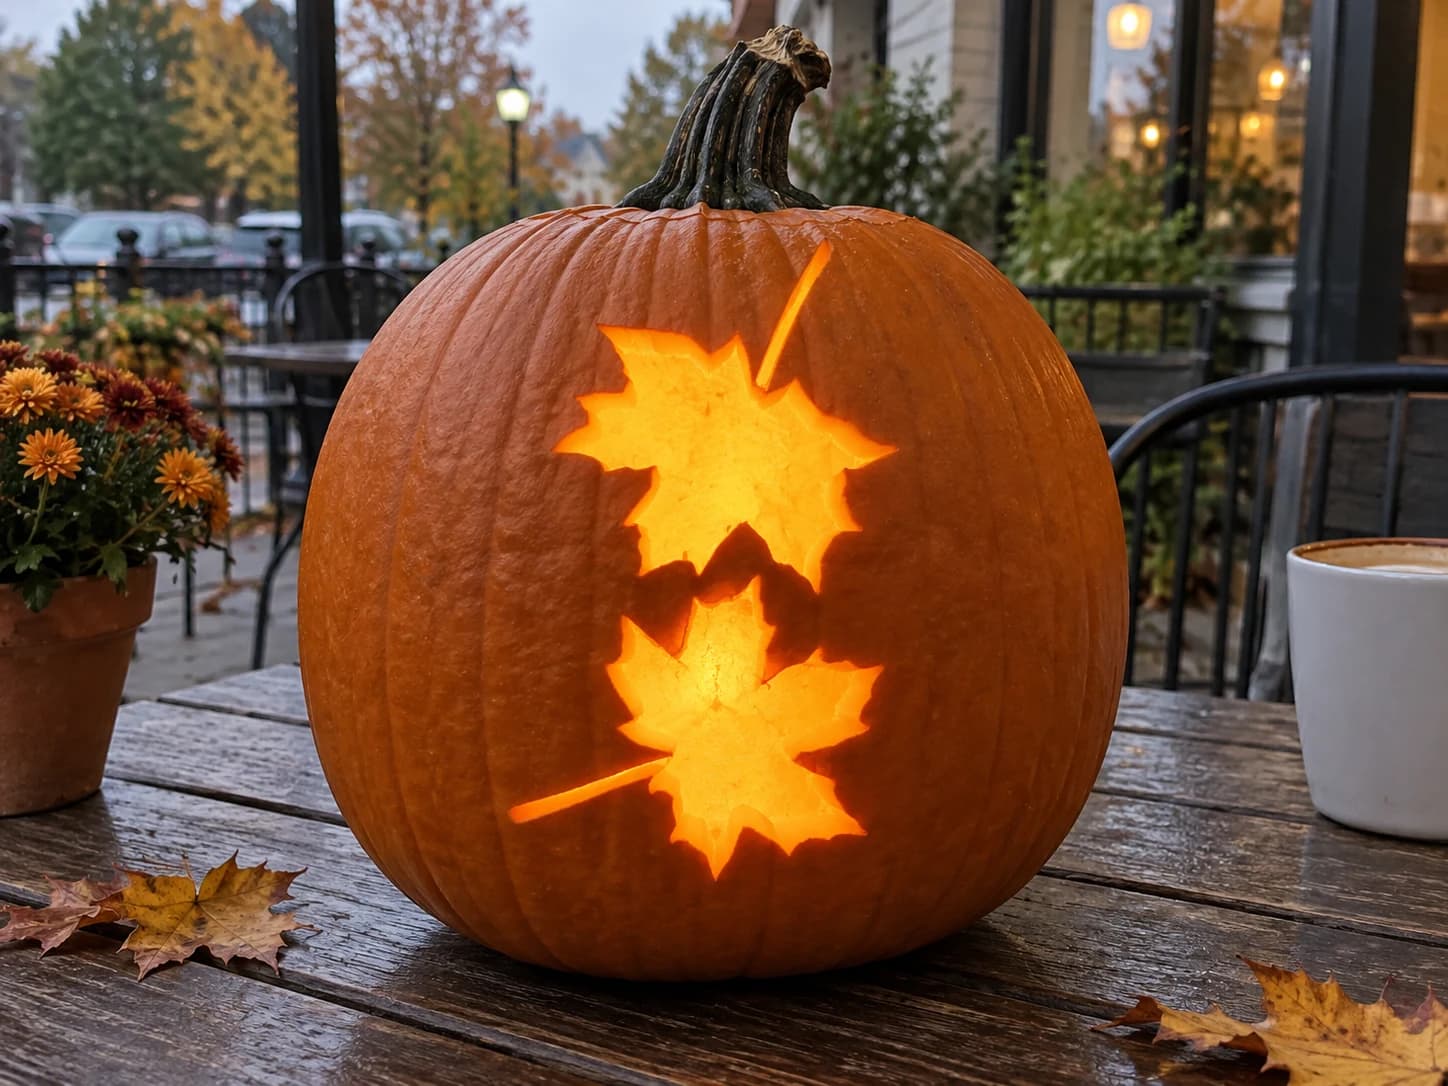
Two Maple Leaves Pumpkin Stencil
Two maple leaves are shown on the same stencil sheet, stacked vertically: the upper leaf faces right with its stem pointing up, the lower leaf faces left with its stem trailing down. Both are cut as single solid silhouettes with the pointed maple-lobe edges forming the outline. Lit from inside, the two glowing leaf shapes overlap slightly at center, giving the pumpkin a layered, scattered-leaves feel. Carve the upper leaf first and fully remove it before starting the lower leaf so the two openings don't inadvertently merge along their closest edges.
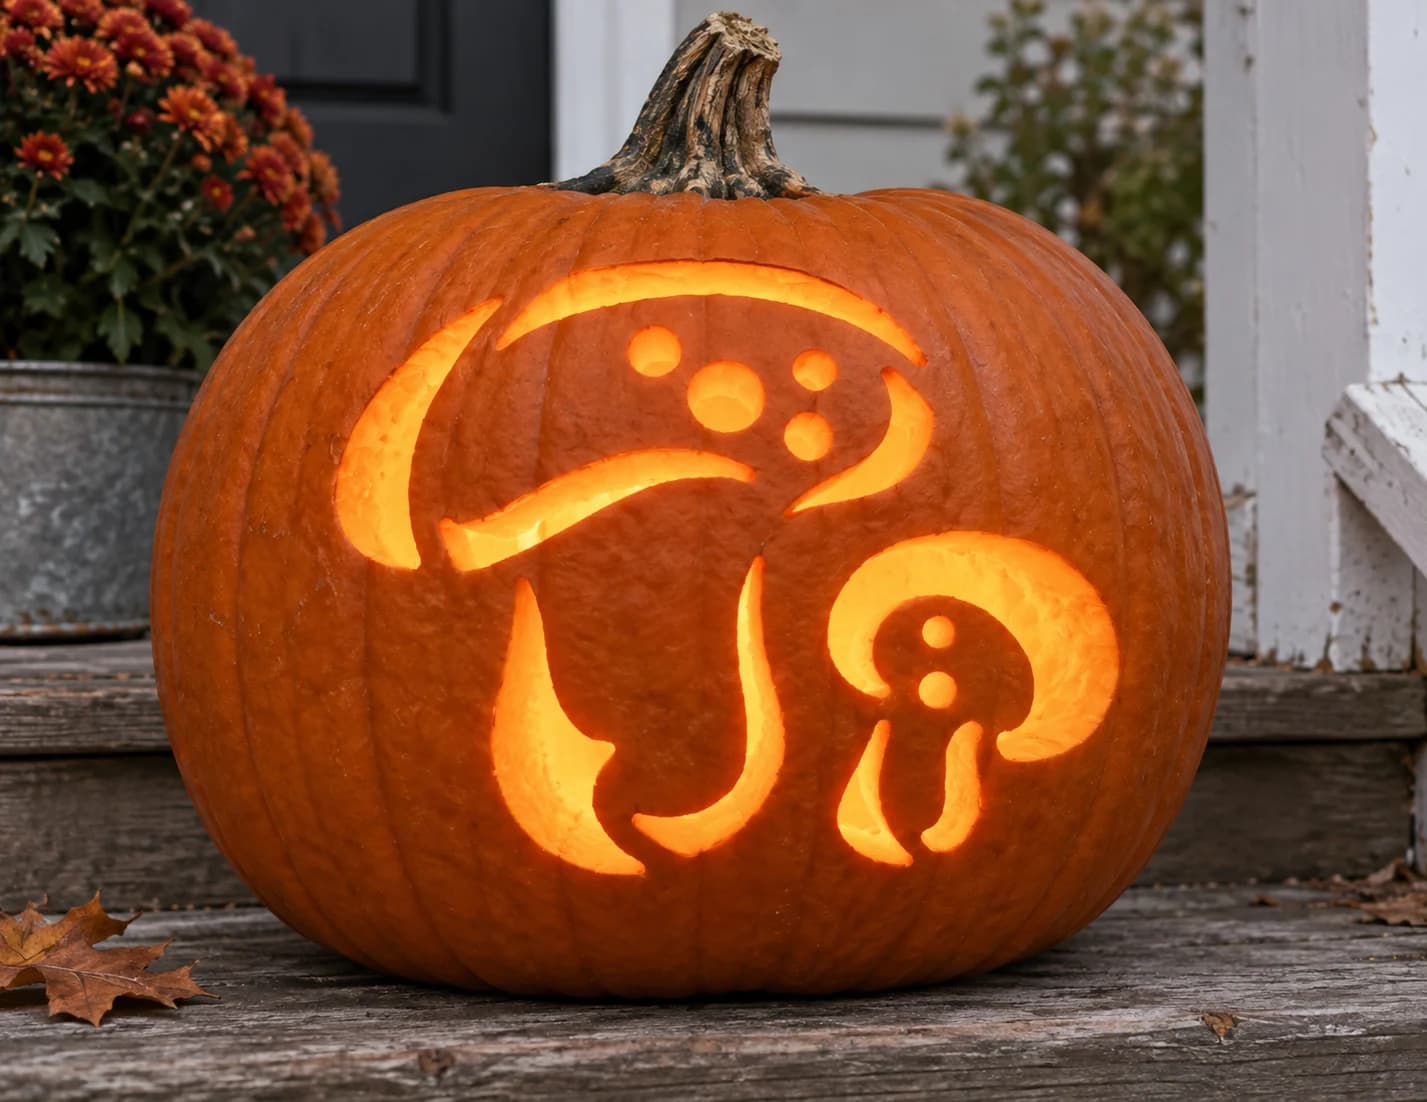
Two Mushrooms Pumpkin Stencil
Two mushrooms fill this easy pumpkin stencil: a large one with a wide rounded cap dotted by three circular spots and two curved gill lines beneath, and a smaller companion mushroom to its right with a dome cap and two dots. Both stems and root tendrils are cut through as open shapes against solid pumpkin wall, giving the lit jack-o-lantern a clean, whimsical forest-floor silhouette. Leave the solid ridgeline that separates the large cap from the gill area intact as a natural bridge, cutting it would cause the gill shapes to fall free.
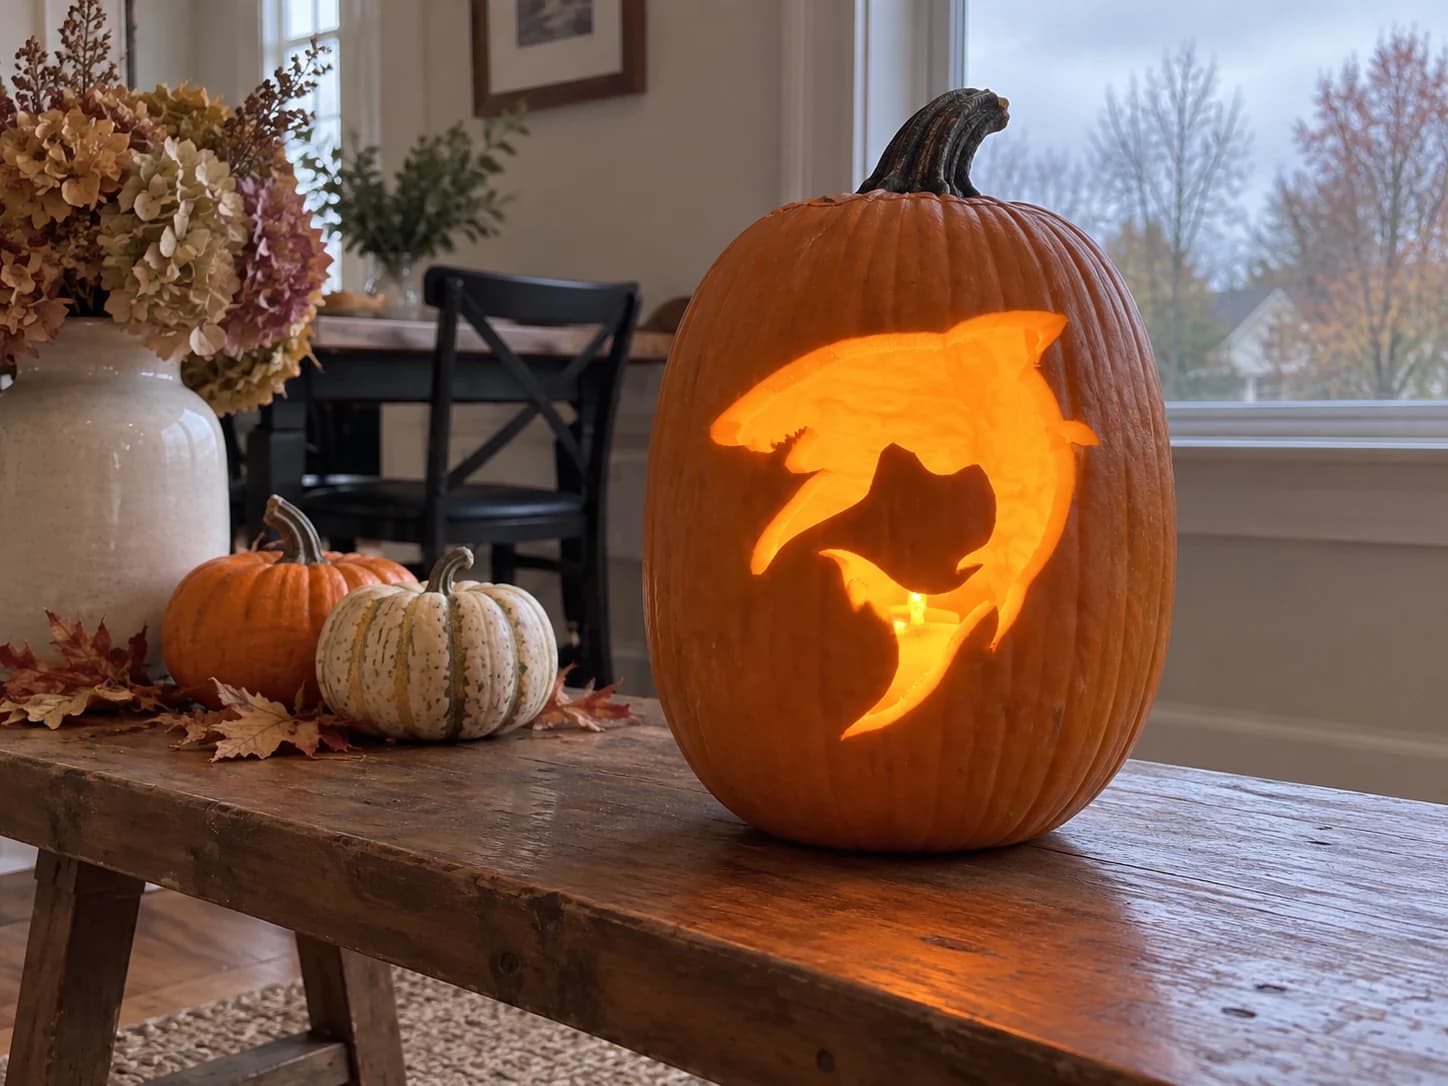
Two Sharks Pumpkin Stencil
Two sharks overlap in a dramatic diving composition for this easy pumpkin stencil: a large shark lunges forward with serrated teeth exposed, and a smaller shark curves below it. The negative space between the two bodies is cut away, leaving the sharks as solid orange pumpkin forms. The jagged row of teeth on the large shark is the most detailed edge in the design. Cut the teeth line with individual short plunge-cuts per tooth point rather than sawing along the jagged edge, which reduces the risk of tearing the tips.
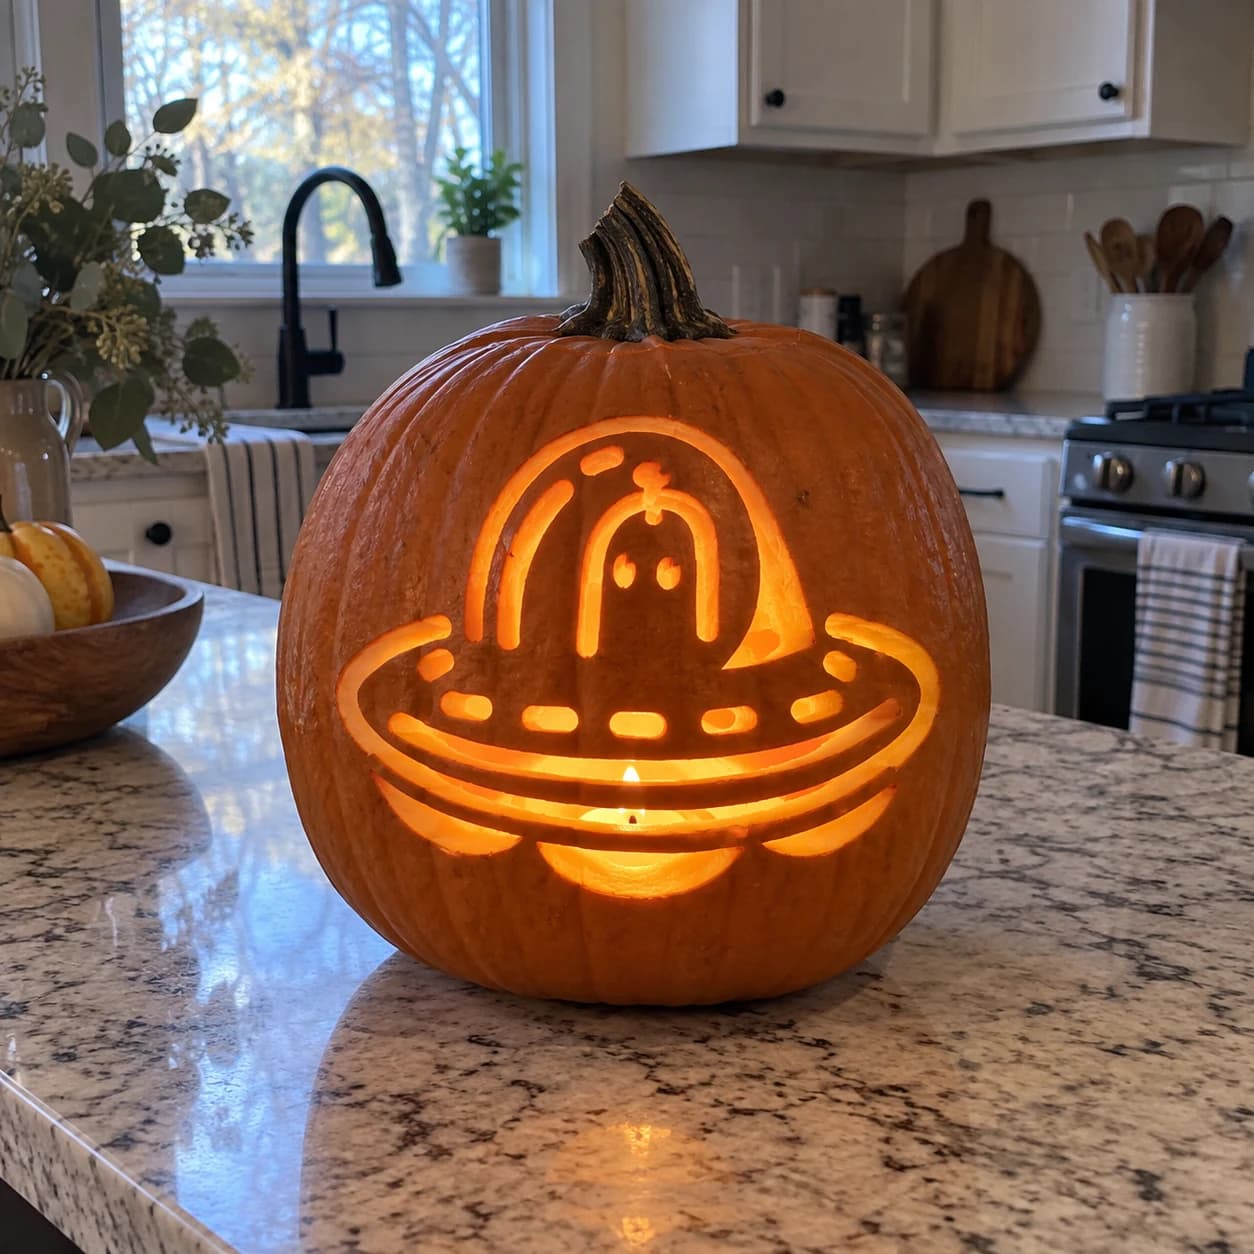
UFO Flying Saucer Pumpkin Stencil
A cartoon flying saucer floats in this hard-difficulty pumpkin stencil, with a domed cockpit at the top showing a simple ghost-like alien face inside. A wide flattened disc body below features a row of oval porthole cutouts around its rim and sweeping curved rings beneath. The alien inside the dome and the porthole ovals are each separate pierced shapes. Cut the dome interior and the alien face details before opening the porthole ovals around the rim, so the dome remains attached and stable while you navigate the narrow disc body.
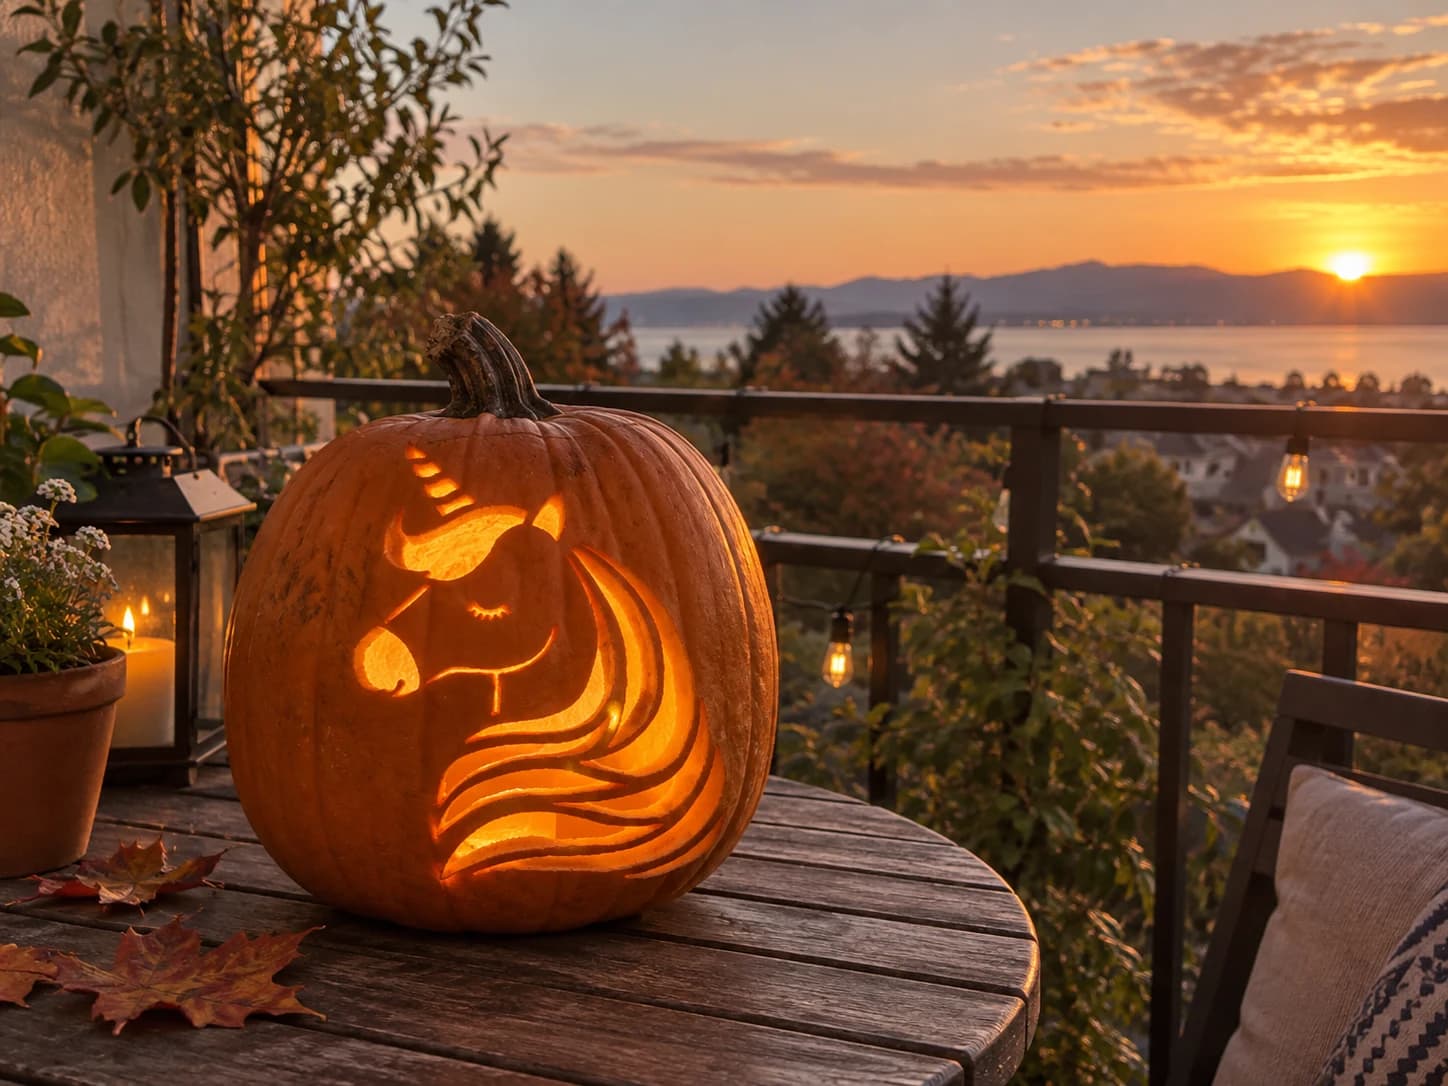
Unicorn Head Pumpkin Stencil
A unicorn head in three-quarter profile faces left with eyes gently closed and long lashes visible, a segmented spiraling horn at the brow, small round nostrils, and a flowing mane of long layered strands cascading to the right on this hard pumpkin stencil. The mane strands are narrow parallel ribbons of solid skin separated by pierced channels. Cut the large open head silhouette first, then carve each mane ribbon from its base at the neck upward so the tapered strand tips are the very last cuts and never lose support.
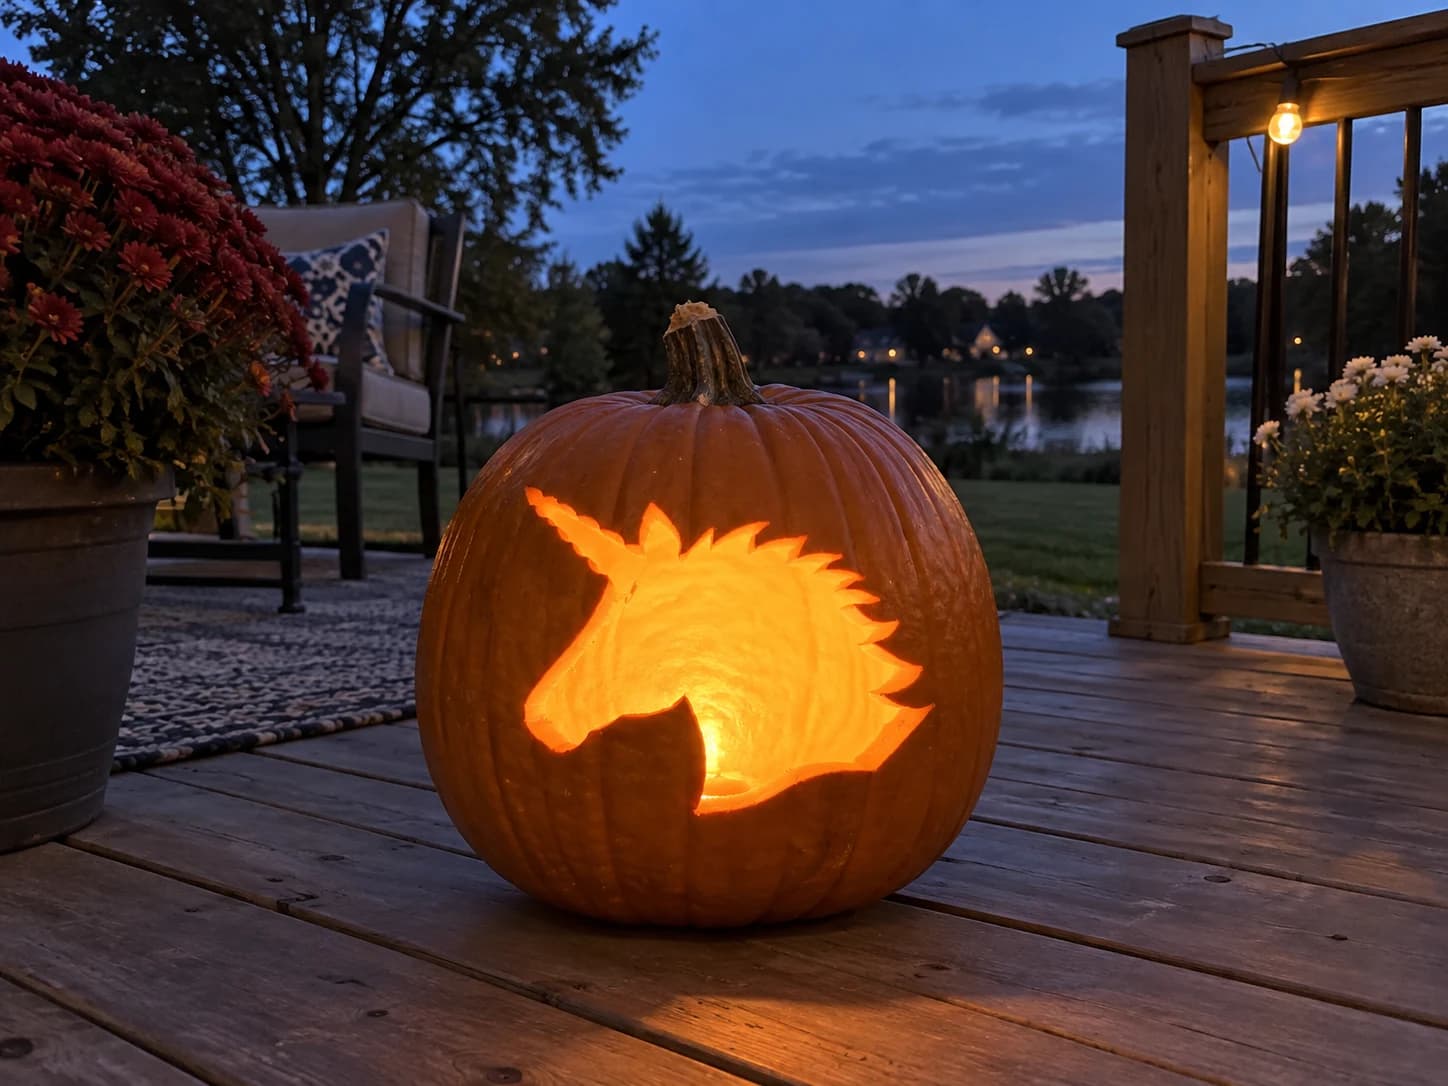
Unicorn Pumpkin Stencil
A unicorn head in profile fills this beginner pumpkin stencil as a single clean silhouette: the long curved horn, a flowing mane with jagged spiky edges along the neck, and a graceful muzzle. The entire design is carved as one connected open shape so the lit jack-o-lantern shows the full unicorn outline glowing as a bright cutout. The jagged mane edge along the top of the neck creates a row of shallow points that can break if the blade wanders. Keep cuts on the mane tips short and angled directly inward toward the center mass to avoid snapping the narrow points.
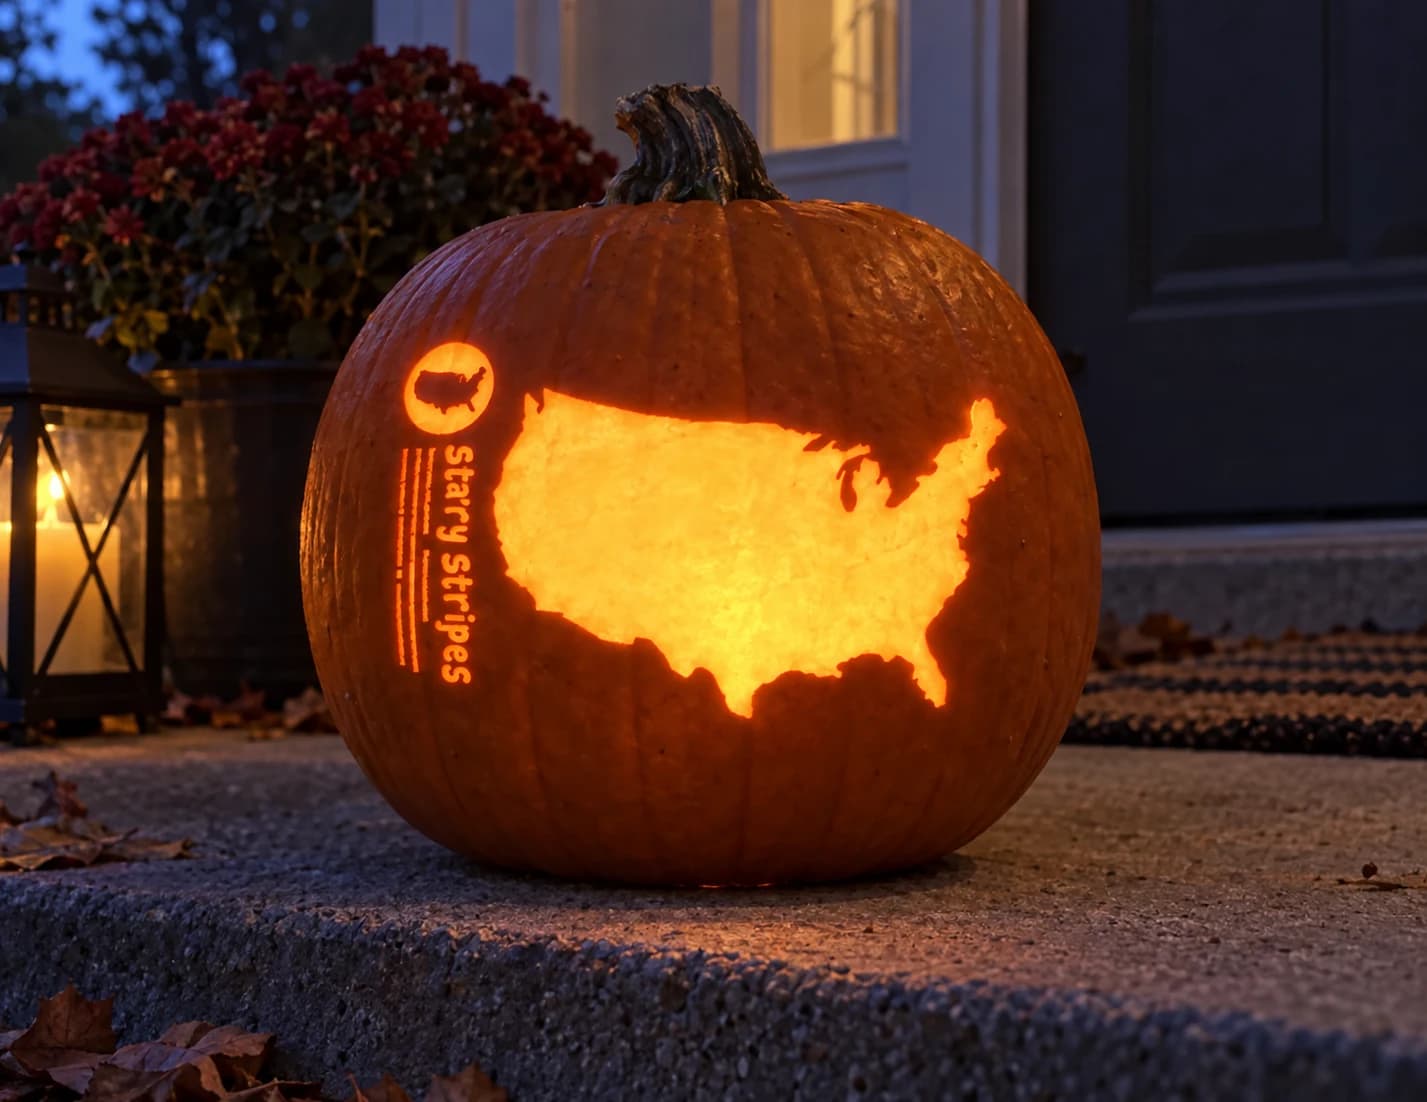
USA Map Pumpkin Stencil
The contiguous silhouette of the contiguous United States is carved as a single open pierce-through in this expert pumpkin stencil. The intricate coastline, Great Lakes inlets, and Florida peninsula are all retained in the cut edge, requiring precise control all the way around the outline. Lit from inside, the pumpkin glows entirely through the mapped shape. Work clockwise around the perimeter without lifting your tool from the cut line, since re-entering the groove at a sharp angle like the Gulf Coast bays is the most common place where the wall cracks.
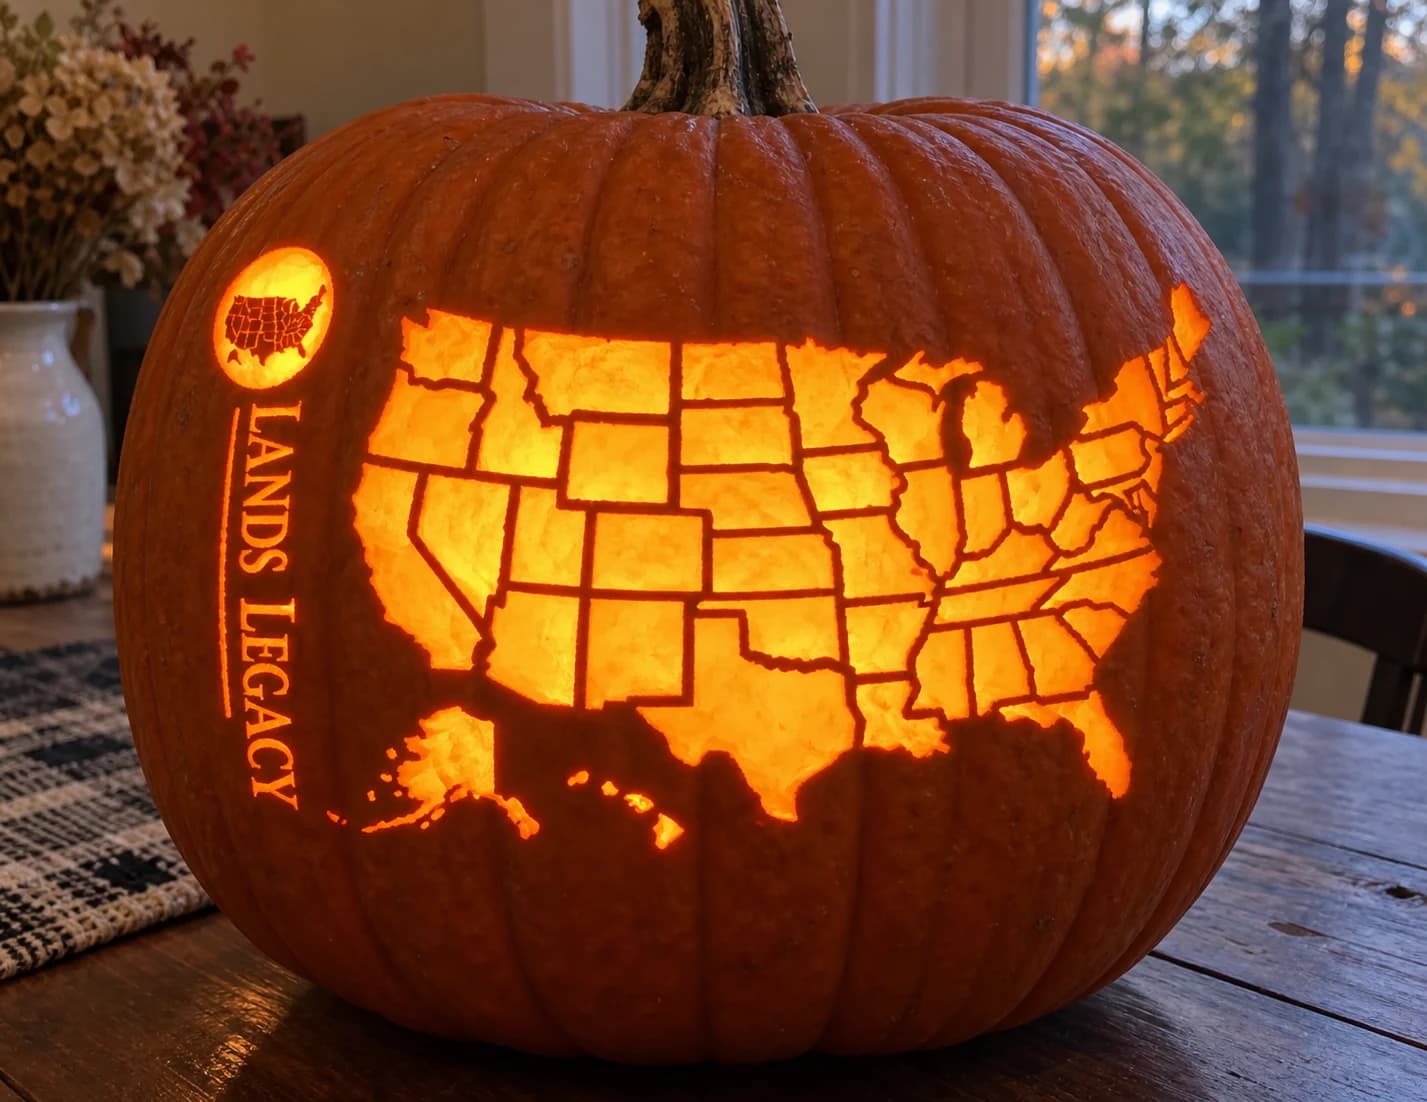
USA Map Pumpkin Stencil
The contiguous United States is carved as a single large pierced shape, with the internal state borders rendered as narrow solid ridges that remain after cutting away all the negative space inside each state. Alaska and Hawaii appear as separate inset shapes below the main landmass. When lit, each state glows individually, separated by hairline orange lines. The narrow state borders in the Northeast are the most fragile: carve those tiny states before removing the surrounding pumpkin wall so you have maximum support.
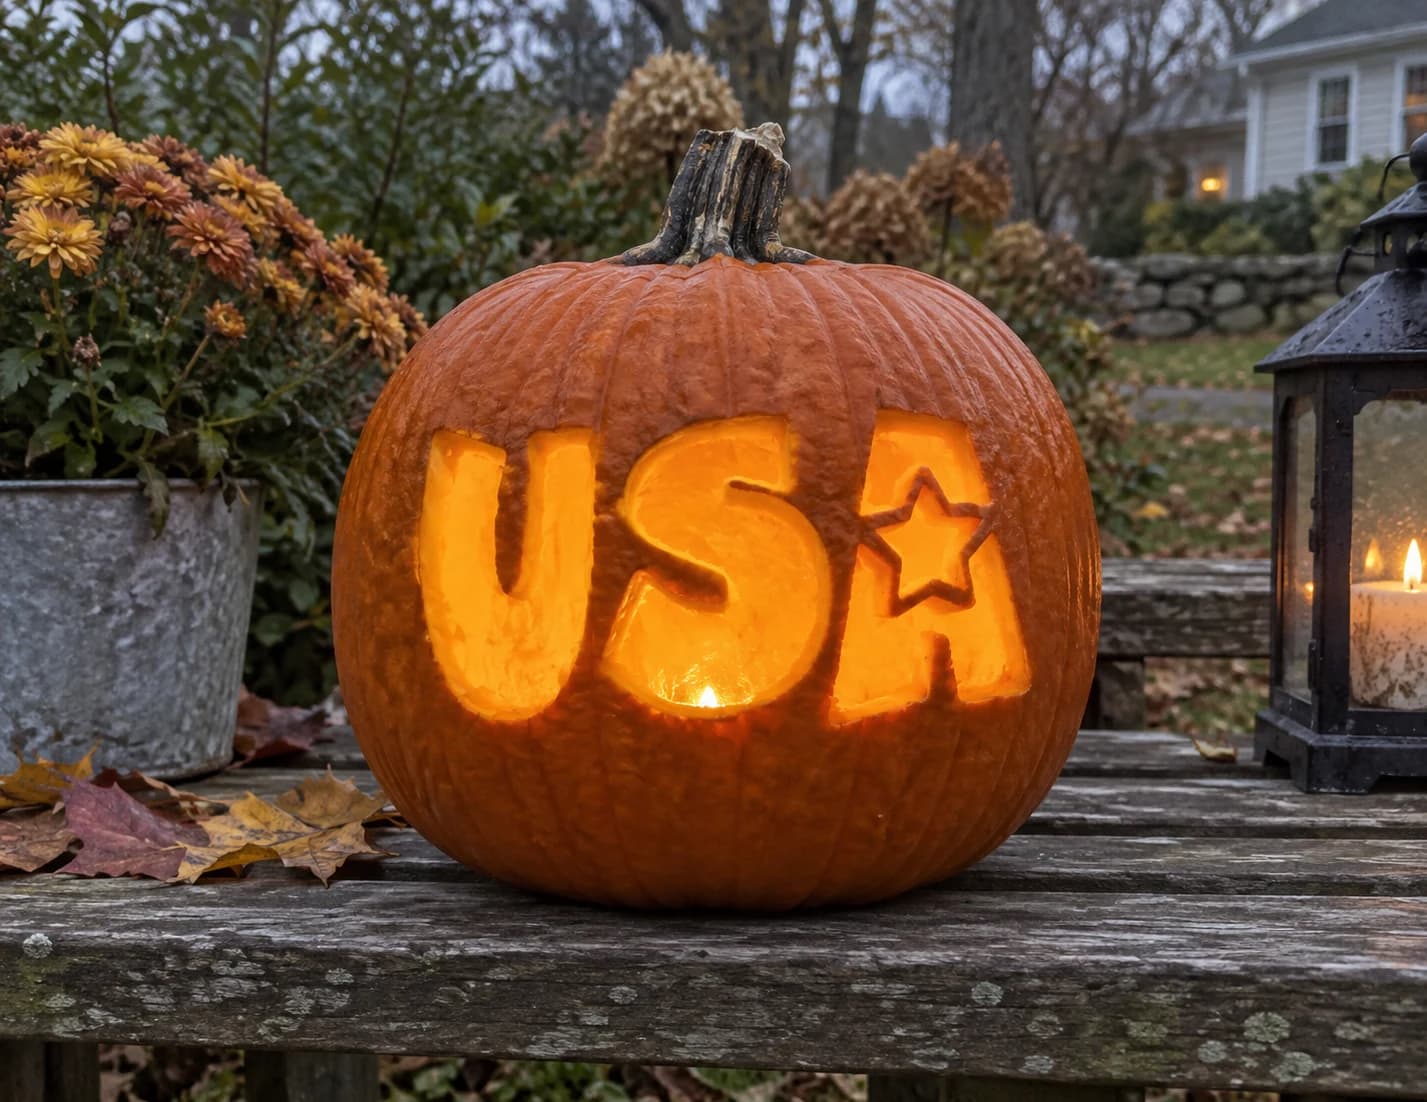
USA Text Pumpkin Stencil
Bold block letters spelling "USA" are carved as open pierce-throughs in this easy pumpkin stencil, with a five-pointed star replacing the crossbar of the letter A. The rounded, wide letters are generously sized and leave thick orange walls between them. On the lit pumpkin the three letters glow brightly and the star cutout inside the A shines as a distinct shape. Score the star outline inside the A before cutting the surrounding letter body, since the star's tight inner points are easiest to navigate when the pumpkin wall around them is still rigid.
Vampire Fangs Pumpkin Stencil
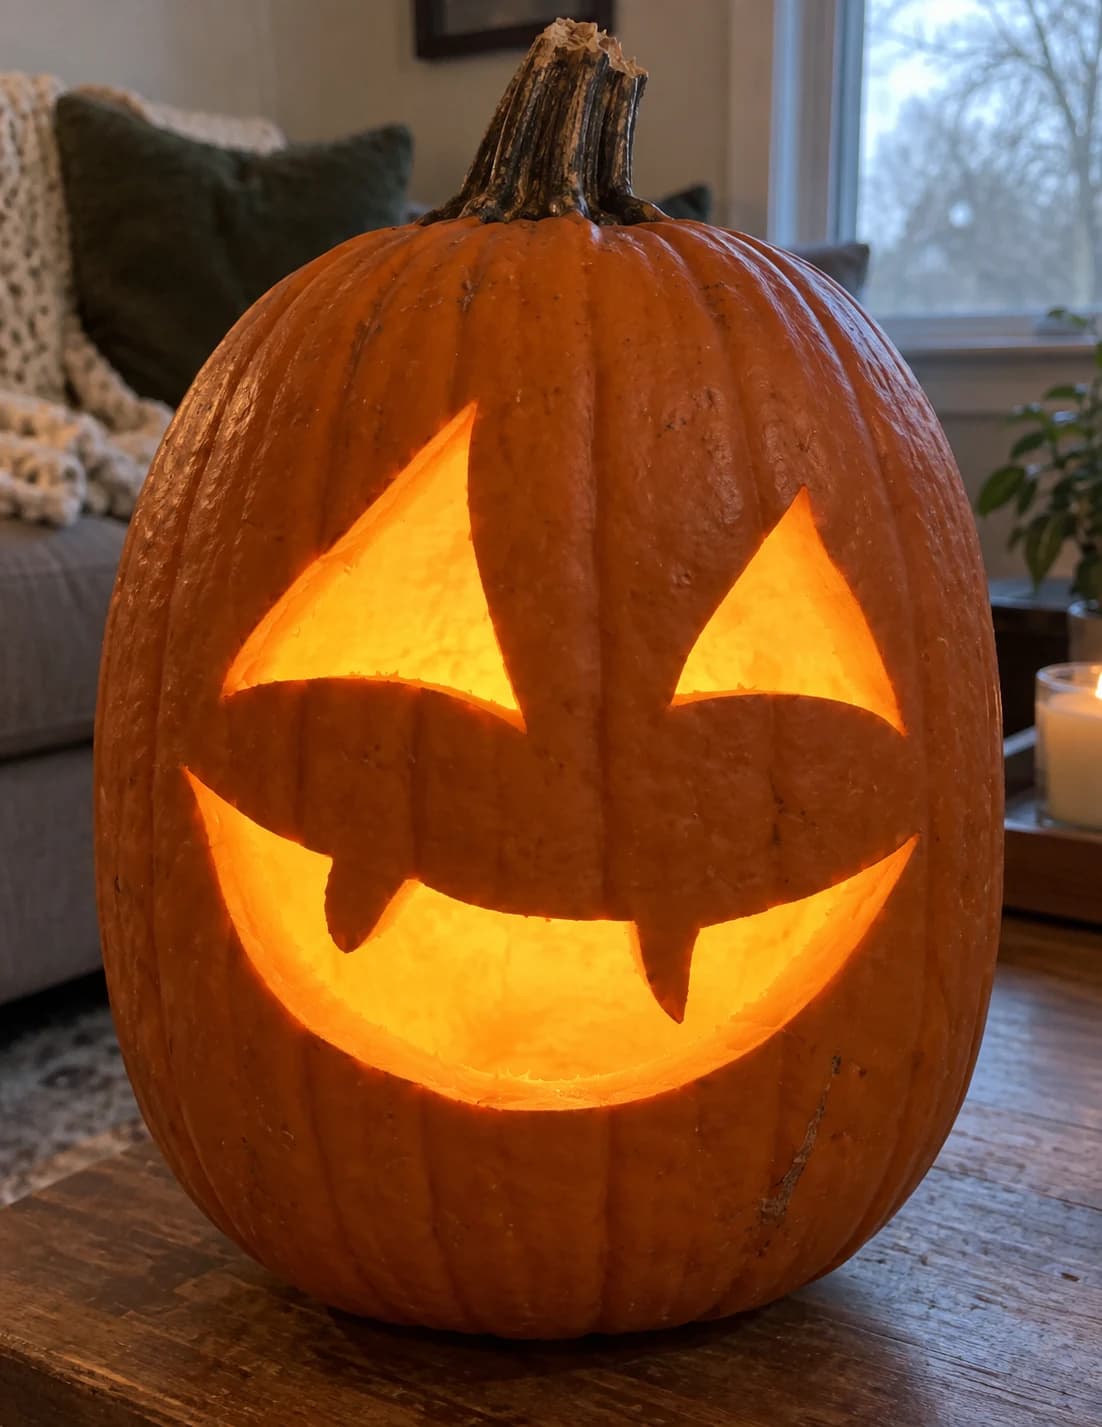
Three simple shapes make up this easy vampire pumpkin stencil: two large angular eye cuts that taper to sharp inner corners and a wide crescent grin with two pointed fangs hanging from the upper lip. The design is spare and confident, leaving most of the pumpkin surface solid, so the three glowing openings read as a sinister smirk from a distance. When lit, the fang tips glow brightest; cut the fangs from the inside of the mouth outward so your blade exits the shell cleanly without cracking the narrow points.
Velociraptor Pumpkin Stencil
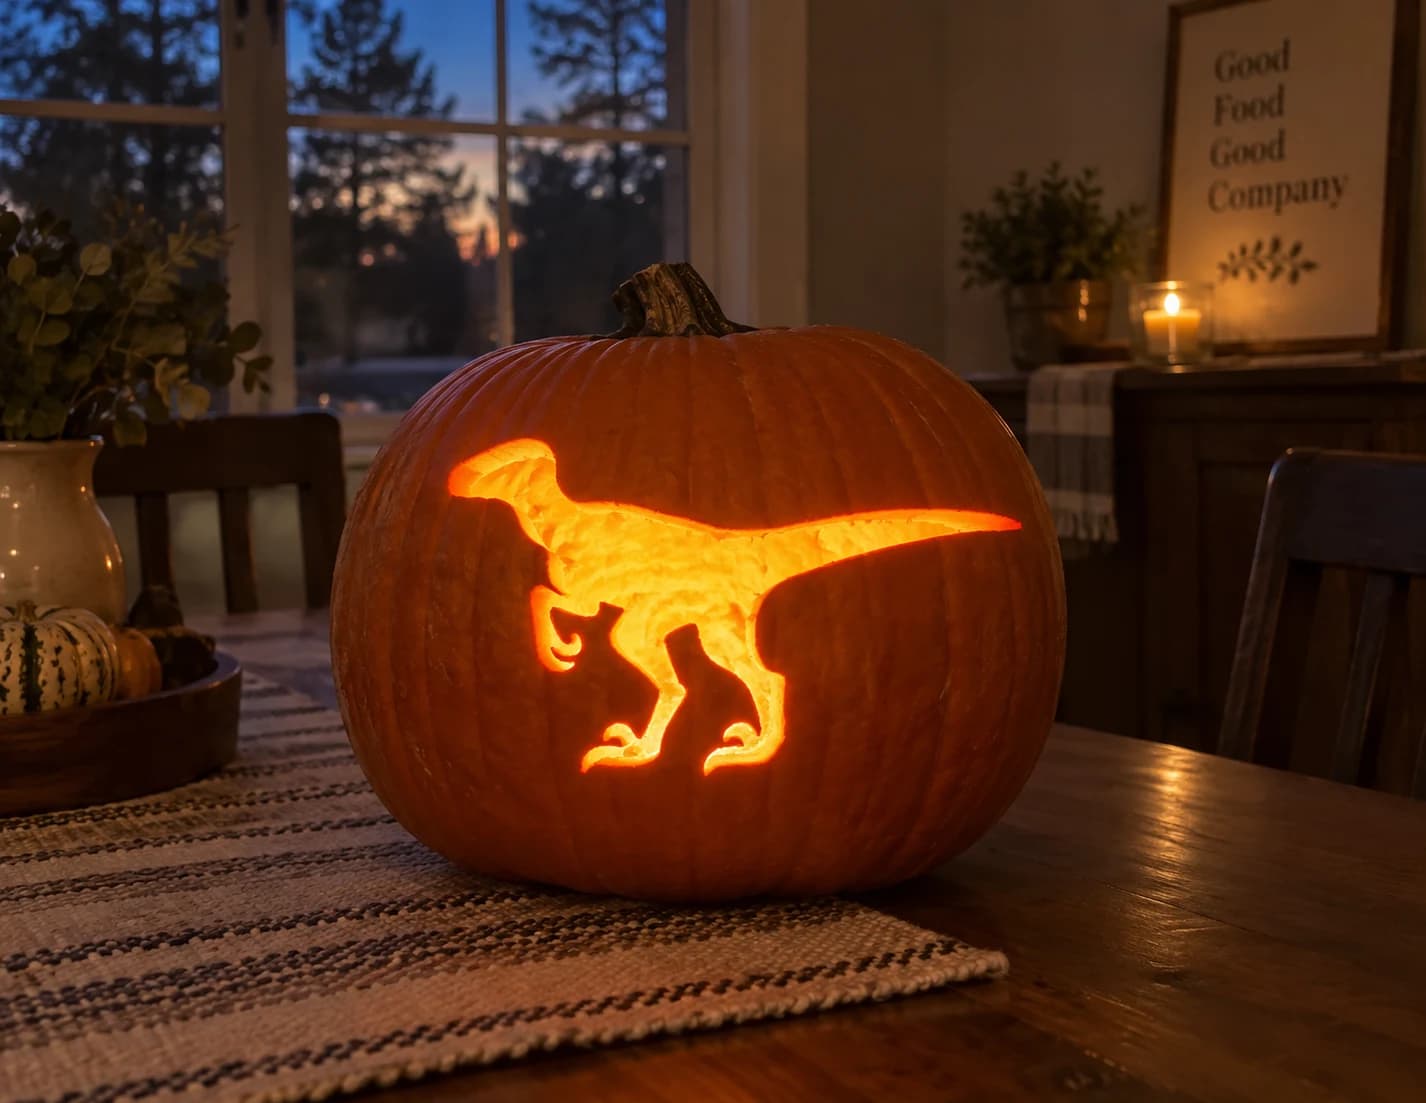
A velociraptor in full stride dominates this easy pumpkin stencil, shown in profile with its distinctive upright neck, narrow head, small forelimbs, and long stiffened tail extended behind it. The entire dinosaur silhouette is cut as a single open shape, and a small inner detail near the chest is removed separately to show the bent arm. Lit from behind, it reads instantly as a raptor shadow against the glowing pumpkin. Trace the tail outline before cutting because the long thin tail tip can run outside the pumpkin's curve if not centered.
Will You Marry Me Pumpkin Stencil
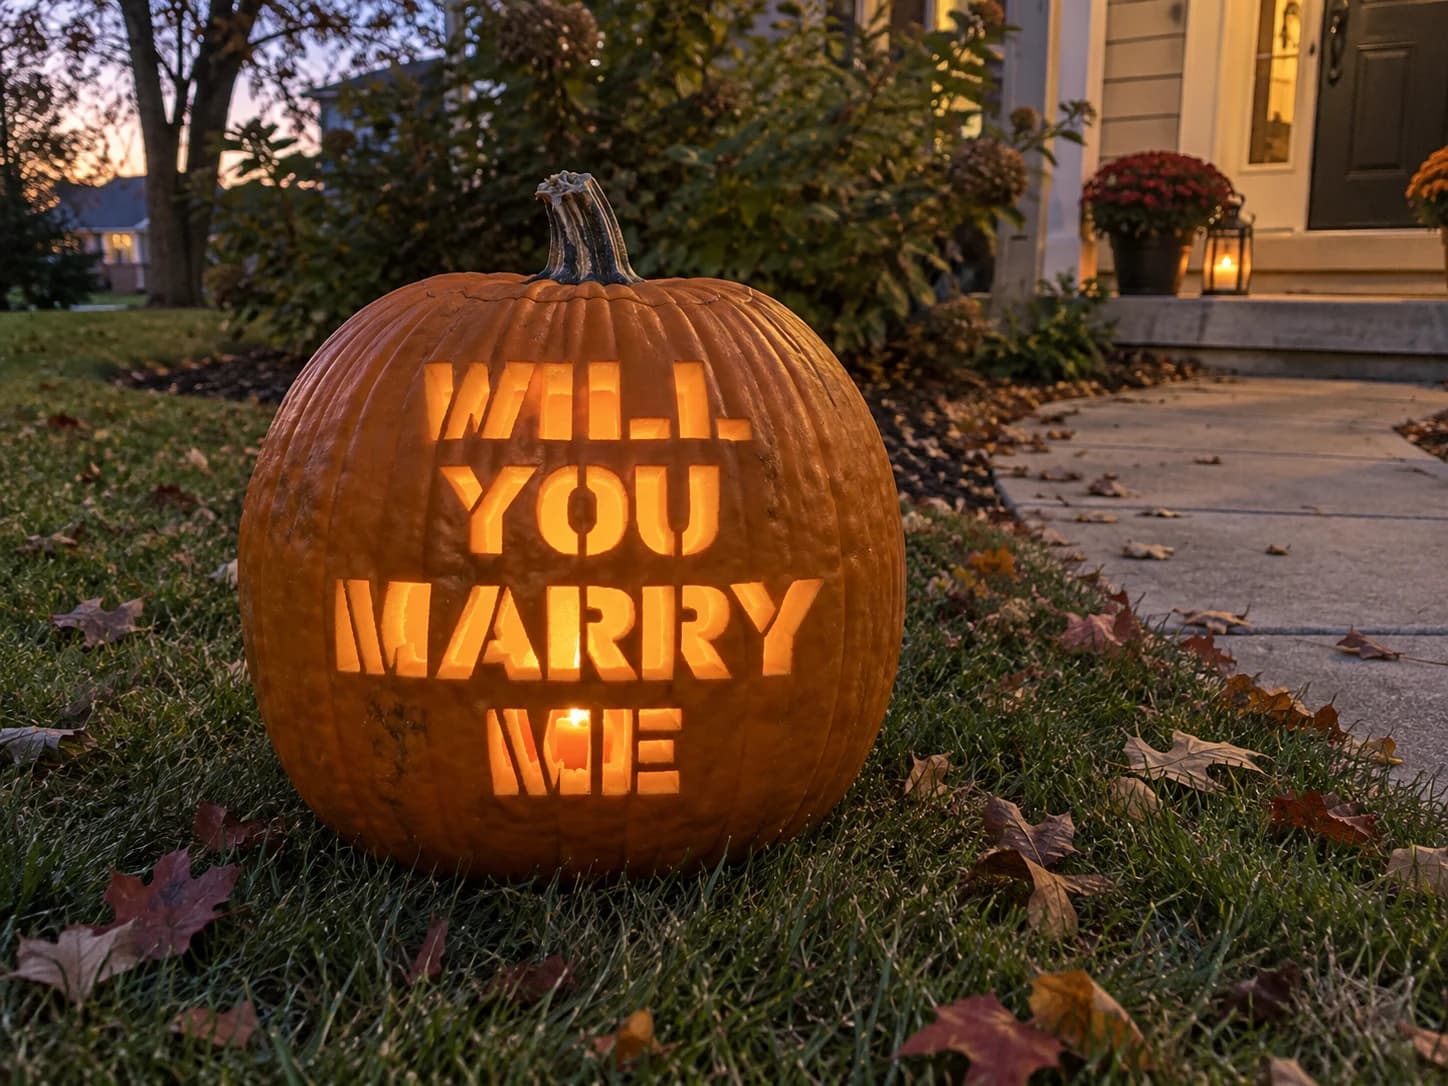
The words "WILL YOU MARRY ME" are stacked in four lines of large bold block letters that fill the entire pumpkin face on this hard pumpkin stencil. Each letter is a solid-bordered cutout with counter shapes, and letters with enclosed loops such as the O and D require internal bridges to retain the center islands. Cut the counters inside closed letters first before removing the outer letter bodies, so the island pieces stay seated in place and do not drop into the pumpkin during carving.
Witch on Moon Pumpkin Stencil
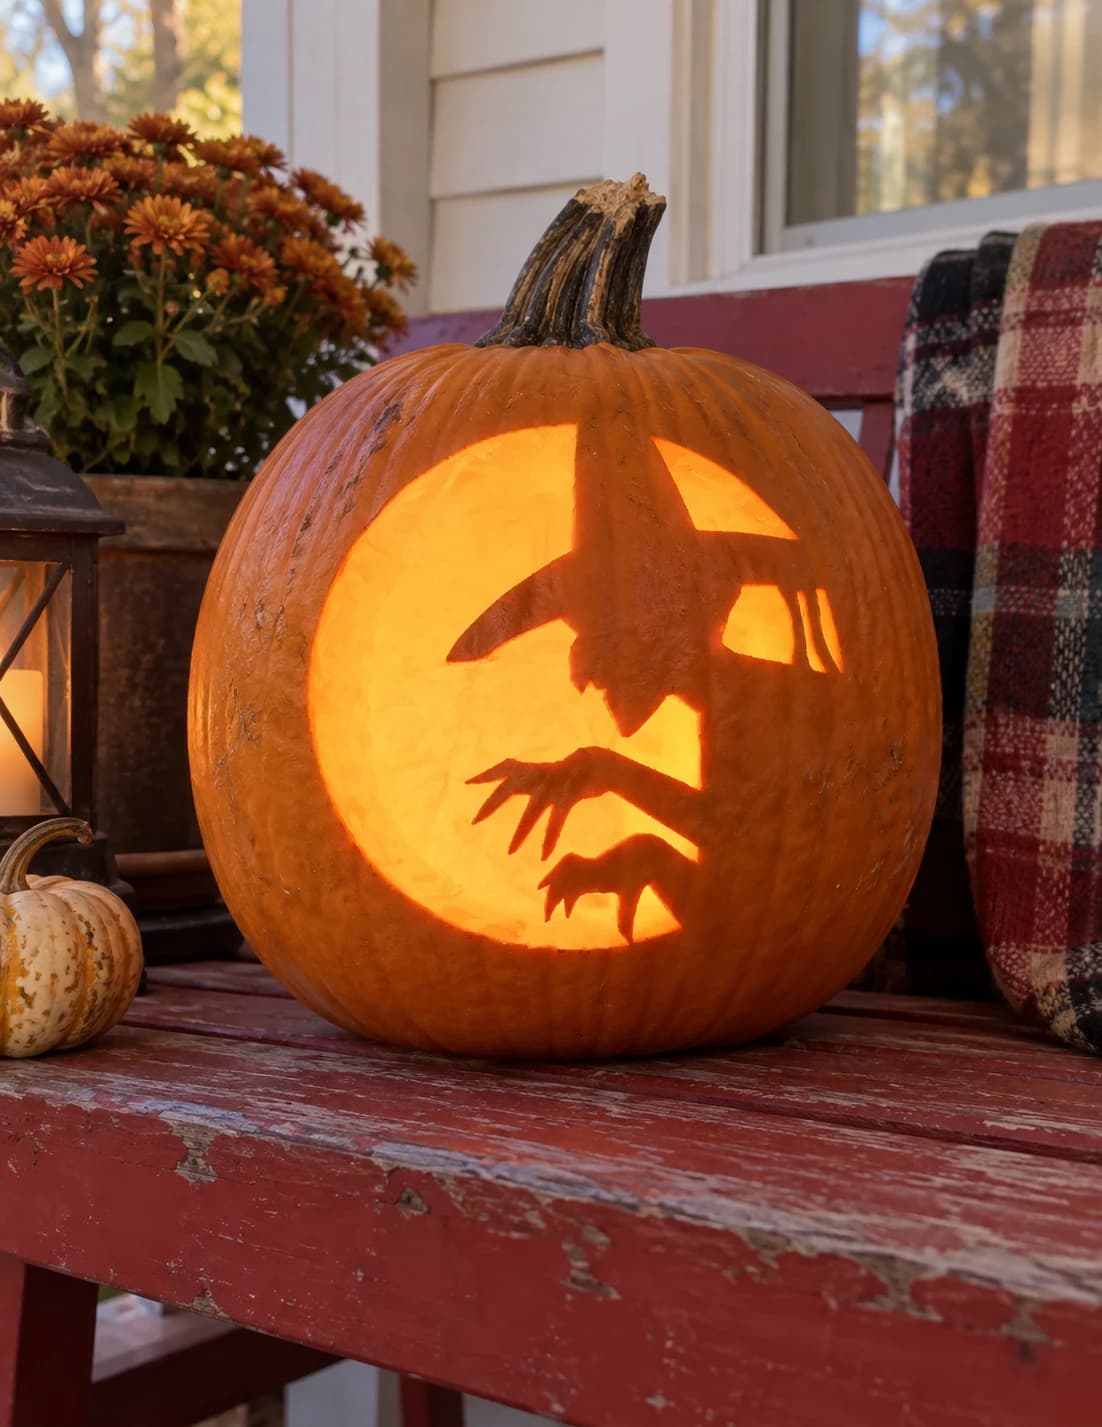
A large crescent moon shape is carved away to create a sweeping dark arc on this easy Halloween pumpkin stencil, and within that negative space a witch's profile appears in silhouette: a pointed hat, hooked nose, and grasping claw-like fingers reaching downward. A cluster of three small rectangular slots and a jagged hat-brim notch provide the only additional cut elements. The cropped hat top is a floating island; secure it with a toothpick before you make the final crescent arc cut so it doesn't drop and crack the brim.