Halloween Pumpkin Carving Contest · Starts October 1st · $500 in prizes
← Back to ideas
@ai_concepts
Aug 12, 2026
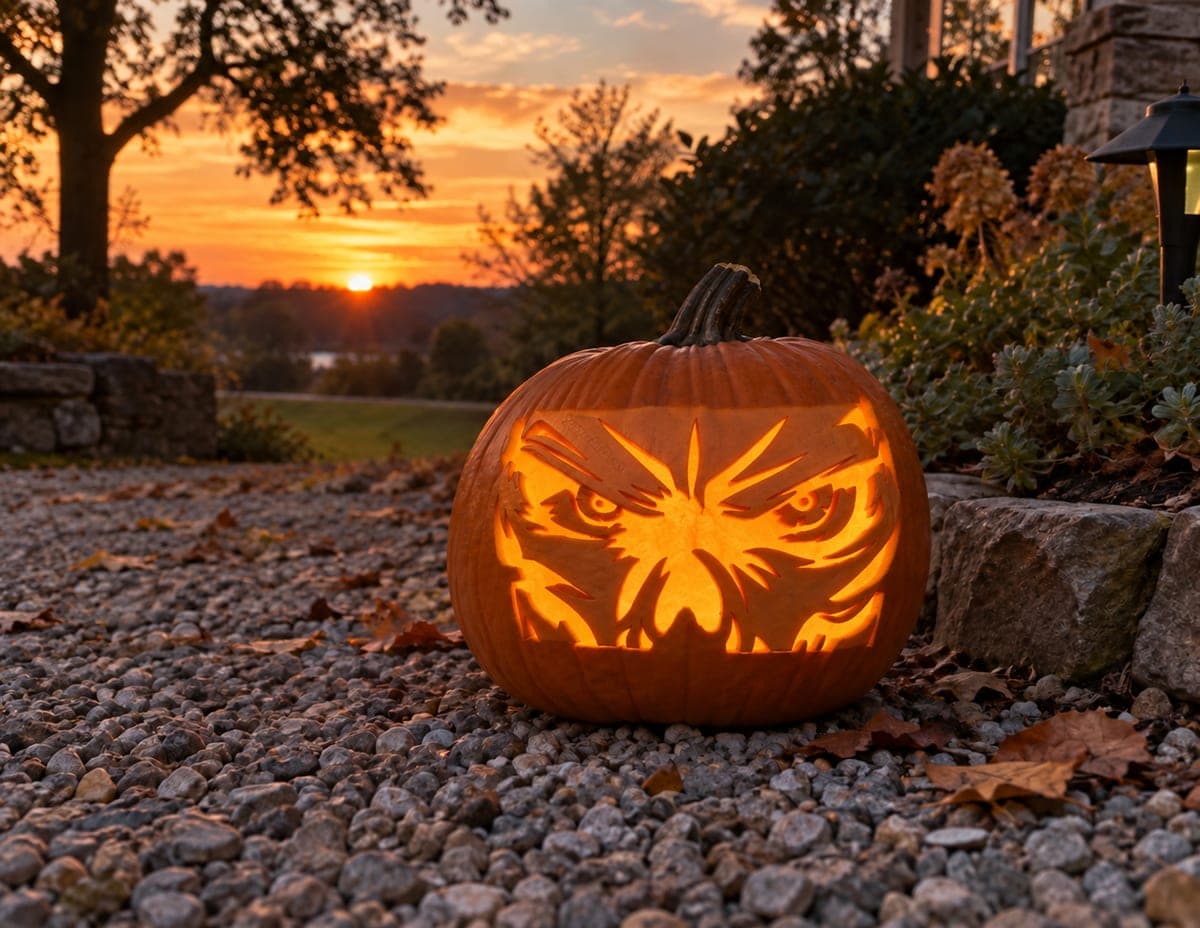
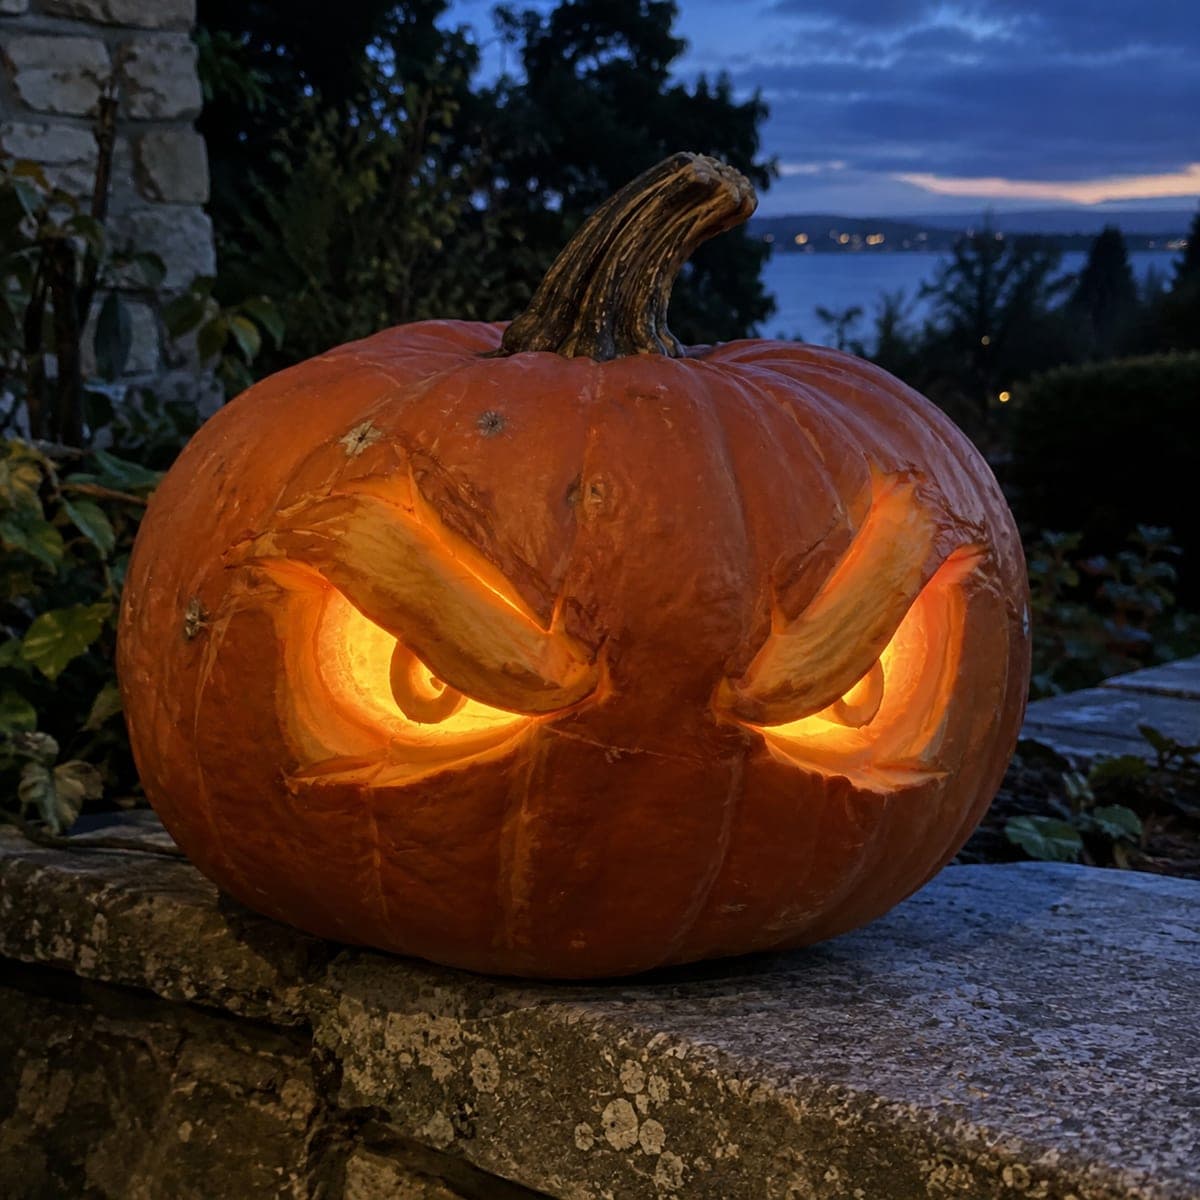
Angry Glowing Eyes Minimalist Pumpkin CarvingAI
0

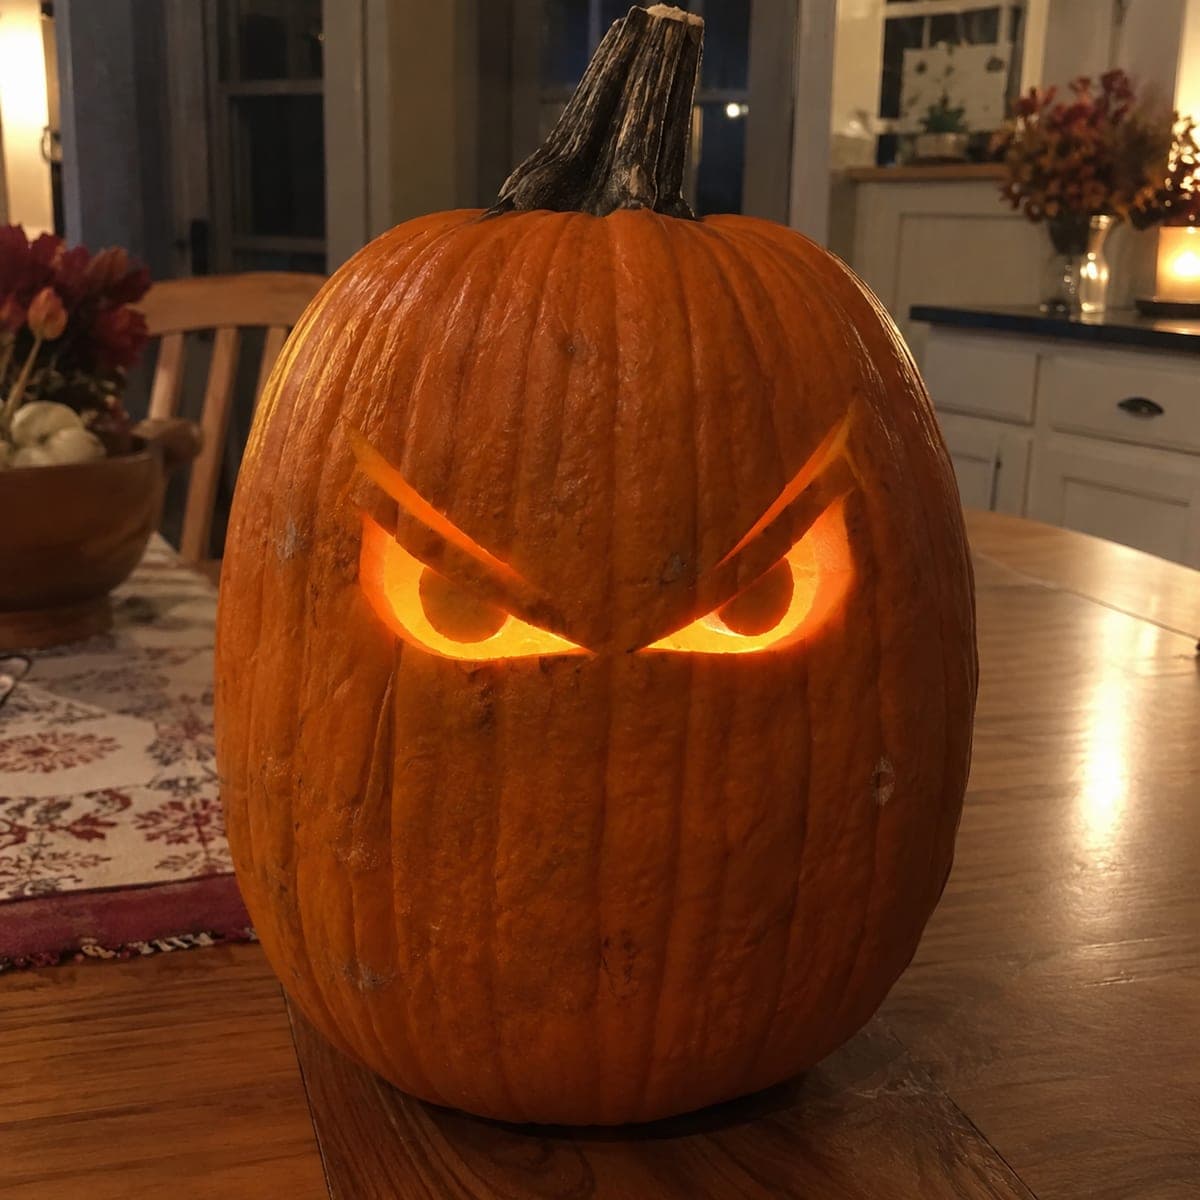
Angry Glowing Eyes Minimalist Pumpkin Carving

Two furious slanted eyes are the entire design on this minimalist pumpkin carving, and the restraint is what makes it menacing. It takes maybe fifteen minutes, two angled cuts for the brows and two rounded ones beneath, ideal for a last-minute Halloween pumpkin. Angle your knife inward so the pupils stay attached as ledges inside each eye. A flickering candle makes the glare seem to move.

This is an AI-generated concept image: a realistic, carvable design idea rather than a photo of a finished carve. AI concepts are always labeled and sit out the leaderboard and the contest.

No ratings yet · Sign in to rate
Comments (0)

  • No comments yet — be the first.

Save without an account. Sign in to like or comment.

Our tips for carving a similar design

The whole trick here is restraint: two angled brow cuts over two rounded lower cuts read instantly as a furious glare, so the empty pumpkin does the scaring for you. The one detail that lifts it above a plain pair of holes is leaving a small pupil ledge inside each eye by angling your blade inward. Plan the eyes first, cut the light openings last, and let a warm LED do the rest.

Written by PumpkinCarvingIdeas.com, inspired by the image above. These are our suggestions, not instructions from the uploader. This approach to the AI concept has not been tested on a real pumpkin.

From pumpkin to porch

  1. Prep the pumpkin and open the back

    Pick a tall, smooth pumpkin with a flat-ish front face for the eyes. Instead of cutting the lid, make a round access hole in the back so the front stays clean and strong. Scoop the insides and scrape the front wall down to about one inch thick where the eyes will go. A thinner wall makes cutting cleaner and lets the glow read better.

  2. Mark the two eyes

    With a washable marker, draw two eyes that tilt down toward the center of the face to create the angry look. Each eye is a slanted brow line on top and a rounded curve underneath, wider at the outer edge. Leave a clear gap between the two eyes so the bridge of skin stays solid. Step back and check the symmetry before you cut anything.

  3. Score the outlines

    Trace over your marker lines with a poke tool or the tip of a carving saw, keeping the cut shallow at first. This gives you a guide groove so your knife does not wander on the ridged surface. Take your time across any vertical ribs, since the blade wants to slide in the grooves. Redraw a line if a cut starts drifting.

  4. Cut the eyes and shape the pupils

    An adult should handle the blade. Cut fully through the brow slits and the rounded lower shapes, working slowly and pulling waste pieces out gently. To make each pupil, angle the knife inward as you finish the lower curve so a small rounded ledge of shell stays attached rather than falling out. That ledge blocks part of the light and reads as a dark pupil floating in the glow.

  5. Clean edges and test the light

    Trim any ragged inner edges with a paring knife so the openings look crisp. Set a battery LED inside, not a candle, since the thin wall and inner ledges can scorch. Point the light up toward the eyes and check that the pupils cast a shadow. Widen the openings slightly if the glare looks too dim.

  6. Stage and photograph

    Place the pumpkin on a dark surface indoors or on a porch away from wind. A slightly flickering LED makes the glare seem to shift and come alive. Shoot in near darkness so the two eyes are the only bright shapes. Wipe the front clean of marker before the final photo.

Gather your supplies

Check things off as you get ready.

Work on a stable surface, keep your free hand out of the cutting path, and have an adult handle sharp tools.

Three levels of light

  • Leave intact

    The entire outer face and the ribs stay untouched and dark, which is what makes the eyes pop.

  • Peel & shade

    Optional: lightly shave a thin halo of skin just around each eye for a soft orange bloom that frames the glare.

  • Cut through

    The two brow slits and rounded lower shapes cut fully through for the brightest light, with the attached pupil ledges holding back a dark center.

Learn the carving basics

Before you start cutting

How do I keep the pupils from falling out?

Do not cut them as separate free-floating pieces. Instead, angle your blade inward while finishing the lower curve so a small rounded shelf of shell stays connected to the inside wall. That ledge stays attached and blocks light to form the dark pupil.

Should I use a candle since the look depends on flicker?

Use a flickering LED, not a flame. The front wall is thin and the inner pupil ledges sit close to the light, so a real candle risks scorching and uneven heat. Many LEDs have a built-in flicker mode that gives the same moving glare safely.

My pumpkin has deep vertical ribs across the face. Will that ruin the eyes?

It can pull your knife off line, so score the outlines shallowly first and cut slowly across each rib. Choosing the smoothest side for the face helps a lot. A little surface waviness actually adds to the menacing look, so do not worry about perfection.

Your take belongs here, too.

Changed a detail? Made it simpler? Share a photo of your version and tell the community what worked.

Share your pumpkin

More pumpkins like this

You've reached the end · 8 pumpkins
The Patch Report

Fresh pumpkins, in your inbox.

The best new carvings, ideas worth stealing, and how-tos for carving season. Short, seasonal, and gone by November.

A short email during carving season. Unsubscribe anytime. See our privacy policy.