Halloween Pumpkin Carving Contest · Starts October 1st · $500 in prizes
← Back to ideas
@ai_concepts
Sep 8, 2026
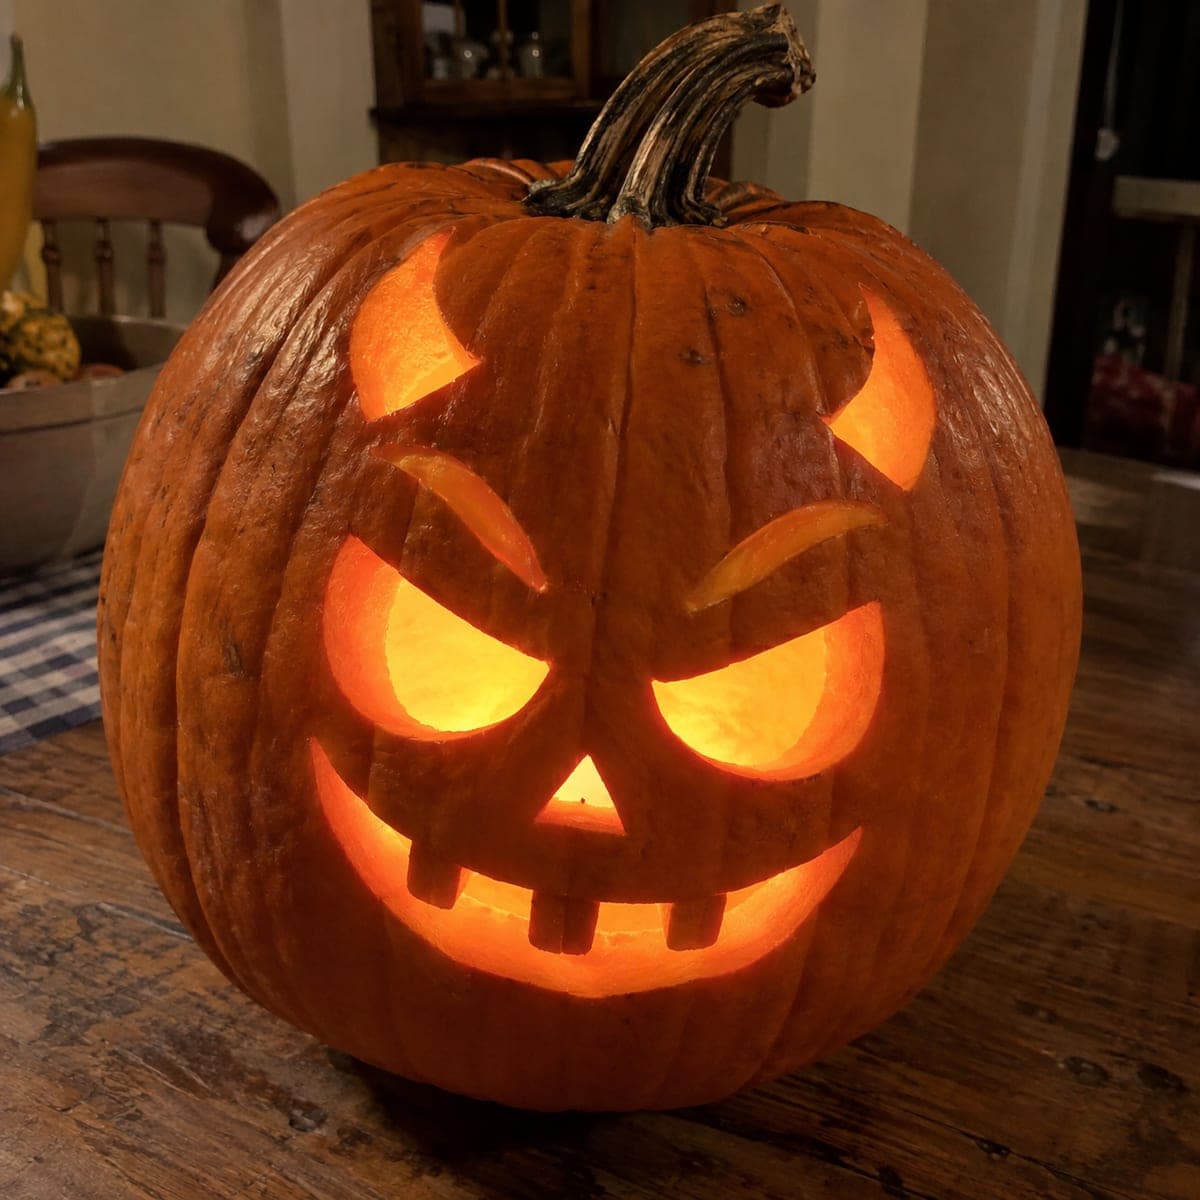
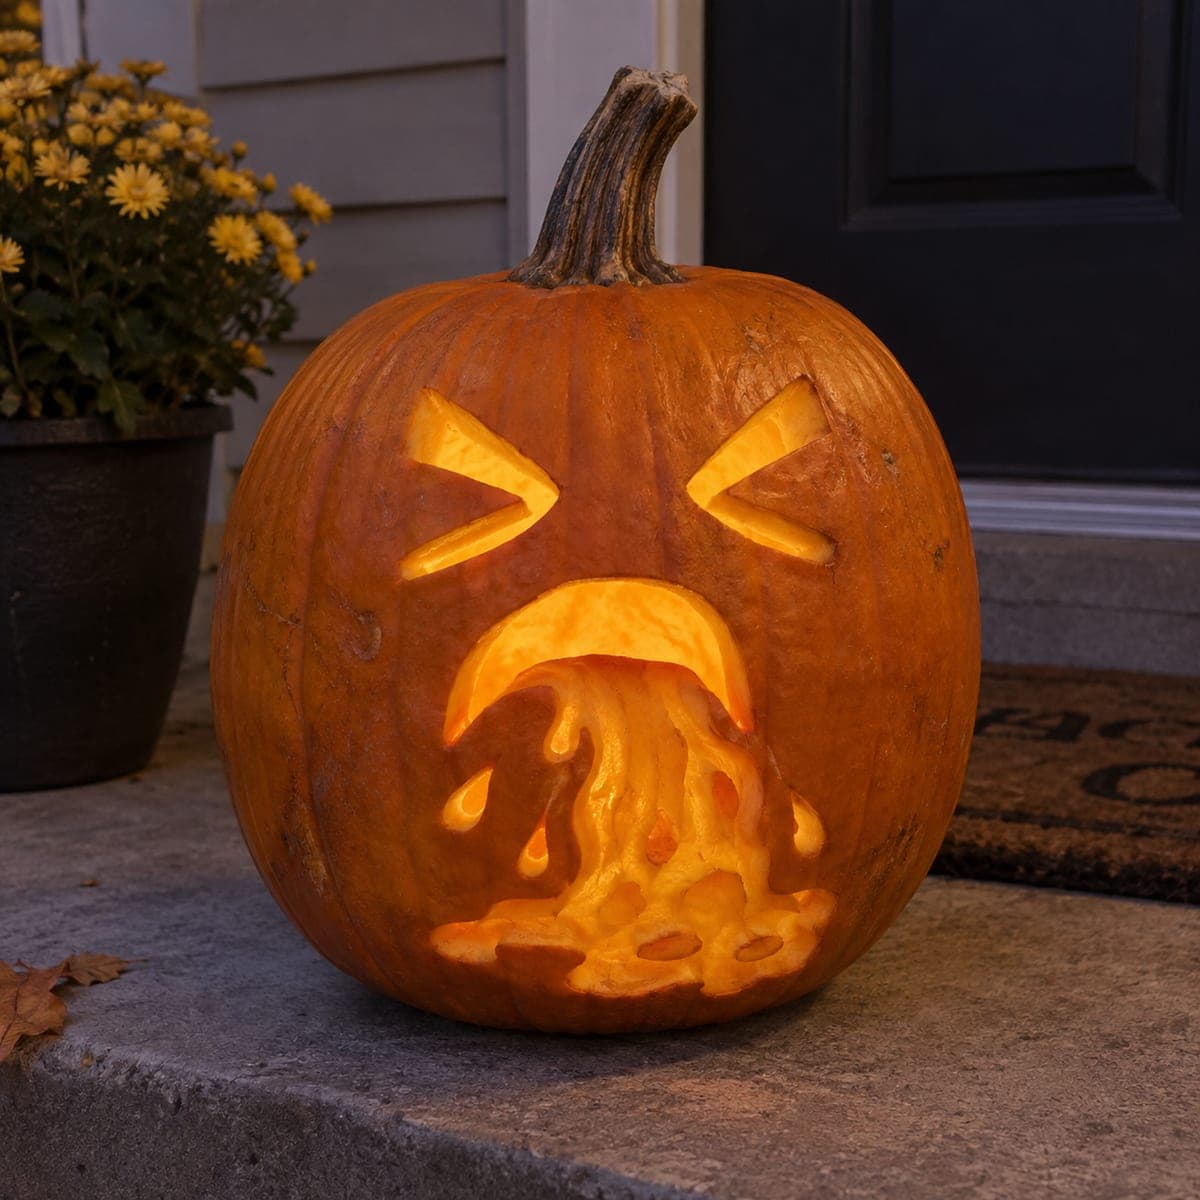
Menacing Snarling Jack-O-Lantern with Jagged TeethAI
0

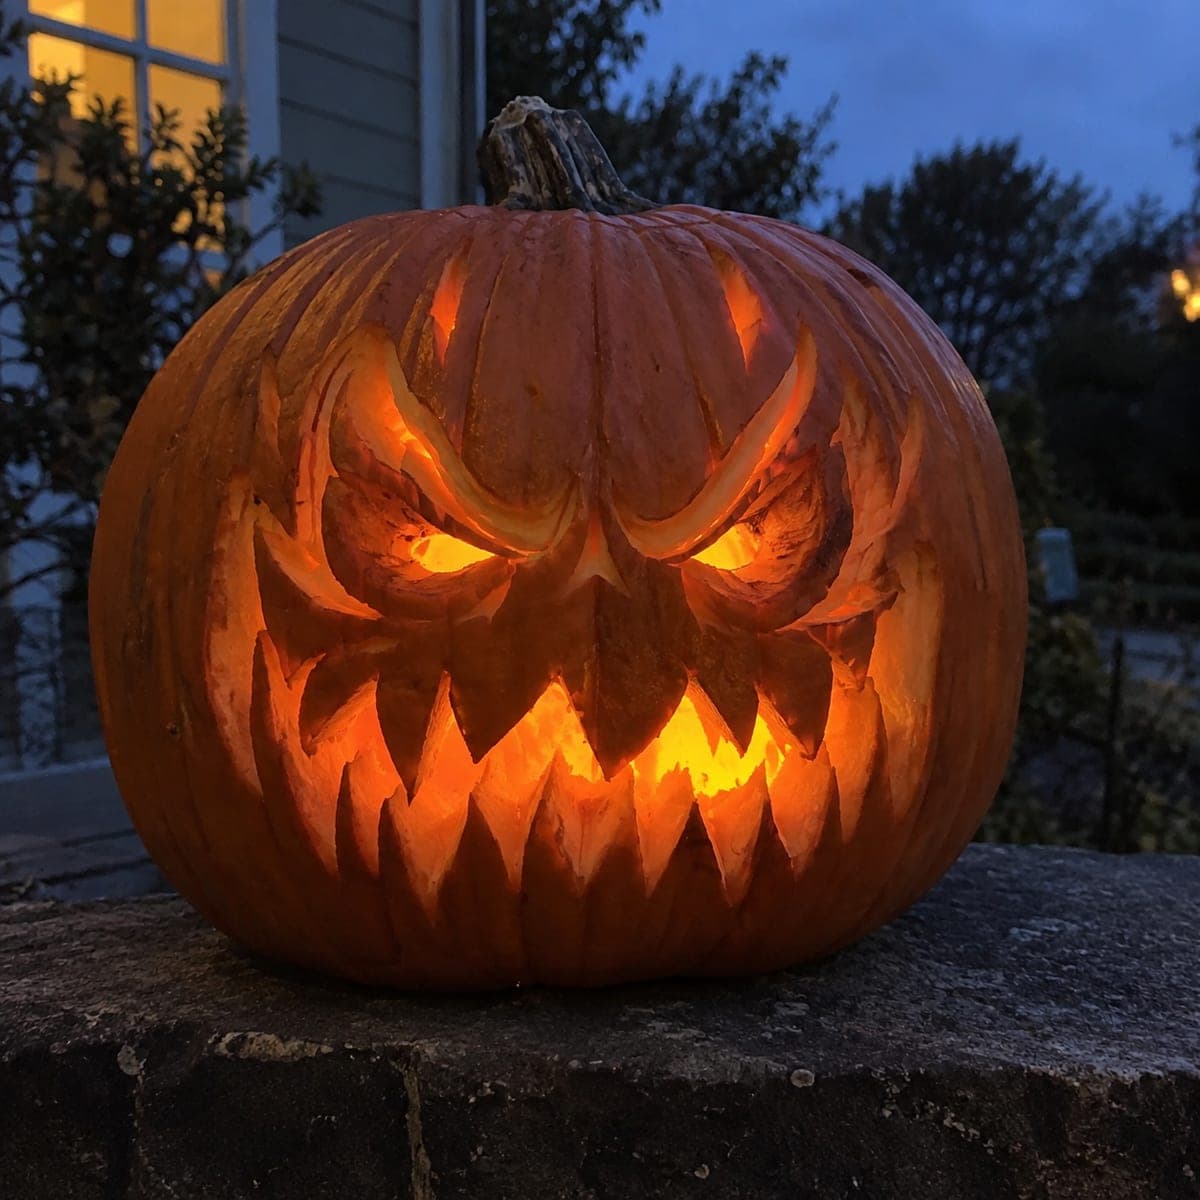
Menacing Snarling Jack-O-Lantern with Jagged Teeth

Deeply furrowed brow cuts and a wide jaw packed with sharp, irregular teeth give this Jack-O-Lantern a genuinely threatening snarl. The angular eyes are notched at the inner corners to suggest a scowl, a small detail that changes the whole read of the face. Carve the teeth individually, varying their height, so the mouth looks chaotic rather than uniform. Placing this pumpkin carving idea at eye level on a wall or ledge maximizes the intimidating effect for trick-or-treaters.

This is an AI-generated concept image: a realistic, carvable design idea rather than a photo of a finished carve. AI concepts are always labeled and sit out the leaderboard and the contest.

No ratings yet · Sign in to rate
Comments (0)

  • No comments yet — be the first.

Save without an account. Sign in to like or comment.

Our tips for carving a similar design

The core trick here is contrast between deep shaded brow furrows and bright full cutouts for the eyes and mouth, which is what sells the scowl. You could plan the face so the angular eyes sit high and close together, then build a wide jaw of individual, uneven teeth below. Carve the teeth one at a time with varied heights so the grin reads as chaotic and threatening rather than neat.

Written by PumpkinCarvingIdeas.com, inspired by the image above. These are our suggestions, not instructions from the uploader. This approach to the AI concept has not been tested on a real pumpkin.

From pumpkin to porch

  1. Prep the pumpkin and pick your light

    Choose a tall, round pumpkin with a smooth front so the face has room to spread. Cut a hatch in the bottom rather than the top so you can set it down over an LED light later, and scrape the front interior wall down to about one inch thick. A thinner wall makes peeling and cutting far easier and lets more glow through. Never use a candle, a battery LED is brighter and safe for a wall display.

  2. Transfer the face layout

    Sketch or tape on your design with the angular eyes up high and notched at the inner corners, the brow furrows arching between and above them, and a wide mouth across the lower third. Poke through the outlines with a pin or a transfer tool so you have a dotted map on the skin. Keep the mouth outline as one big shape for now, and mark each tooth separately inside it. Step back and check the spacing before you cut anything.

  3. Shade the brow furrows first

    Using a skin-peeling or shading tool, remove just the outer skin along the brow furrows and around the eyes to create dim glowing ridges. Peeling rather than cutting here keeps the forehead solid while still catching light, which gives the scowl its depth. Vary how deep you scrape so some furrows glow more than others. Save all full cutouts for later so the pumpkin stays sturdy while you work.

  4. Cut the eyes

    Cut fully through the two angular eyes, keeping the sharp inner-corner notches that create the glare. Start your blade in the center of each eye and work outward to the points so you do not overshoot the corners. Cut slowly on the tight angles and let the tool do the work instead of forcing it. Clean the edges from the inside so the light reads crisp.

  5. Carve the teeth individually

    Work the mouth last since it is the largest opening. Cut each tooth as its own triangle, alternating from the top and bottom edges and varying the height so no two match. Leave a thin bridge of skin between neighboring teeth so the jaw does not collapse into one big hole. Take your time on the points, and if a tooth cracks, trim it shorter rather than trying to save a fragile tip.

  6. Light it and shoot the photo

    Set the pumpkin over a bright LED and check the glow from a few feet away. If any furrow looks flat, peel it a little deeper to lift the shading. Place the finished pumpkin on a wall or ledge at roughly eye level so the snarl meets viewers head on. Photograph it at dusk when the sky is still faintly blue for the strongest contrast.

Gather your supplies

Check things off as you get ready.

Work on a stable surface, keep your free hand out of the cutting path, and have an adult handle sharp tools.

Three levels of light

  • Leave intact

    The forehead, cheeks, and outer rind stay untouched and dark to frame the face.

  • Peel & shade

    The brow furrows and the ridges around the eyes are skin-peeled for a dim orange glow that adds depth to the scowl.

  • Cut through

    The angular eyes and the full row of jagged teeth are cut through for the brightest light.

Learn the carving basics

Before you start cutting

How do I keep the jagged teeth from breaking off?

Leave a thin bridge of uncut skin between each tooth so the whole jaw supports itself instead of relying on skinny points. Carve the mouth last, after the eyes and shading are done, so the pumpkin stays rigid while you handle it. If a point does snap, just trim that tooth a little shorter and it will still blend into the uneven row.

What makes the eyes look angry rather than plain?

The notch at each inner corner is what turns the eyes into a scowl, so keep those small V cuts crisp. Angling the eyes so the inner corners sit lower and closer together also pulls the brow into a glare. Peeling the ridges just above the eyes adds a shadowed frown that finishes the effect.

Since this is a concept image, will a real pumpkin glow the same way?

A real carve can get close if you thin the front wall to about an inch and use a bright LED. The peeled brow furrows will glow dimmer than the full cutouts, which is exactly the contrast that makes the face menacing. Expect your teeth to look slightly softer than a rendered image, and that irregularity actually helps the chaotic snarl.

Your take belongs here, too.

Changed a detail? Made it simpler? Share a photo of your version and tell the community what worked.

Share your pumpkin

More pumpkins like this

You've reached the end · 8 pumpkins
The Patch Report

Fresh pumpkins, in your inbox.

The best new carvings, ideas worth stealing, and how-tos for carving season. Short, seasonal, and gone by November.

A short email during carving season. Unsubscribe anytime. See our privacy policy.