Halloween Pumpkin Carving Contest Β· Starts October 1st Β· $500 in prizes
← Back to ideas
@ai_concepts
Sep 14, 2026
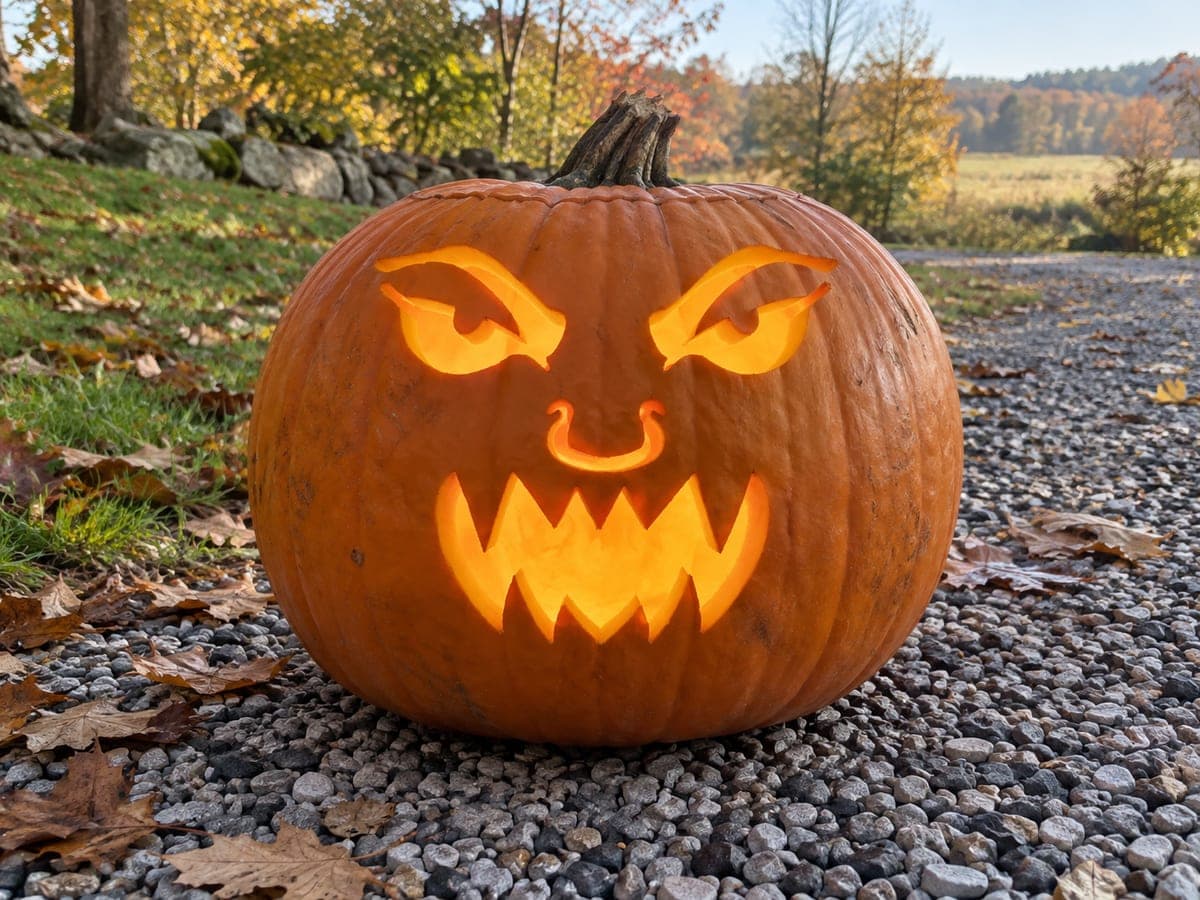
Cat-Eyed Fanged Jack-O-Lantern PumpkinAI
0

Cat-Eyed Fanged Jack-O-Lantern Pumpkin

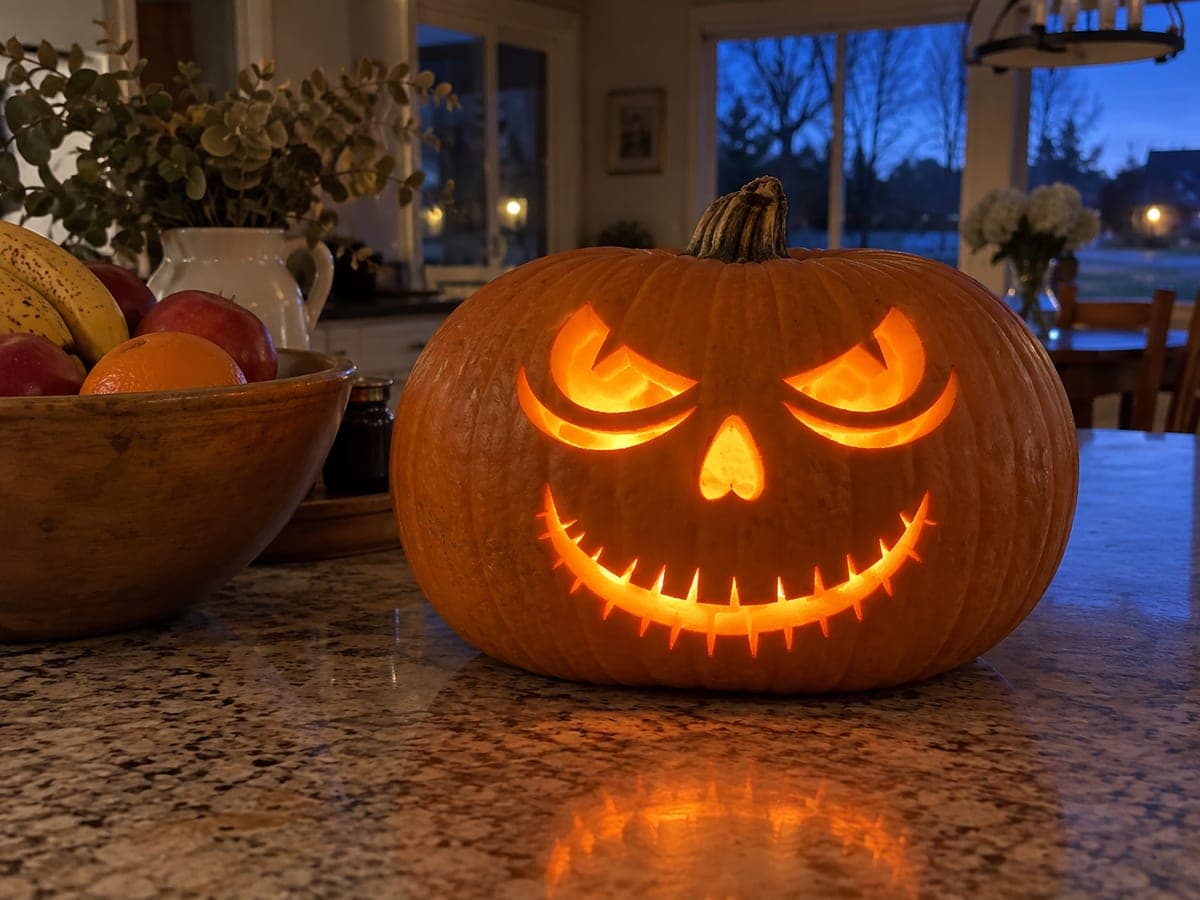
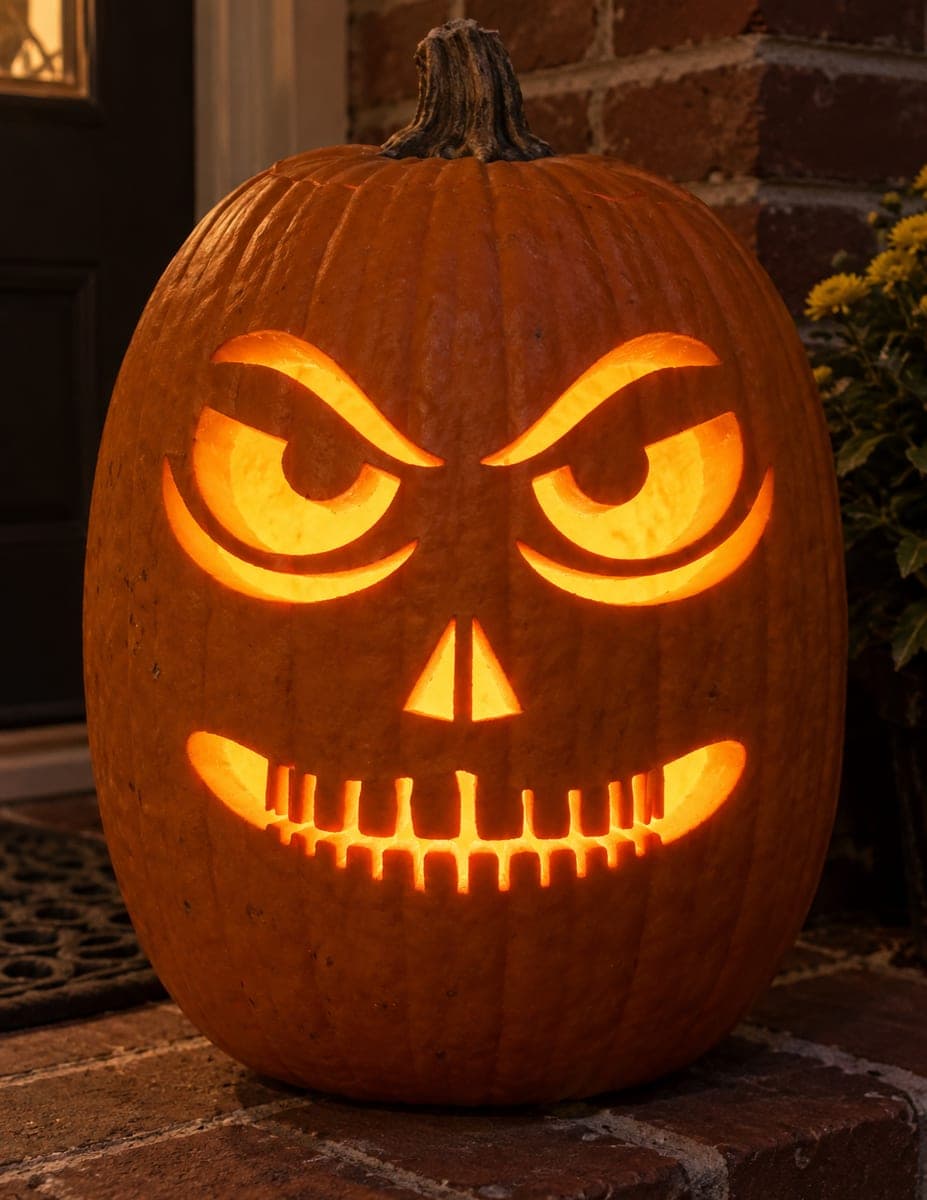
Long, narrow, cat-like eye slits taper to fine points at each corner, flanking a small triangular nose above a row of sharp fang-like teeth that vary in size. This jack-o-lantern pumpkin carving idea draws its menace from the extreme horizontal stretch of those eyes combined with the irregular tooth heights. Cut the thin eye slits with a fine jab saw, taking short strokes from each end toward the middle to avoid splitting the tapered tips. Angling a flashlight across the uncarved surface from the side helps you spot the traced lines more clearly before cutting.

This is an AI-generated concept image: a realistic, carvable design idea rather than a photo of a finished carve. AI concepts are always labeled and sit out the leaderboard and the contest.
No ratings yet Β· Sign in to rate

Comments (0)

  • No comments yet β€” be the first.

Save without an account. Sign in to like or comment.

Our tips for carving a similar design

The whole scowl comes from two long, narrow cat-eye slits that stretch sideways and taper to fine points, paired with a row of uneven fang teeth. The plan is to trace everything first, then carve the delicate eye tips and nose before the big grin so the shell stays firm while you work the small details. Keep the teeth varied in height so the mouth reads as jagged rather than tidy.

Written by PumpkinCarvingIdeas.com, inspired by the image above. These are our suggestions, not instructions from the uploader. This approach to the AI concept has not been tested on a real pumpkin.

From pumpkin to porch

  1. Pick a firm pumpkin and open the back

    Choose a rounder pumpkin with a smooth, blemish-free front the size of a dinner plate. Since this is a lit design, cut a hatch in the back rather than the top so the front face stays unbroken. Angle your cut inward so the lid rests without falling through. Scoop the inside and thin the front carving wall to about one inch so light passes evenly.

  2. Transfer the face and read the lines

    Tape your stencil flat and poke closely spaced dots along the eyes, nose, and every tooth edge. Remove the paper and connect the dots with a washable marker. Sweep a flashlight across the surface from the side to make the traced lines pop before you cut. Double check that both eye slits stretch the same distance and taper to matching points.

  3. Cut the cat-eye slits carefully

    Use a fine jab saw for the long narrow eyes. Work each slit in short strokes from both outer ends toward the middle so the tapered tips do not split or crumble. Let the saw do the work and avoid twisting it inside the thin channel. Pop the small waste pieces out gently from the front.

  4. Carve the nose, then the fanged grin

    Cut the small triangular nose next while the shell is still strong. Then carve the mouth, treating each fang as its own clean triangle and keeping the heights deliberately uneven. Cut the widest openings last so the surrounding surface does not sag. Leave a little pumpkin between neighboring teeth so the points stay crisp and supported.

  5. Clean the edges and test the light

    Trim any ragged inner edges with a small detail blade or a fingernail to sharpen each point. Drop in one or two bright LED lights, never a candle, and darken the room to check the glow. If any area looks dull, shave the inside wall behind it a little thinner. Wipe off leftover marker lines with a damp cloth.

  6. Stage and photograph it

    Set the pumpkin on gravel or a stone step at dusk for the best contrast. Aim the LEDs slightly upward so the eyes and grin throw a warm, even glow. Take photos from just above ground level to make the face feel looming. A coat of petroleum jelly on cut edges slows drying if you want it to last a few extra days.

Gather your supplies

Check things off as you get ready.

Work on a stable surface, keep your free hand out of the cutting path, and have an adult handle sharp tools.

Three levels of light

  • Leave intact

    The wide cheeks and forehead stay as untouched skin, keeping the face dark and menacing around the features.

  • Peel & shade

    You could shade-peel a thin halo just inside the eye slits or along the nose bridge for a soft dim glow that adds depth.

  • Cut through

    The cat-eye slits, triangular nose, and every fang are cut fully through for the brightest light.

Learn the carving basics

Before you start cutting

How do I keep the tapered eye tips from breaking off?

Cut each slit in short strokes working from both pointed ends inward toward the center. That way the saw never pushes against an unsupported tip. Keep the blade straight and avoid prying, and pop the waste out gently from the front.

This is an AI concept image, so can a real pumpkin look like this?

Yes, the design is fully carvable on a real pumpkin. The eye slits are thin but stay attached at both ends, and the fangs are simple triangles with a bit of shell left between them for support. Just thin the front wall and work the small cuts before the big ones.

Why are the teeth different heights, and does that matter?

The uneven fang heights are what make the grin look wild instead of neat. Keep some teeth tall and some short and vary the gaps. Leaving a little pumpkin between each tooth keeps the points crisp and stops the mouth from collapsing.

Your take belongs here, too.

Changed a detail? Made it simpler? Share a photo of your version and tell the community what worked.

Share your pumpkin

More pumpkins like this

You've reached the end Β· 8 pumpkins
The Patch Report

Fresh pumpkins, in your inbox.

The best new carvings, ideas worth stealing, and how-tos for carving season. Short, seasonal, and gone by November.

A short email during carving season. Unsubscribe anytime. See our privacy policy.